> DAY ONE - If you haven't read about Day One you can read it here.
SUGCON DAY 2
The 2nd Day of SUGCON started bright an early so after a quick breakfast and cup of tea at the hotel I headed down to the first session I’d planned to see.
Rob’s session is one of the key sessions I really didn’t want to miss this year. A few clients I’ve spoken to recently (and other Sitecore Dev’s I’ve chatted to at SUGCON so far) are facing this challenge:
‘How do we move to XM Cloud from XP and what do we need to consider?’
– so I was keen to learn from Rob’s experiences.
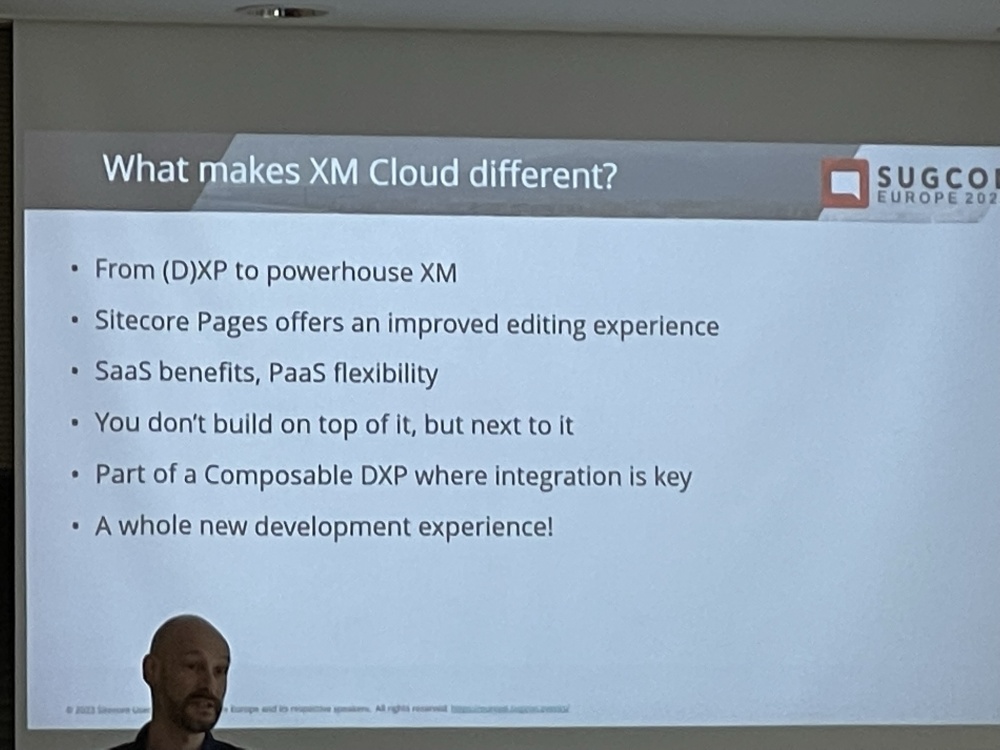
Migrating advanced Sitecore implementations to XM Cloud – Rob Habraken

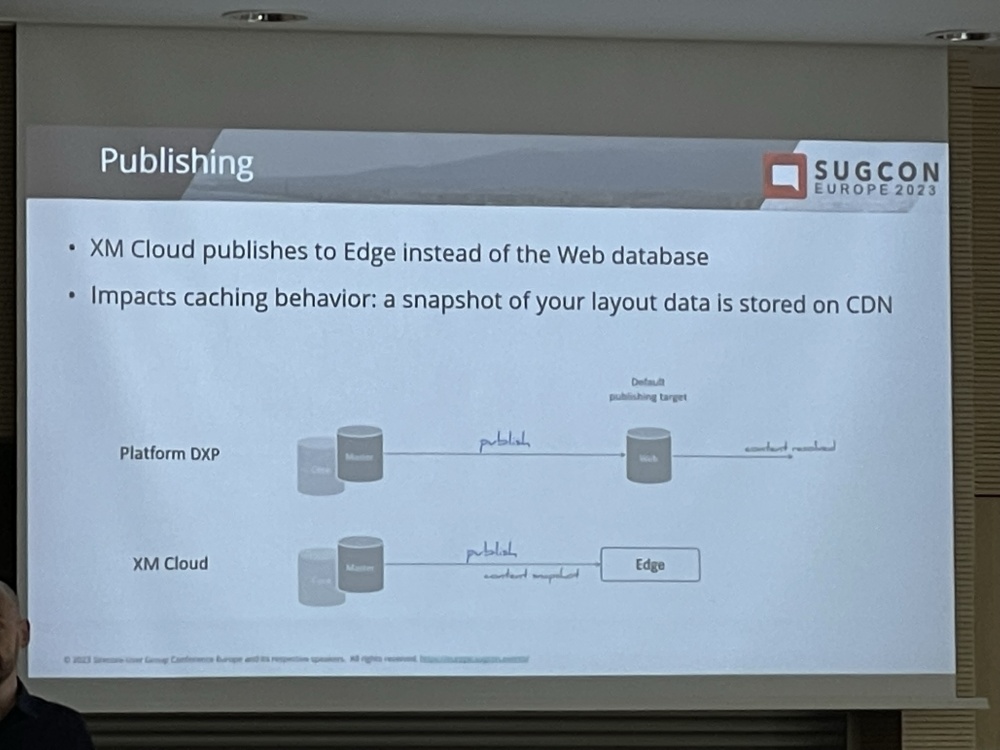
Rob started with telling us the differences with XM Cloud and explaining how publishing works differently (given you publish to the Edge):
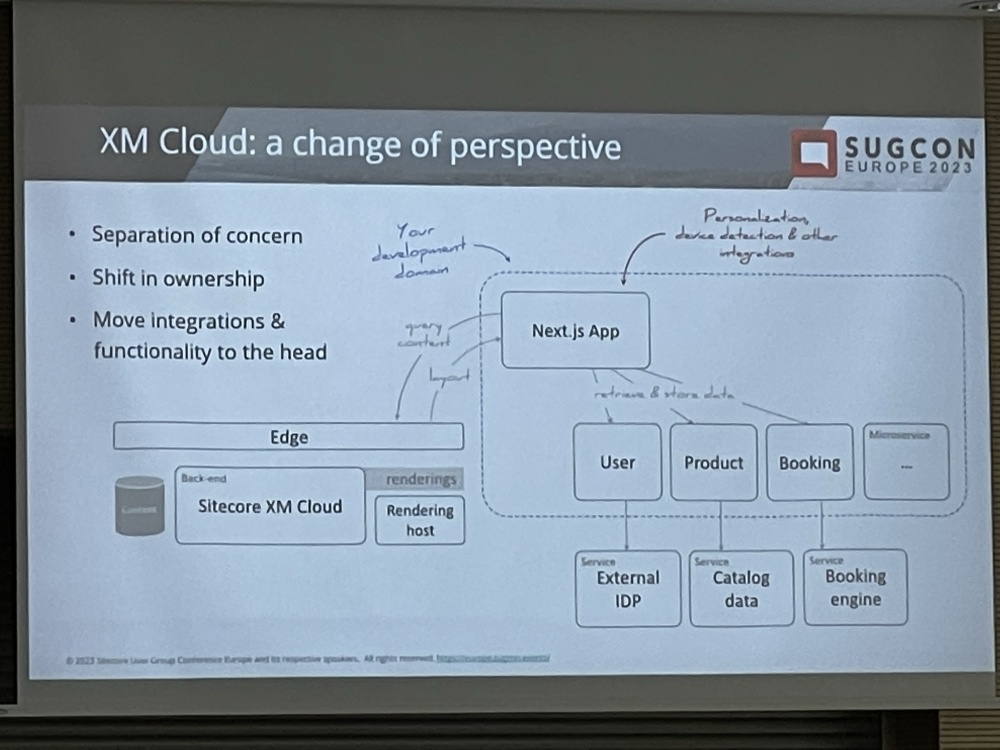
Rob then shared a typical XP implementation diagram and showed how XP Differs as integrations and functionality is moved into the head application:
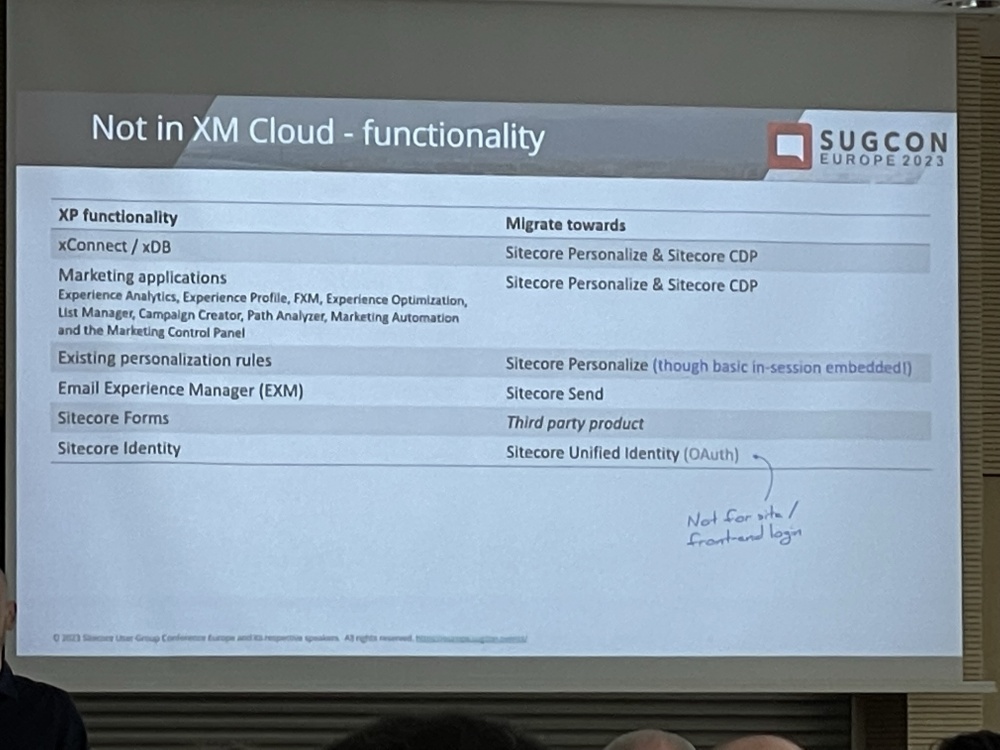
He then discussed what is included and not included in XM Cloud in detail. Martin shared some similar slides the day before, but I think these were a little clearer so I didn’t include them in the previous post:
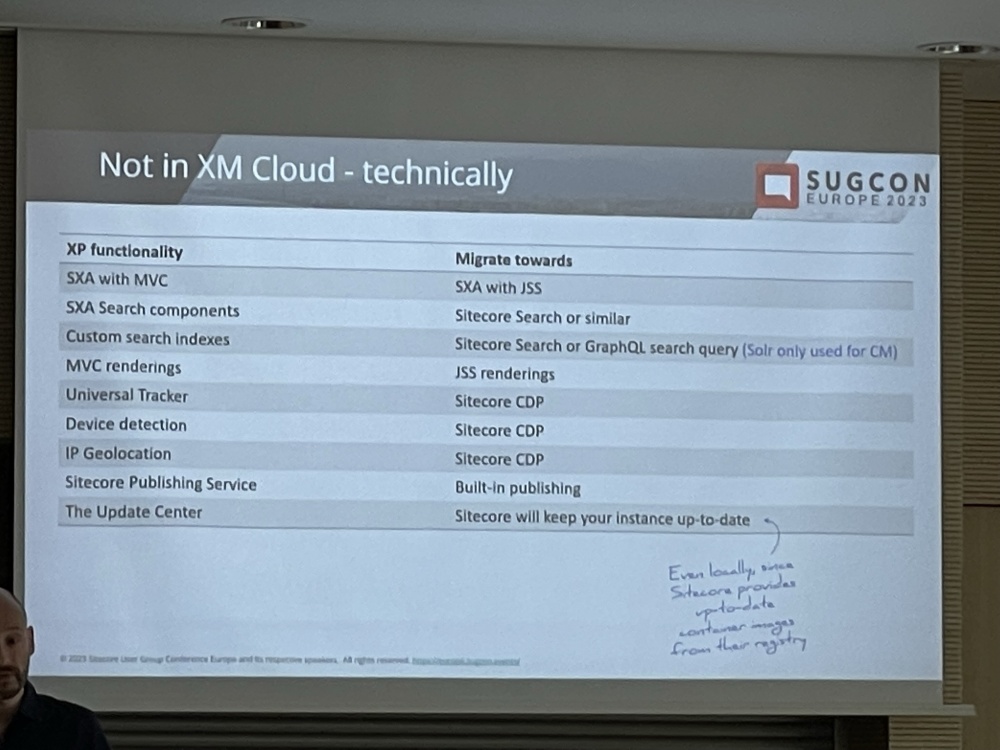
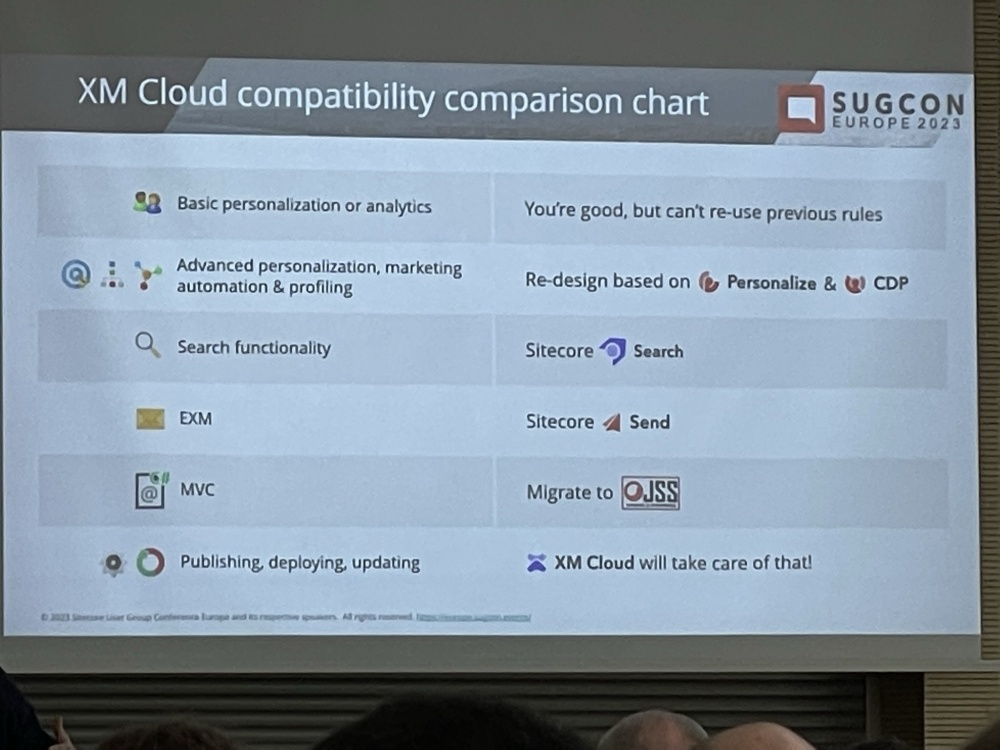
This was also a pretty cool comparison of XP vs XM Cloud equivalent features:
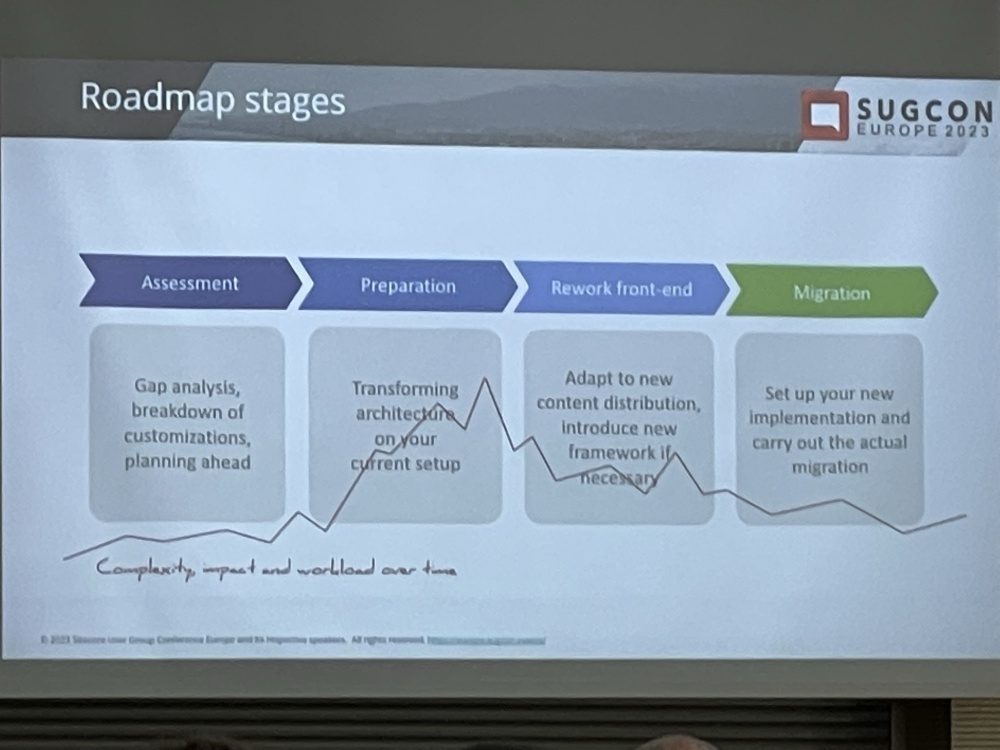
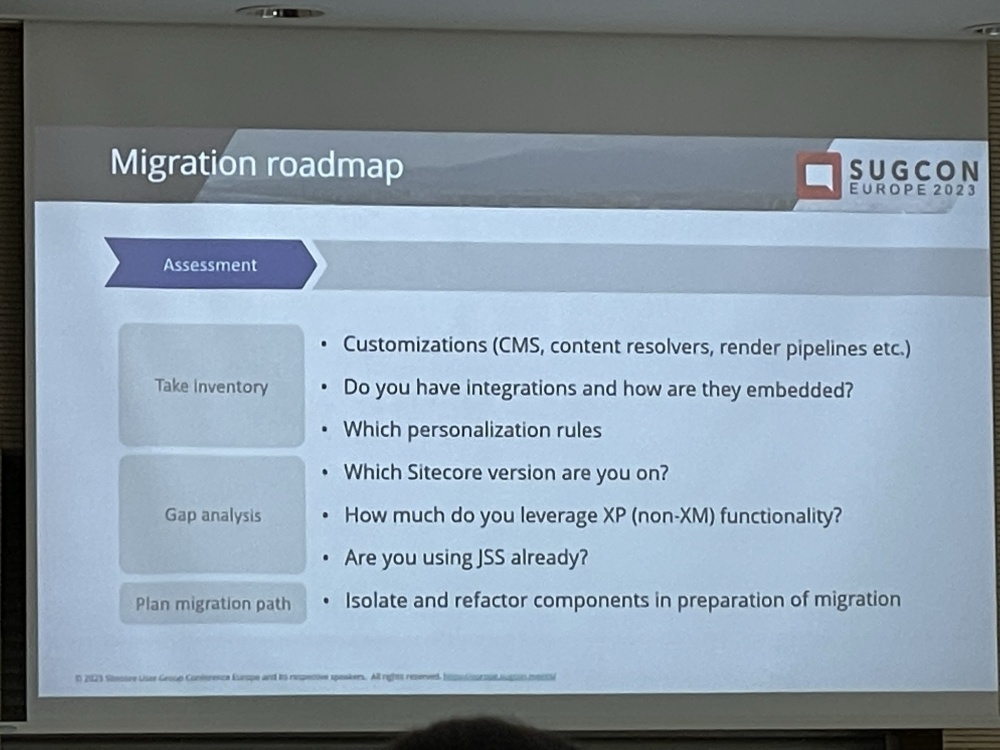
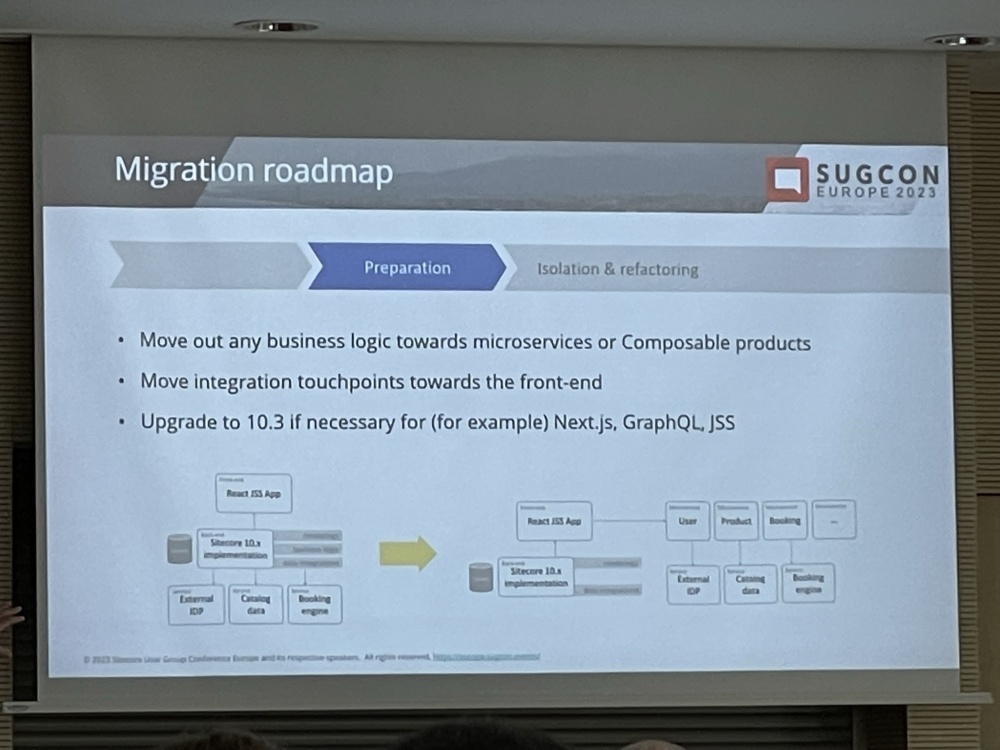
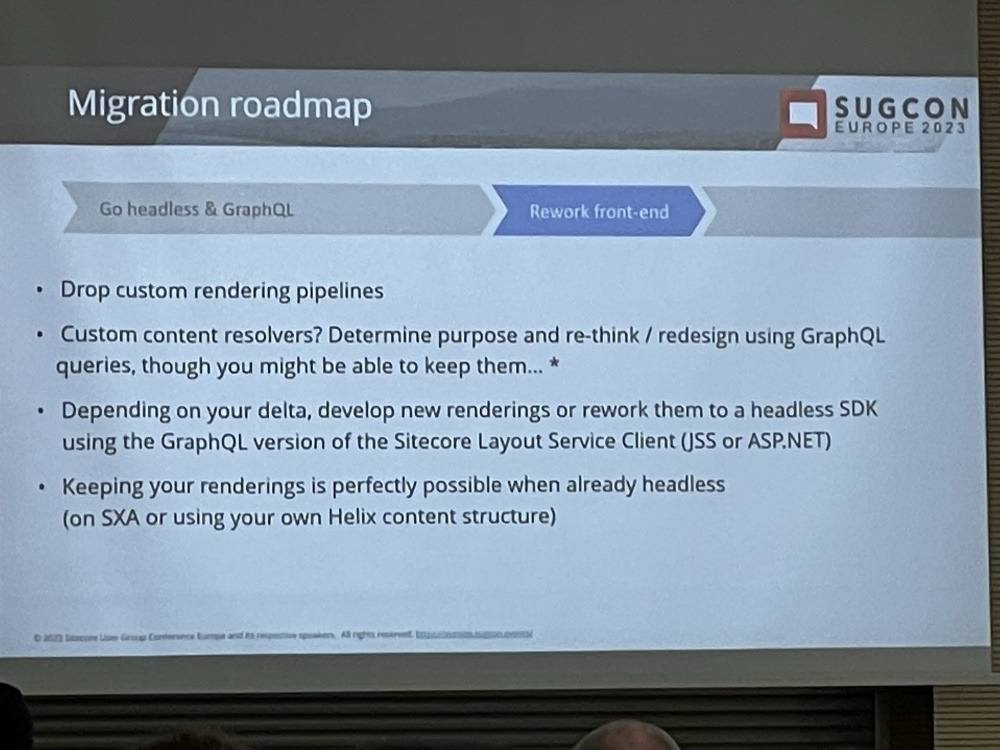
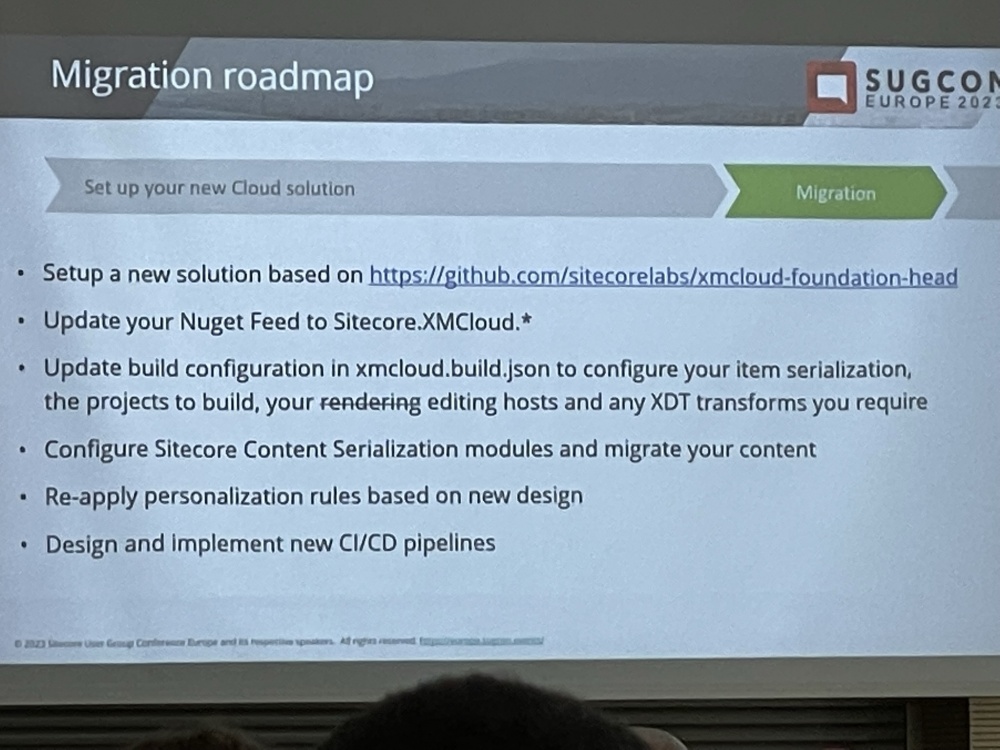
Rob then discussed the Migration approach to XM Cloud. There was a lot of really useful info here about things to consider and how to get your project prepared for the migration and how to tackle it:
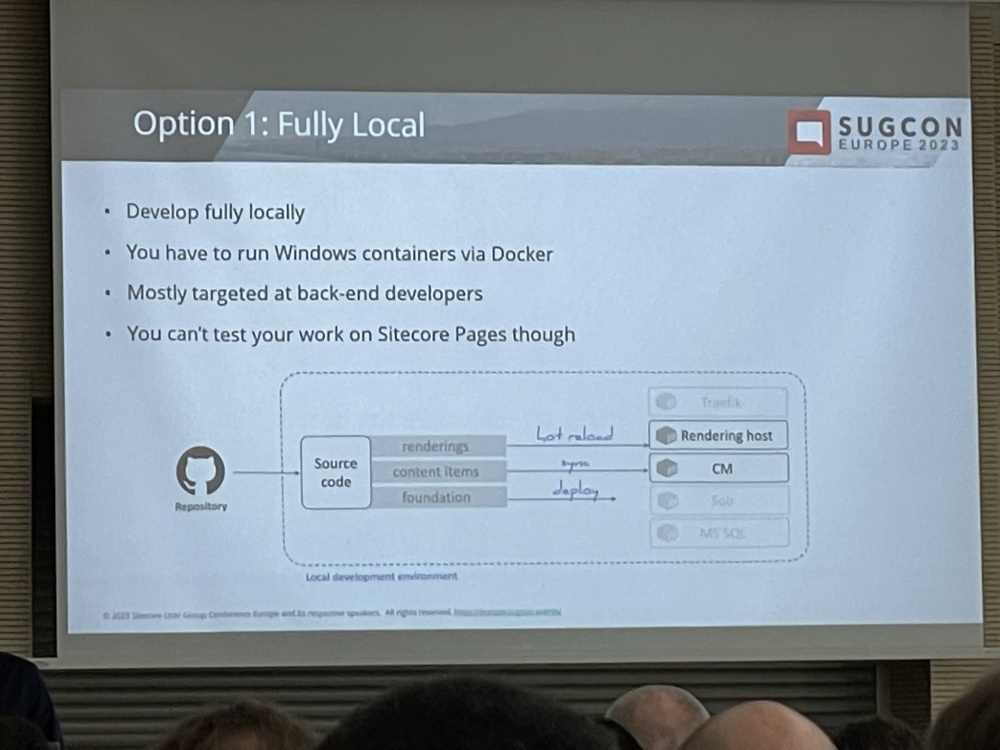
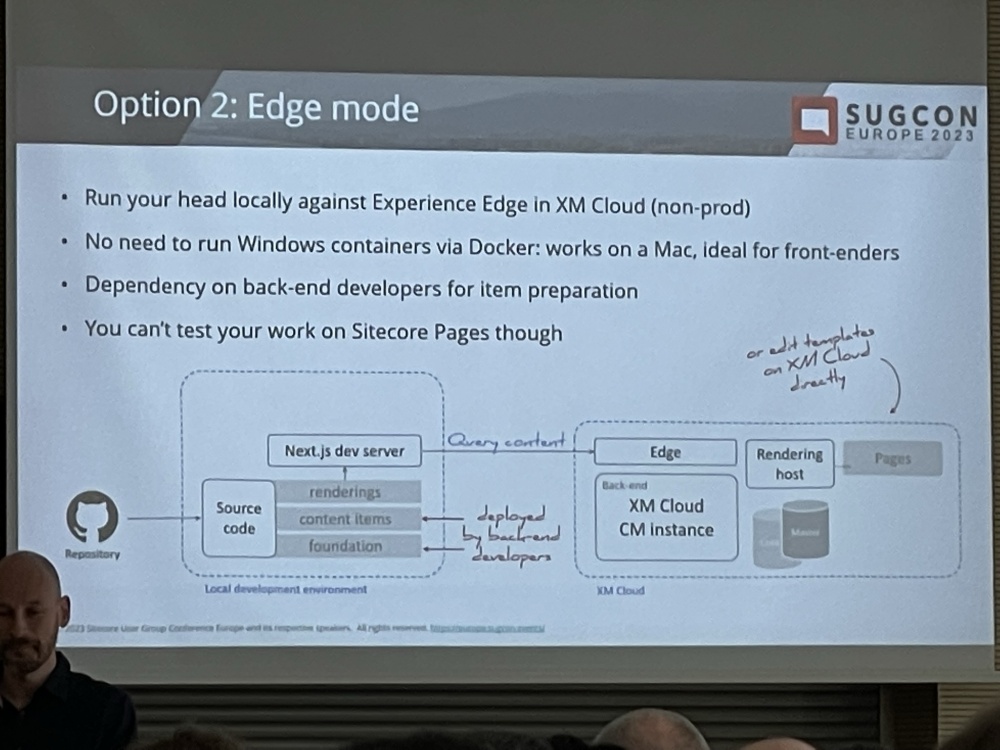
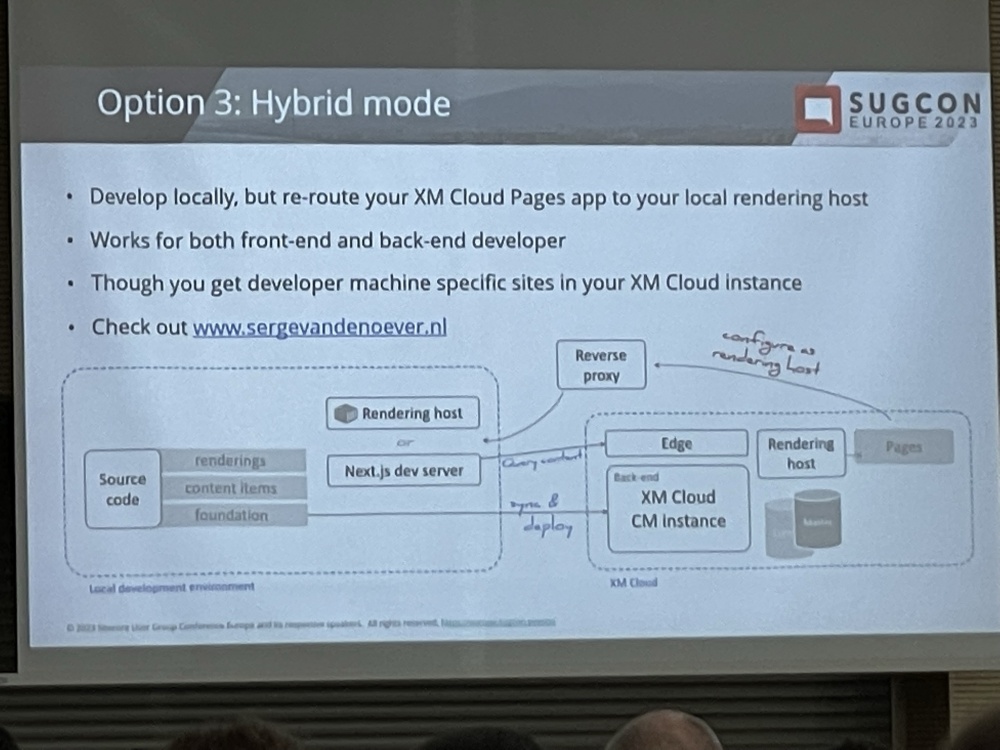
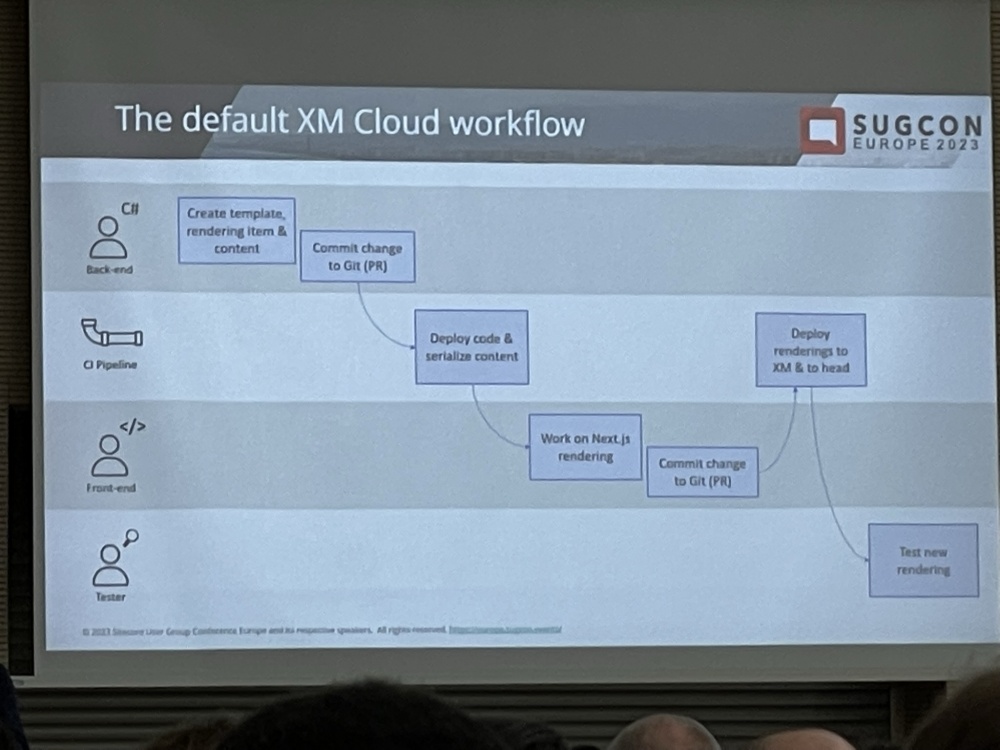
Next up was the the different development approaches and workflow. I’ve talked about these before but I didn’t know much about option 3 at all. I guess most Sitecore developers (especially in a small team) will use option 1, but option 3 is a really good approach for being able to use local content for your development without having to push it to XM Cloud:
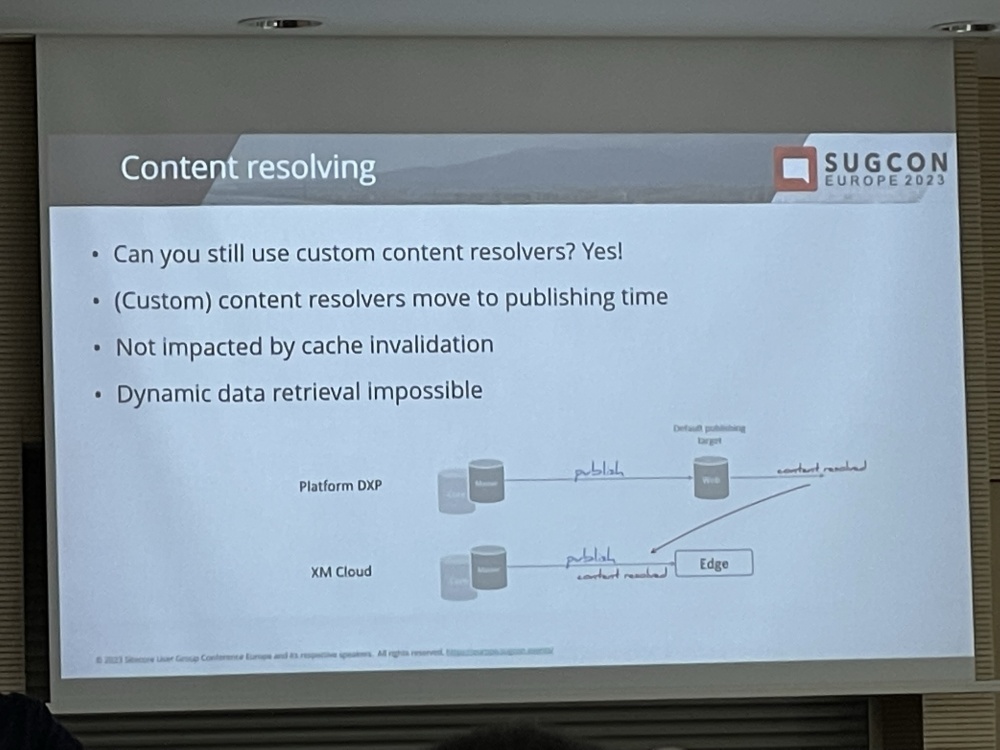
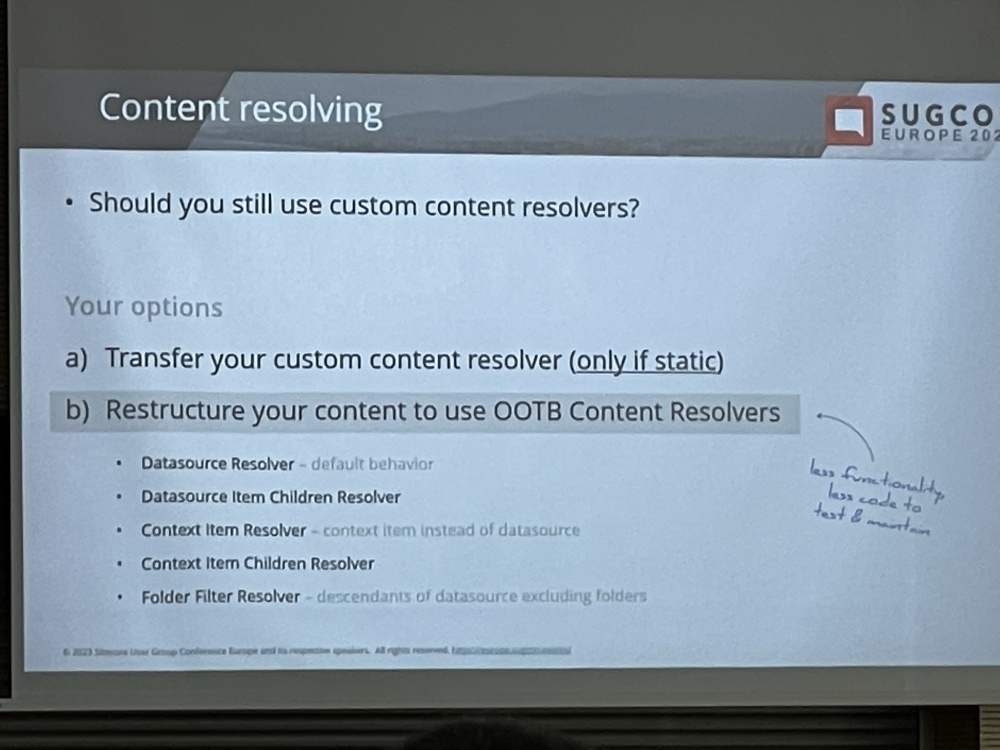
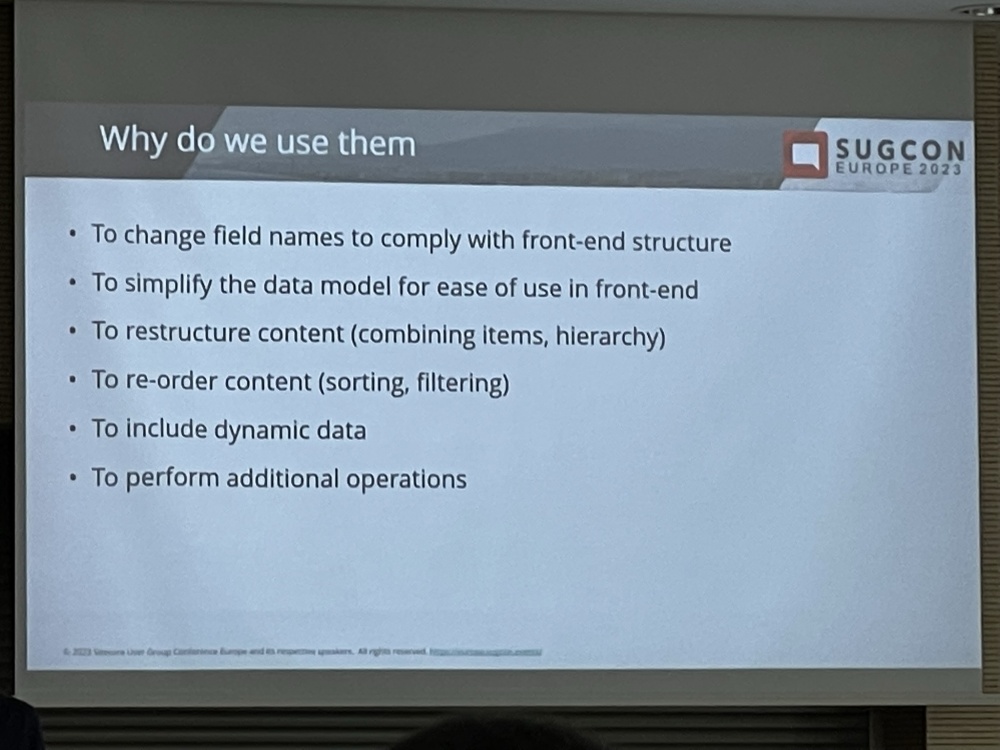
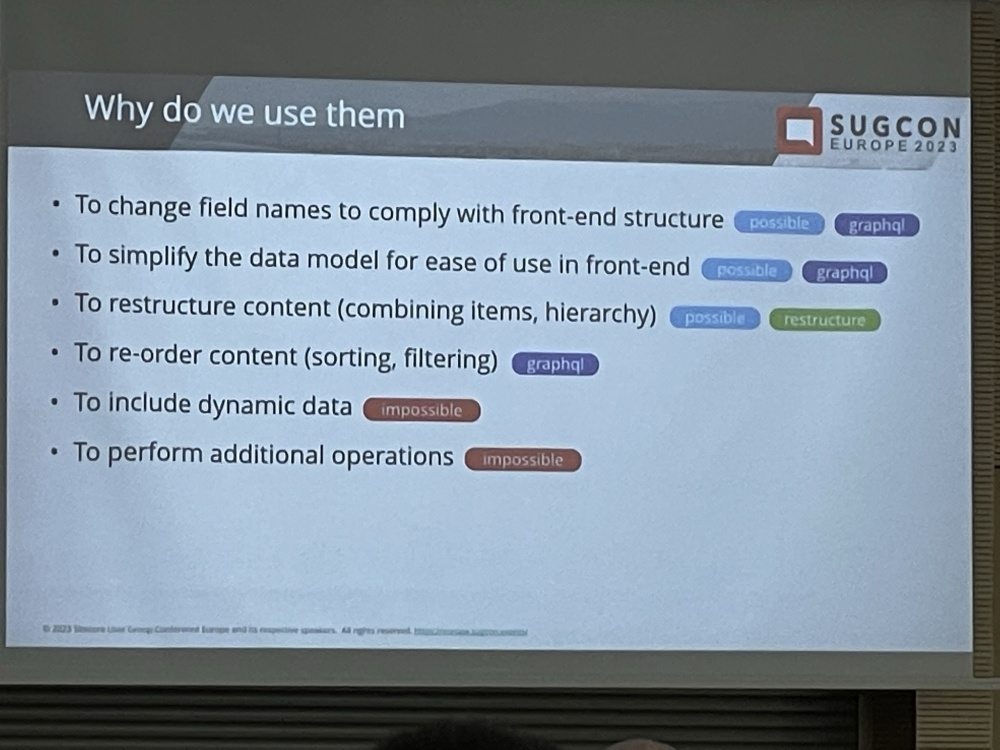
Rob then went on to explain in detail about how Content Resolvers don’t work if they are dynamic and only static ones do. It’s possible to use some out of the box ones or implement your own GraphQL Content Resolver:
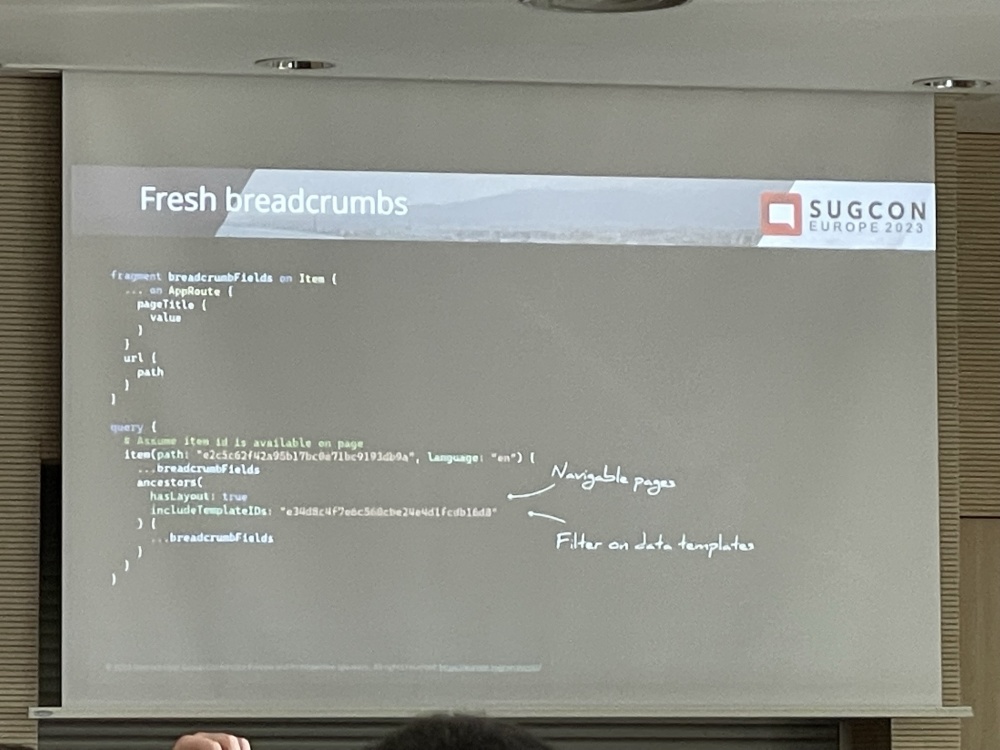
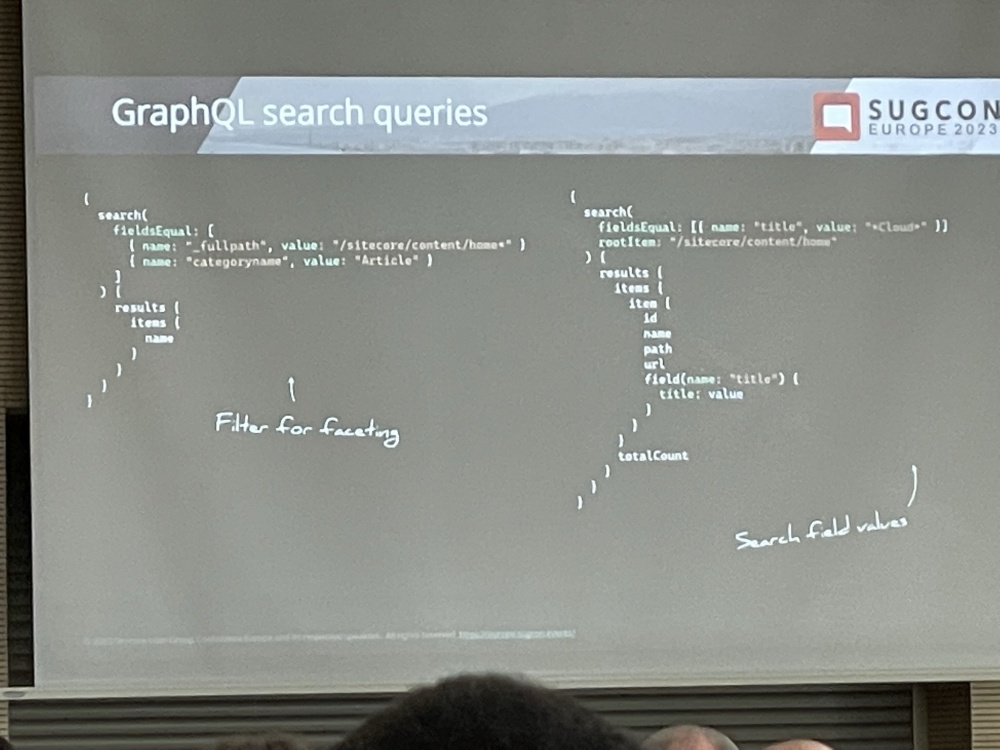
This is an example of Bread crumbs in XM Cloud and a GraphQL search query:
Rob finished his talk with a summary of the benefits of XM Cloud. The shift in Development domain and thinking is the tricky part for a lot of Sitecore Developers I feel:

Rendering your data in headless – 101 different ways
– Mike Edwards
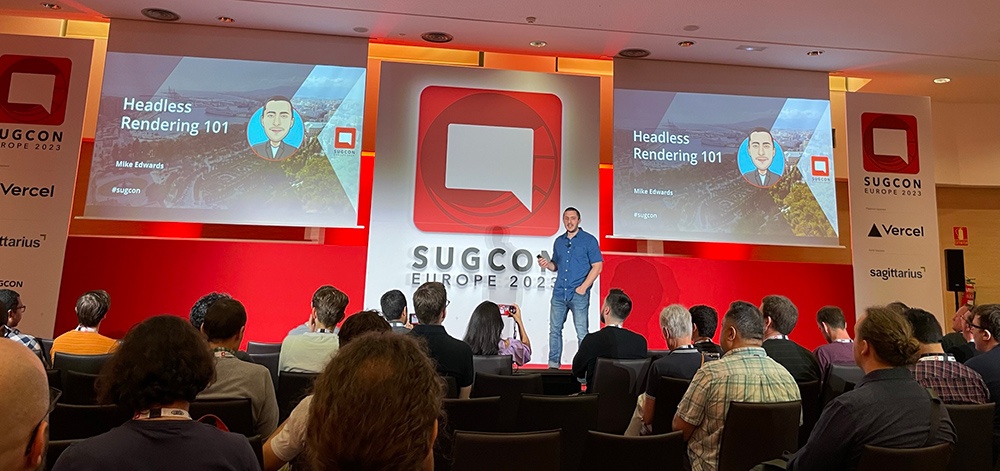
I’ve known Mike for a number of years now and he’s always an good speaker so I was looking forward to Mike sharing his learnings from his headless journey.
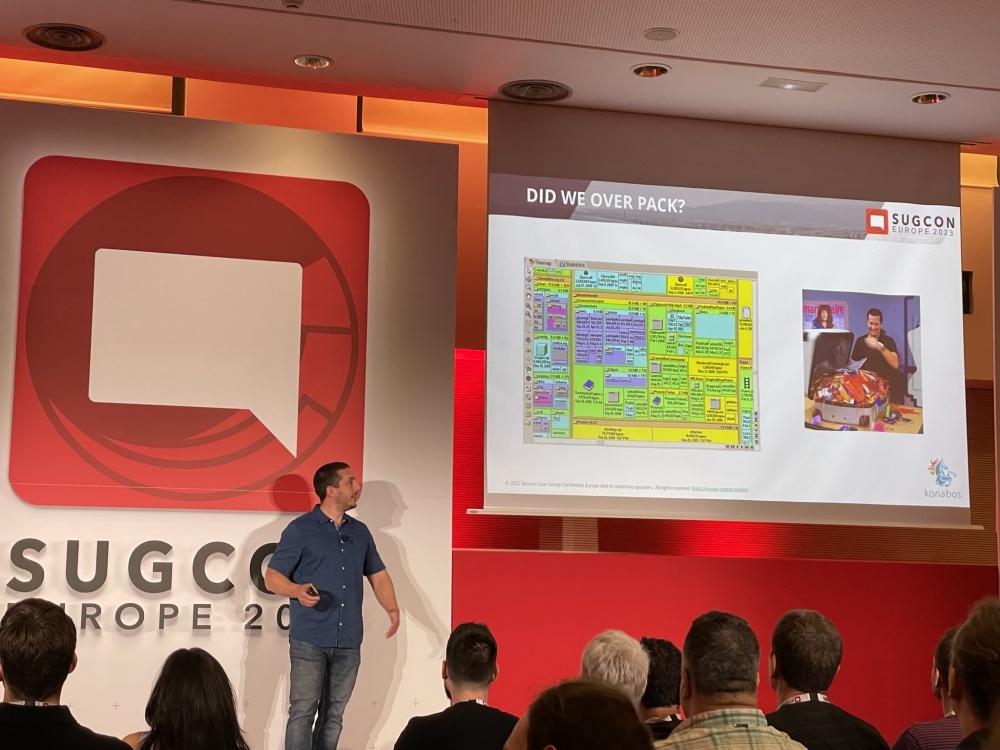

Mike started by lamenting how things used to be easy in the World of MVC and server-side development and then with all the JQuery and JS frameworks things became pretty bloated.
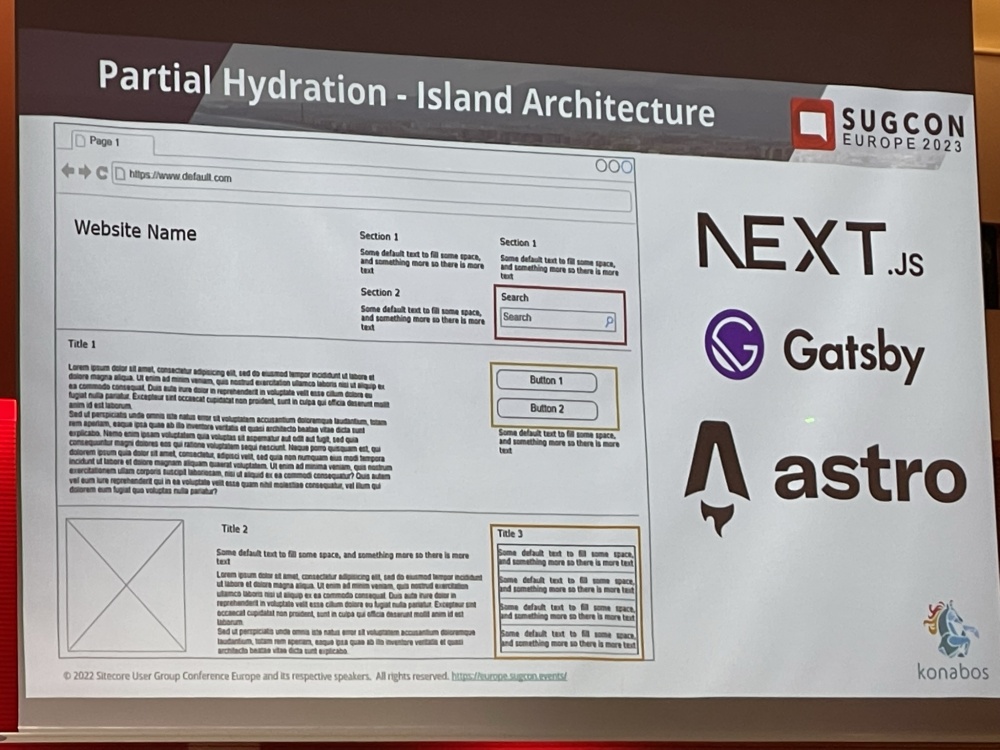
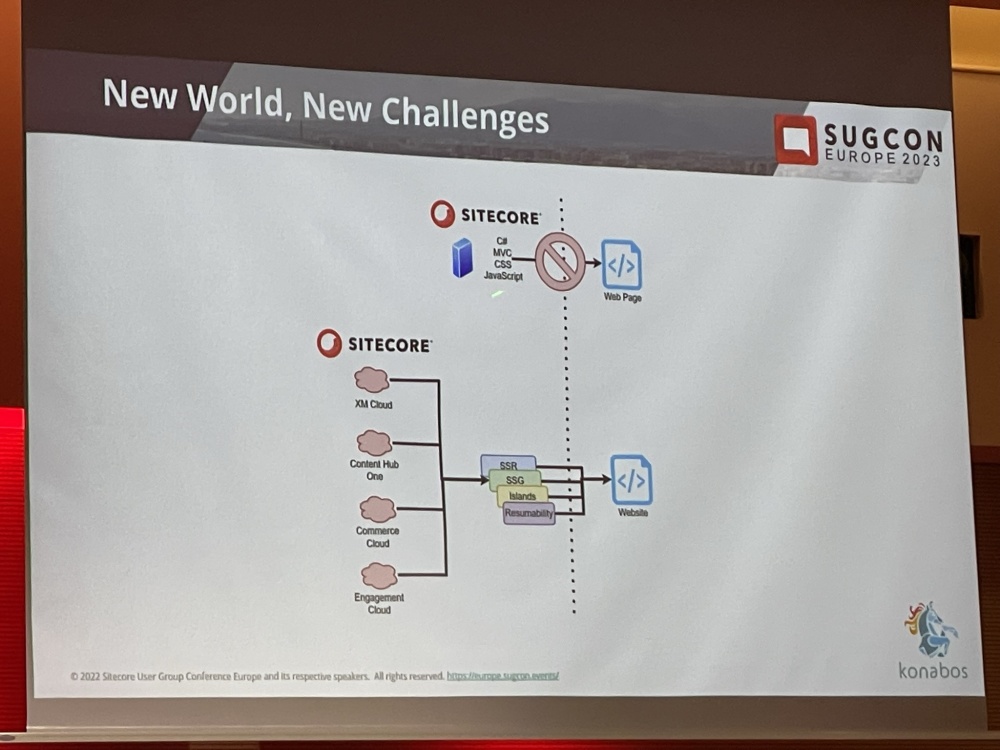
Things have moved on a lot now in FE development though and there are now many different options for building Headless websites in Sitecore, some of these I’m aware of or have experimented with – Others I’ve not heard of, such as ‘Island Architecture’.
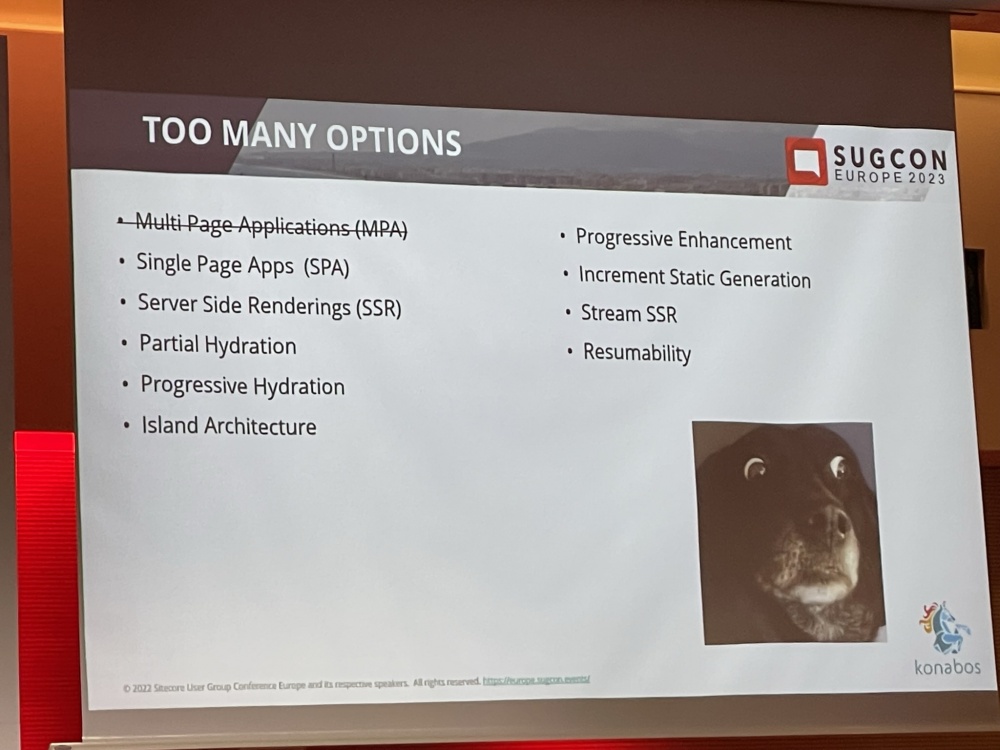

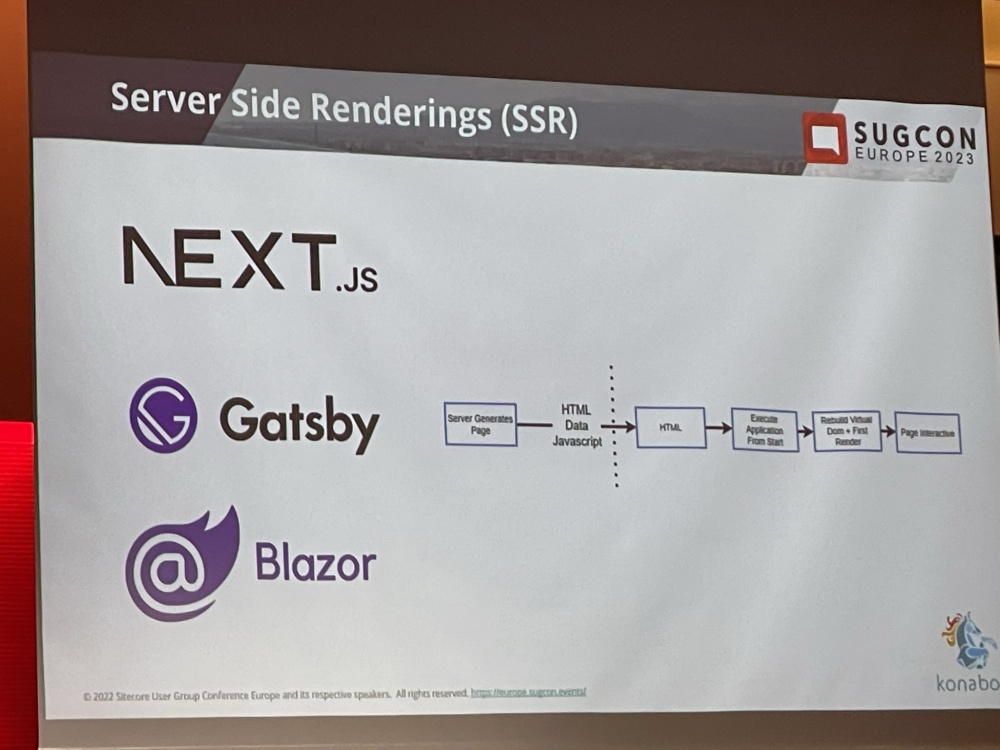
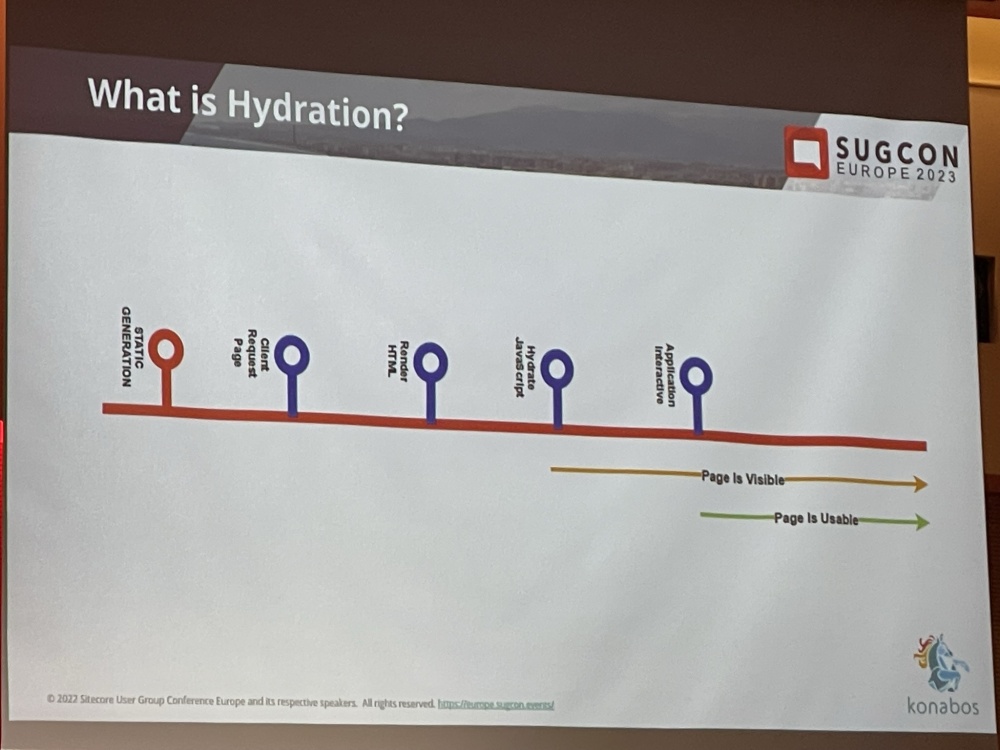
SPAs bring their own set of problems in terms of page load times and indexability so Mike went into Hydration and Partial Hydration techniques and approaches that try to solve these issues:
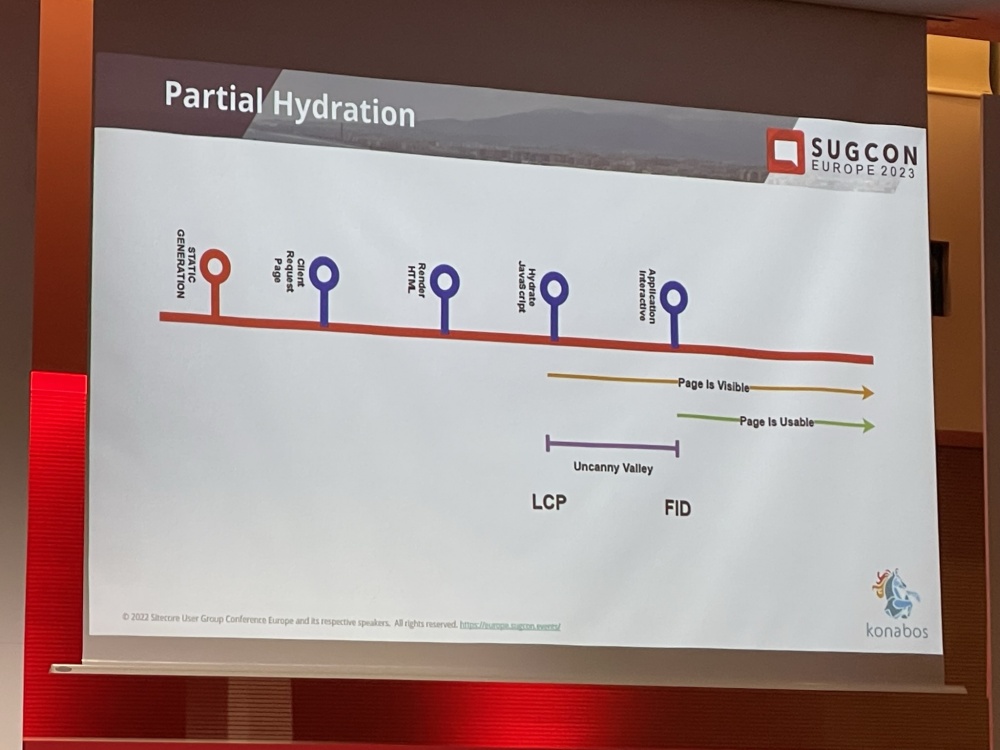
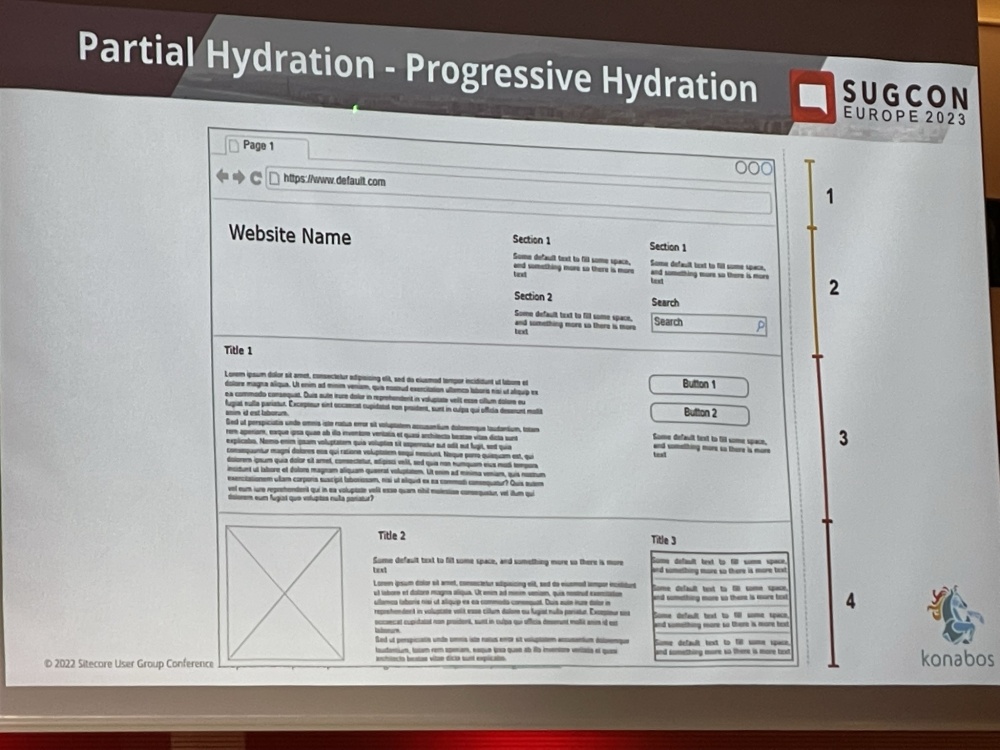
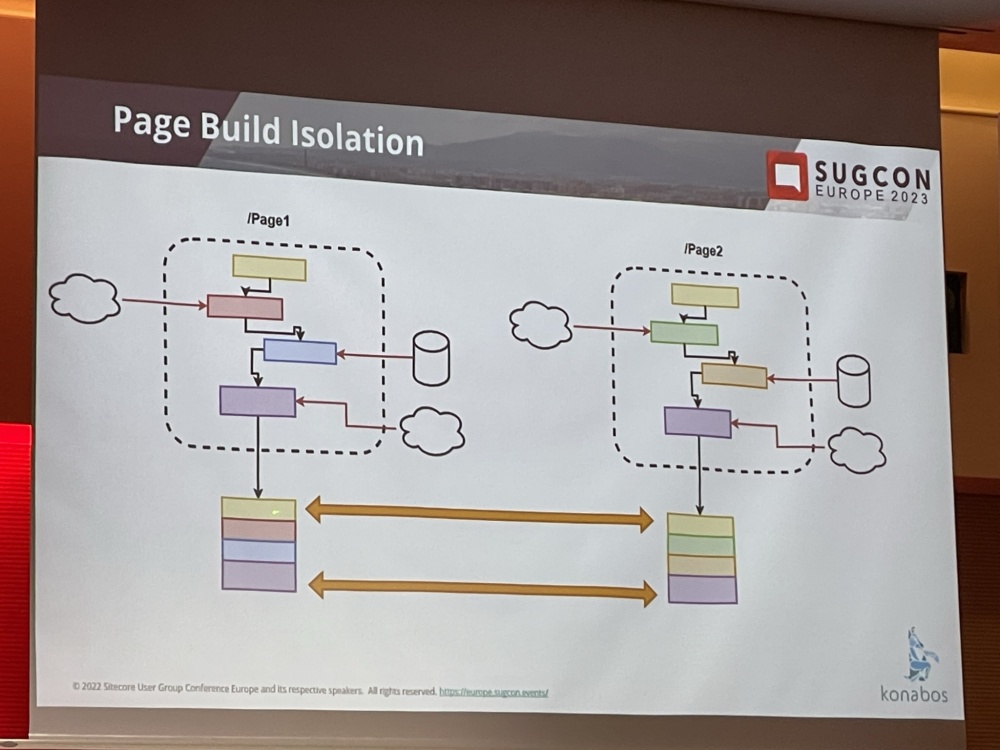
Then Mike explained more about Partial Hydration examples and Island Architecture. Island Architecture lets you create your web app with pure HTML and CSS for all the static content but then add in regions/placeholders of dynamic content to support interactive ‘islands’ of content. Given the rest of the page is static it downloads really quickly and is available to use faster.
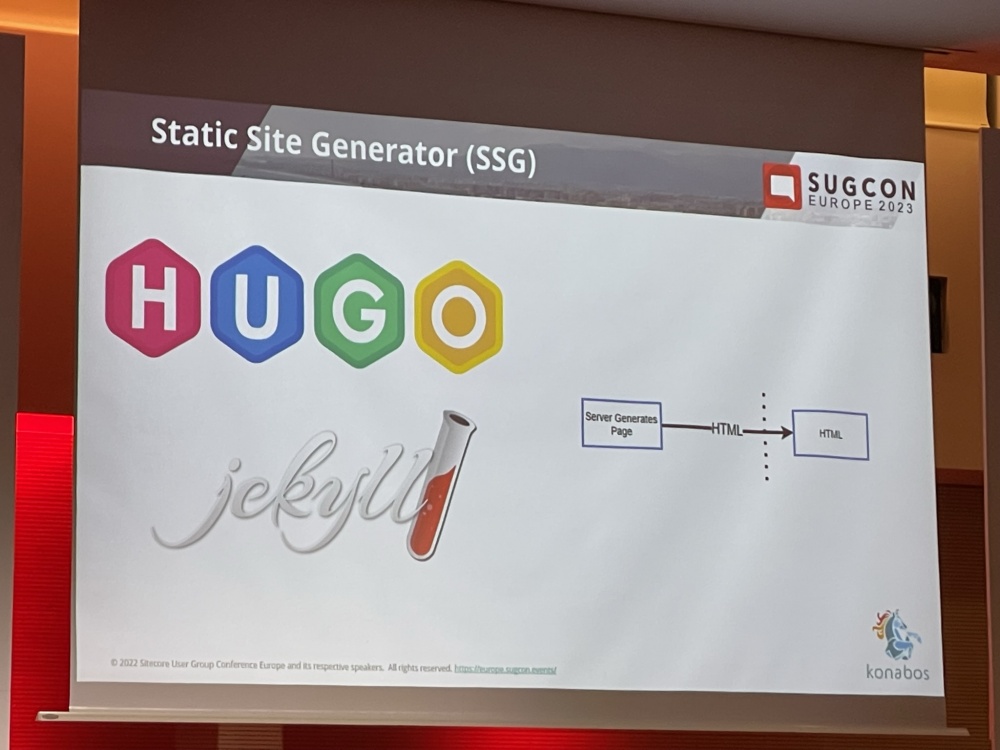
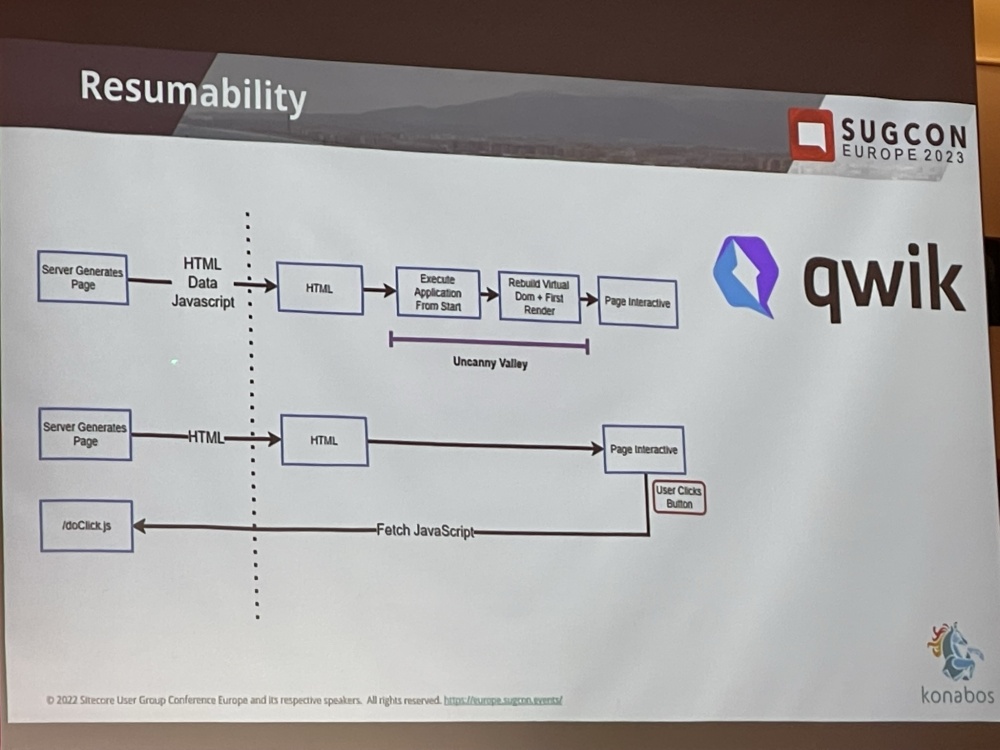
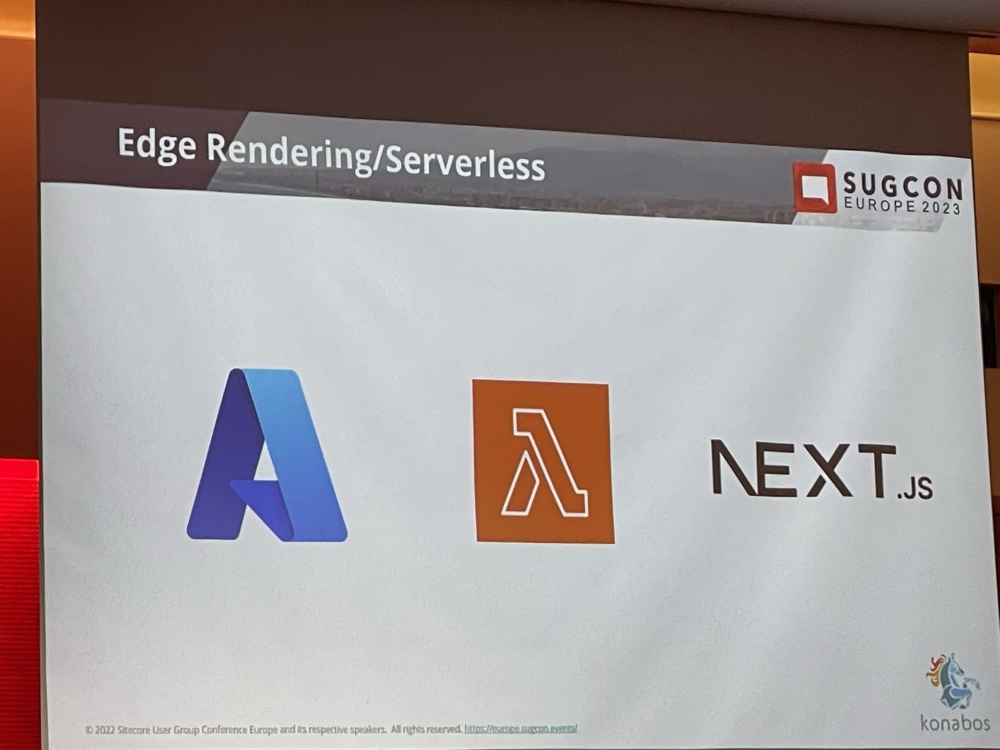
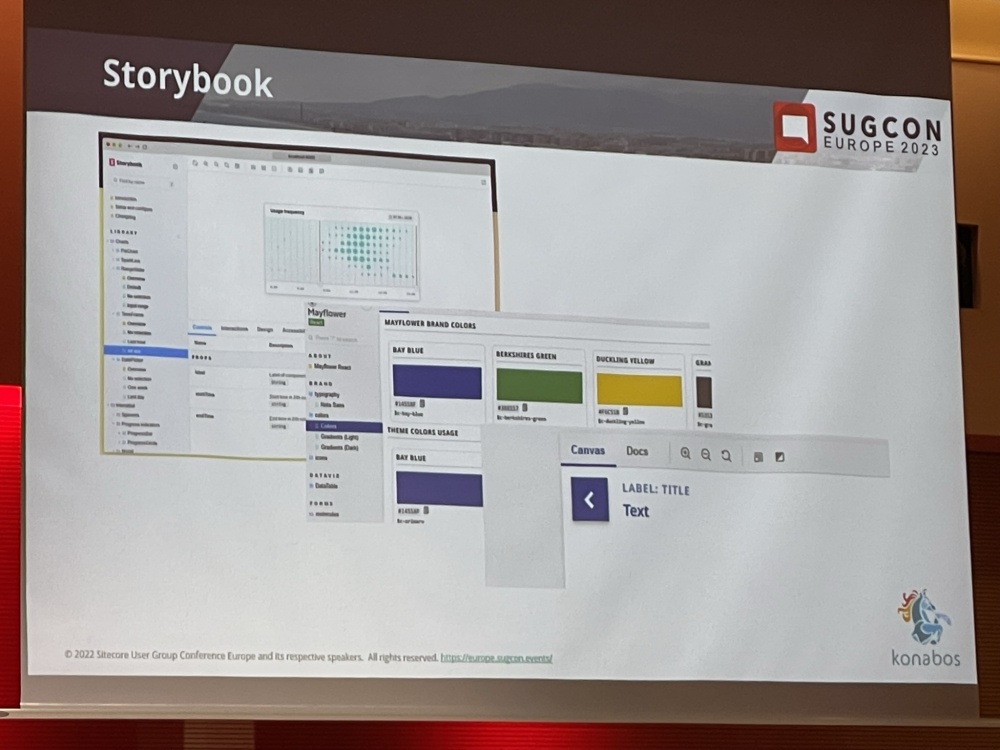
Mike then covered Resumability, Edge/Serverless and tools such as Storybook and Hydration Payload.
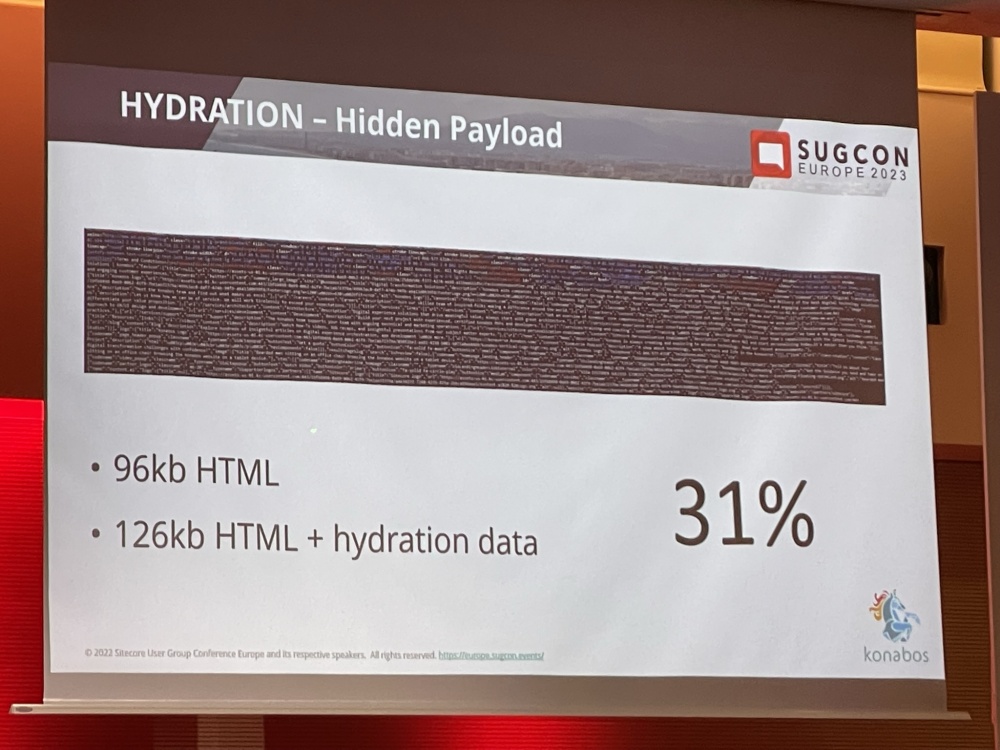
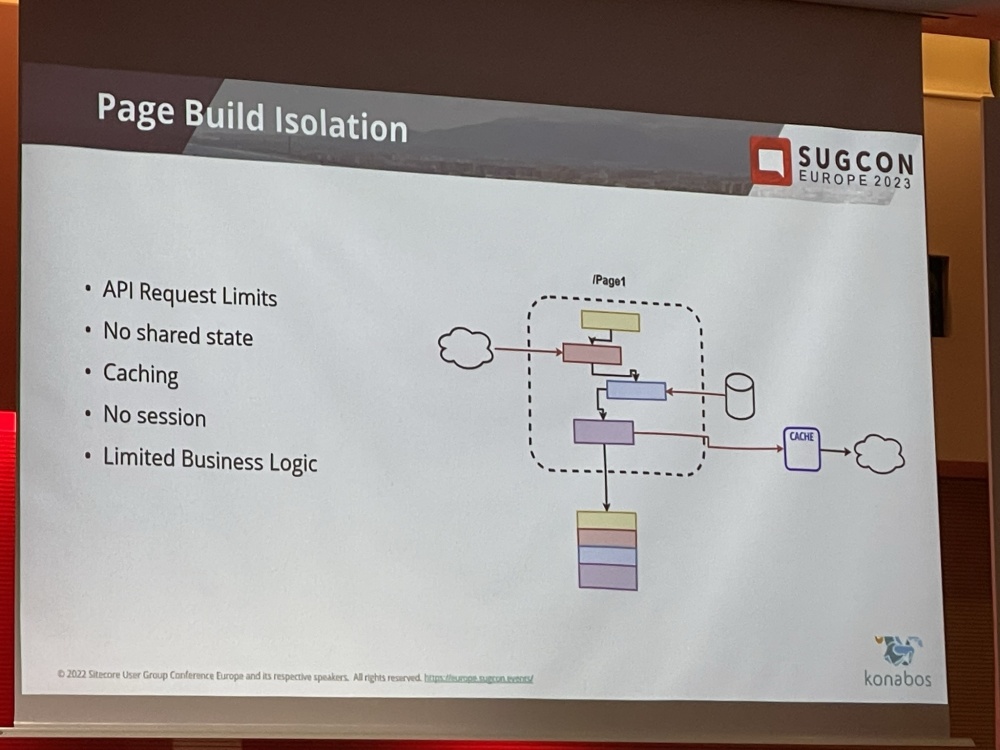
There are some Challenges and limitations which need to be re-address:

Finally Mike ended with saying that this is the future and we need to embrace the new world.
It was a really interesting talk and gave me a lot to think about and research further. The following talks were 15 minute lightning talks until lunch.
Leverage Sitecore Connect for Sitecore CDP – Sarah O’Reilly
I’d heard a fair bit about Connect but I’ve not really seen much about how it actually works. So I was looking forward to this session
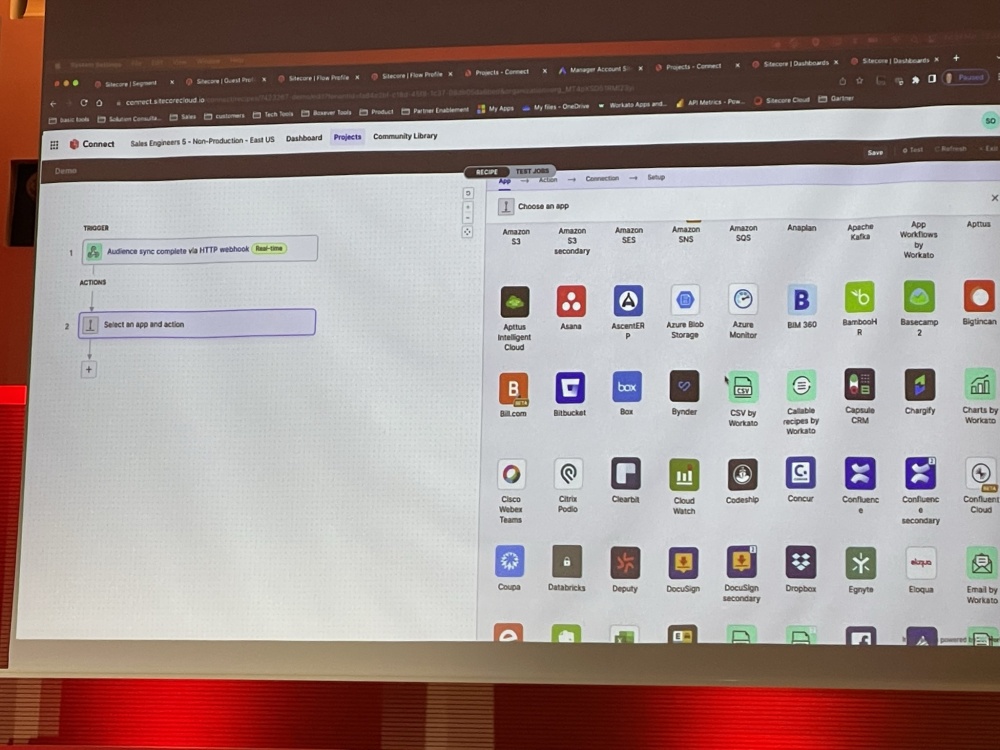
Sarah took us through an example of using Connect to import user segment data from CDP into Google Ads.
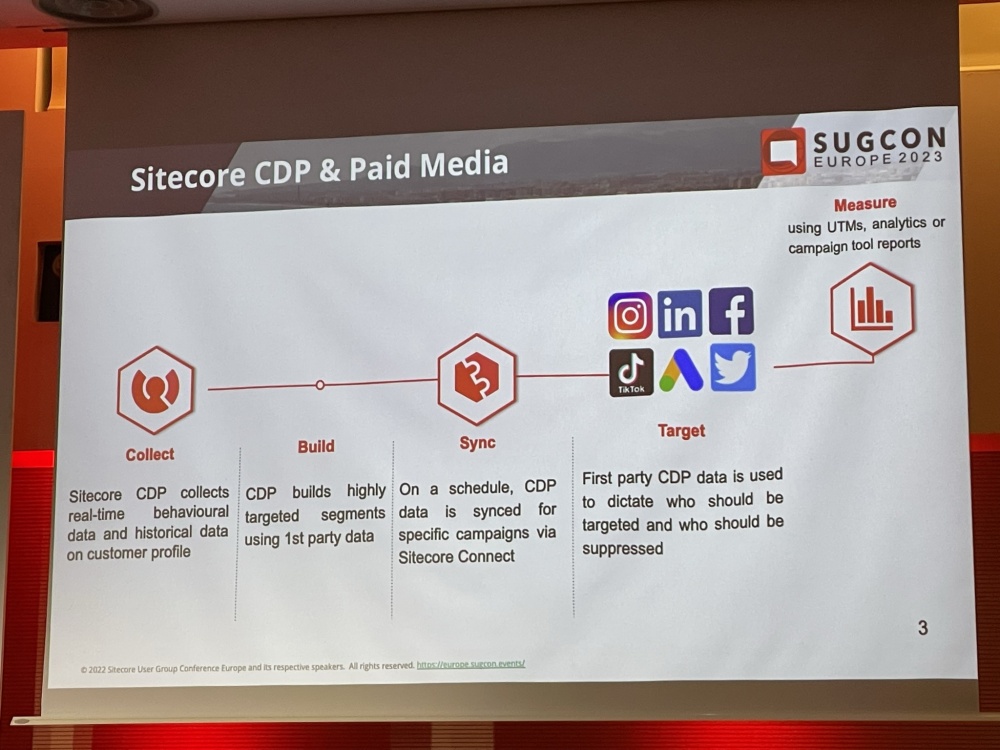
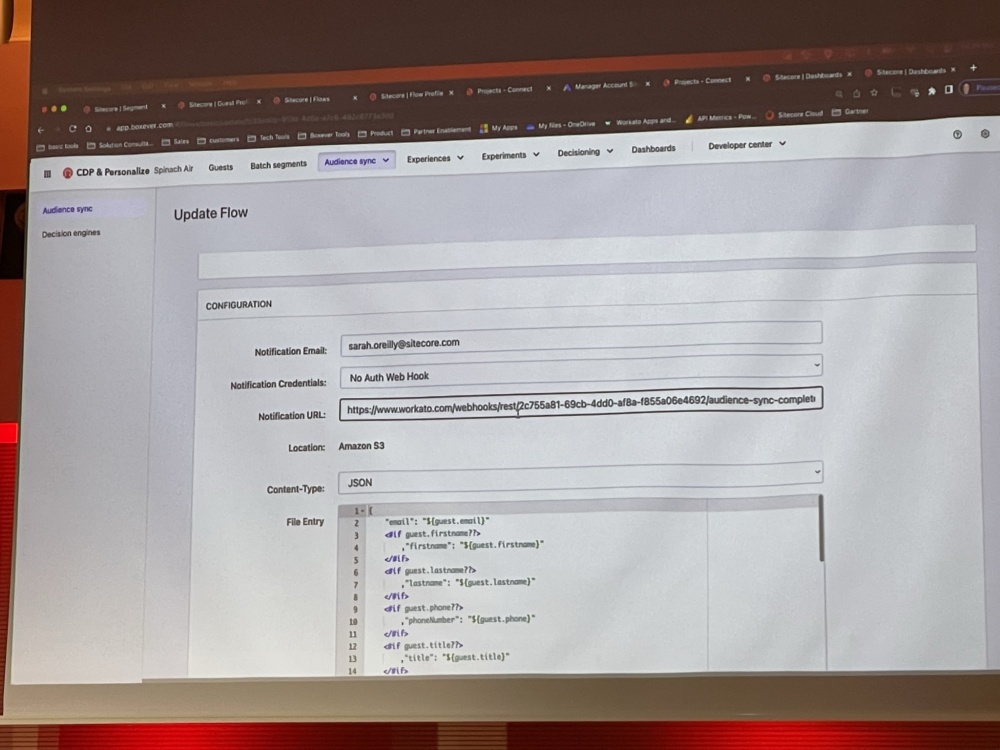
Once the export was setup to build from CDP the steps were then configured in Connect to sync to Google Ads:
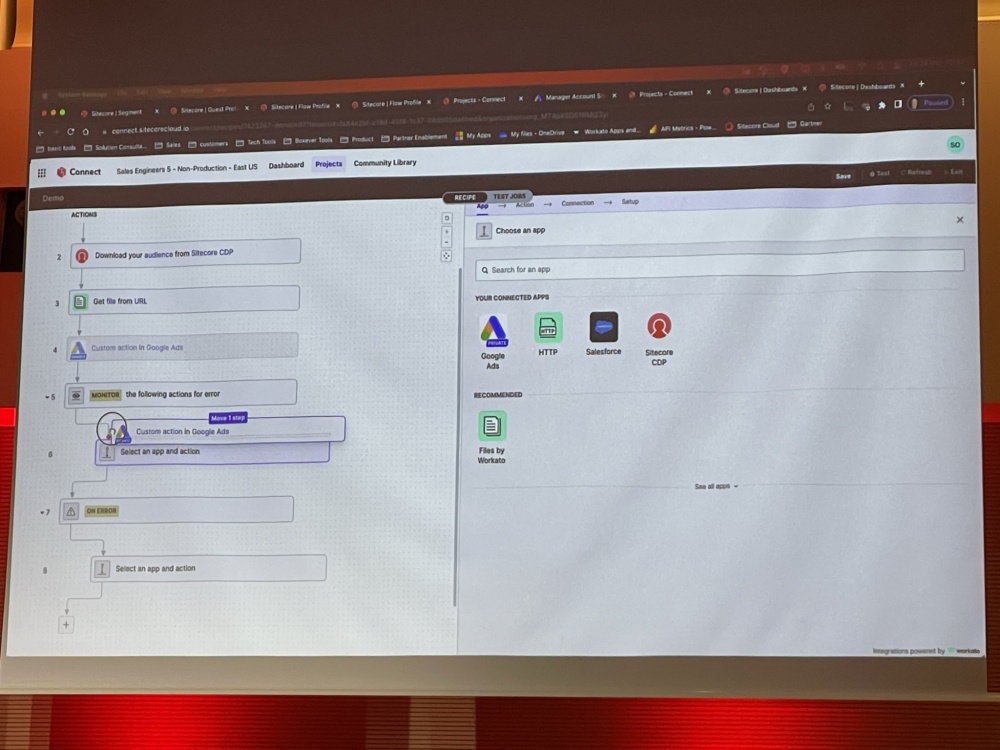
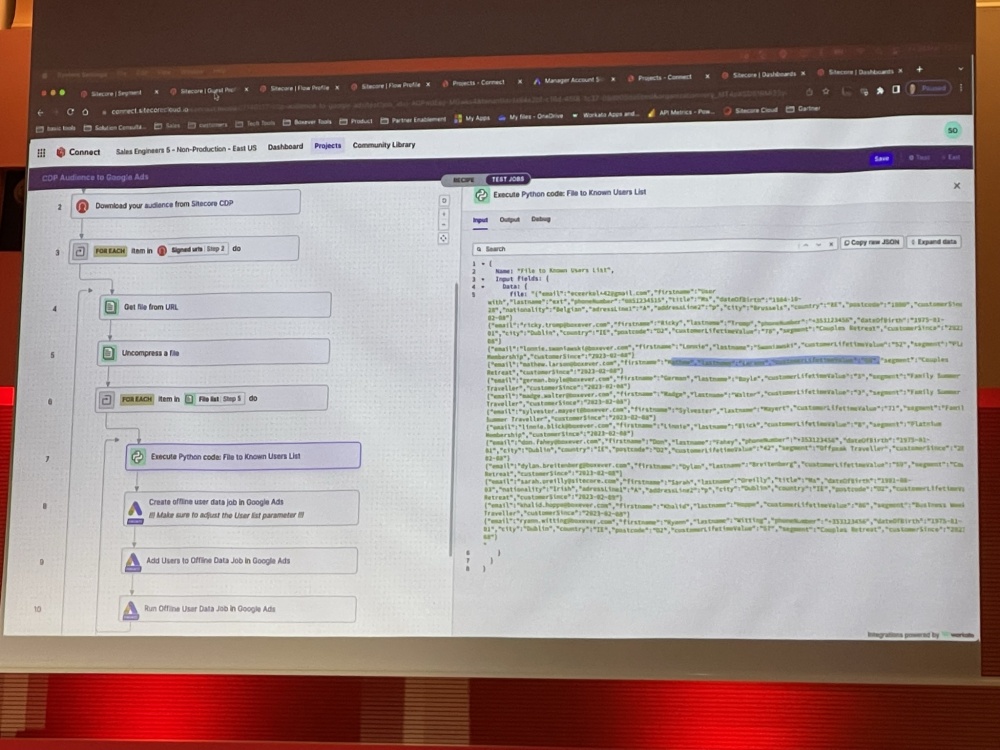
There are tons of Apps supported and different recipes defined and it was impressive to see the options for building logic such as if statements / for loops data mapping and manipulation all within Connect.
This was an insightful session and really interesting to see how it works. I can see how it could be used to help with migrating to XM Cloud from XP or another CMS platform.
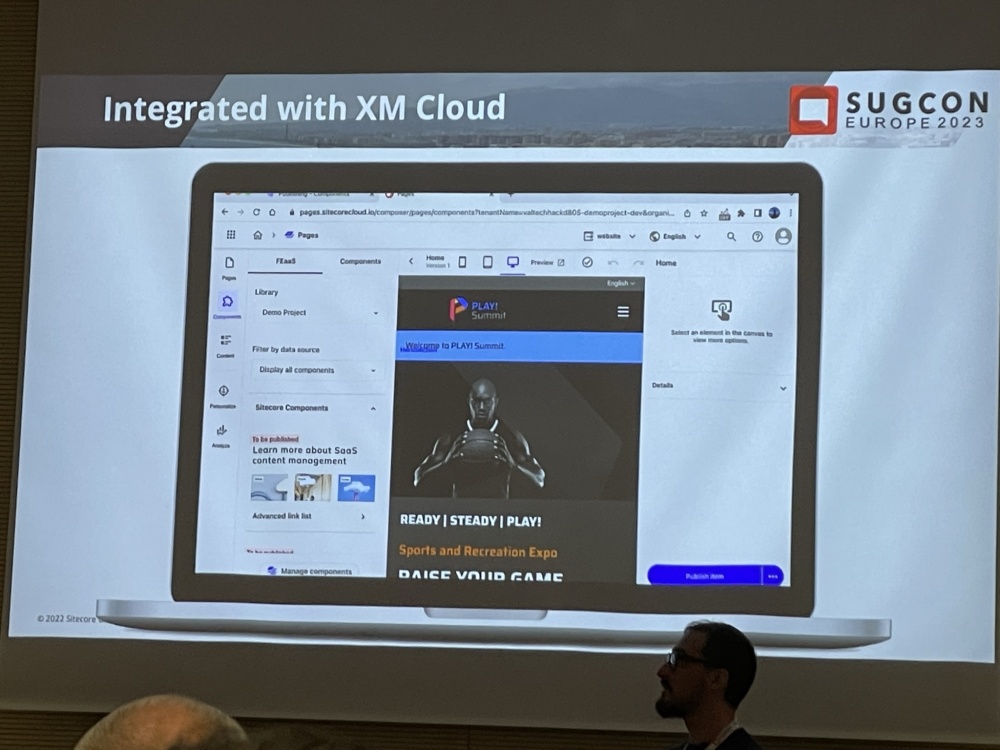
Sitecore components explained for your marketers – Ugo Quaisse
The next session was about the Sitecore Components builder in Pages in XM Cloud. I’ve heard a bit about this but not seen much of it in detail. I was hoping to see a full demo of it. I guess at the session was only 15 minutes there wasn’t time, but I still learned quite a bit about how it works.


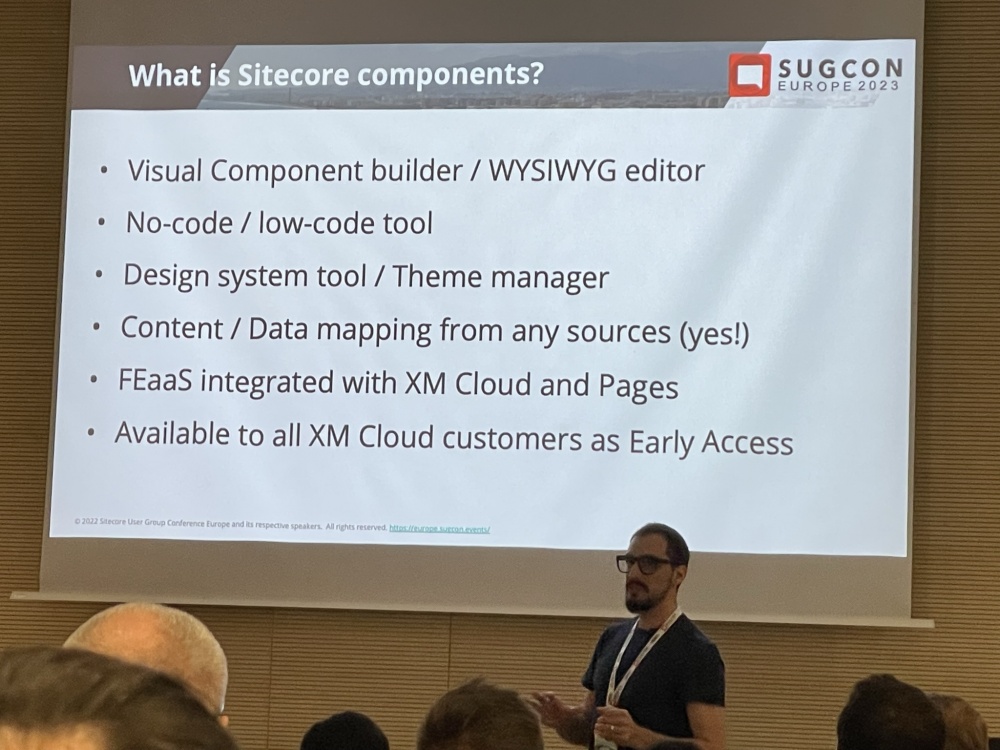
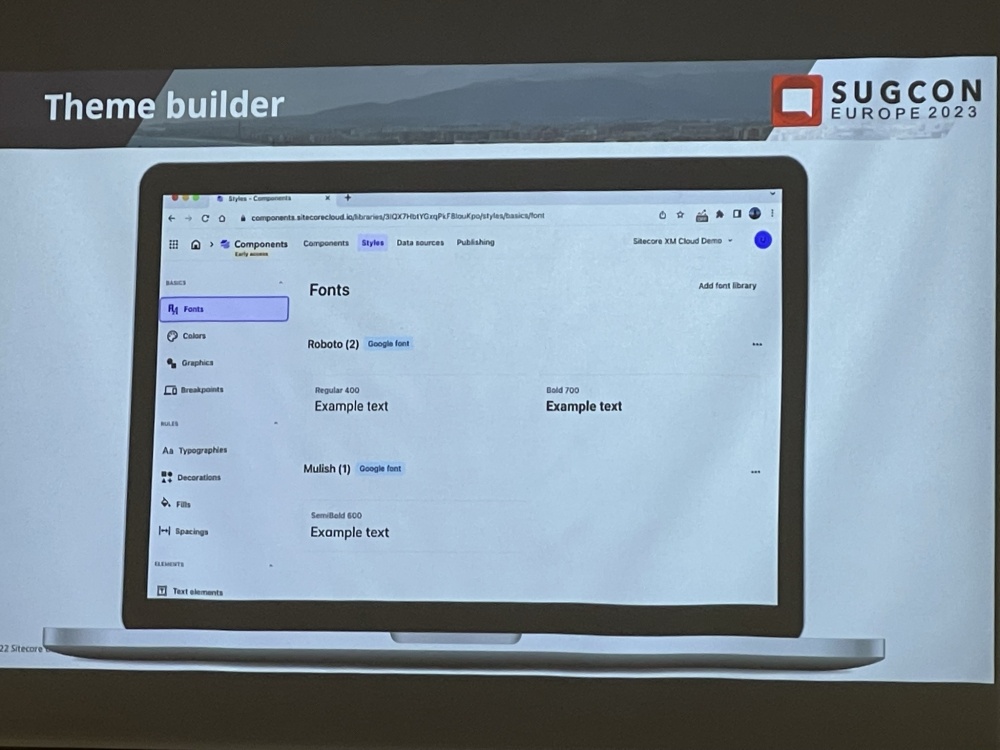
The Component Builder can be used without any development or code required at all. First Themes are setup with colours, fonts and breakpoints configured.
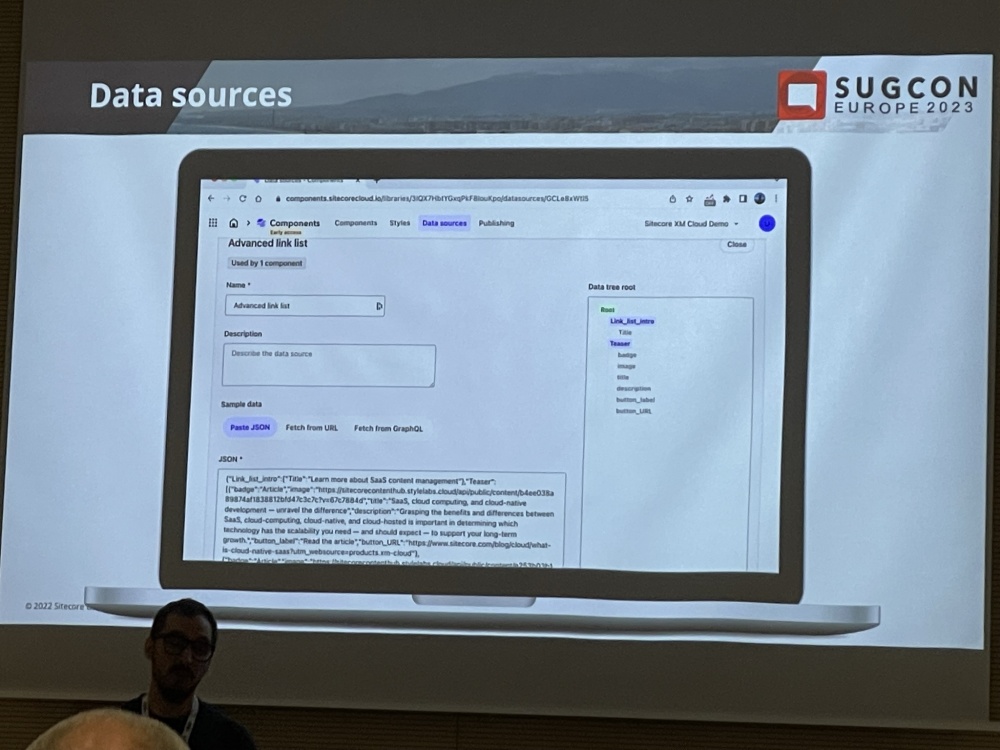
Then datasources are setup and mapped from either a url or json or GraphQL.
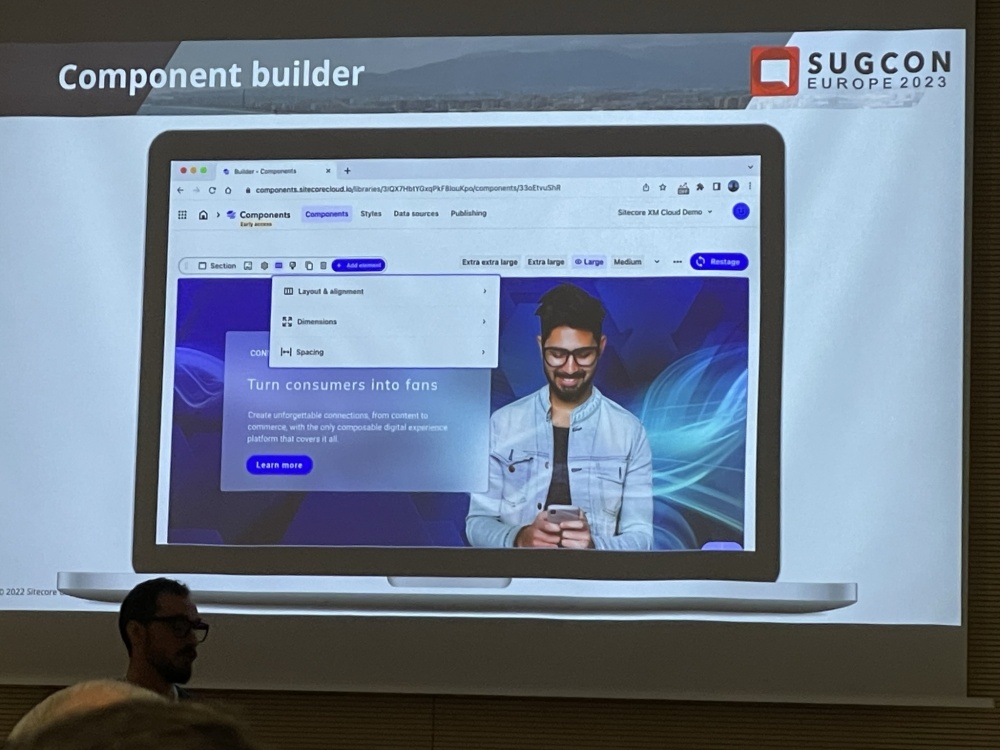
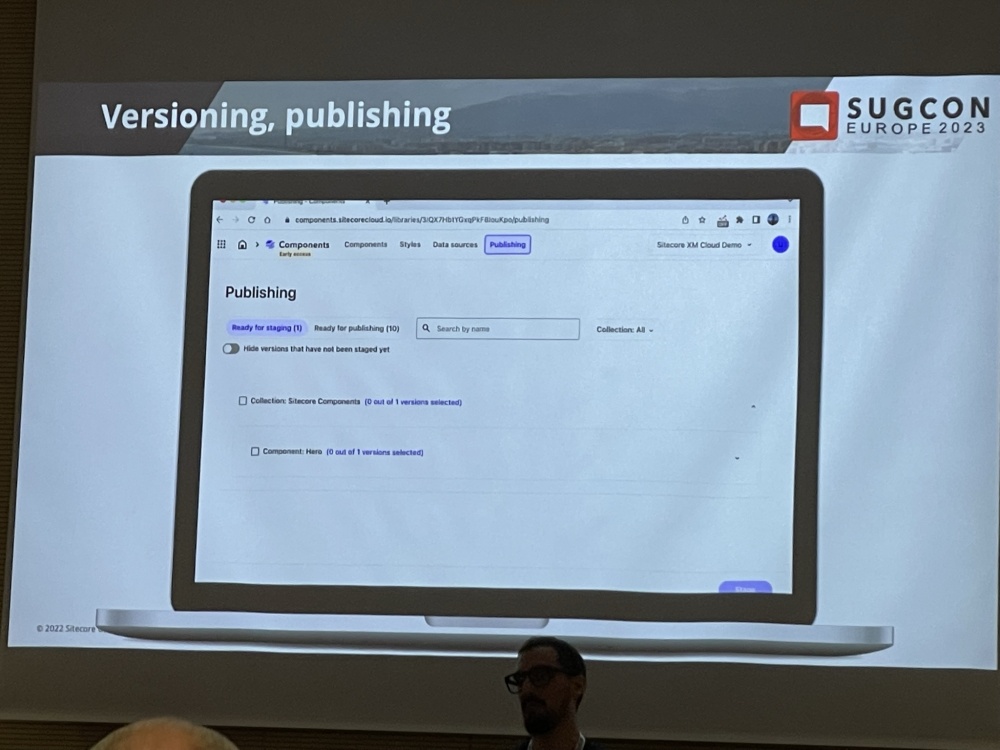
Then the components ‘look and feel’ – layout, dimensions and sizing can be configured in the Builder. This looks pretty neat. Then versioning and publishing is setup for the Component.
Lastly some details were shared around the benefits for digital creatives, it’s possible to get Sites built very quickly and easily using Components Builder.

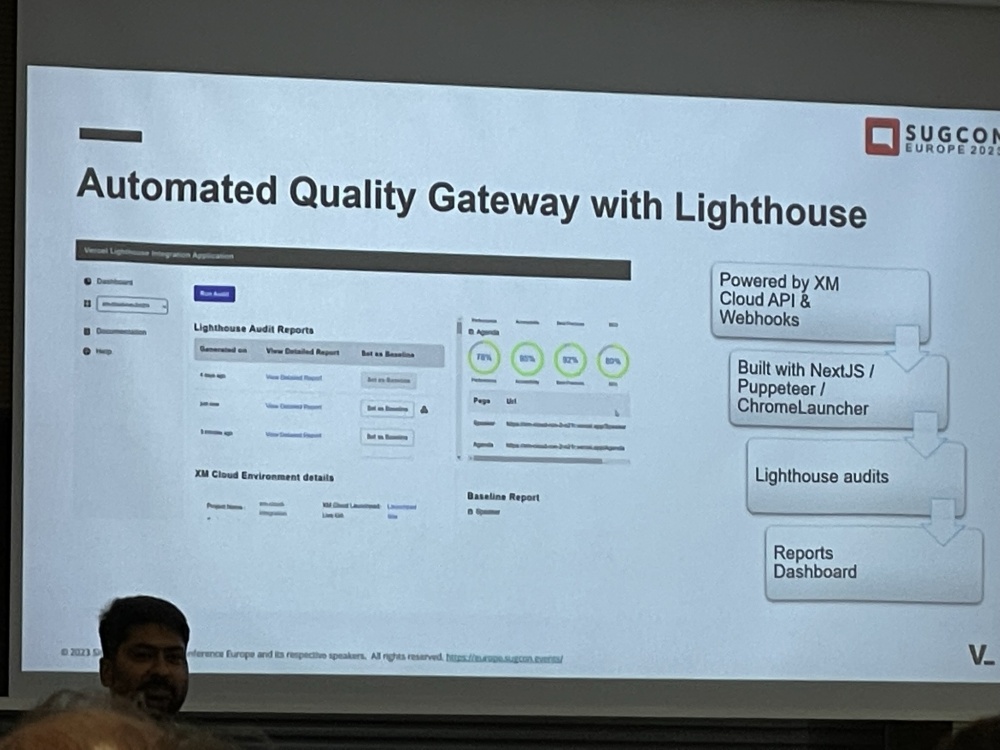
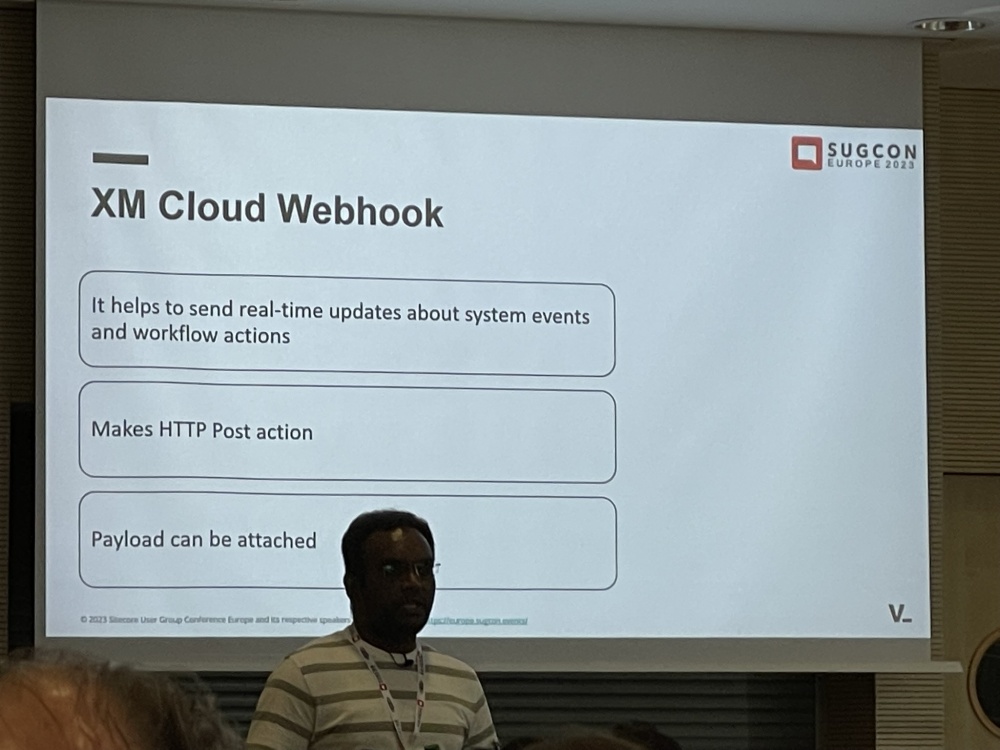
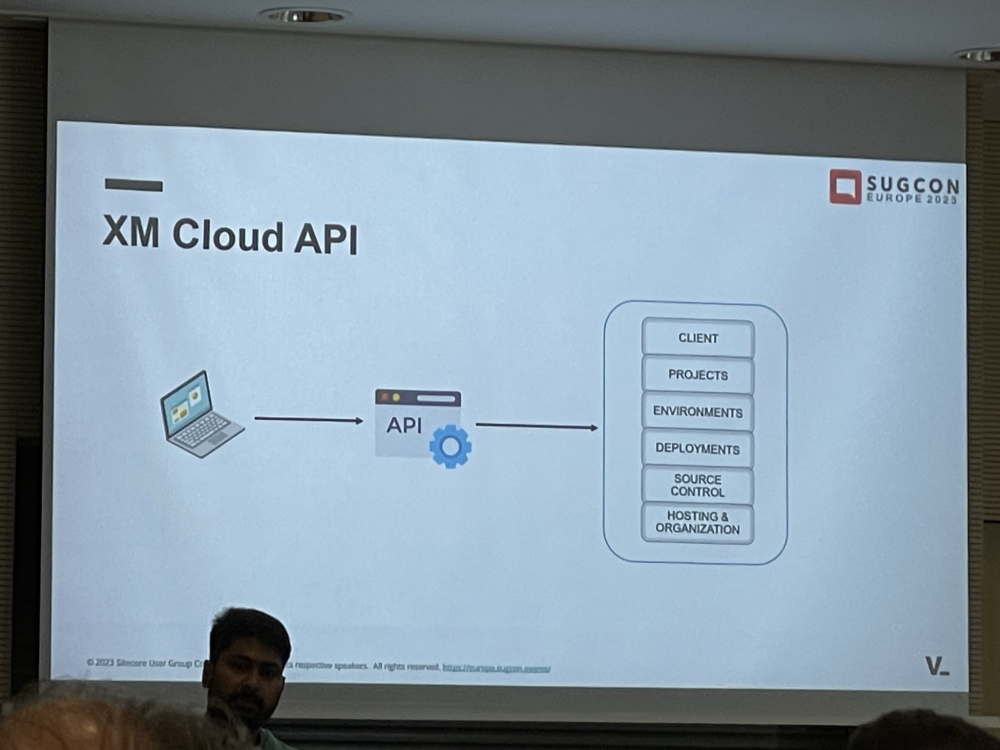
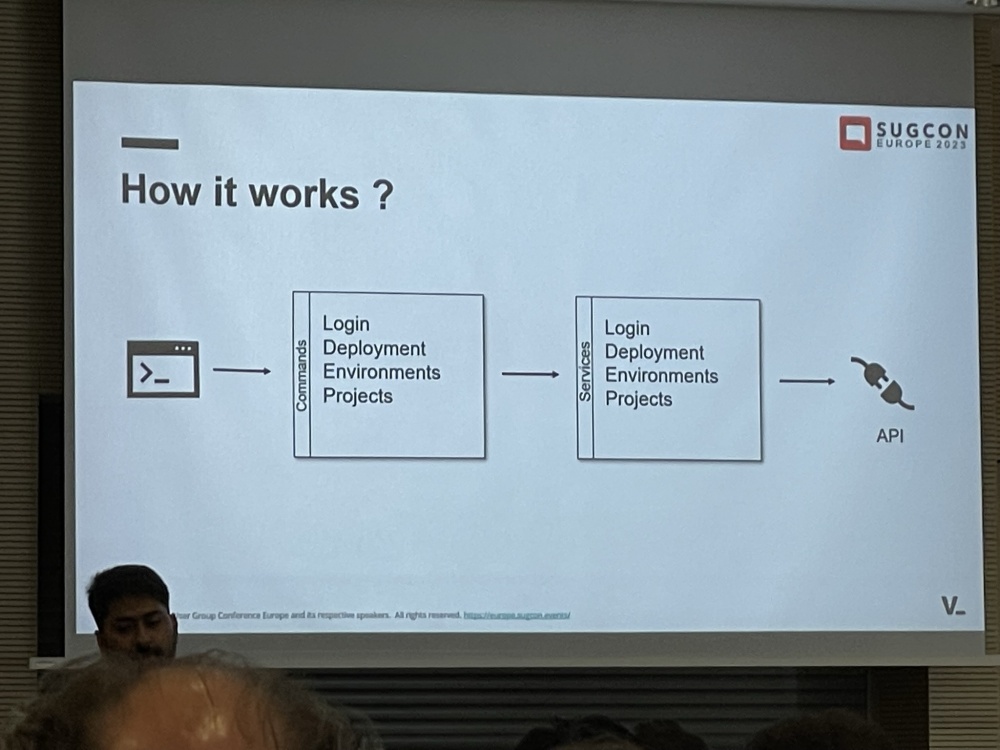
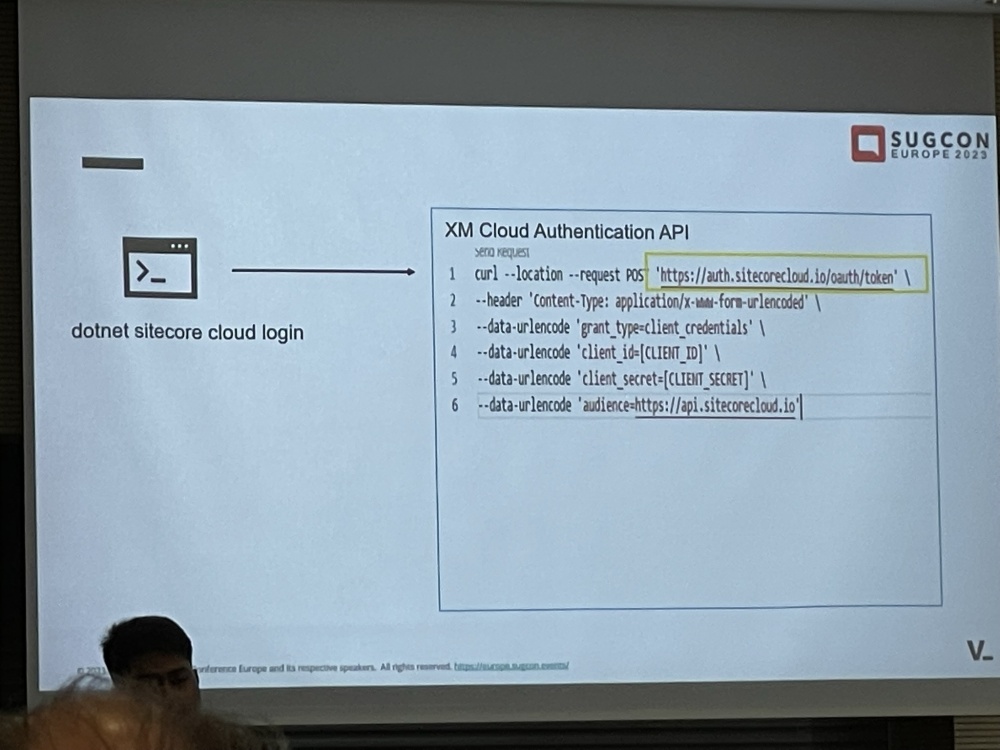
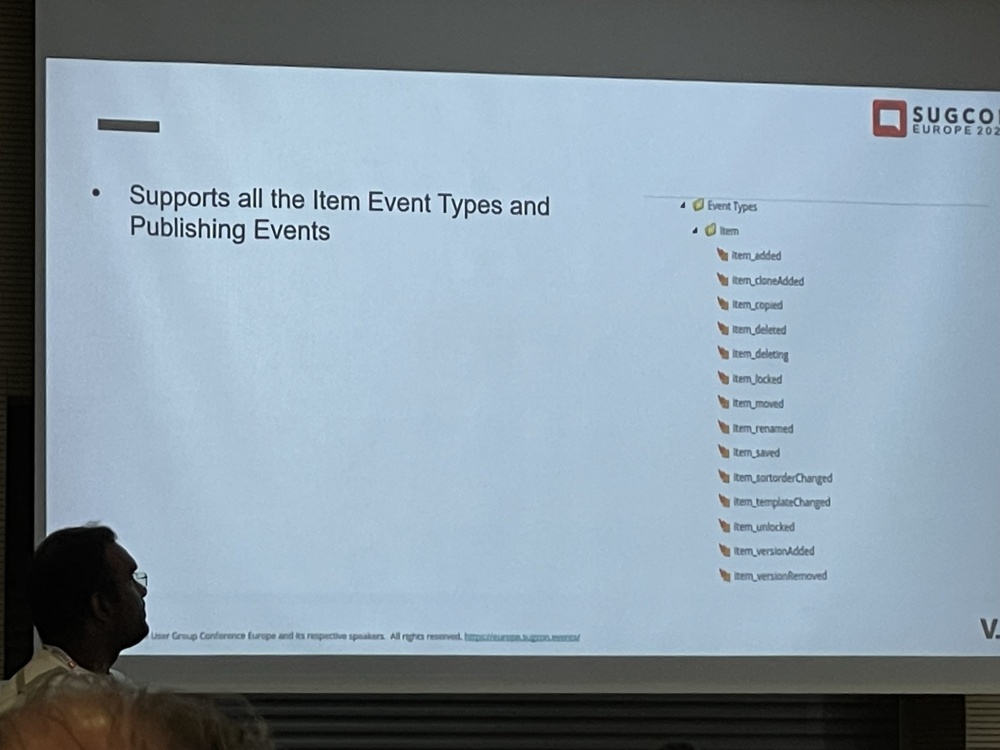
Leveraging XM Cloud APIs and Webhooks to powerup integrations – Ramkumar Dhinakaran & Elakkuvan Rajamani
After lunch it was time for another session, this time on Webhooks. The use-case here was the XM Cloud Lighthouse Integration which would do an automated quality check of pages using Webhooks and report on it.
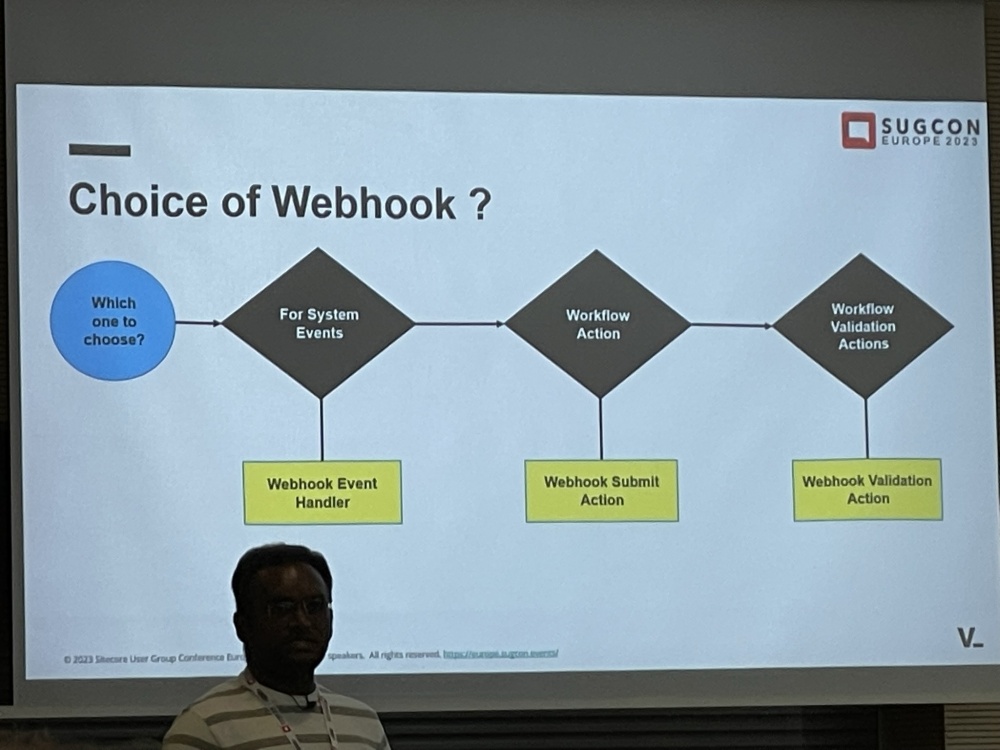
Depending on the integration required it might not be best to use a Webhook:
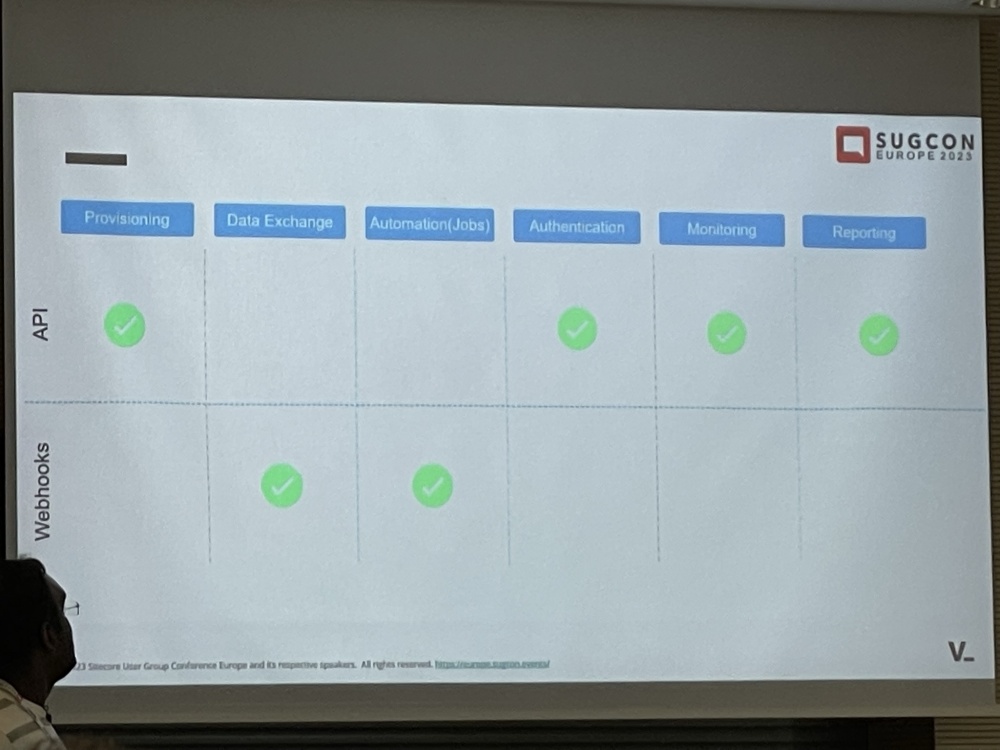
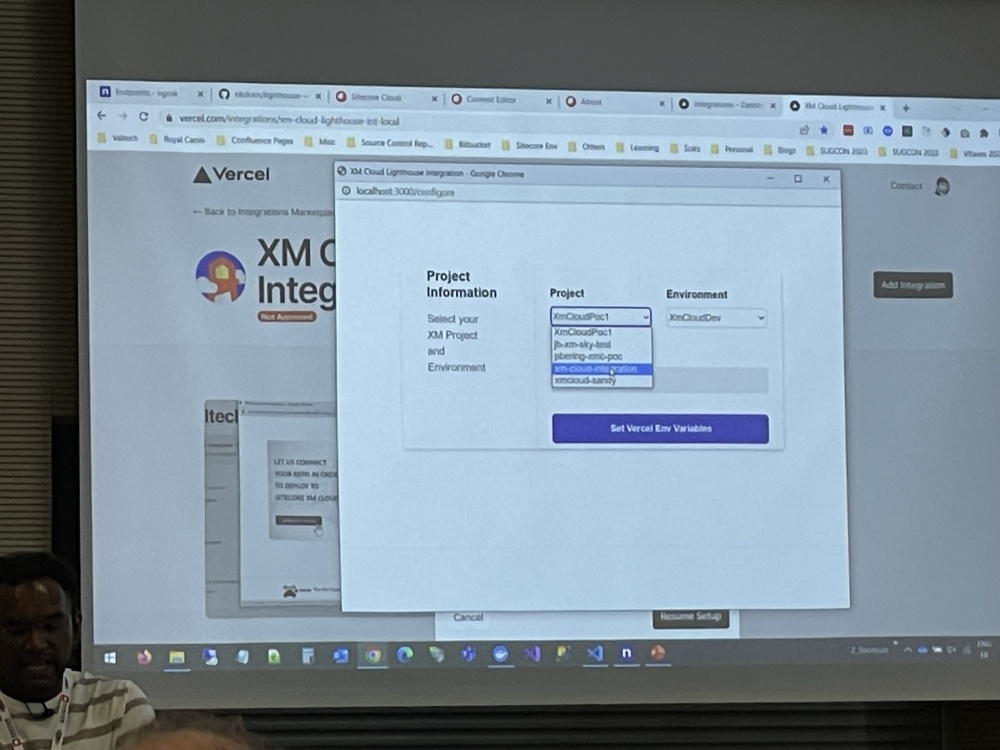
Quite a lot of detail was shared with how this all works and integrates.
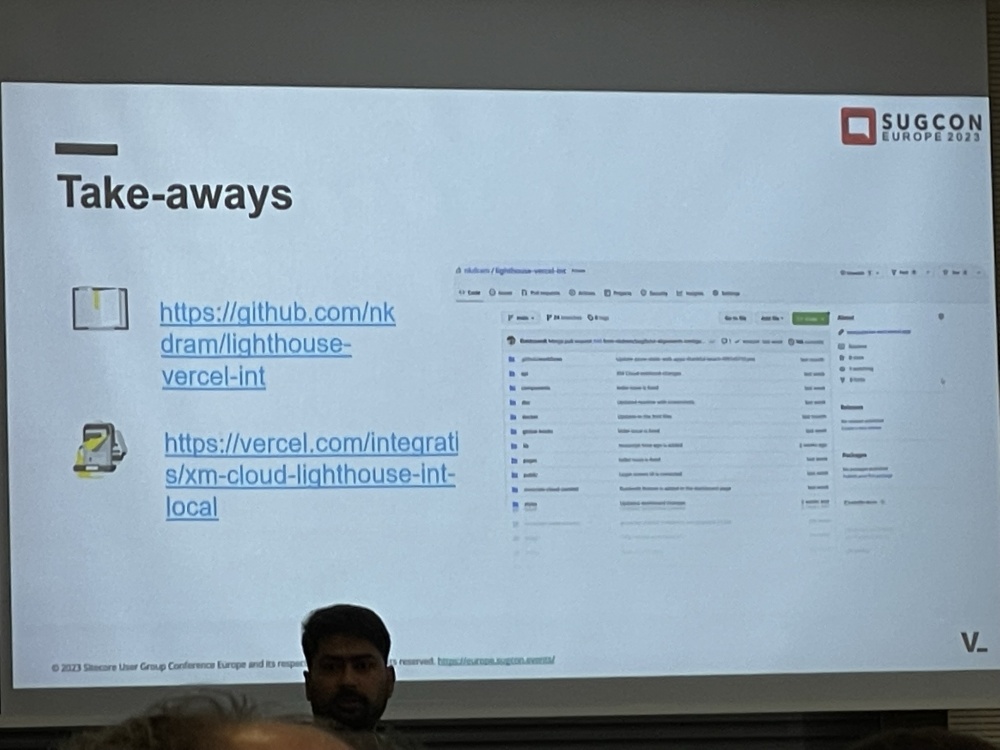
There were some links and takeaways shared at the end.
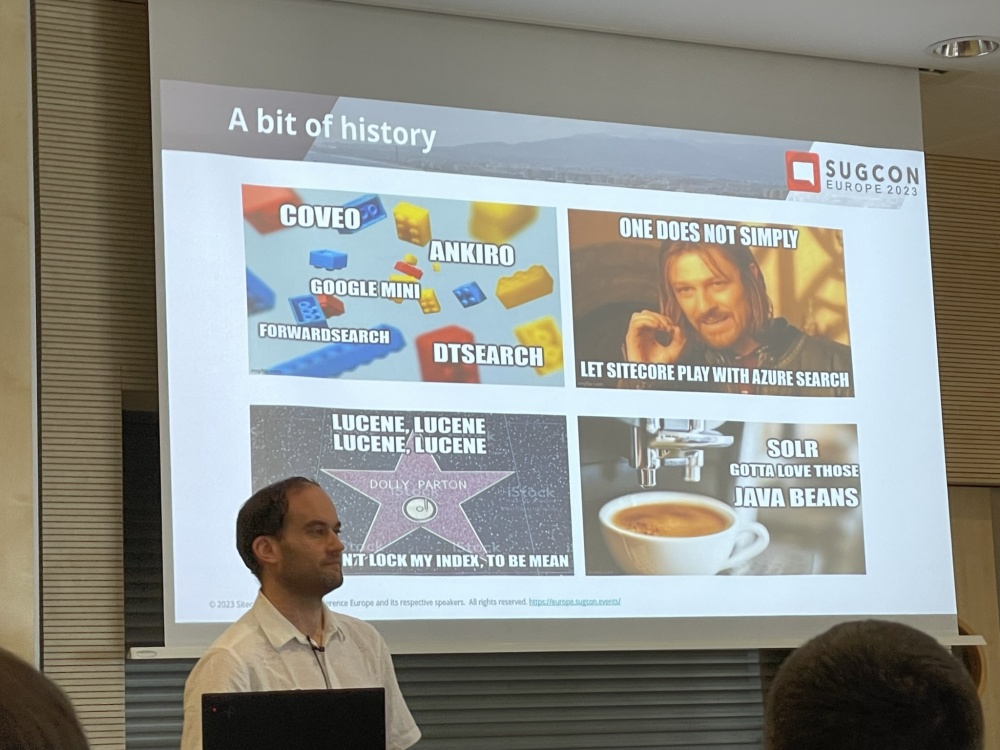
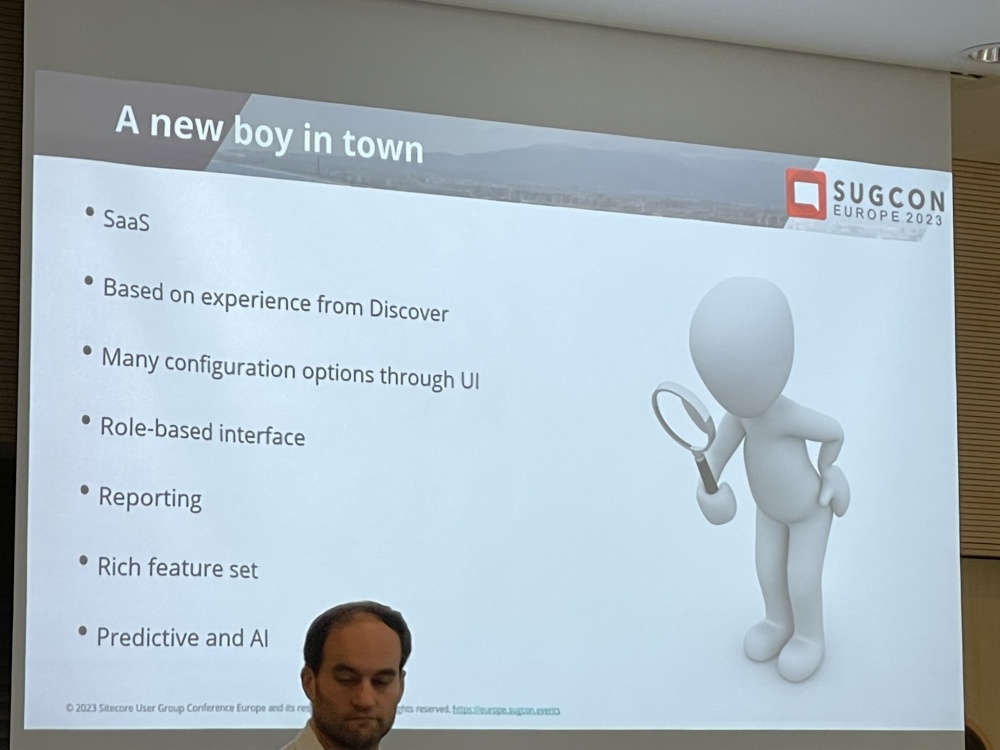
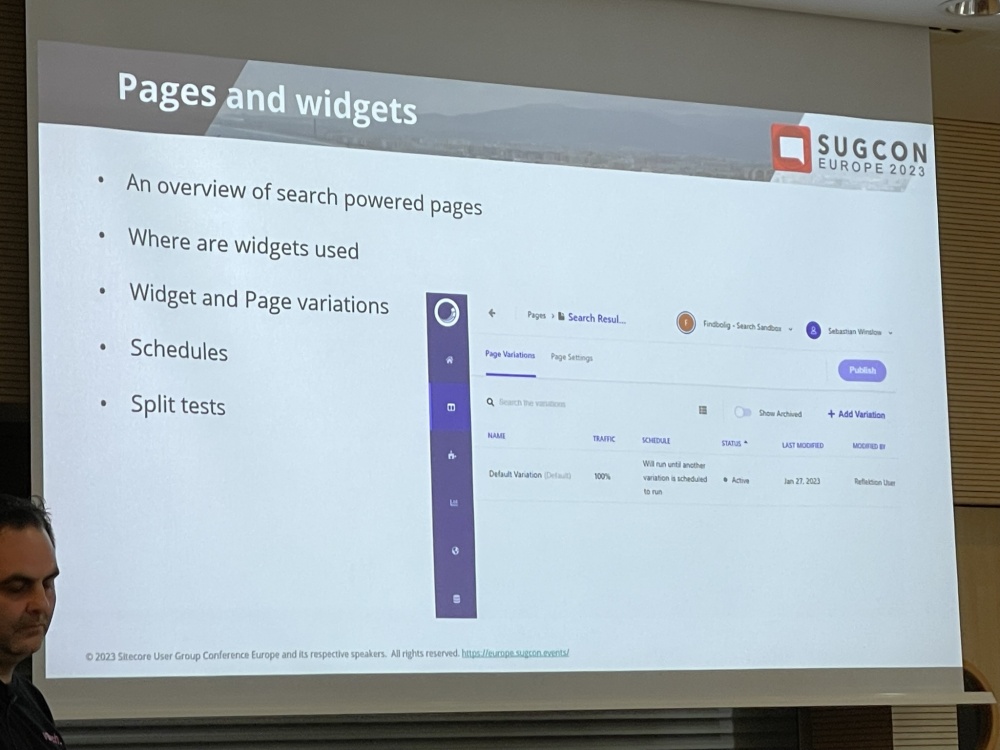
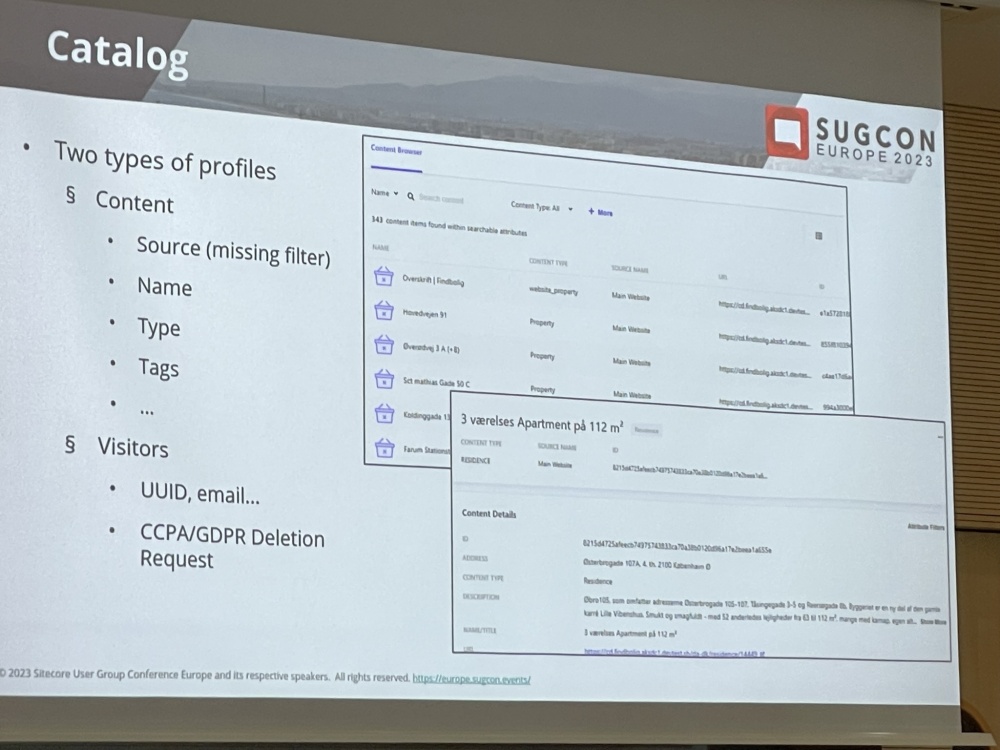
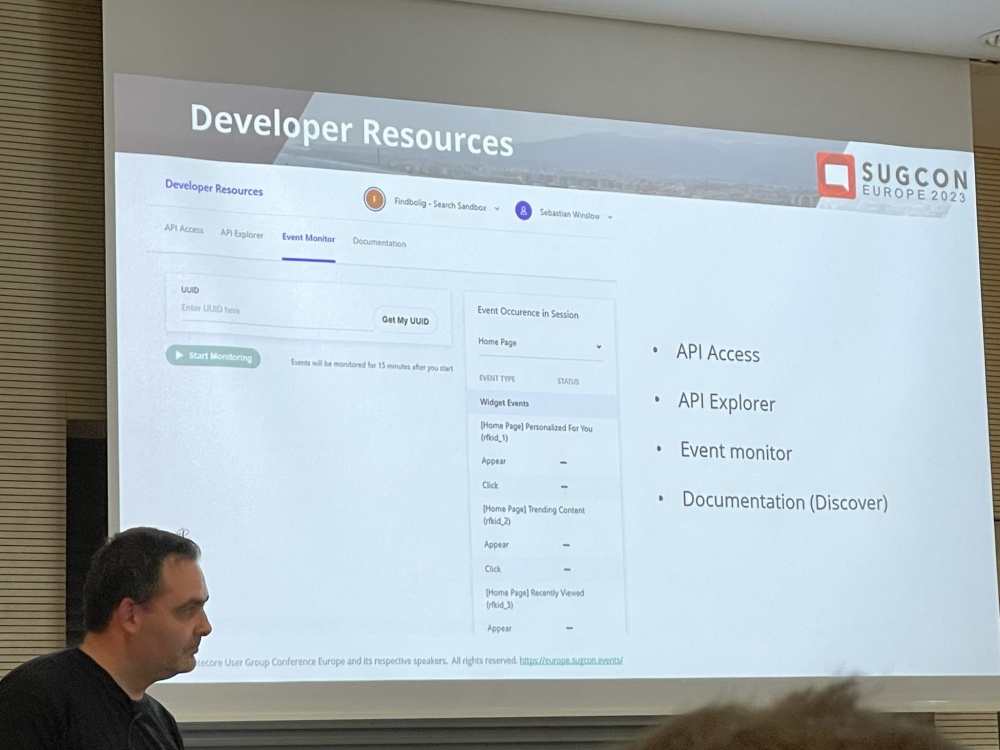
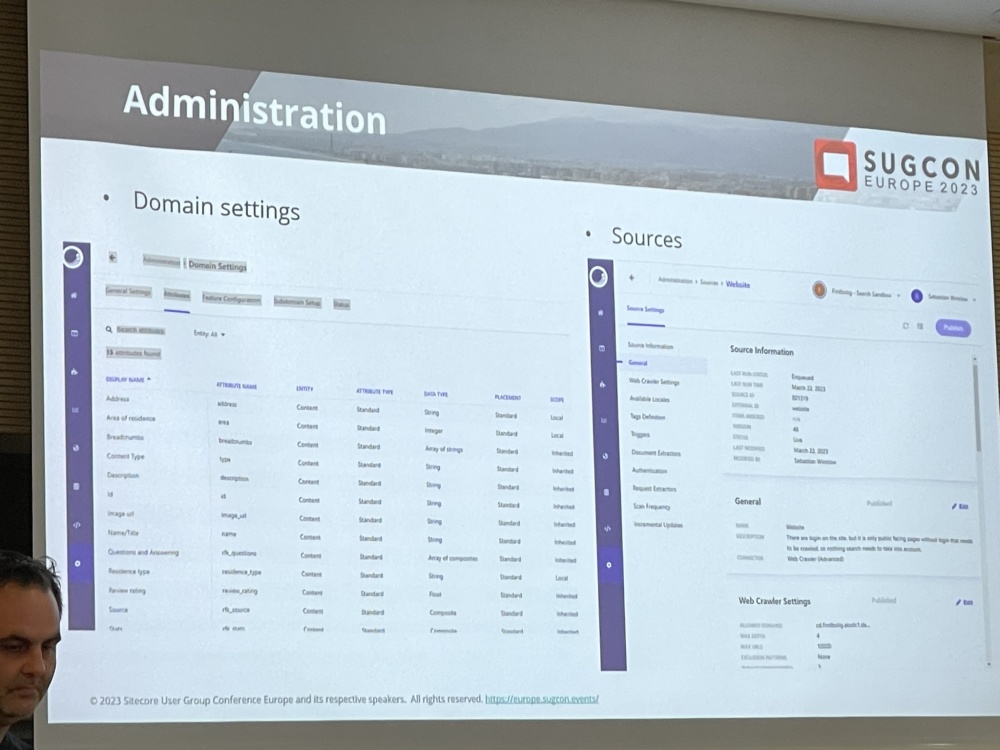
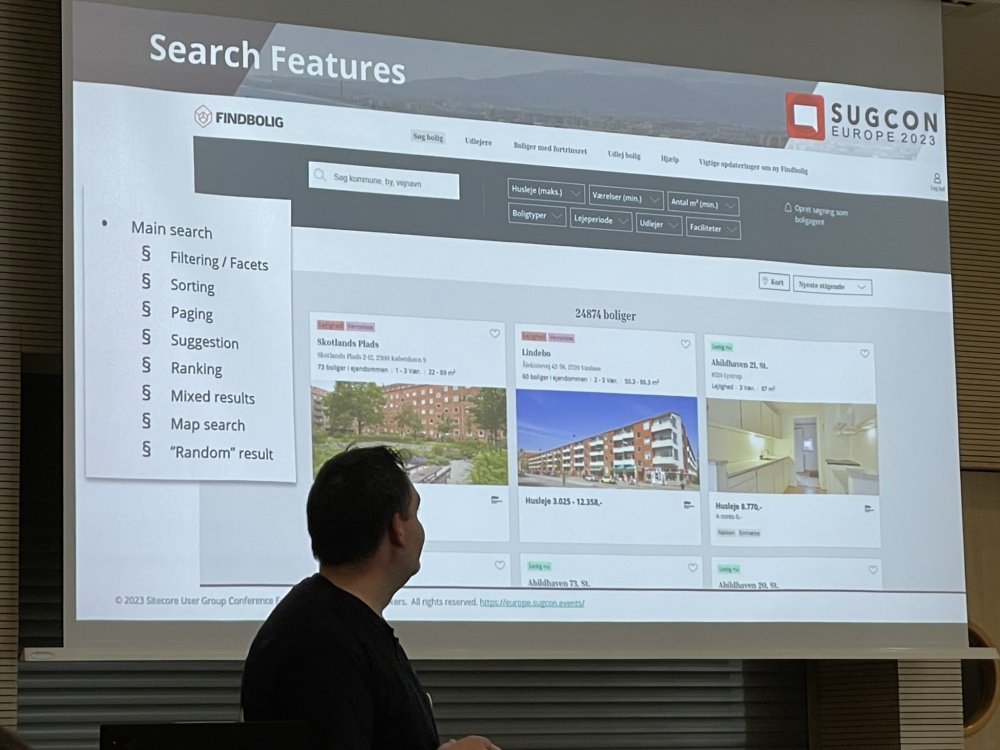
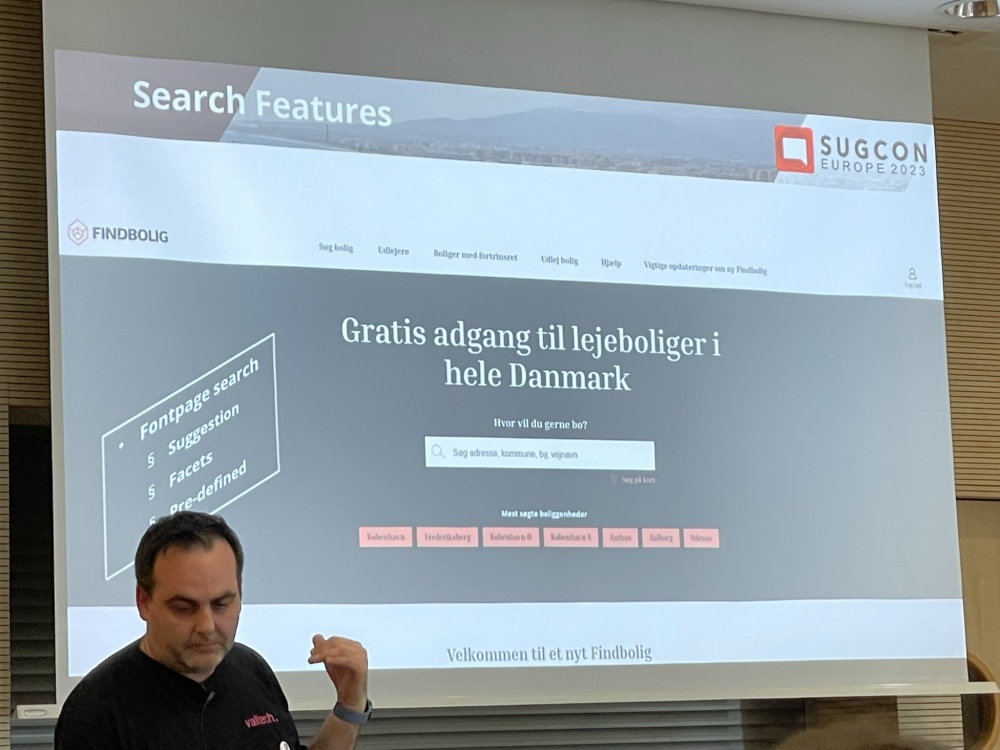
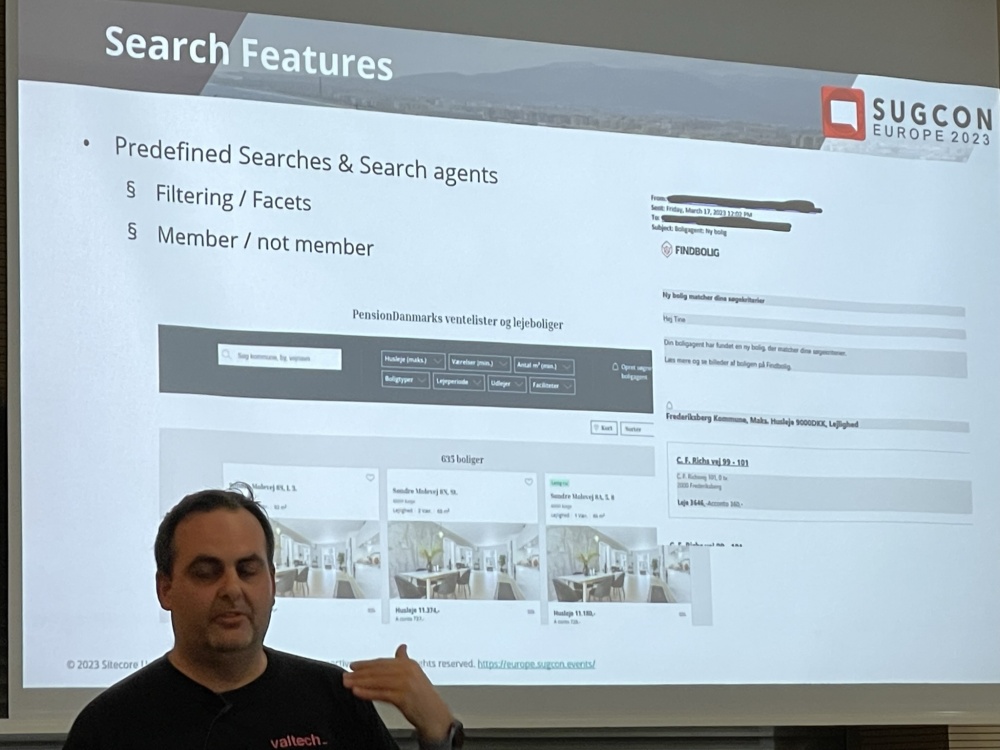
Sitecore Search: Real case PoC – Sebastian Winslow & Jesper Balle
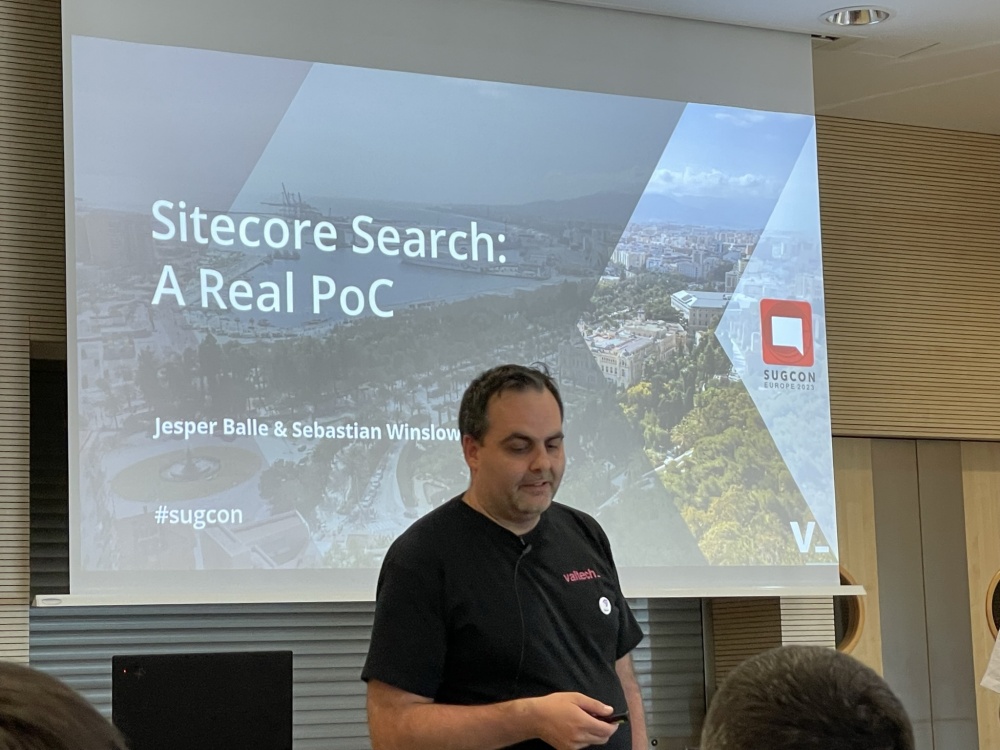
The 2nd to last session for the day was on the Sitecore search (based on Discover) which I was keen to learn about more as I didn’t know much about how it worked.
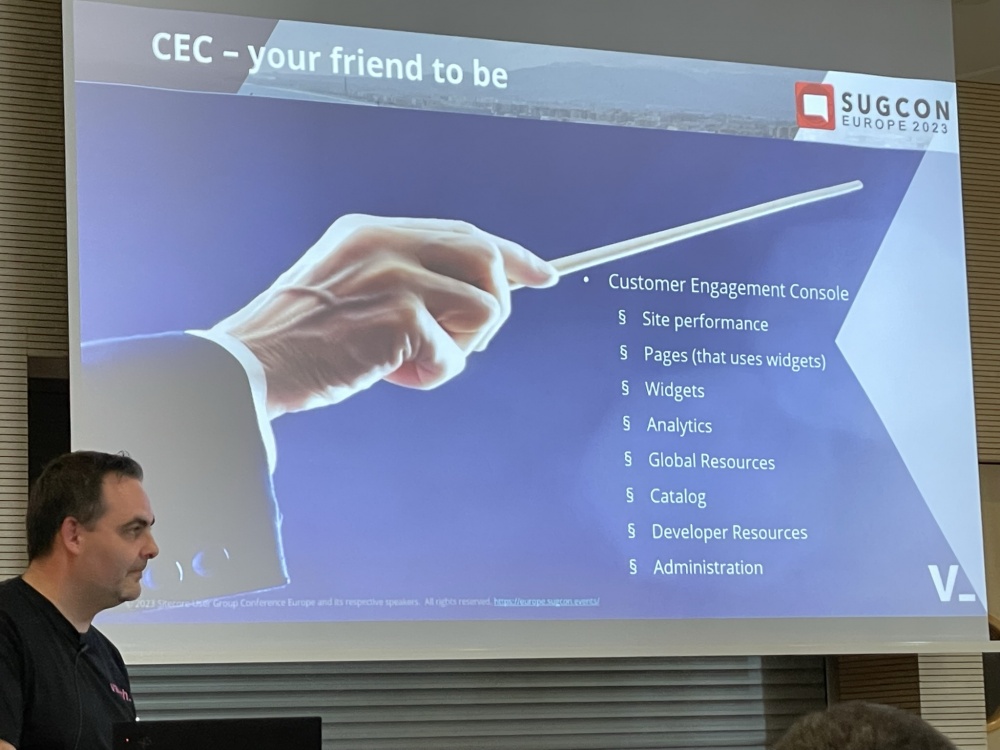
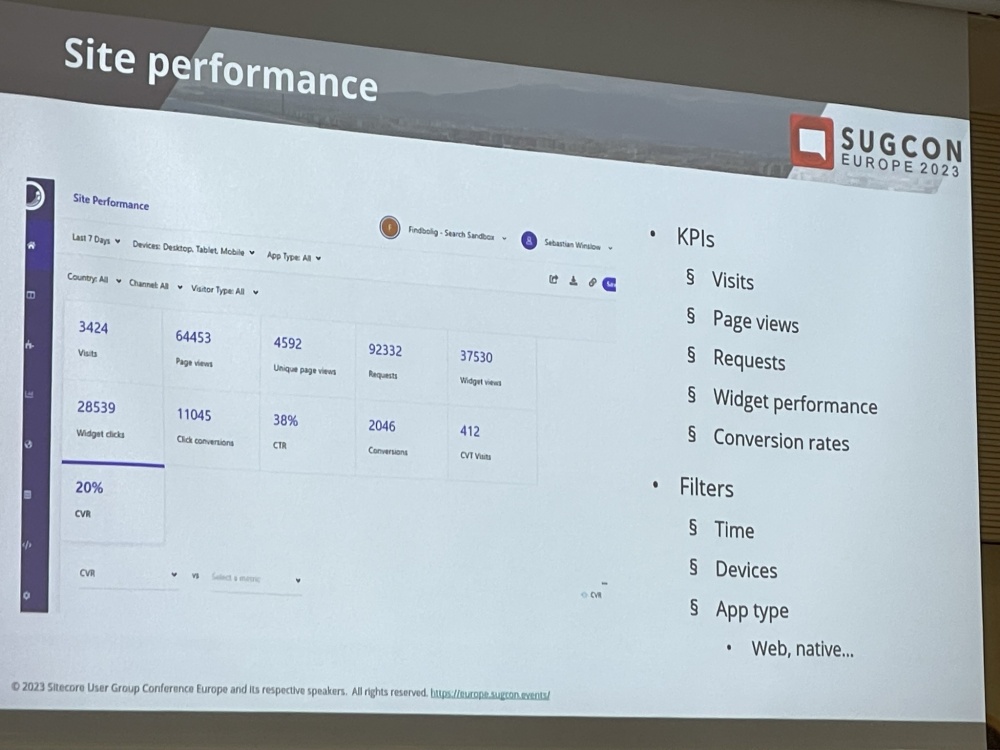
CEC looks pretty powerful and can be used to manage search, performance is key and widgets can be configured for search and catalog:
Some dev resources and admin info were shared:
The use case for search was a property Site. There is still some features that need to be built.
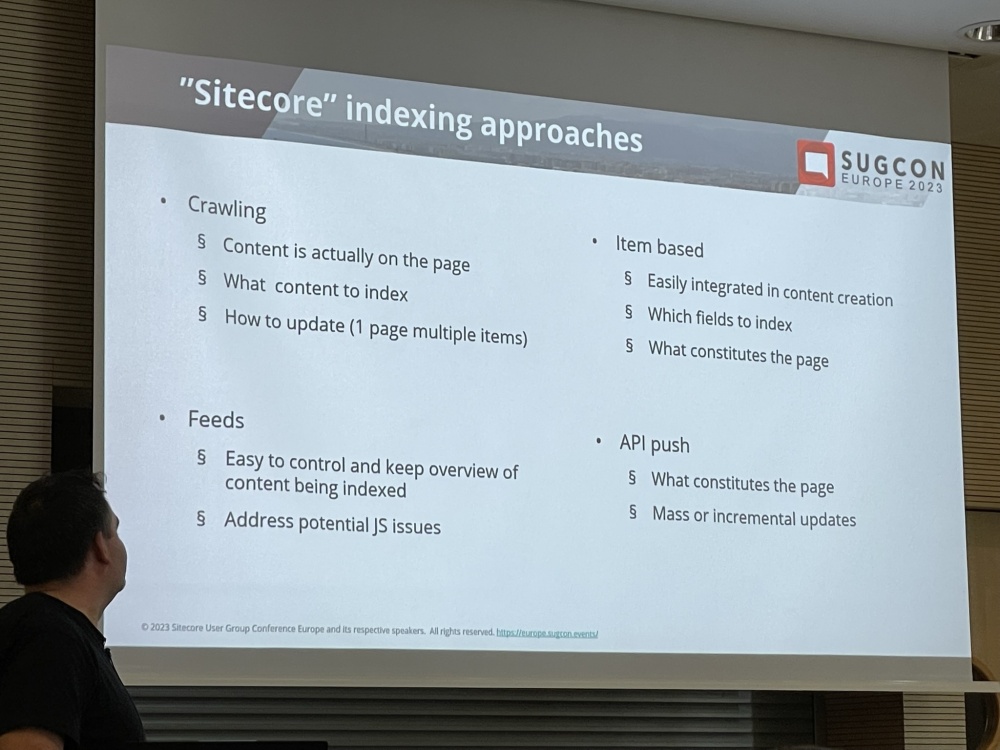
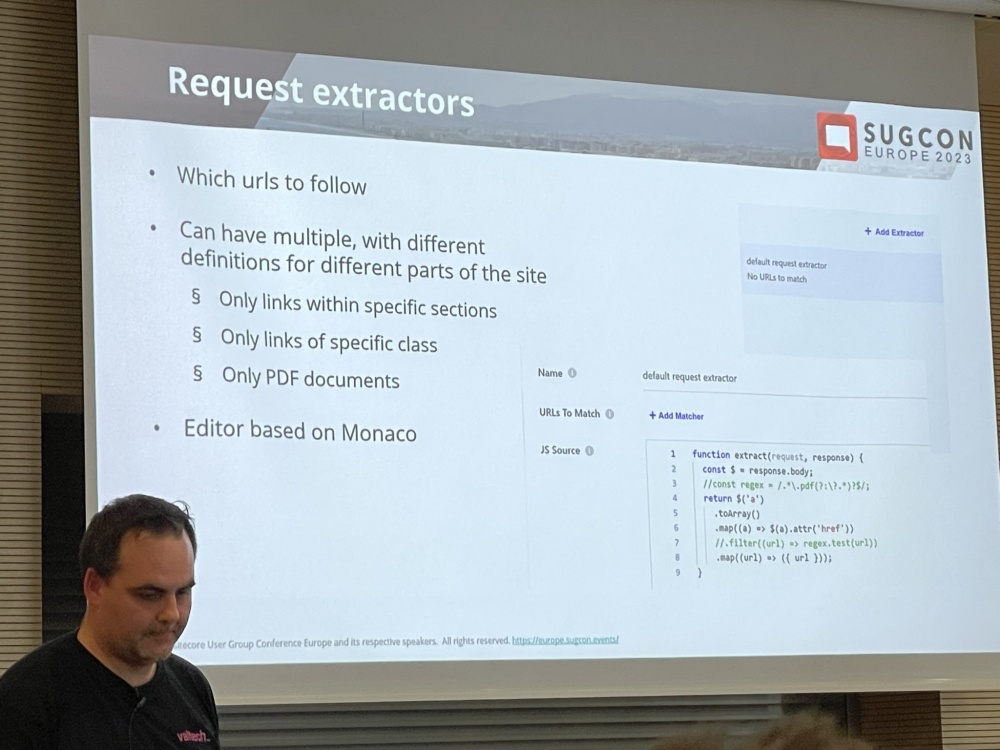
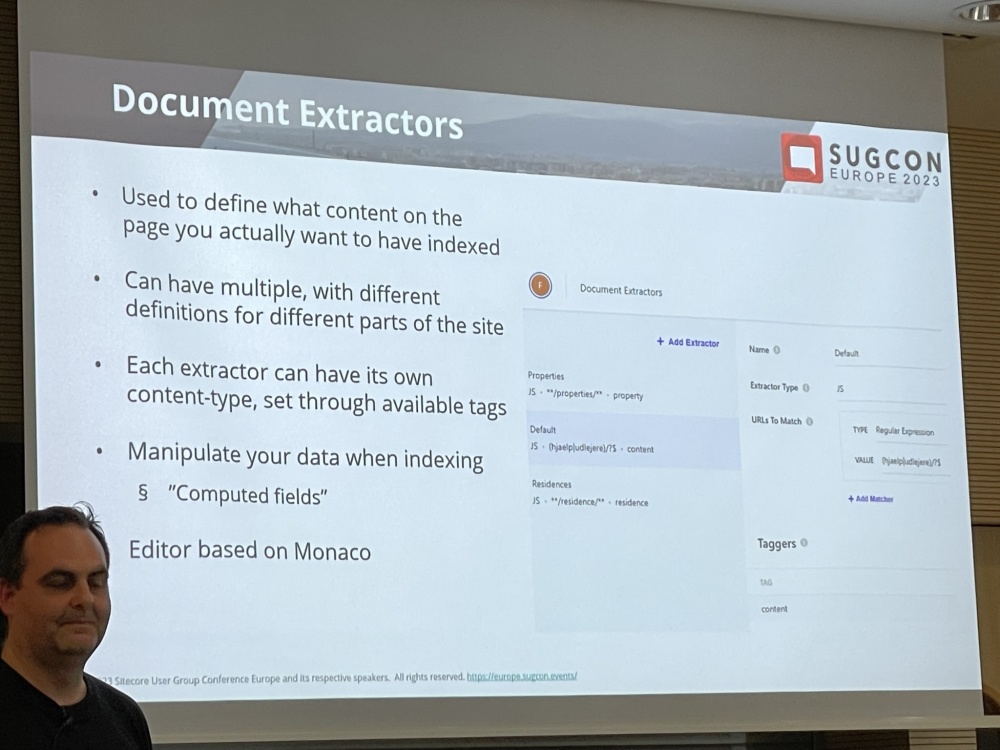
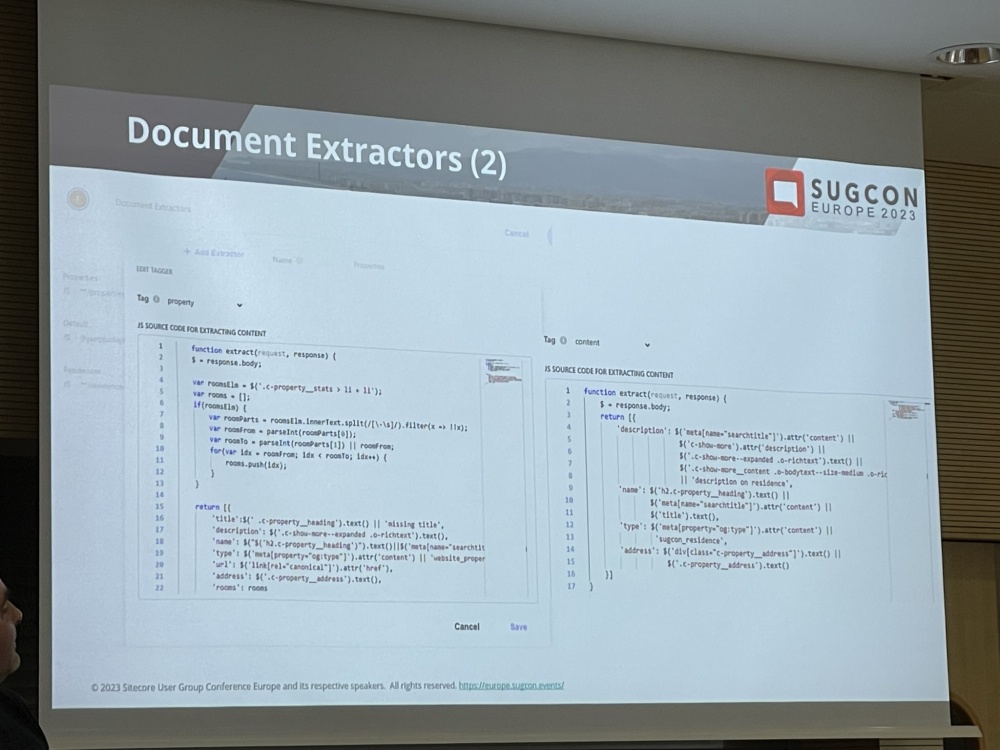
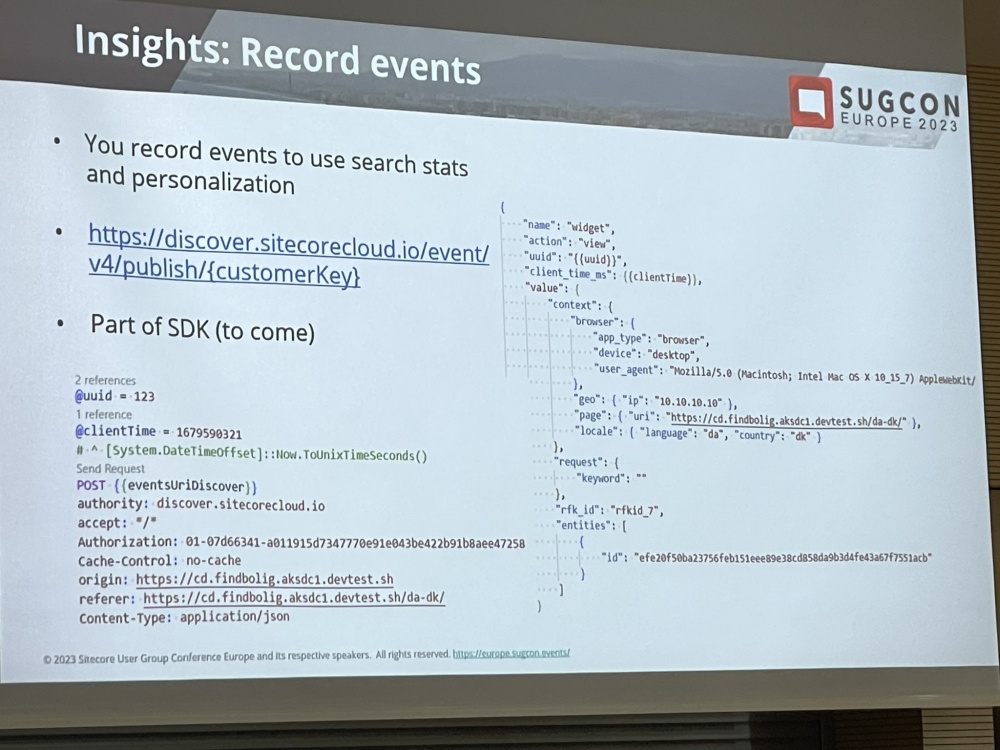
Some info was then provided on Triggers to get the content, Request and document extractors to process and manipulate the content.

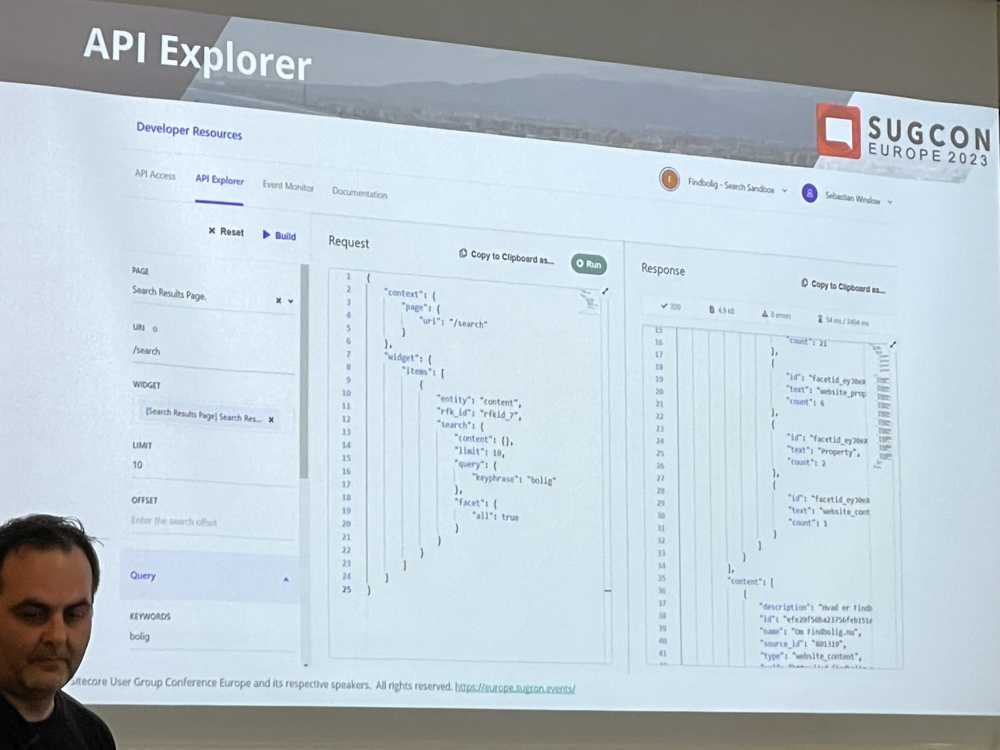
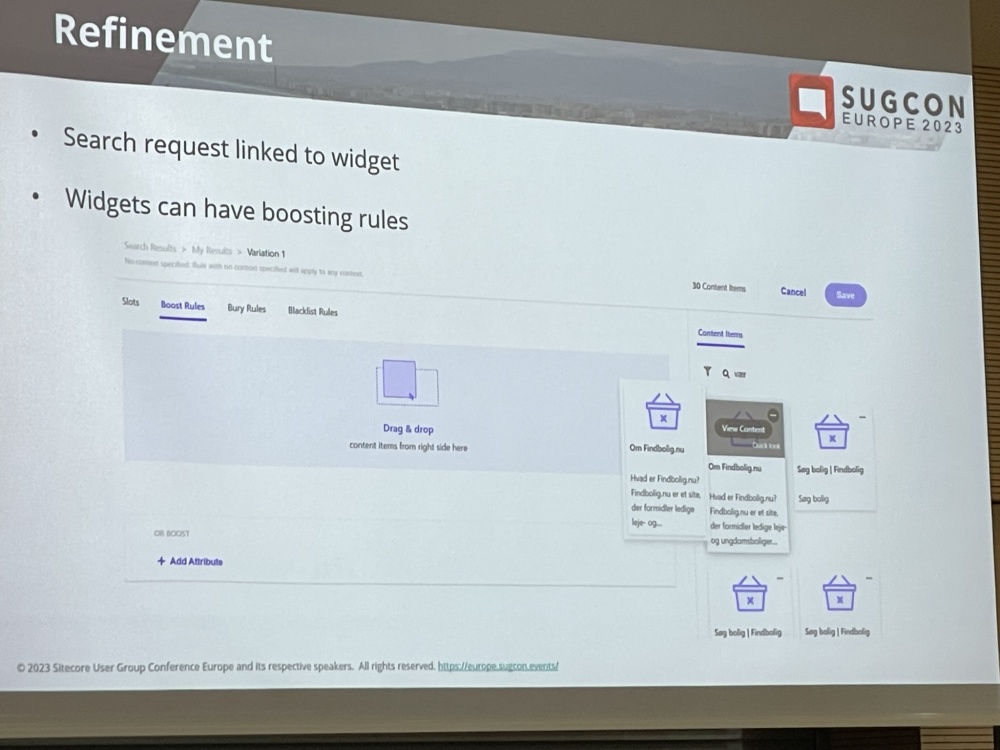
Search API endpoints, results response, API Explorer and ability to refine the widgets.


It’s early days and the search SDK is still not there yet but it’s coming. Be careful with how much content you try and index when testing but there are some significant benefits to using it.
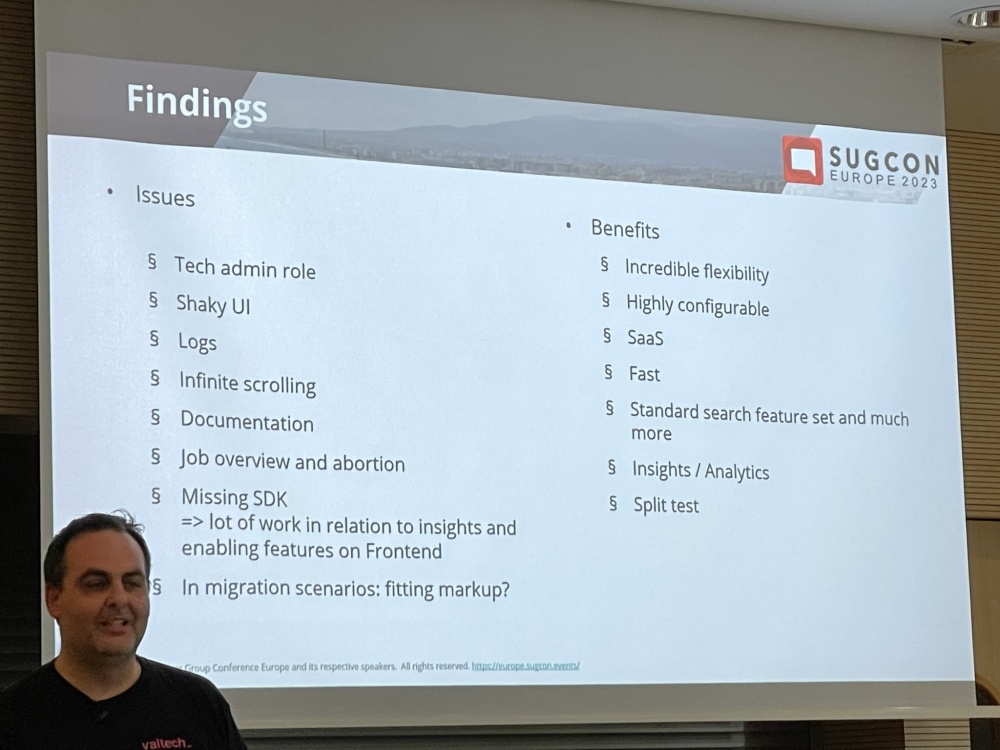
This was a really informative session and gave me all the info I was looking for about how to go about implementing search.
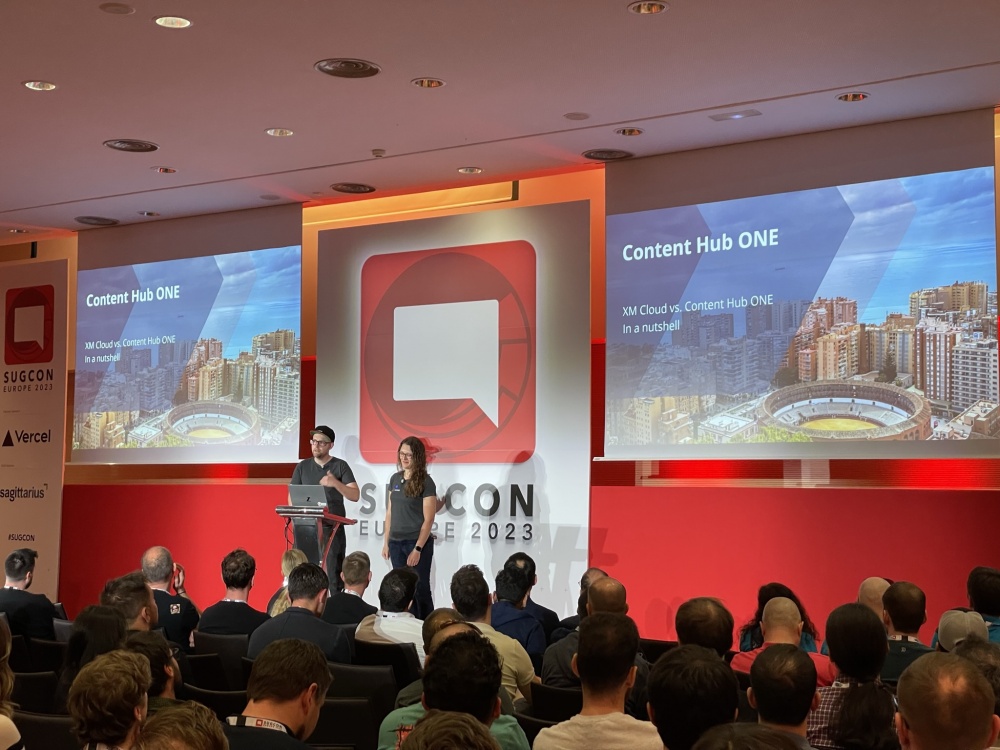
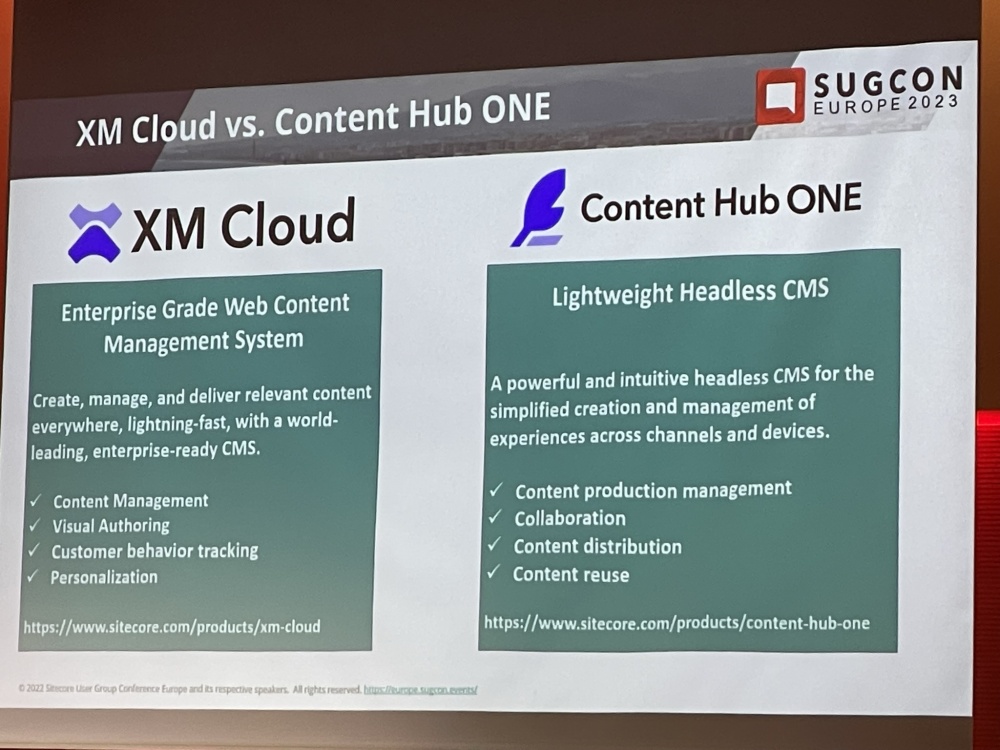
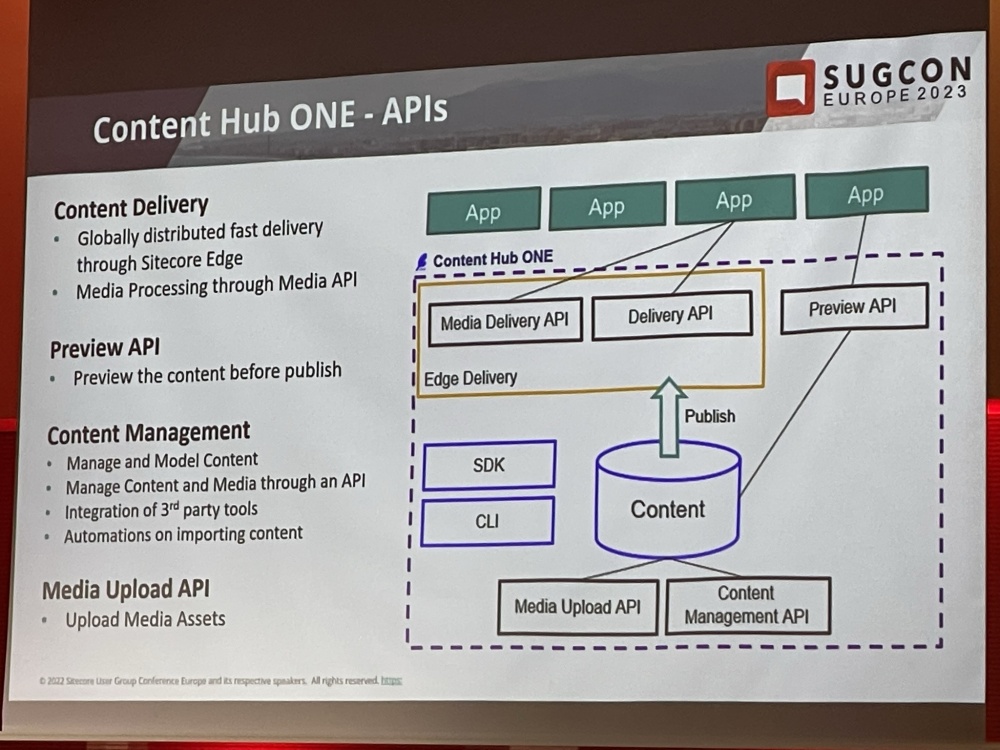
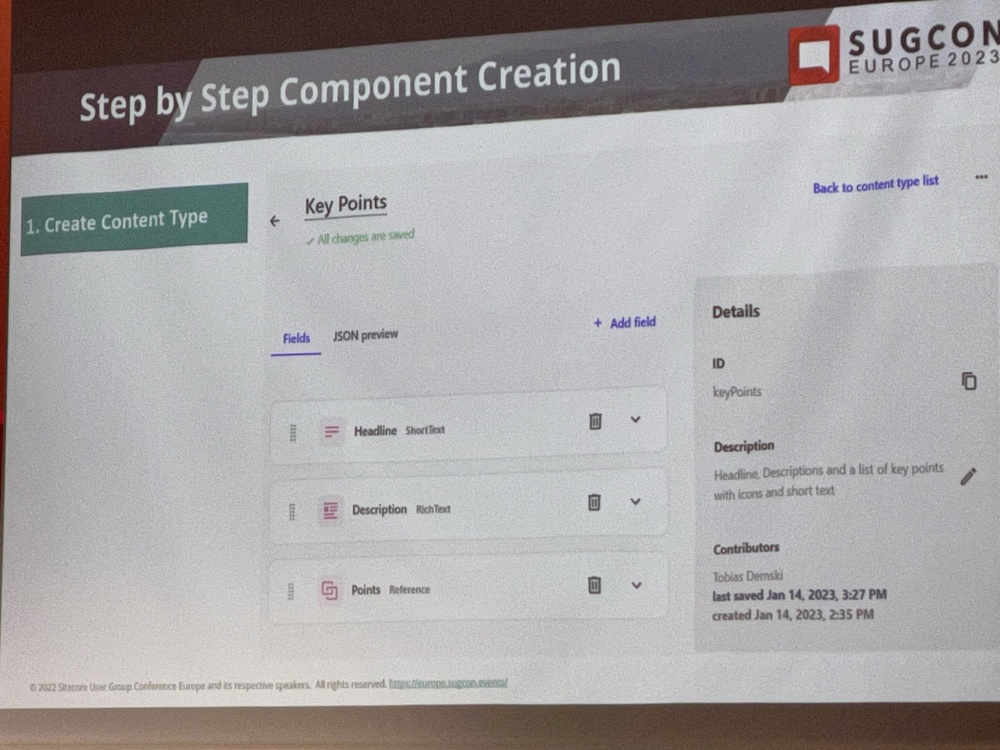
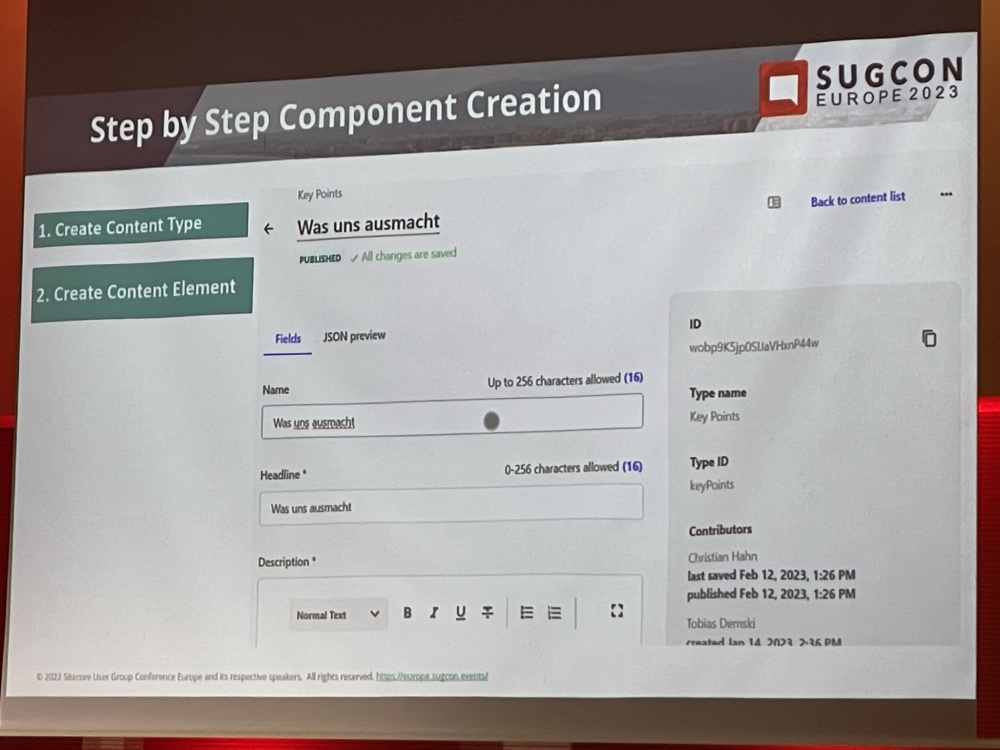
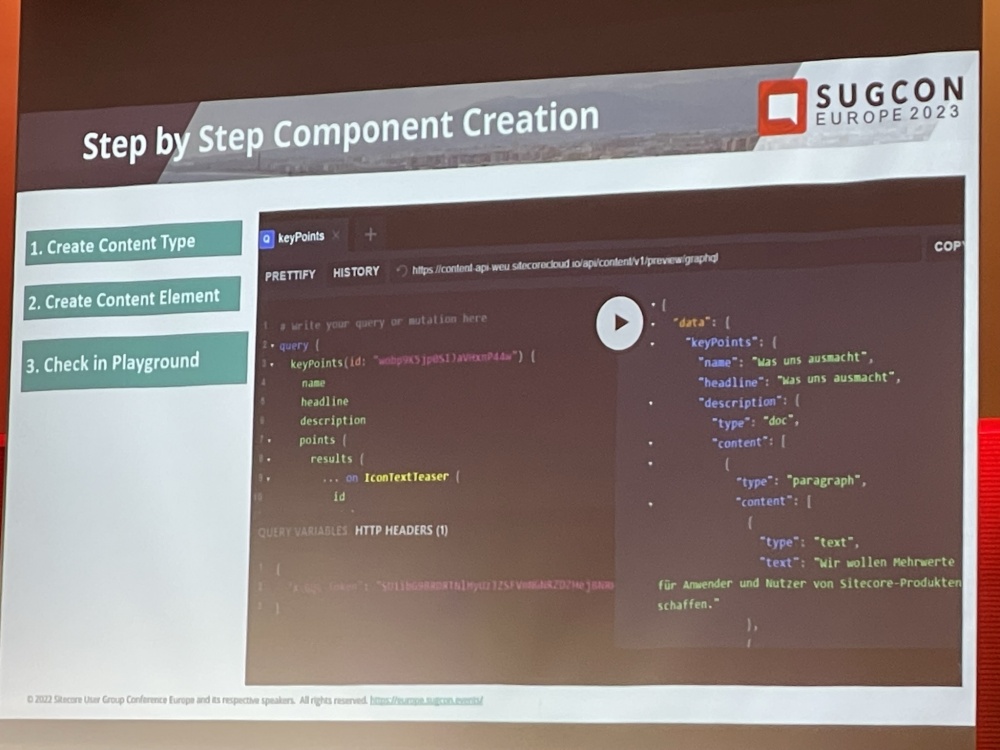
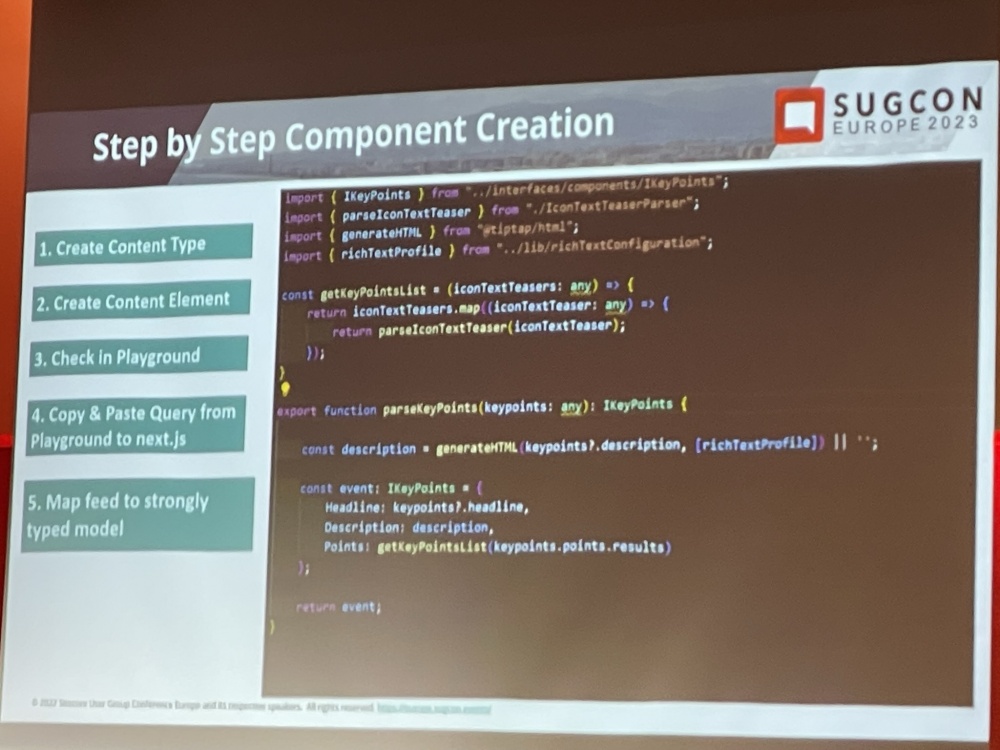
Experiences with Content Hub One – Journey of relaunching our Usergroup website – Katharina Luger & Christian Hahn
Then it was time for my last session of the day on how the Sitecore User Group Germany rebuilt their site as an SPA using Content Hub One.
The slide below was probably the simplest comparison I saw all SUCON of the differences between XM Cloud and Content Hub One.
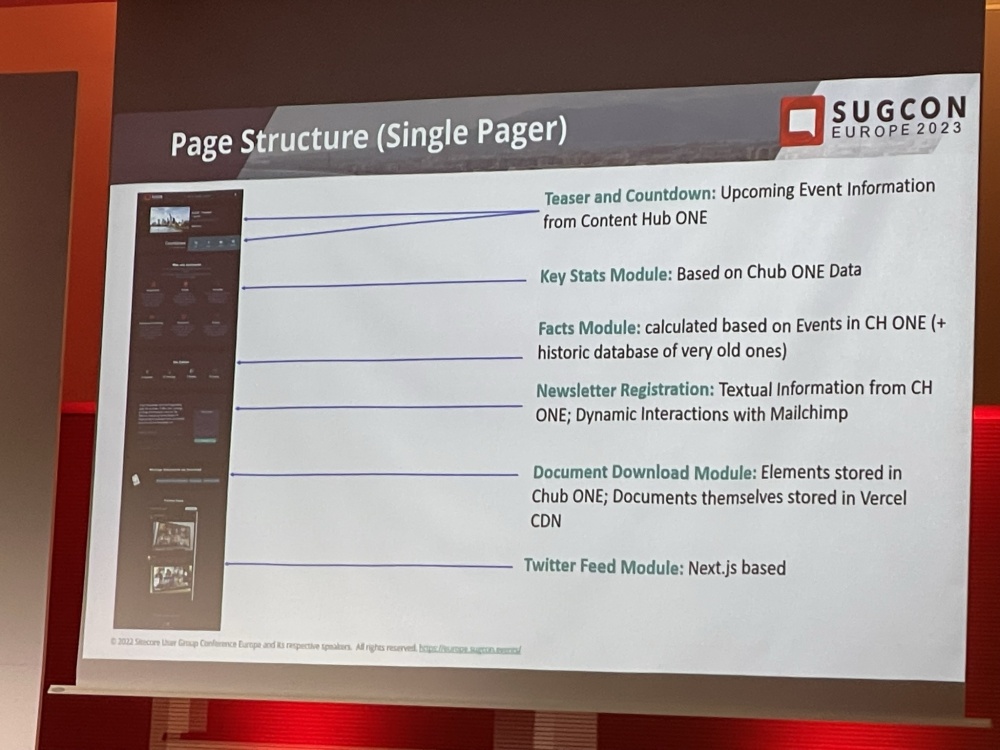
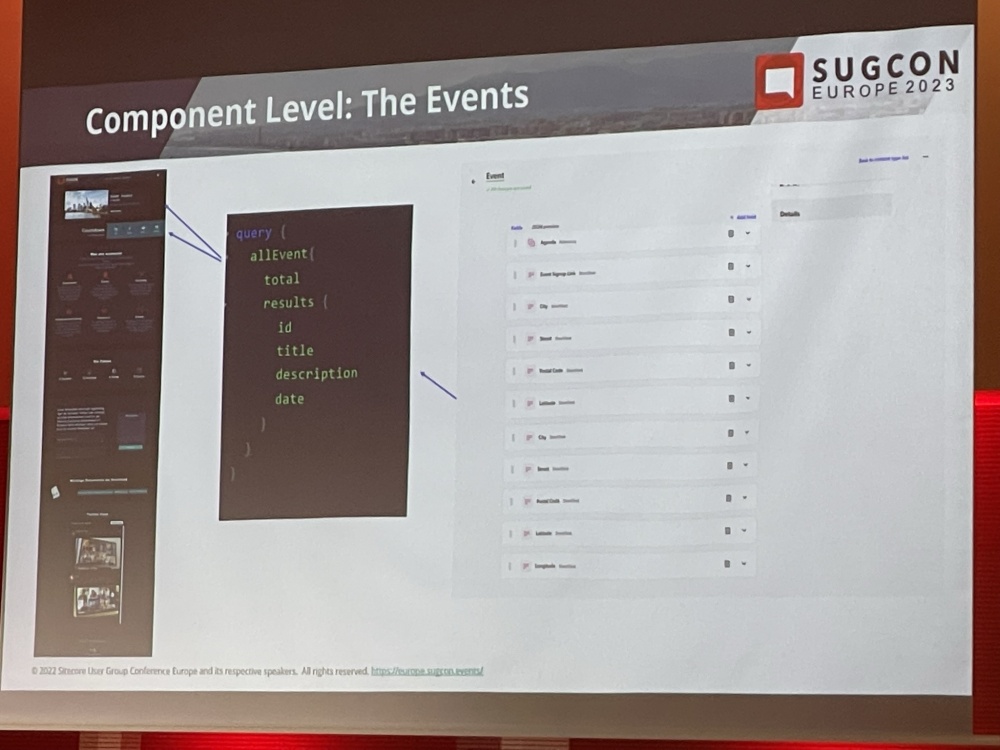
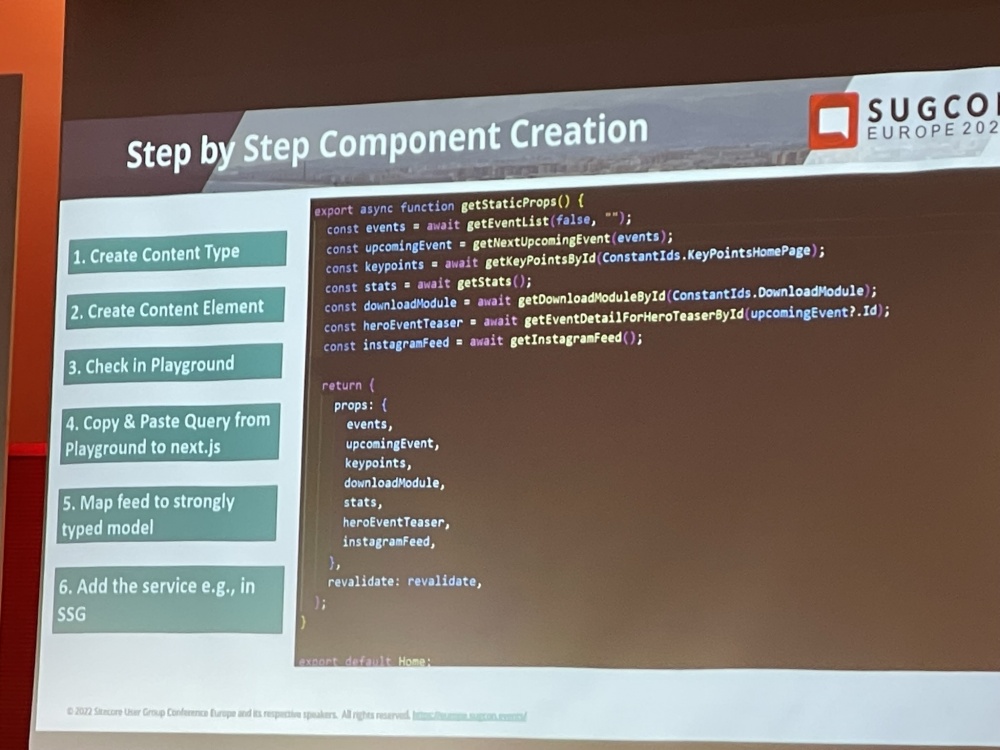
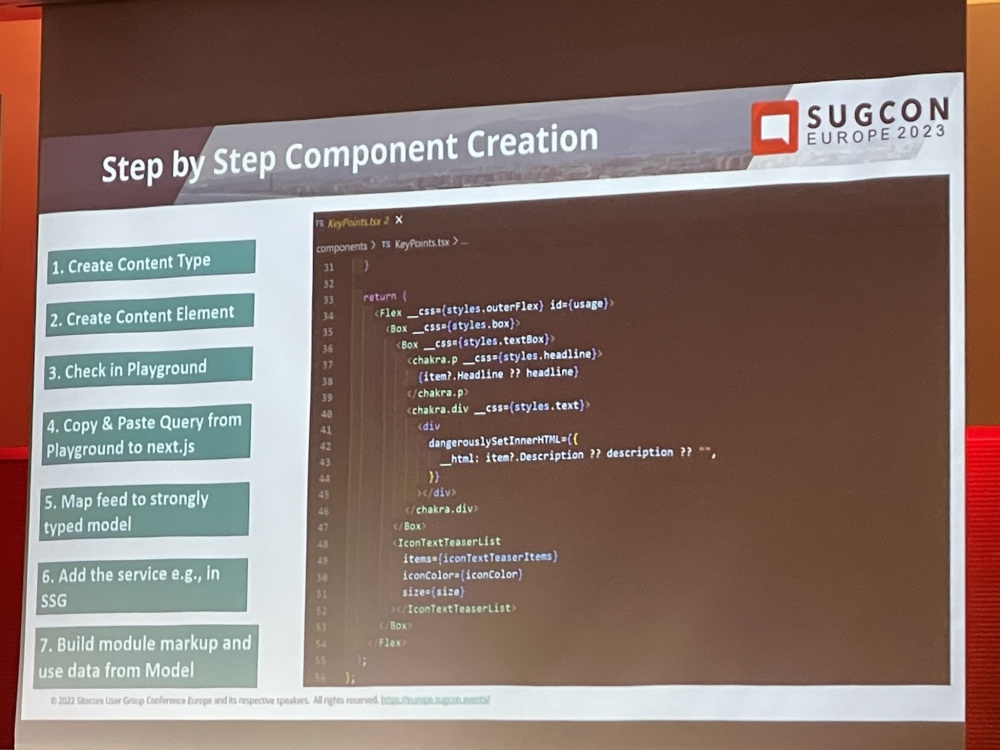
There are 7 Steps to component creation:

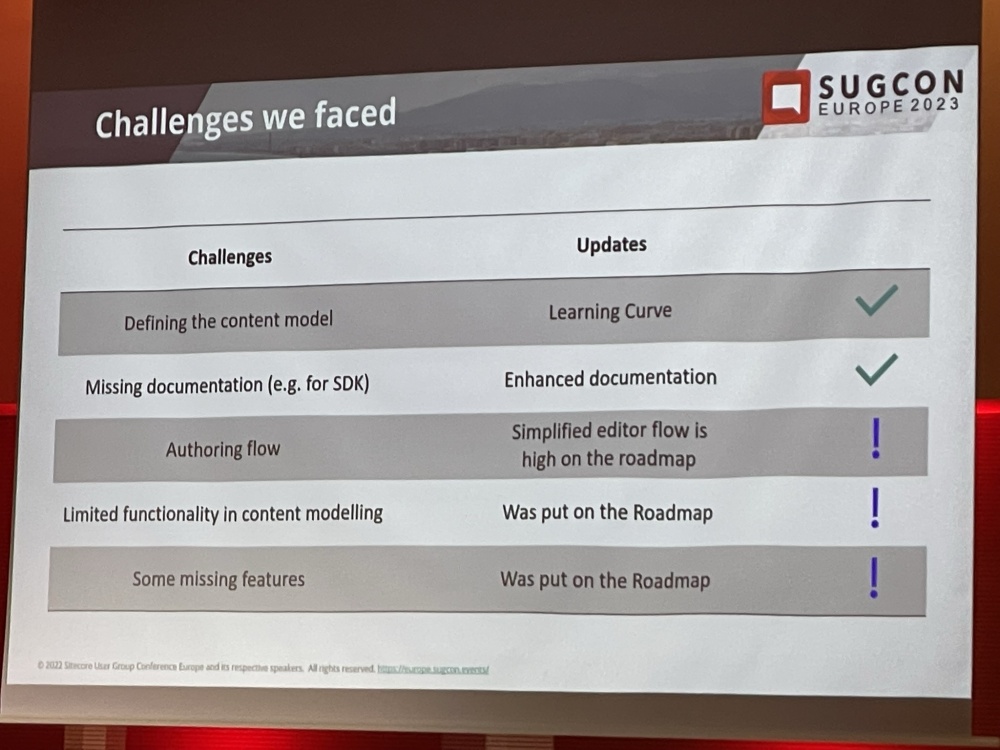
Lastly there were some challenges faced.
This was a really great session and I’m looking forward to working with Content Hub One in the future.
Virtual Closing Keynote by Scott Hanselman
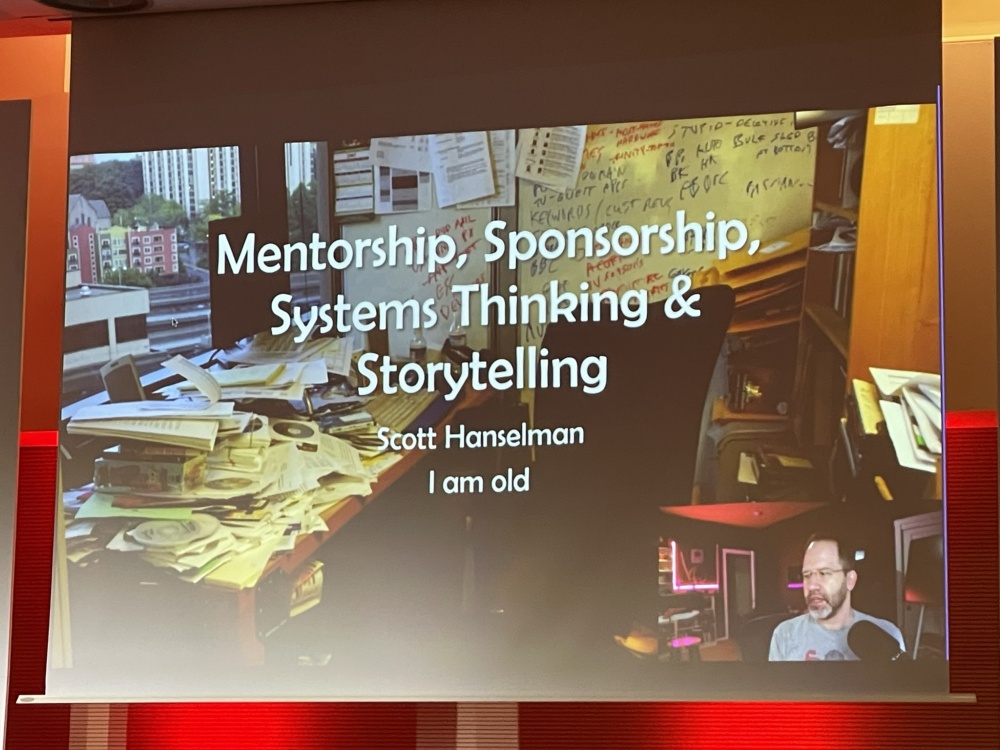
There was then an really entertaining and insightful talk from Scott Hanselman. He had some great advice, wisdom and stories to tell to us and I think everyone in the room was pretty captivated by his talk.

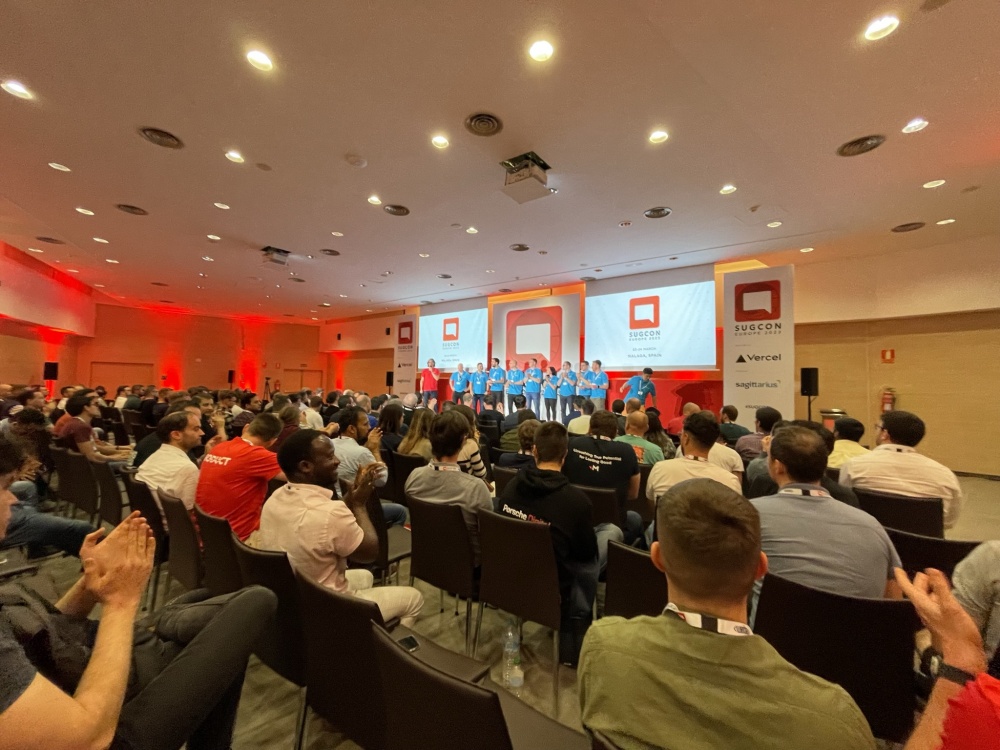
With that it was the end of SUCON 2023, there was a big round of applause for all the organisers. These events take a hell of a lot of organising and a real commitment from everyone involved.
It was time to go and have a few beers and reflect on what was a another brilliant SUGCON.
Hopefully this is useful info for anyone that couldn’t attend this year or had too many beers and forgot what they learned :-).

 Since the release of Sitecore 9.x and above Solr has been the default Search service and there is an requirement to install Solr with an SSL Certificate in order to use SIF to install Sitecore.