Creating a Table Component for Sitecore

So not too long ago I had a requirement to create an Table component for a client.why
Before you shoot me down, I know this is generally a bad idea as the RTE in Sitecore has in-built support for Tables and there are Rich Snippets too. However there were a number of reasons that wouldn’t work well in this scenario, read on to find out why.

But, but RTE!?

table-expeditor


There were some specific requirements which couldn’t be met by the RTE or Rich Snippets fully, we needed to:

  • Add some specific mark-up, classes and wrapping divs around the table (some of this was for responsive requirements).
  • Enforce Table header, body and footer rows
  • Reduce the options for cells and rows to control better what content editors can do (for consistency).
  • Be able to update the table mark-up easily in the future (so Rich Snippets wouldn’t work well here either)
  • Limit the RTE options within a cell also to control better what content editors do.

Ok so how does the Component work?

So I did a bit research and thinking about various options and I liked Ben Golden’s answer on SSE. This provided a simple solution using Sitecore’s standard item and child item architecture to structure the tables.

So this is what I went for, it looks like so in Sitecore:

table-cells

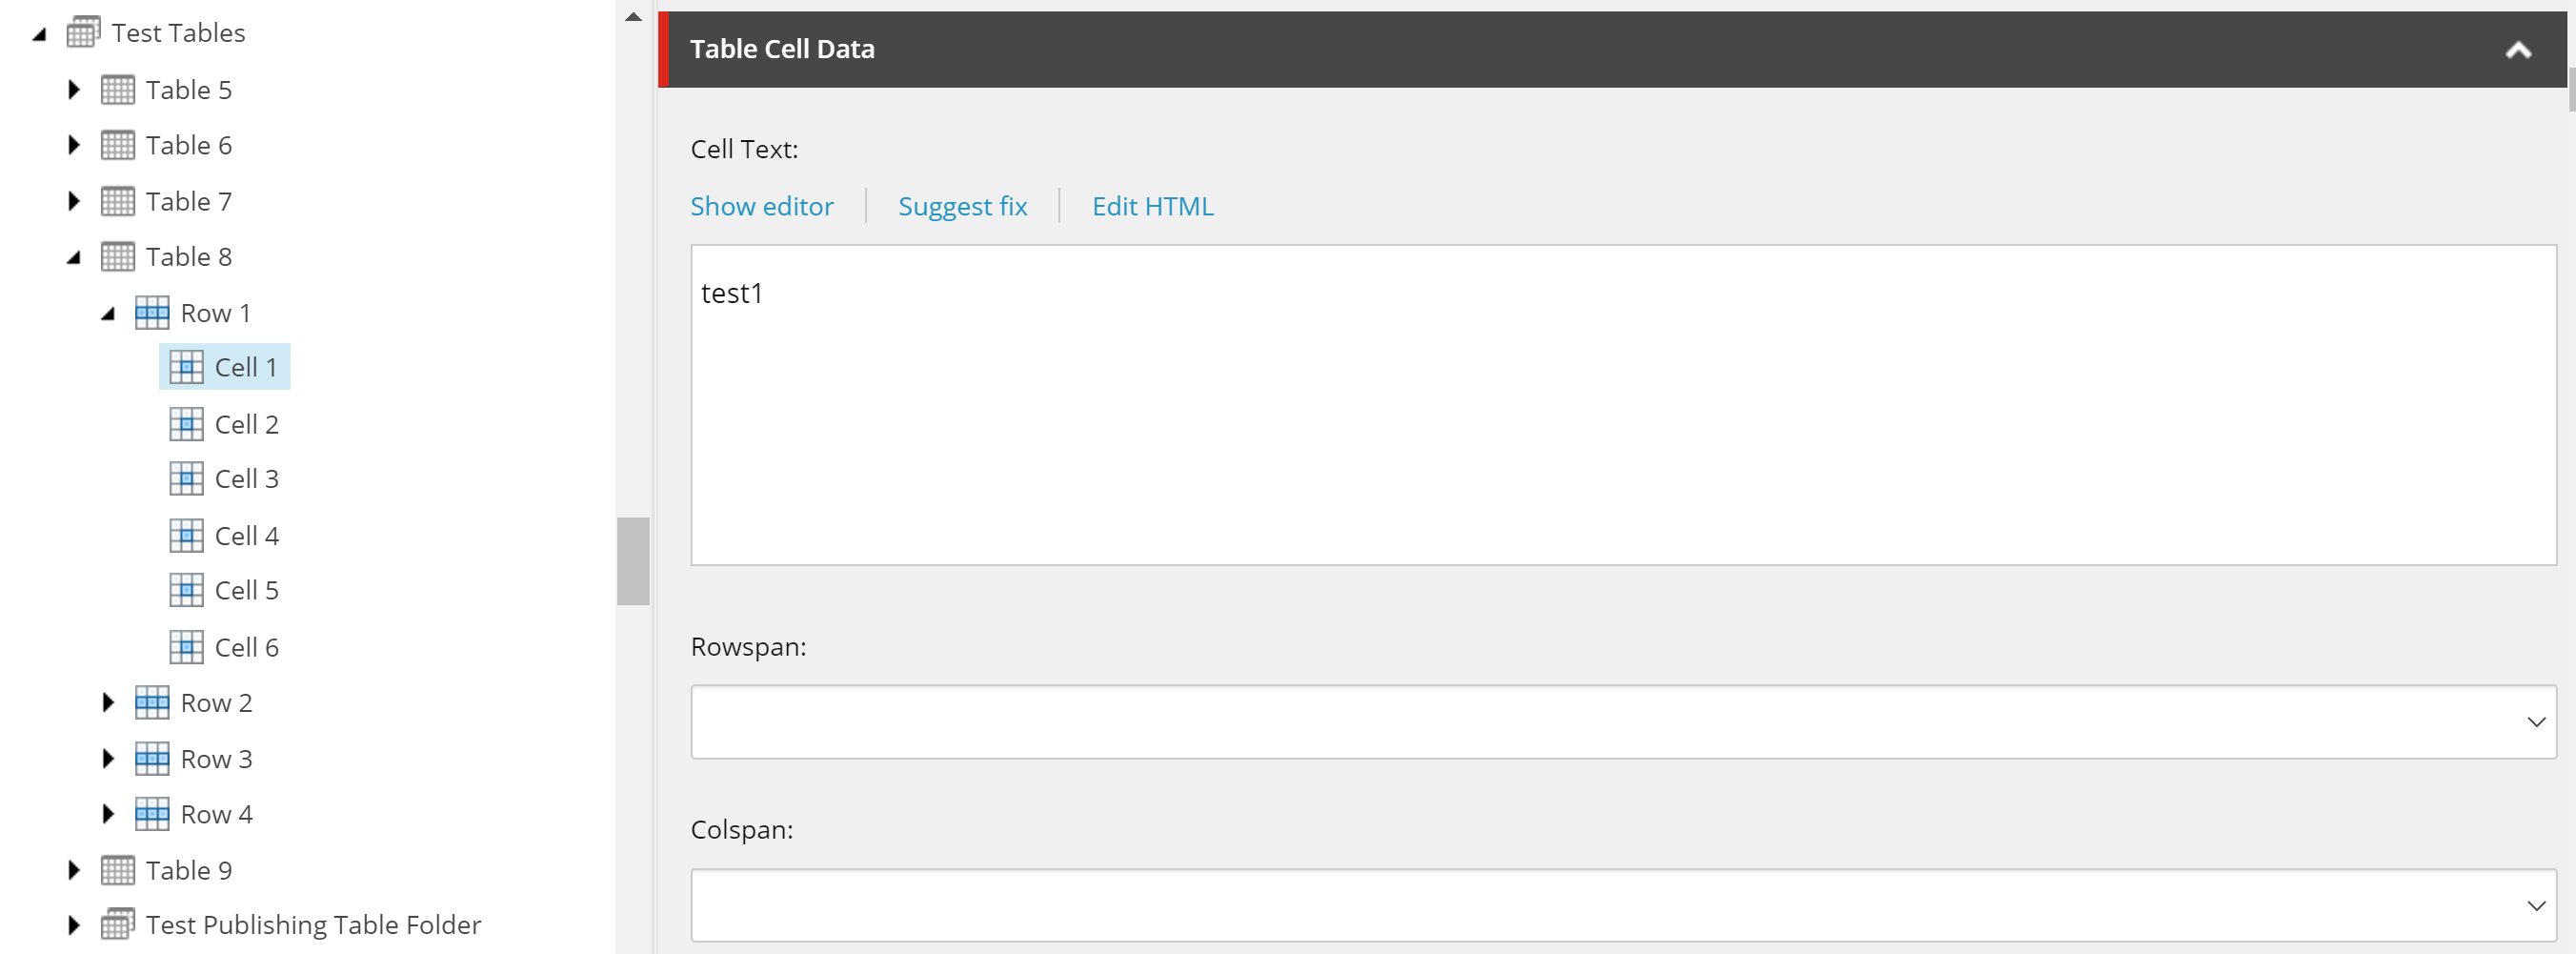
As you can see the structure is Table > Row > Cell(s) and the Table has 3 fields. More could be added easily if required in future.

There are no specific fields on the Rows but the Table has two checkboxes:
table


The cell template looks like so:
cell-template

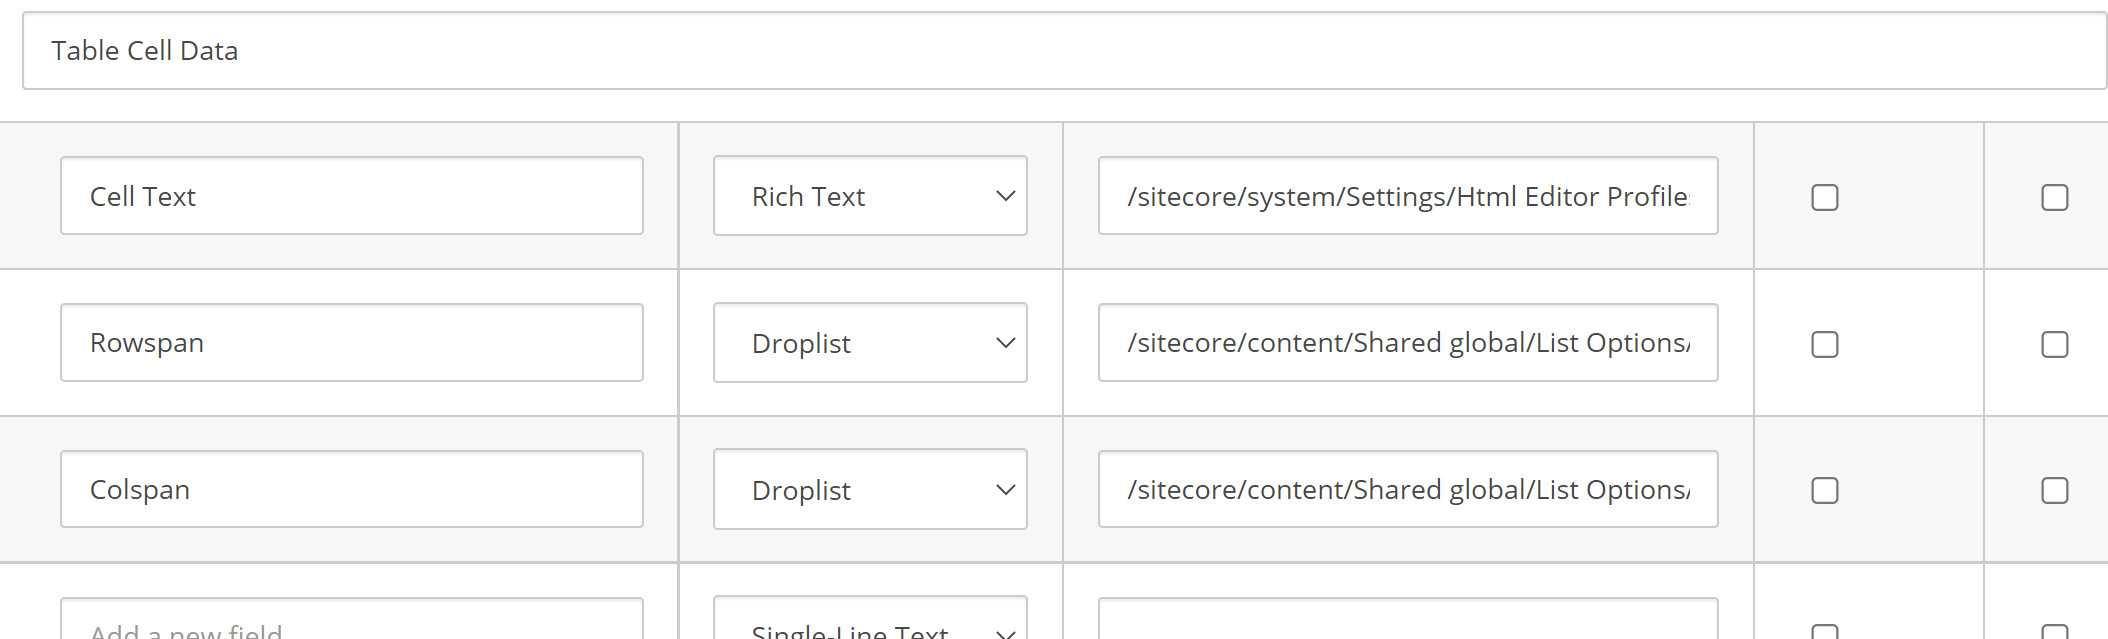
You can see the rowspan and cellspan options use a list of items as their datasource. We also use a custom RTE profile for the cell text to only allow a very small amount of RTE options.

Show me the Code

The following elements were required to build the component.

Rendering

The view is pretty simple. It just loops over the rows and outputs the cells. It also works out if a header and/or footer is required and if so renders out the correct mark-up for the first/last row. We are using Glass here so this may differ a bit for some sites. Note I’ve removed the code for row and cell span to make it easier to read:

The rendering itself is just a simple Sitecore View Rendering:
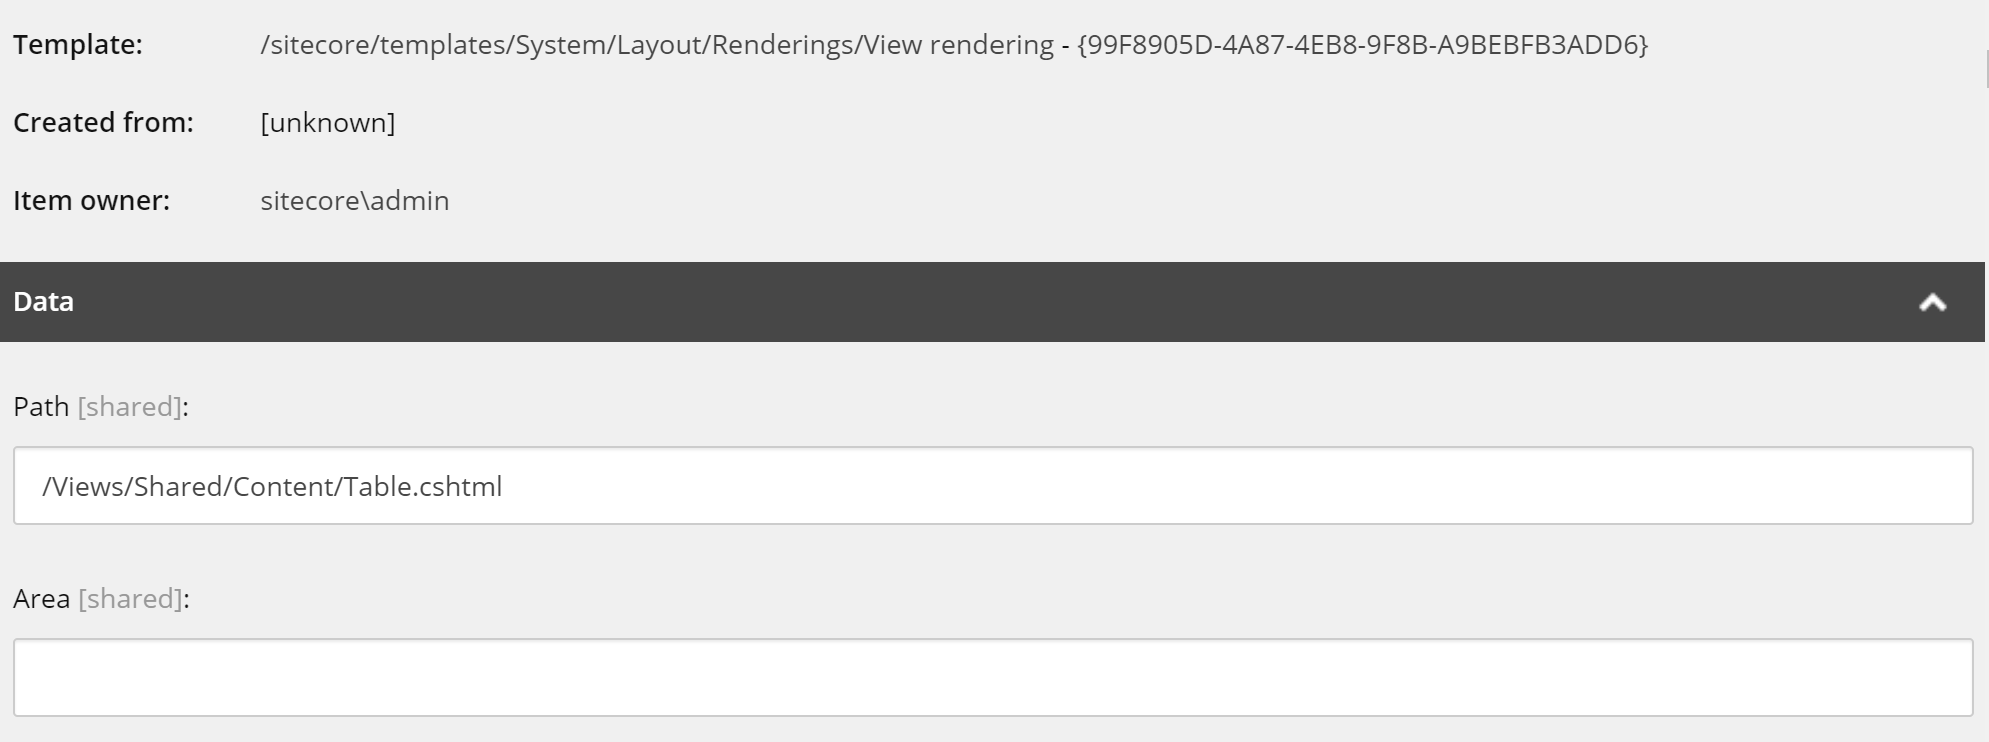
   table-rendering

Models

The following are the 3 models which are used by the component, again pretty simple. The models are mapped with standard Glass mapping for the fields so I’ve not included that here:

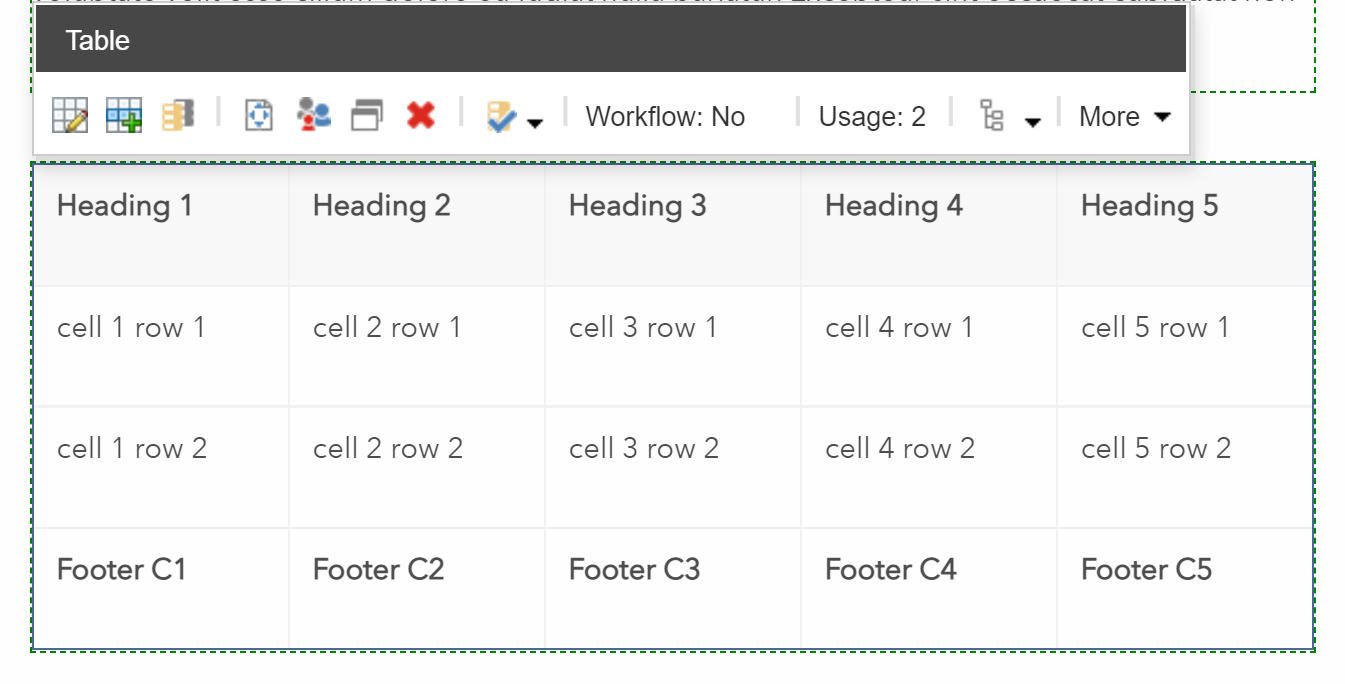
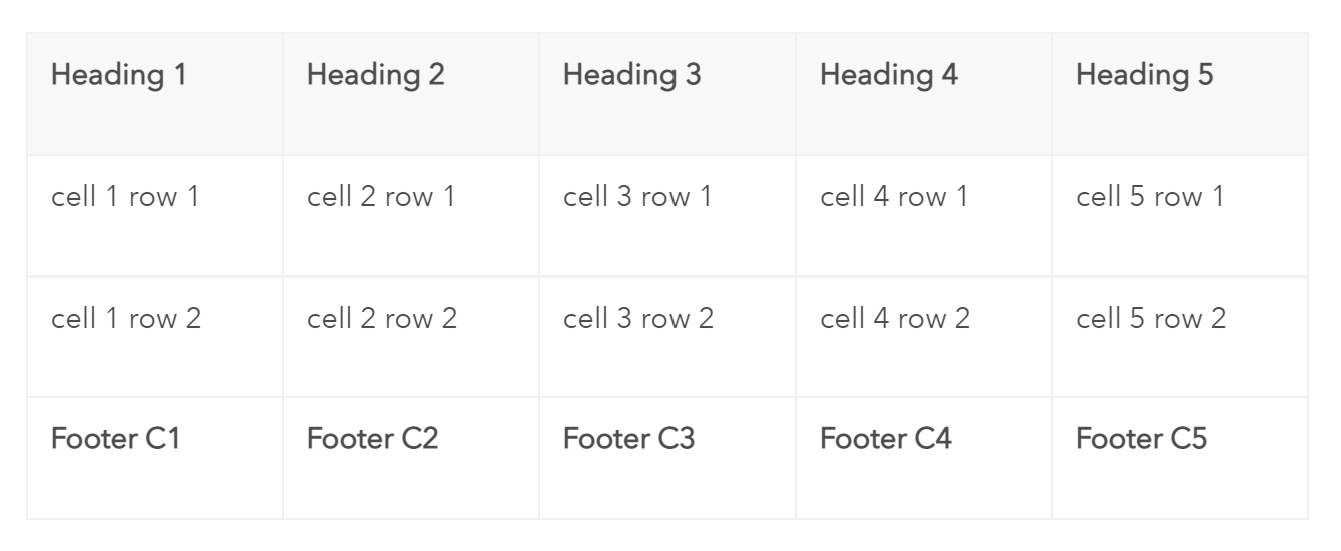
What does it look like?

All being well you should see something like this output in the page:

table-output


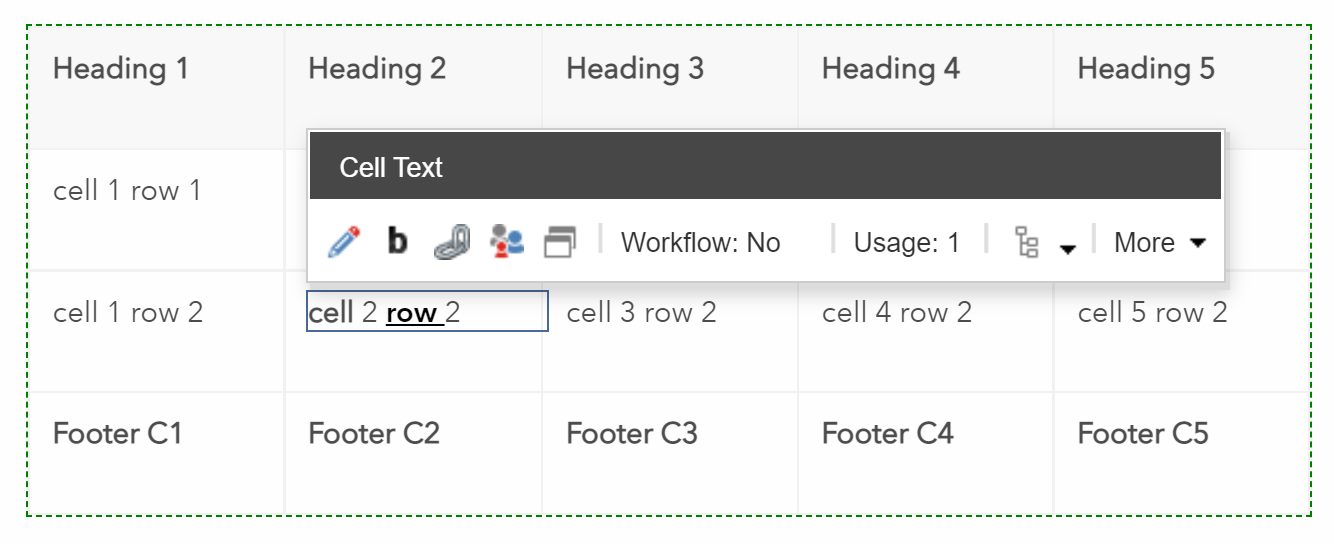
In experience editor you can edit the cells like so:

cell-editing

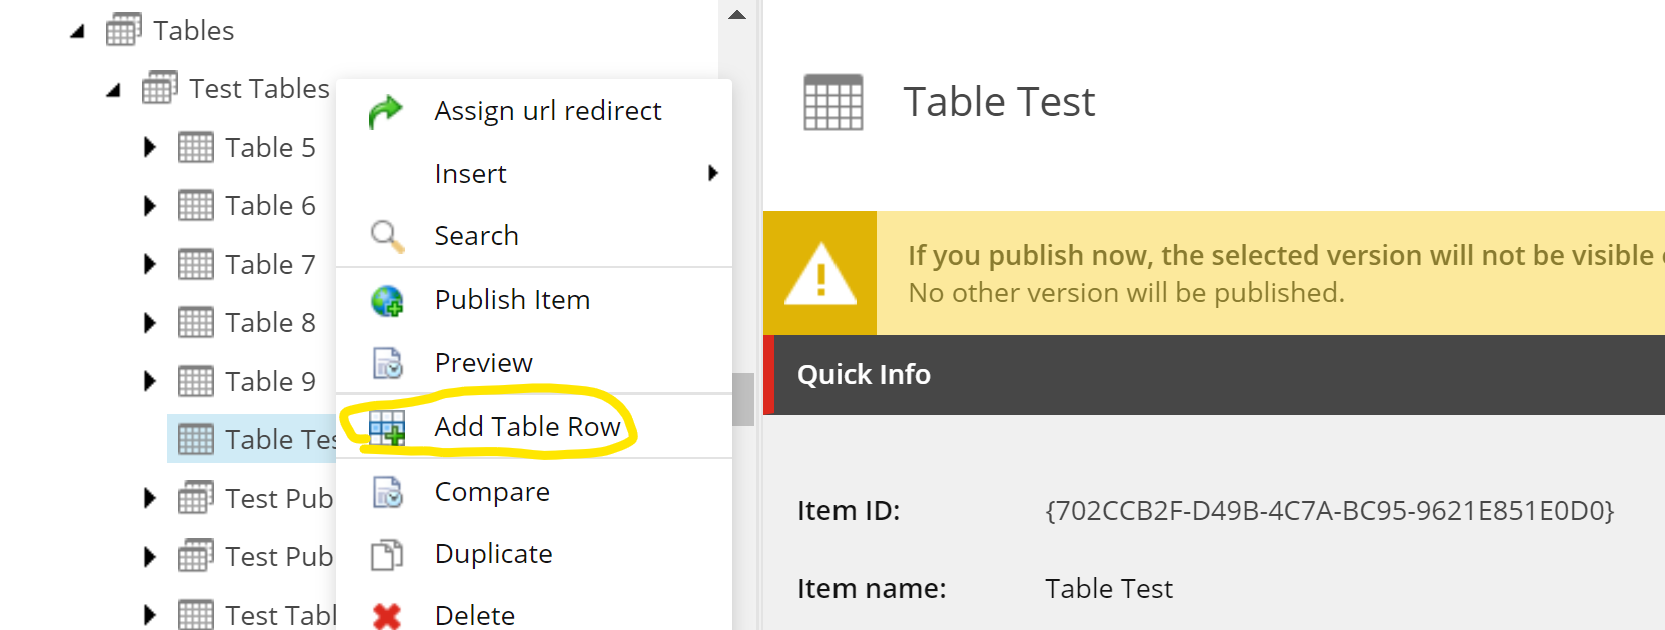
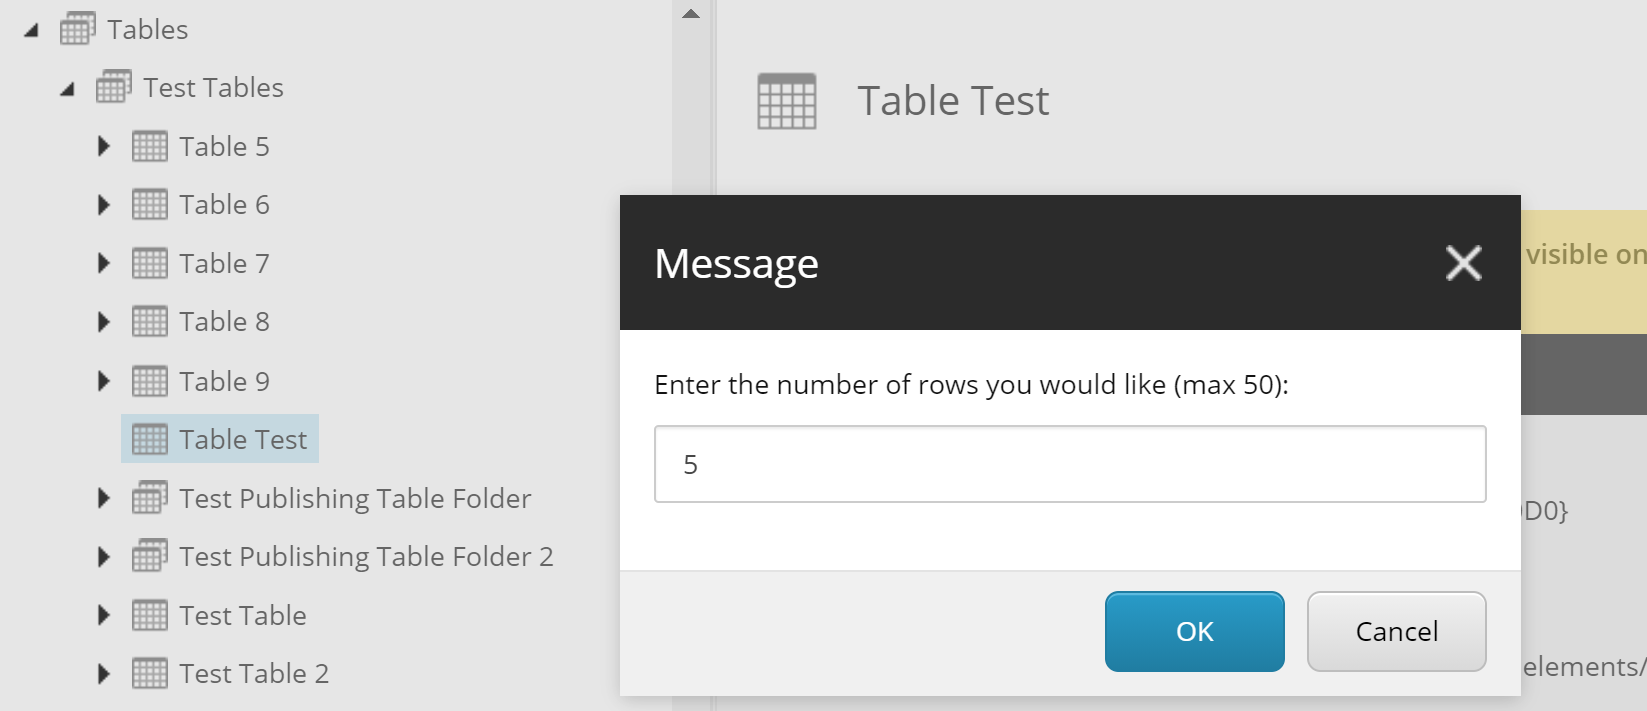
Adding Rows and Cells quickly

This all works quite nicely but it can be time consuming to add rows and columns, especially if creating large tables. So there was a requirement to automate this. So I created a custom action which works in both experience editor and content editor. It’s fairly intelligent as does things like checking to see how many cells exist for current rows when adding new ones, orders the cells and rows automatically and names them for the user too.

add-table-row


add-table-row-5


add-table-row-8


Here is the code, note you will need to update the template ids for the rows and cells if re-using this code:

This is patched in for Content Editor like so:

<sitecore>
<commands>
<command name=”webedit:ext:addtablerows” type=”MyWebsite.Commands.AddTableRows, MyWebsite”/>
</commands>
</sitecore>

It can be added to experience editor by creating an custom experience button to call the command and assigning it to the rendering.

Is this a good idea?

Inevitably there will be requests to add more and more functionality to the table component over time to support things like alignment of cell content and so forth which adds further development time and complexity to the component. However for simple tables this does work fairly well and is an option where there are complicated design requirements or content editor restrictions required for Tables.

Hopefully this is useful for those considering building a Table component and weighing up the pros and cons of doing so.

An Sitecore Multilist field with an External Datasource

This week I needed to create an Multilist which required a DataSource that doesn’t reside in Sitecore.
I’ve done this a few times before but using an DataSource for a Multilist from outside of Sitecore isn’t something I have needed to do often.
There aren’t many articles on how to do this, so I thought I’d write up how to do this using Sitecore 9 (it should work with Sitecore 8 and below too).

hqdefault

I’ve based the implementation on the code from this post by Benjamin Vangansewinkel: http://sitecoreblog.blogspot.co.uk/2012/04/how-to-create-custom-multilist-field.html. So Kudos to Benjamin for writing this back in 2012. The are alternatives to this approach such as using creating a custom token or a custom data provider but I feel a custom Multilist is simpler and easier to manage.

Benjamin’s post is really useful, but some of the code is missing and I needed to show a count of the items available and selected in my Multilist. I’ve also simplified things a little bit and included the full code with an example API call to populate the list.

When it’s complete it will look like this:

multilist-external

Ok lets get started.

Create a Base Class – BaseExternalMultiList.cs

So that we can re-use this implementation for other Multilists with external DataSources we are going to create a Base Class that encapsulates the code for building the Multilist.

The class provides the method for rendering out the Multilist field and I have updated the Javascript to show a count of the number of available items and the selected items when you add or remove items from the list.

Create An Custom MultiList Field – CryptoMultilist.cs

The next Step is to Create our Multilist field by implementing the Base Class. There are 3 methods here that can be implimented:

  1. InitRendering() – in this method we will call our API and populate the list.
  2. GetNonSelectedItems() – in this method we will get our list of all available items.
  3. GetSelectedItems() – in this method we will populate our list of selected items.

Just for fun I’m using an example of a Multilist field that lists all available Crypto Currencies. I’m using this API to get the list: https://www.cryptocompare.com/api  

The API Service – CryptoService.cs

You can obviously use any Service but this example makes a simple call to get a list of Crypto Coins. There are a lot of them apparently, 2528 at time of writing!. This is not production-ready code but provides a simple example for testing. Replace this service with any other service you like to return a list of items.

Supporting Classes

There are some supporting model classes required by the above Service code that allow me to Serialize the JSON response from the API to these models. I’m using Json.Net to do this.  Depending on the API you are using you will need to update these models as required.

Once you have added the above code to your project you can then move on to configuring Sitecore to use your custom Multilist field.

Adding the Custom Multilist to Sitecore

Go to the Core database in Content Editor and navigate to:

/sitecore/system/Field types

Create a new item called ‘Crypto Multilist’ using this template:

/sitecore/templates/System/Templates/Template field type

It is best practice to create a new folder to hold your custom field types (if you don’t have one already).

Add the Assembly and Class information (based on the namespace and assembly of the files you have added). Add an icon to identify your field easier also.

core-db-multilist


Save your new field and then go back to the Master Database in Content editor and navigate to a template you wish to use the new Multilist field on.

Using your Multilist Field

You should now be able to add your new Multilist field to any Data template by selecting it as a Field Type from the dropdown.

add-field-template

Now when you add or edit an item using this Data Template your Multilist field should display populated with the External data and maintain the selected items when saving and going back to the item.

new-field-on-item

Thats all there is to it, you can now re-use this approach for any additional External Datasources you wish without much effort by switching out the service and models.

I might package this up and put it on NuGet at some point if it’s useful. I’d be interested to know of easier or better ways of doing this also.