 There was an early start for Day 2 (especially after a late-ish night involving a few strong Danish Beers), but I knew there were some intriguing talks today so didn’t want to miss anything.
You can read about Day 1 here if you missed it.
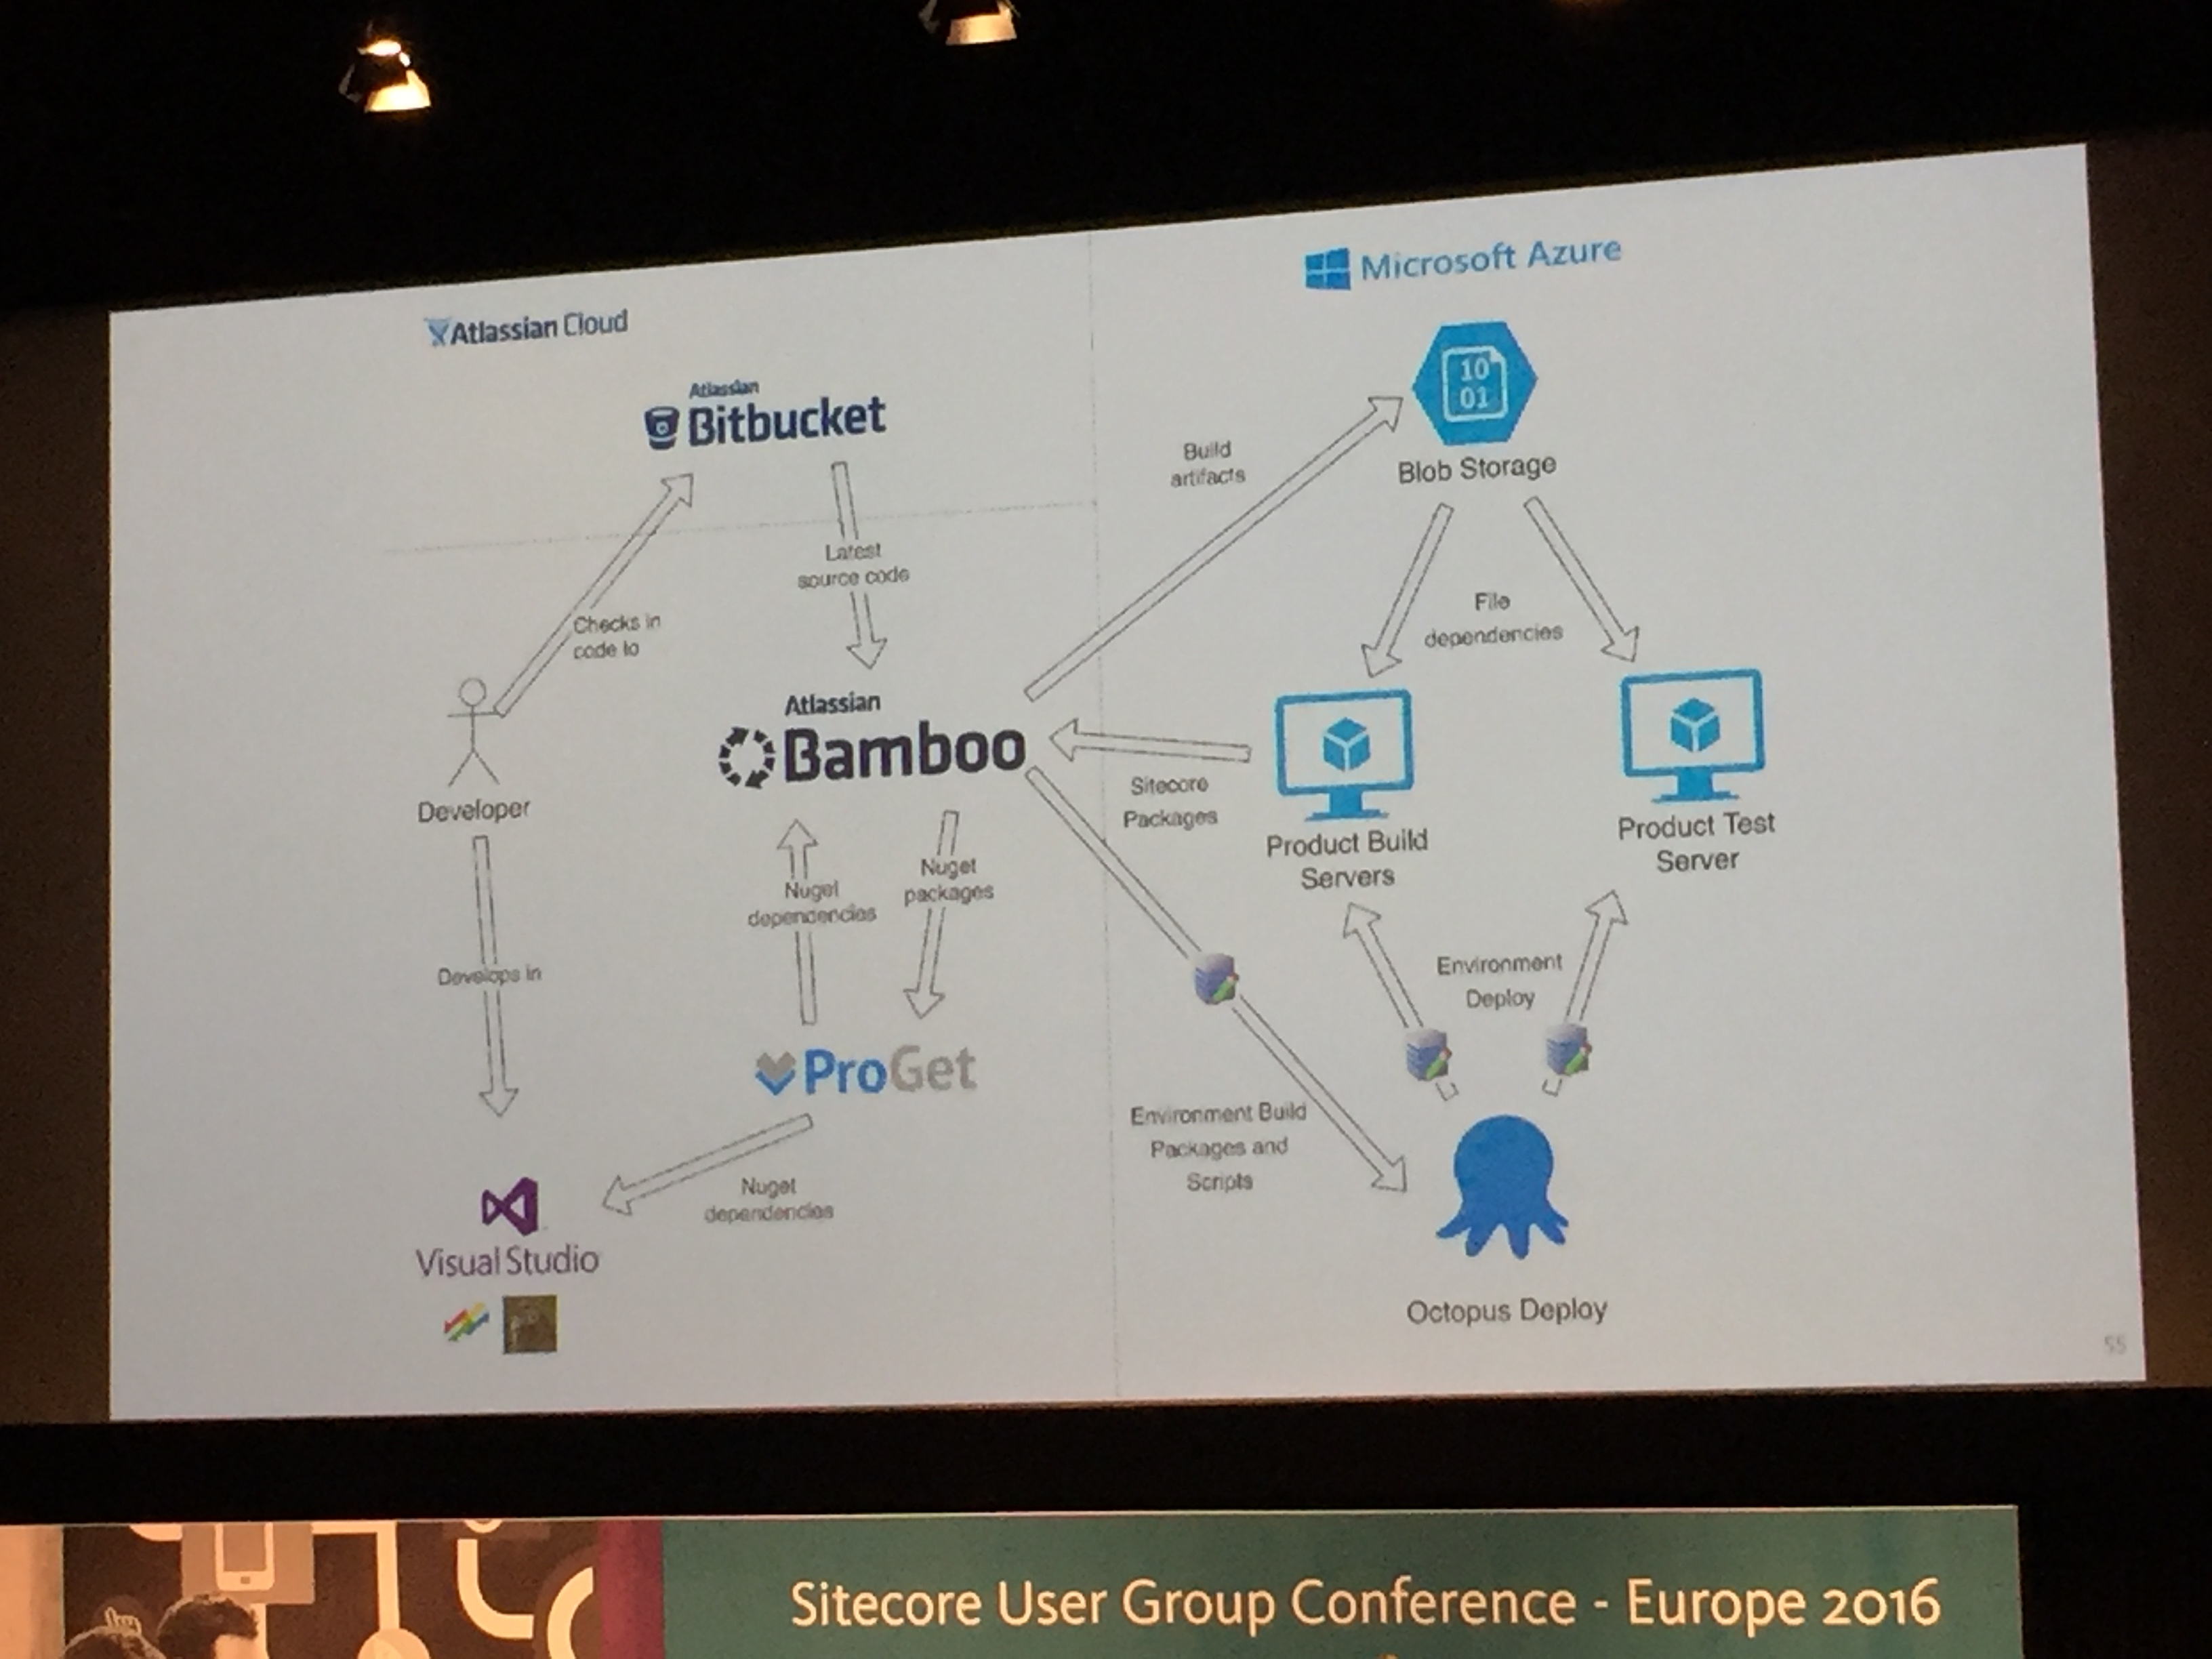
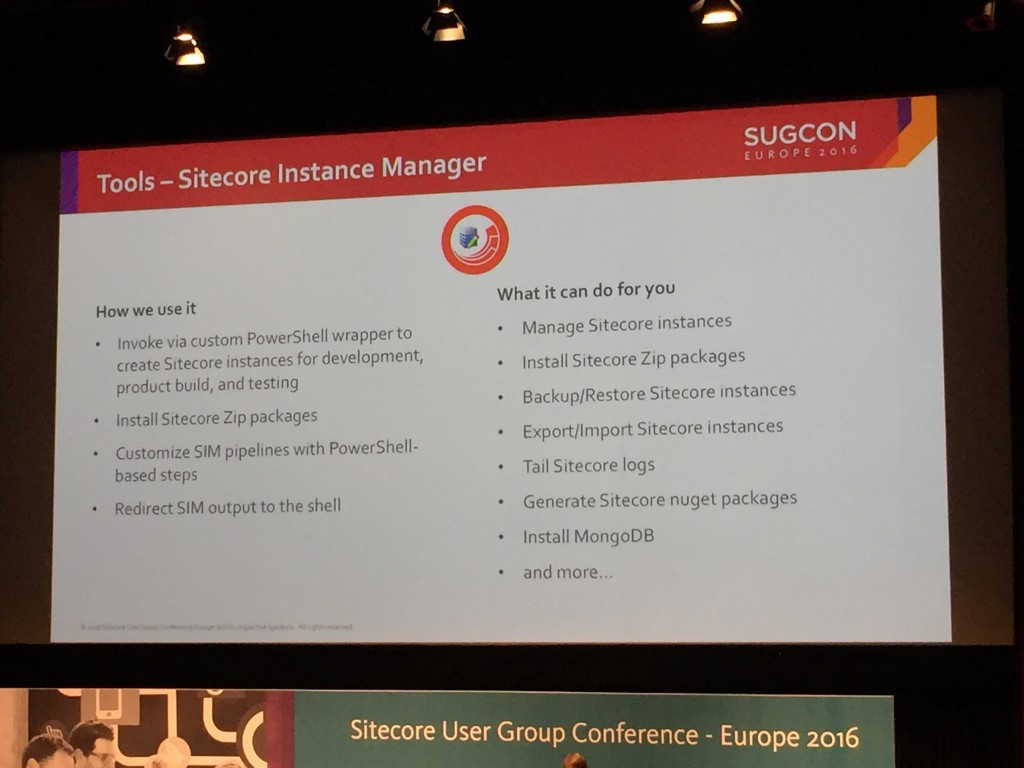
The first session that caught my interest was Nick Wesselmans talk on how Active Commerce use SIM, Powershell, Octopus Deploy and Azure to automate product builds.
Using SIM, Powershell, Octopus Deploy and Azure to automate product builds.
Nick gave an overview of how they created a PowerShell wrapper for SIM to automate Sitecore instances for product builds for their Active Commerce product.
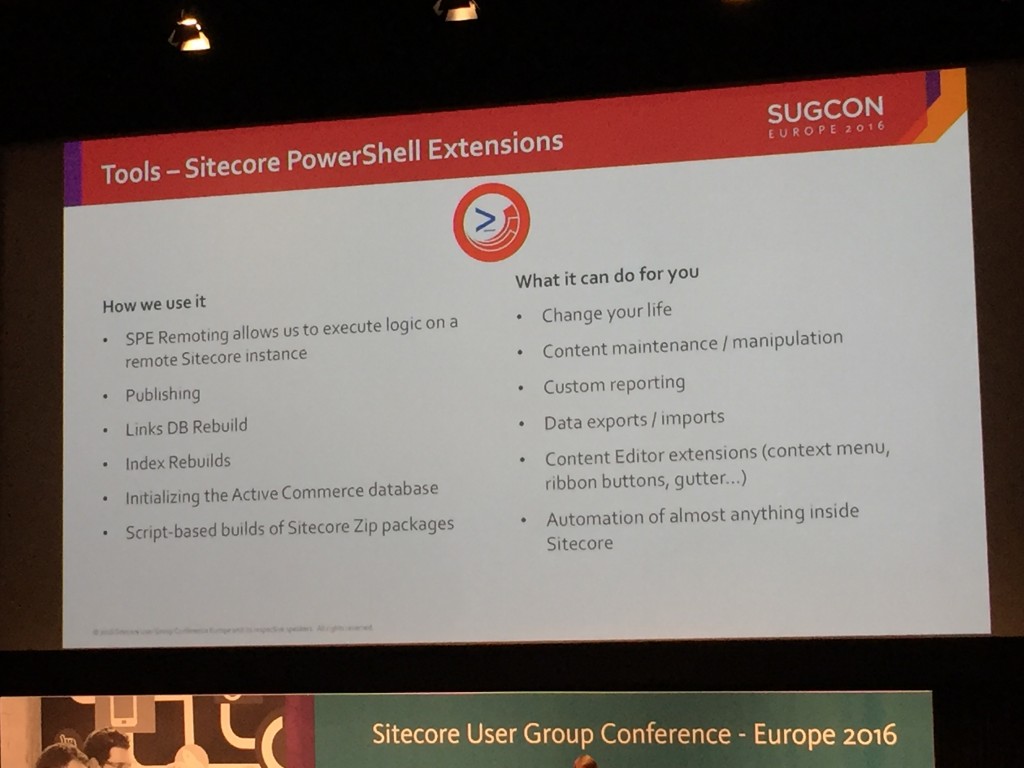
He also talked about how they use Sitecore Power Shell Extensions (SPE) to do things like automate publishing, rebuild the links database and initialise Sitecore Zip package builds. I’ve experimented with SPE but I’ve not used it in anger and this has given me ideas for how I might use it more on current or future projects.
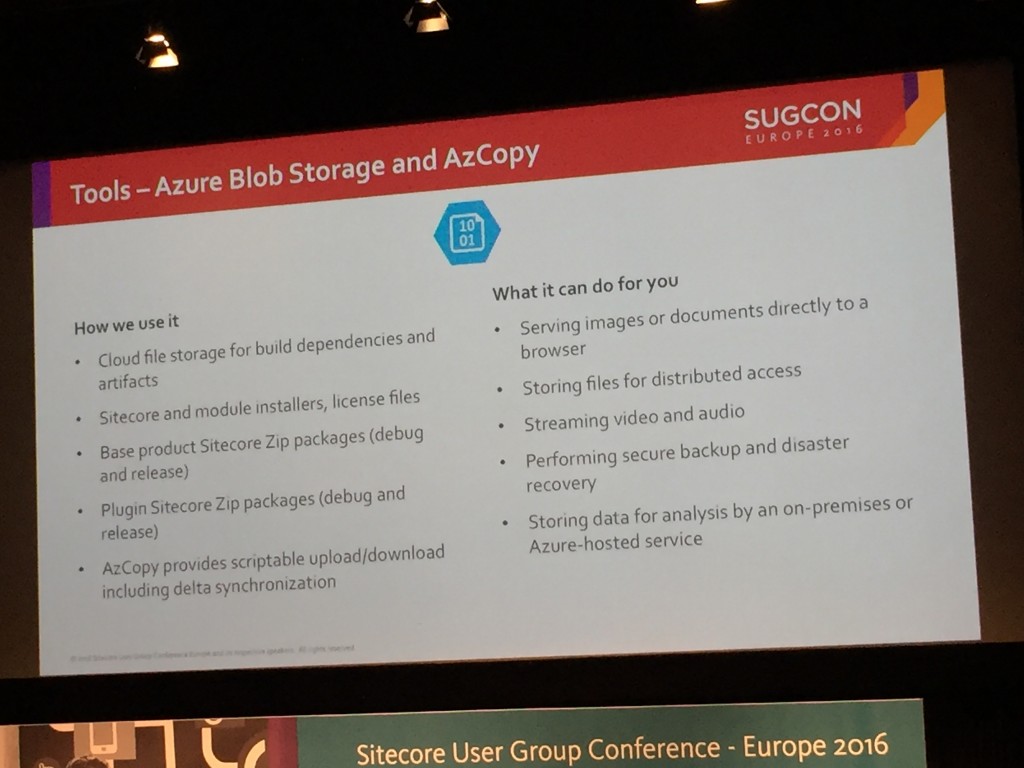
Finally, he talked about their use of Octopus for deployment of packages and invoking PowerShell scripts and Azure IaaS and Azure Blob Storage and AzCopy which is used for quickly spinning up VMs for hosting the product build and test environments. I liked the idea of these being scripted to only run during business hours.
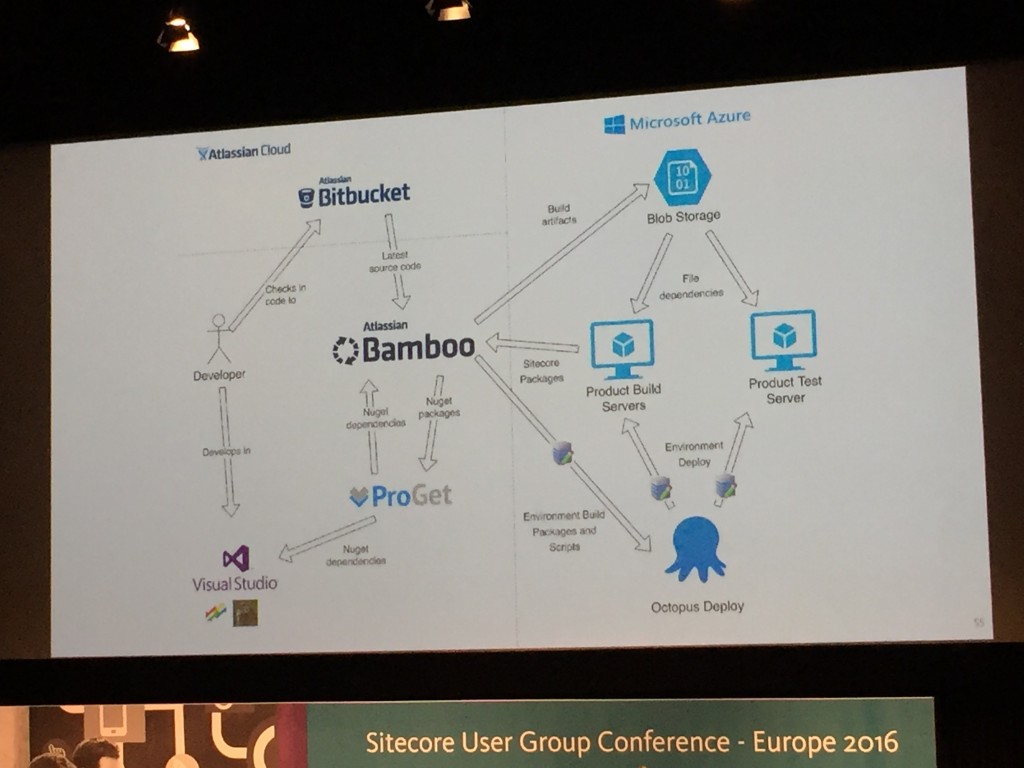
The Active Commerce team also use Bamboo for their build server (but are thinking of moving to Team City). Nick showed us that their build pipeline looks like this:
It was nice to see some familiar approaches here, albeit with different tools in some instances and some new ideas too.
You Me and Sitecore MVC
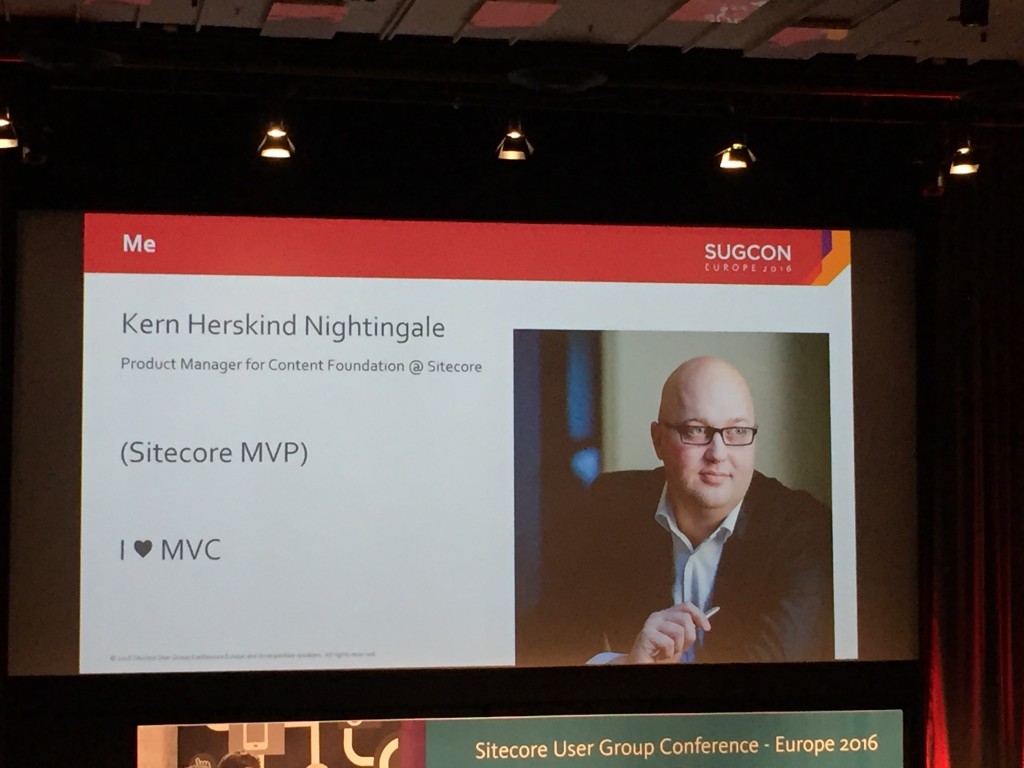
After a short break Kern Herskind delivered and entertaining (and Circus themed) presentation on Sitecore MVC. He even rode a unicycle at the end!
Kern gave a general overview on MVC for those not familiar with the concepts and then how Sitecore MVC works and whats available out of the box. Not much of this was new to me but it was good get a refresher anyway.
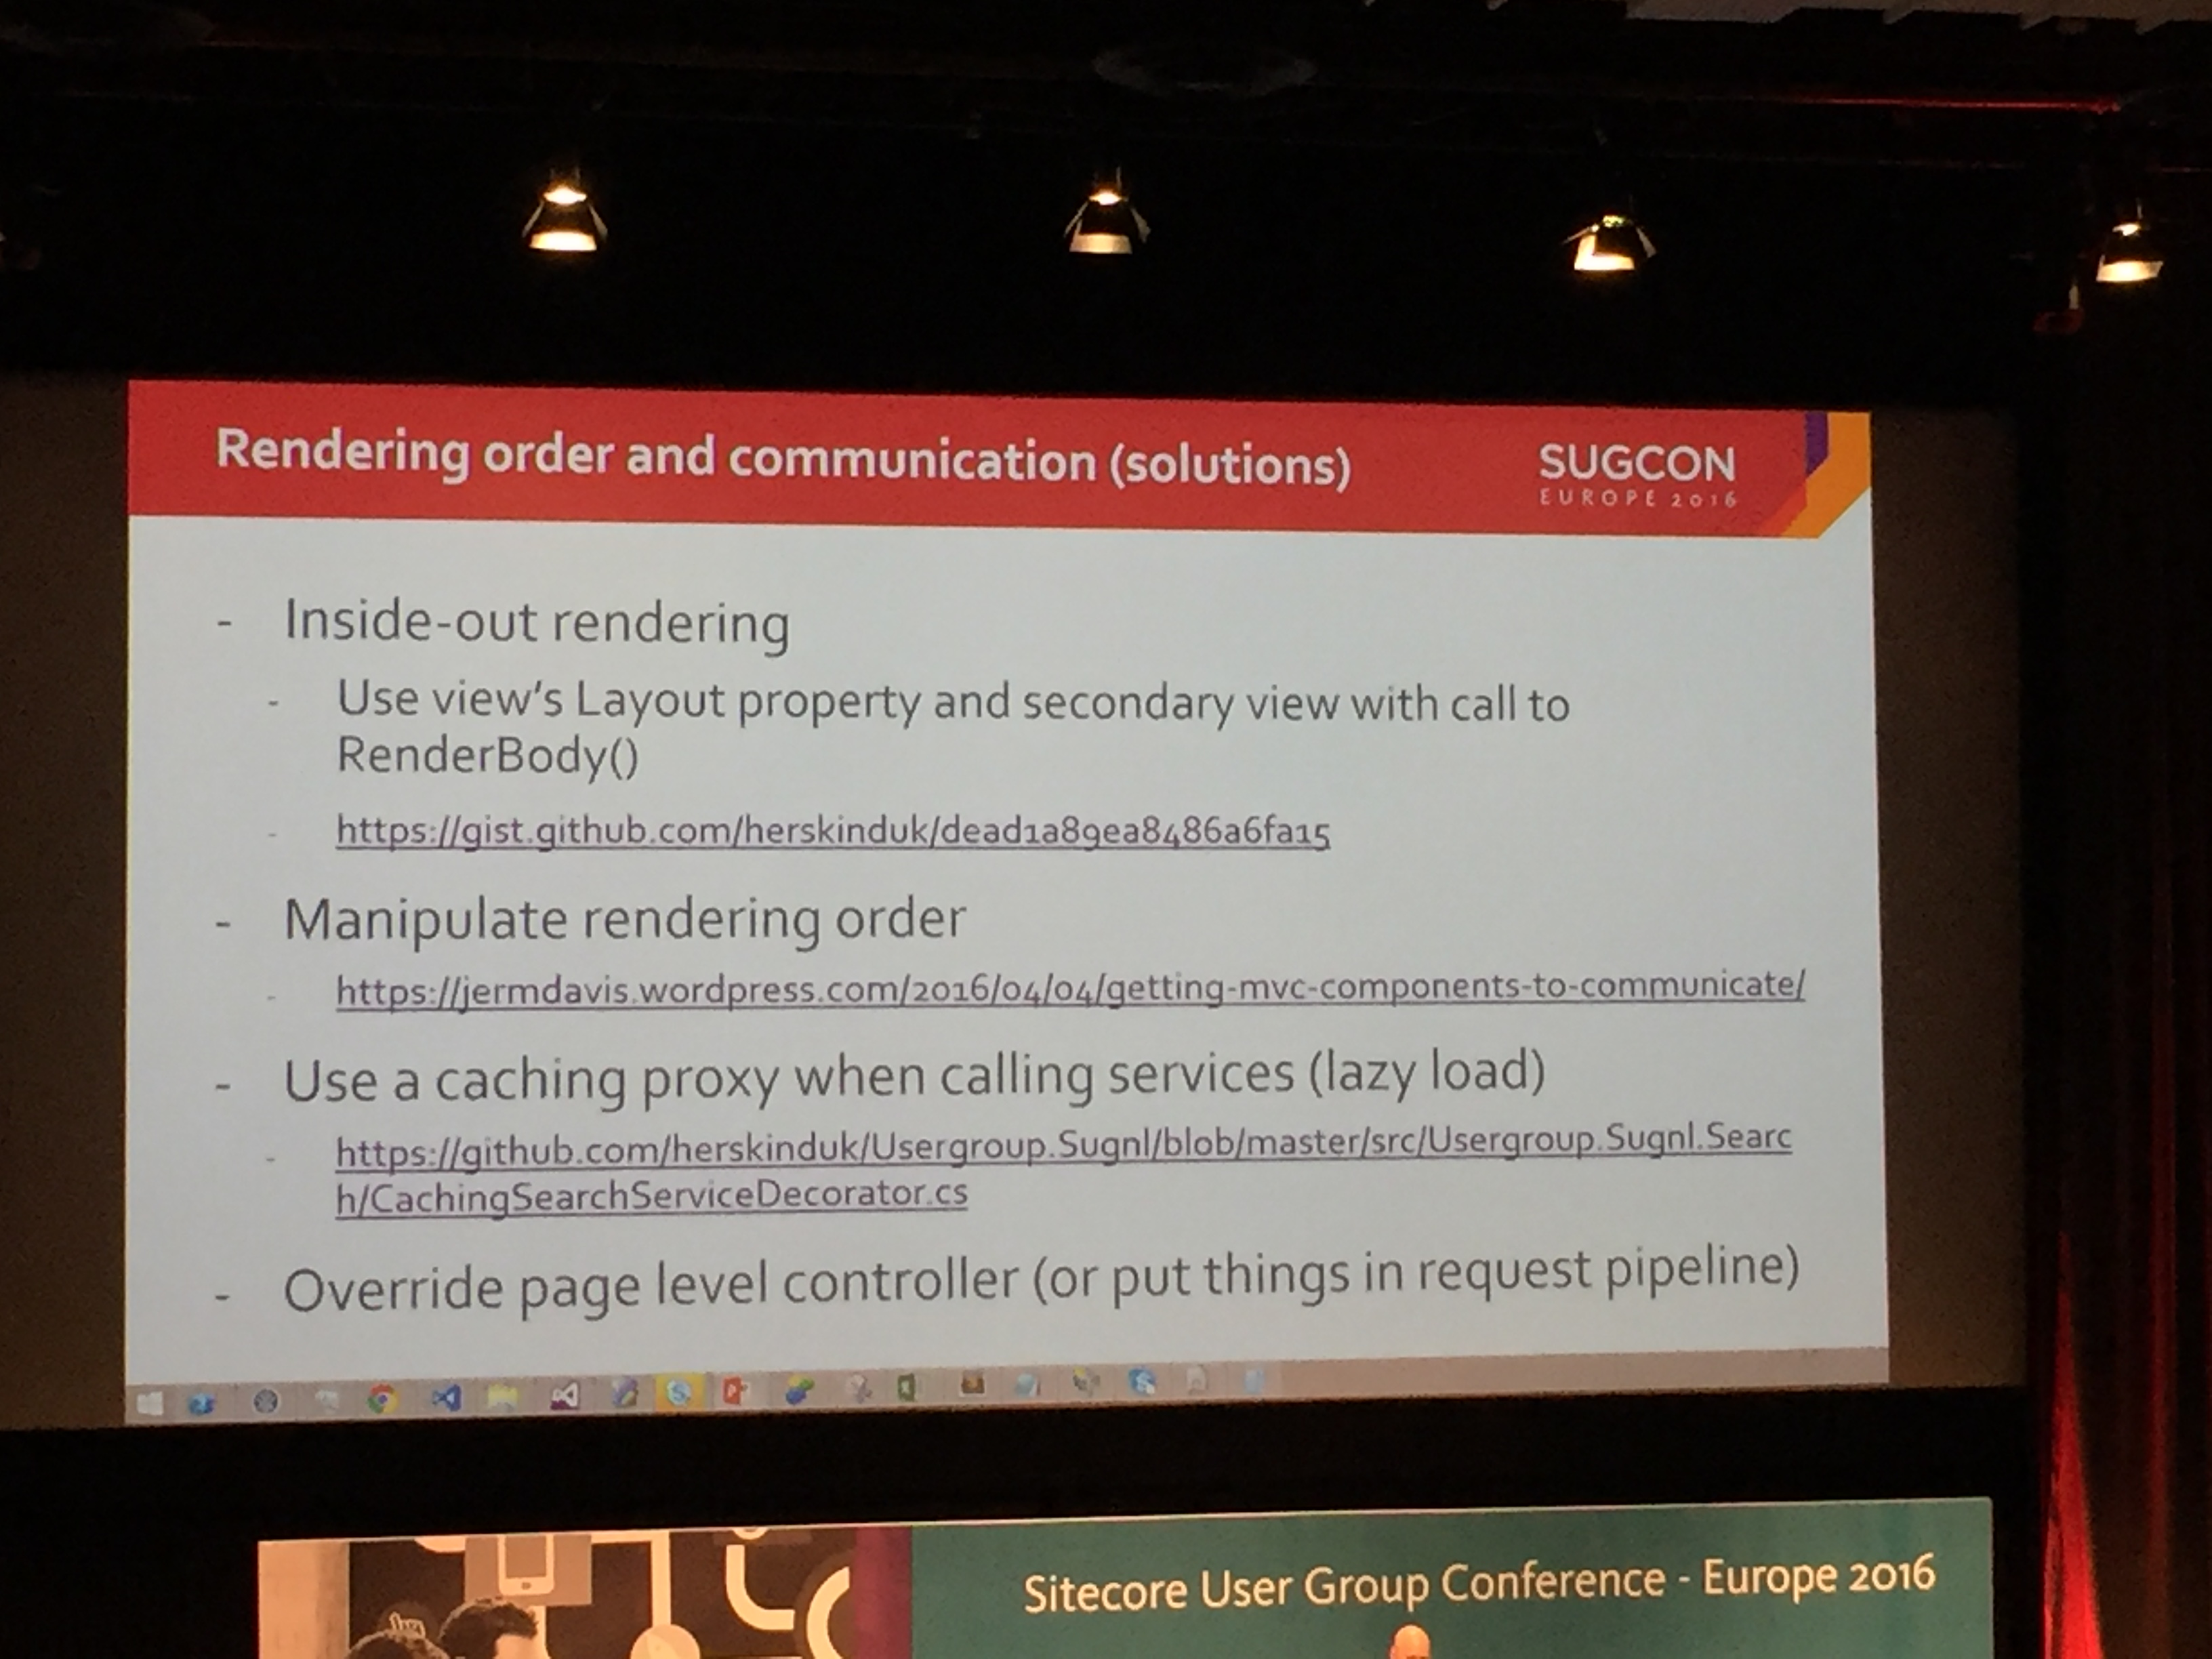
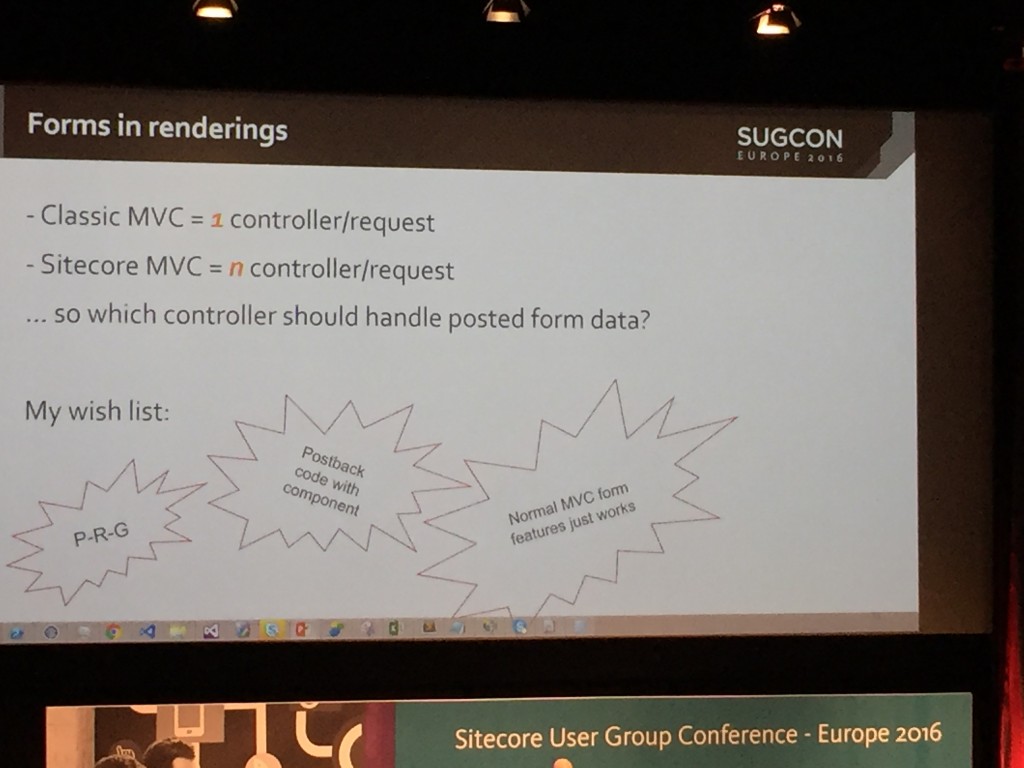
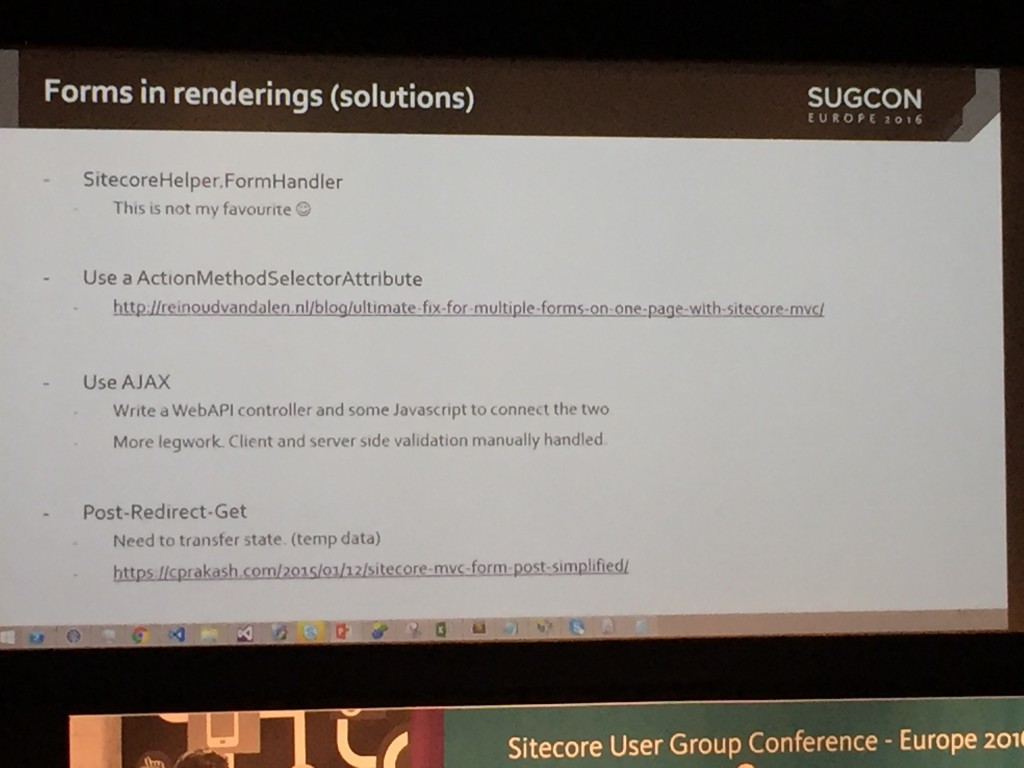
Then Kern talked through some of the downfalls of Sitecore MVC and how he has gone about solving them. Things like renderings not being able to alter any HTML that is rendered prior to them being rendered and multiple form posting issues.

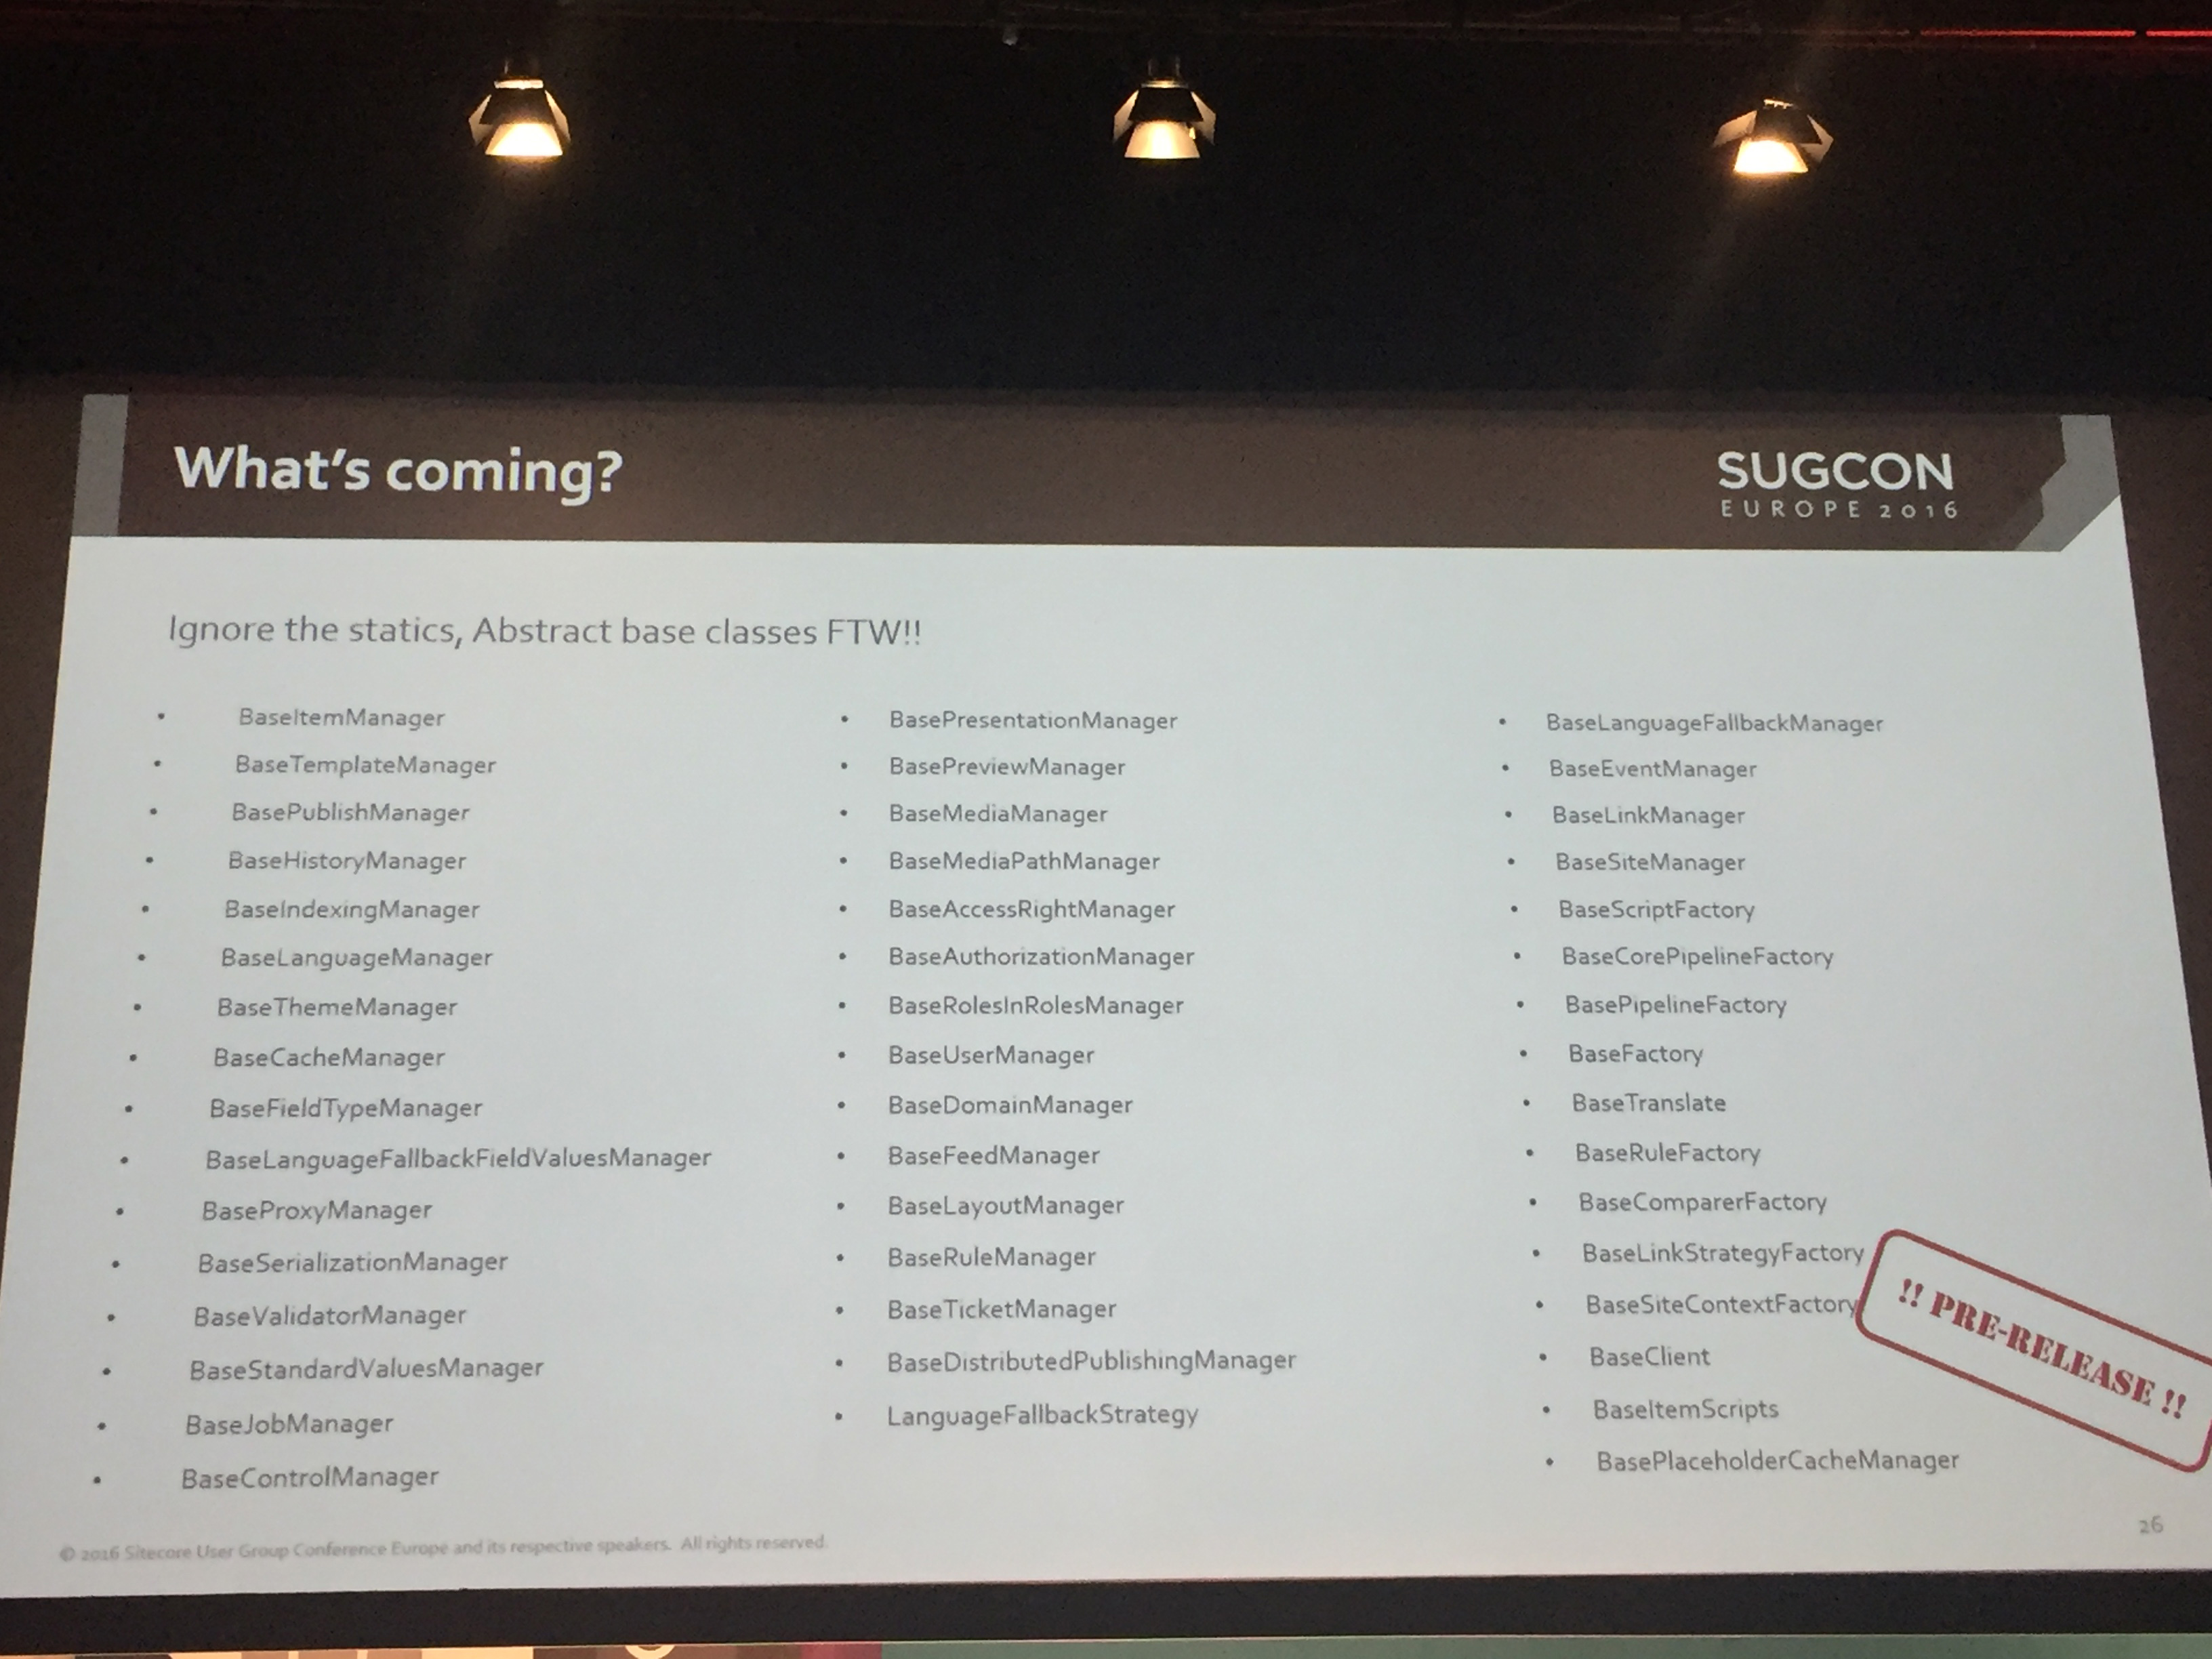
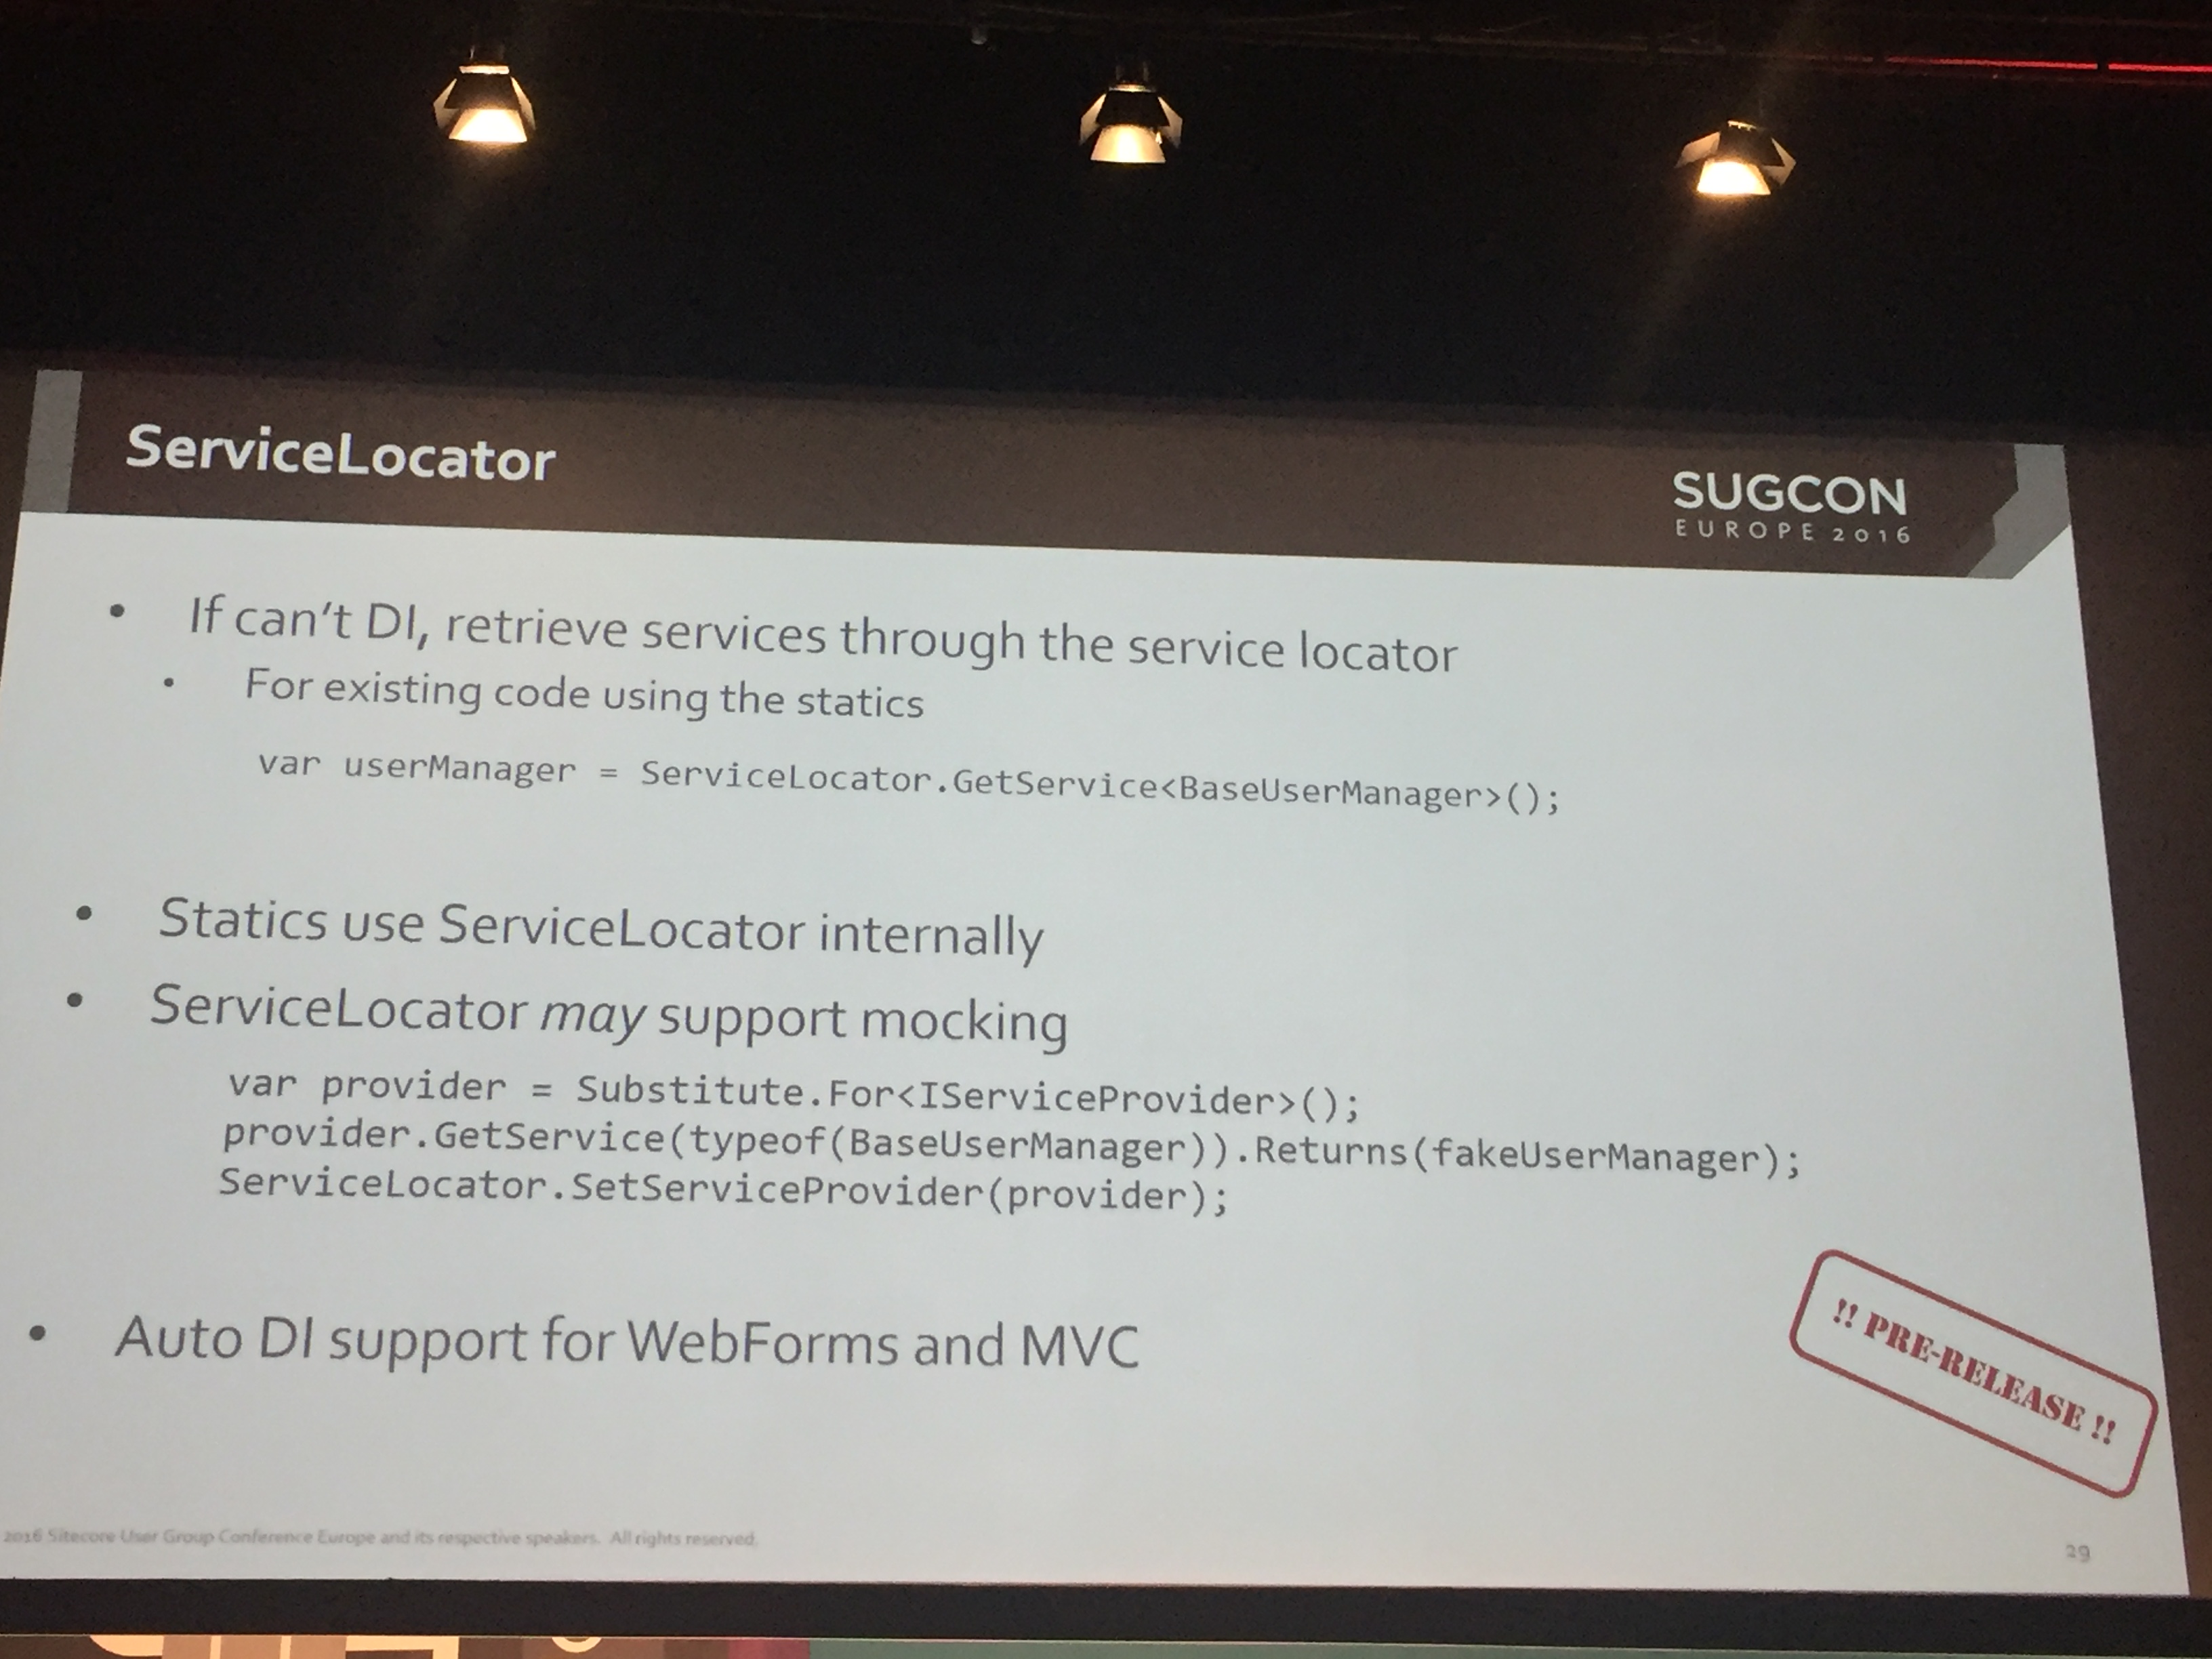
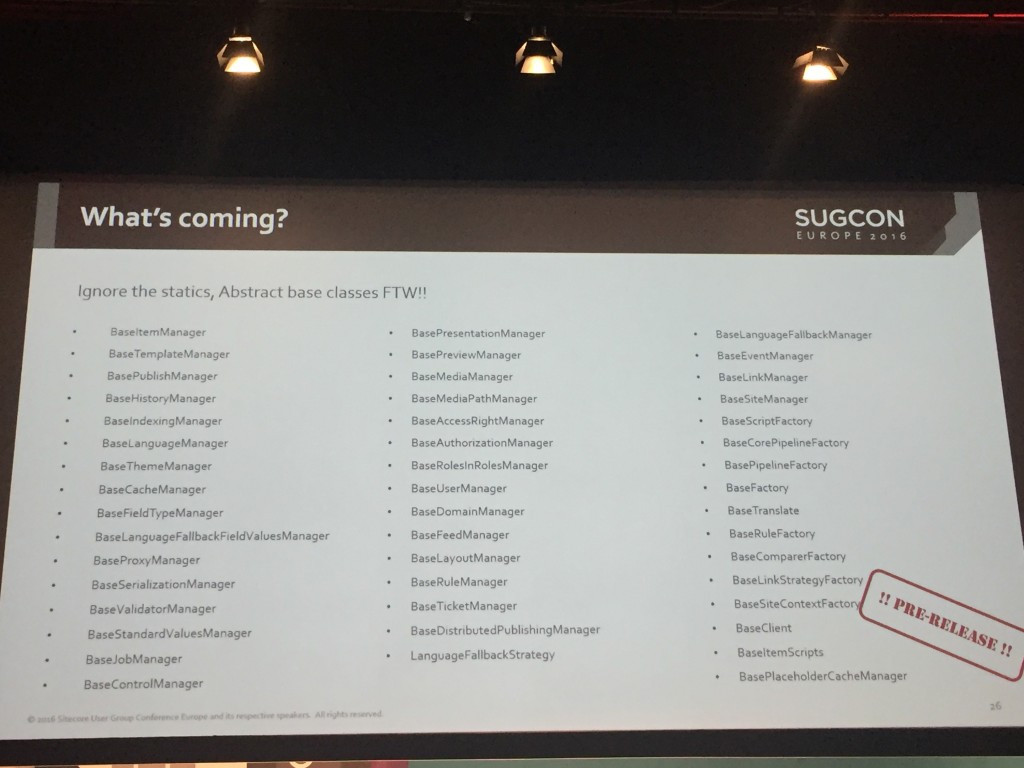
We then go a sneaky peak of what coming up for Sitecore MVC, such as abstract base classes and better ServiceLocator and DI support:

Kern finished by talking about the future of Sitecore MVC and expectations for the future.
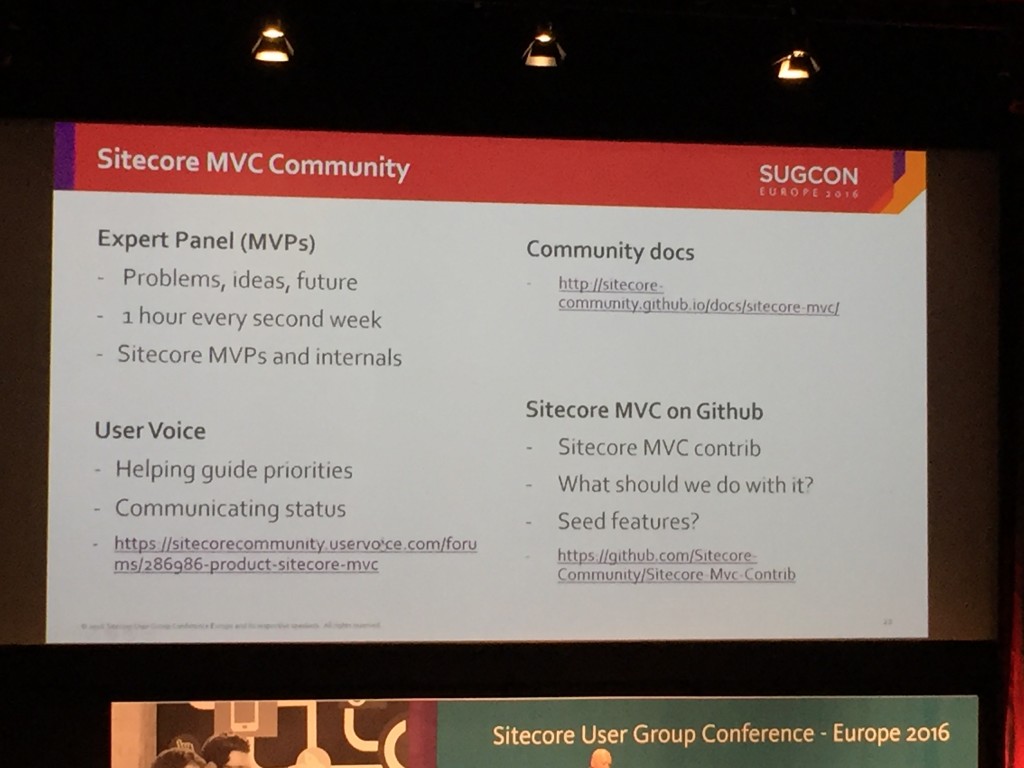
Good to see better documentation and closing feature gaps on the list of improvements.
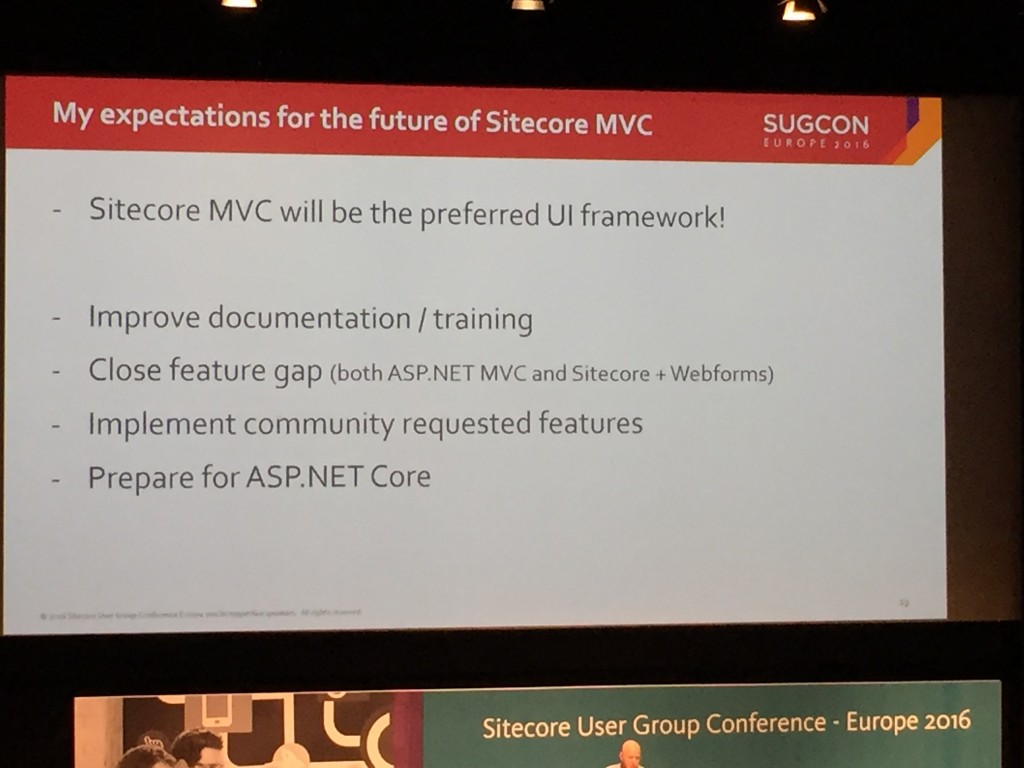
The key message here being that Sitecore MVC is going to continue to be the preferred UI Framework.
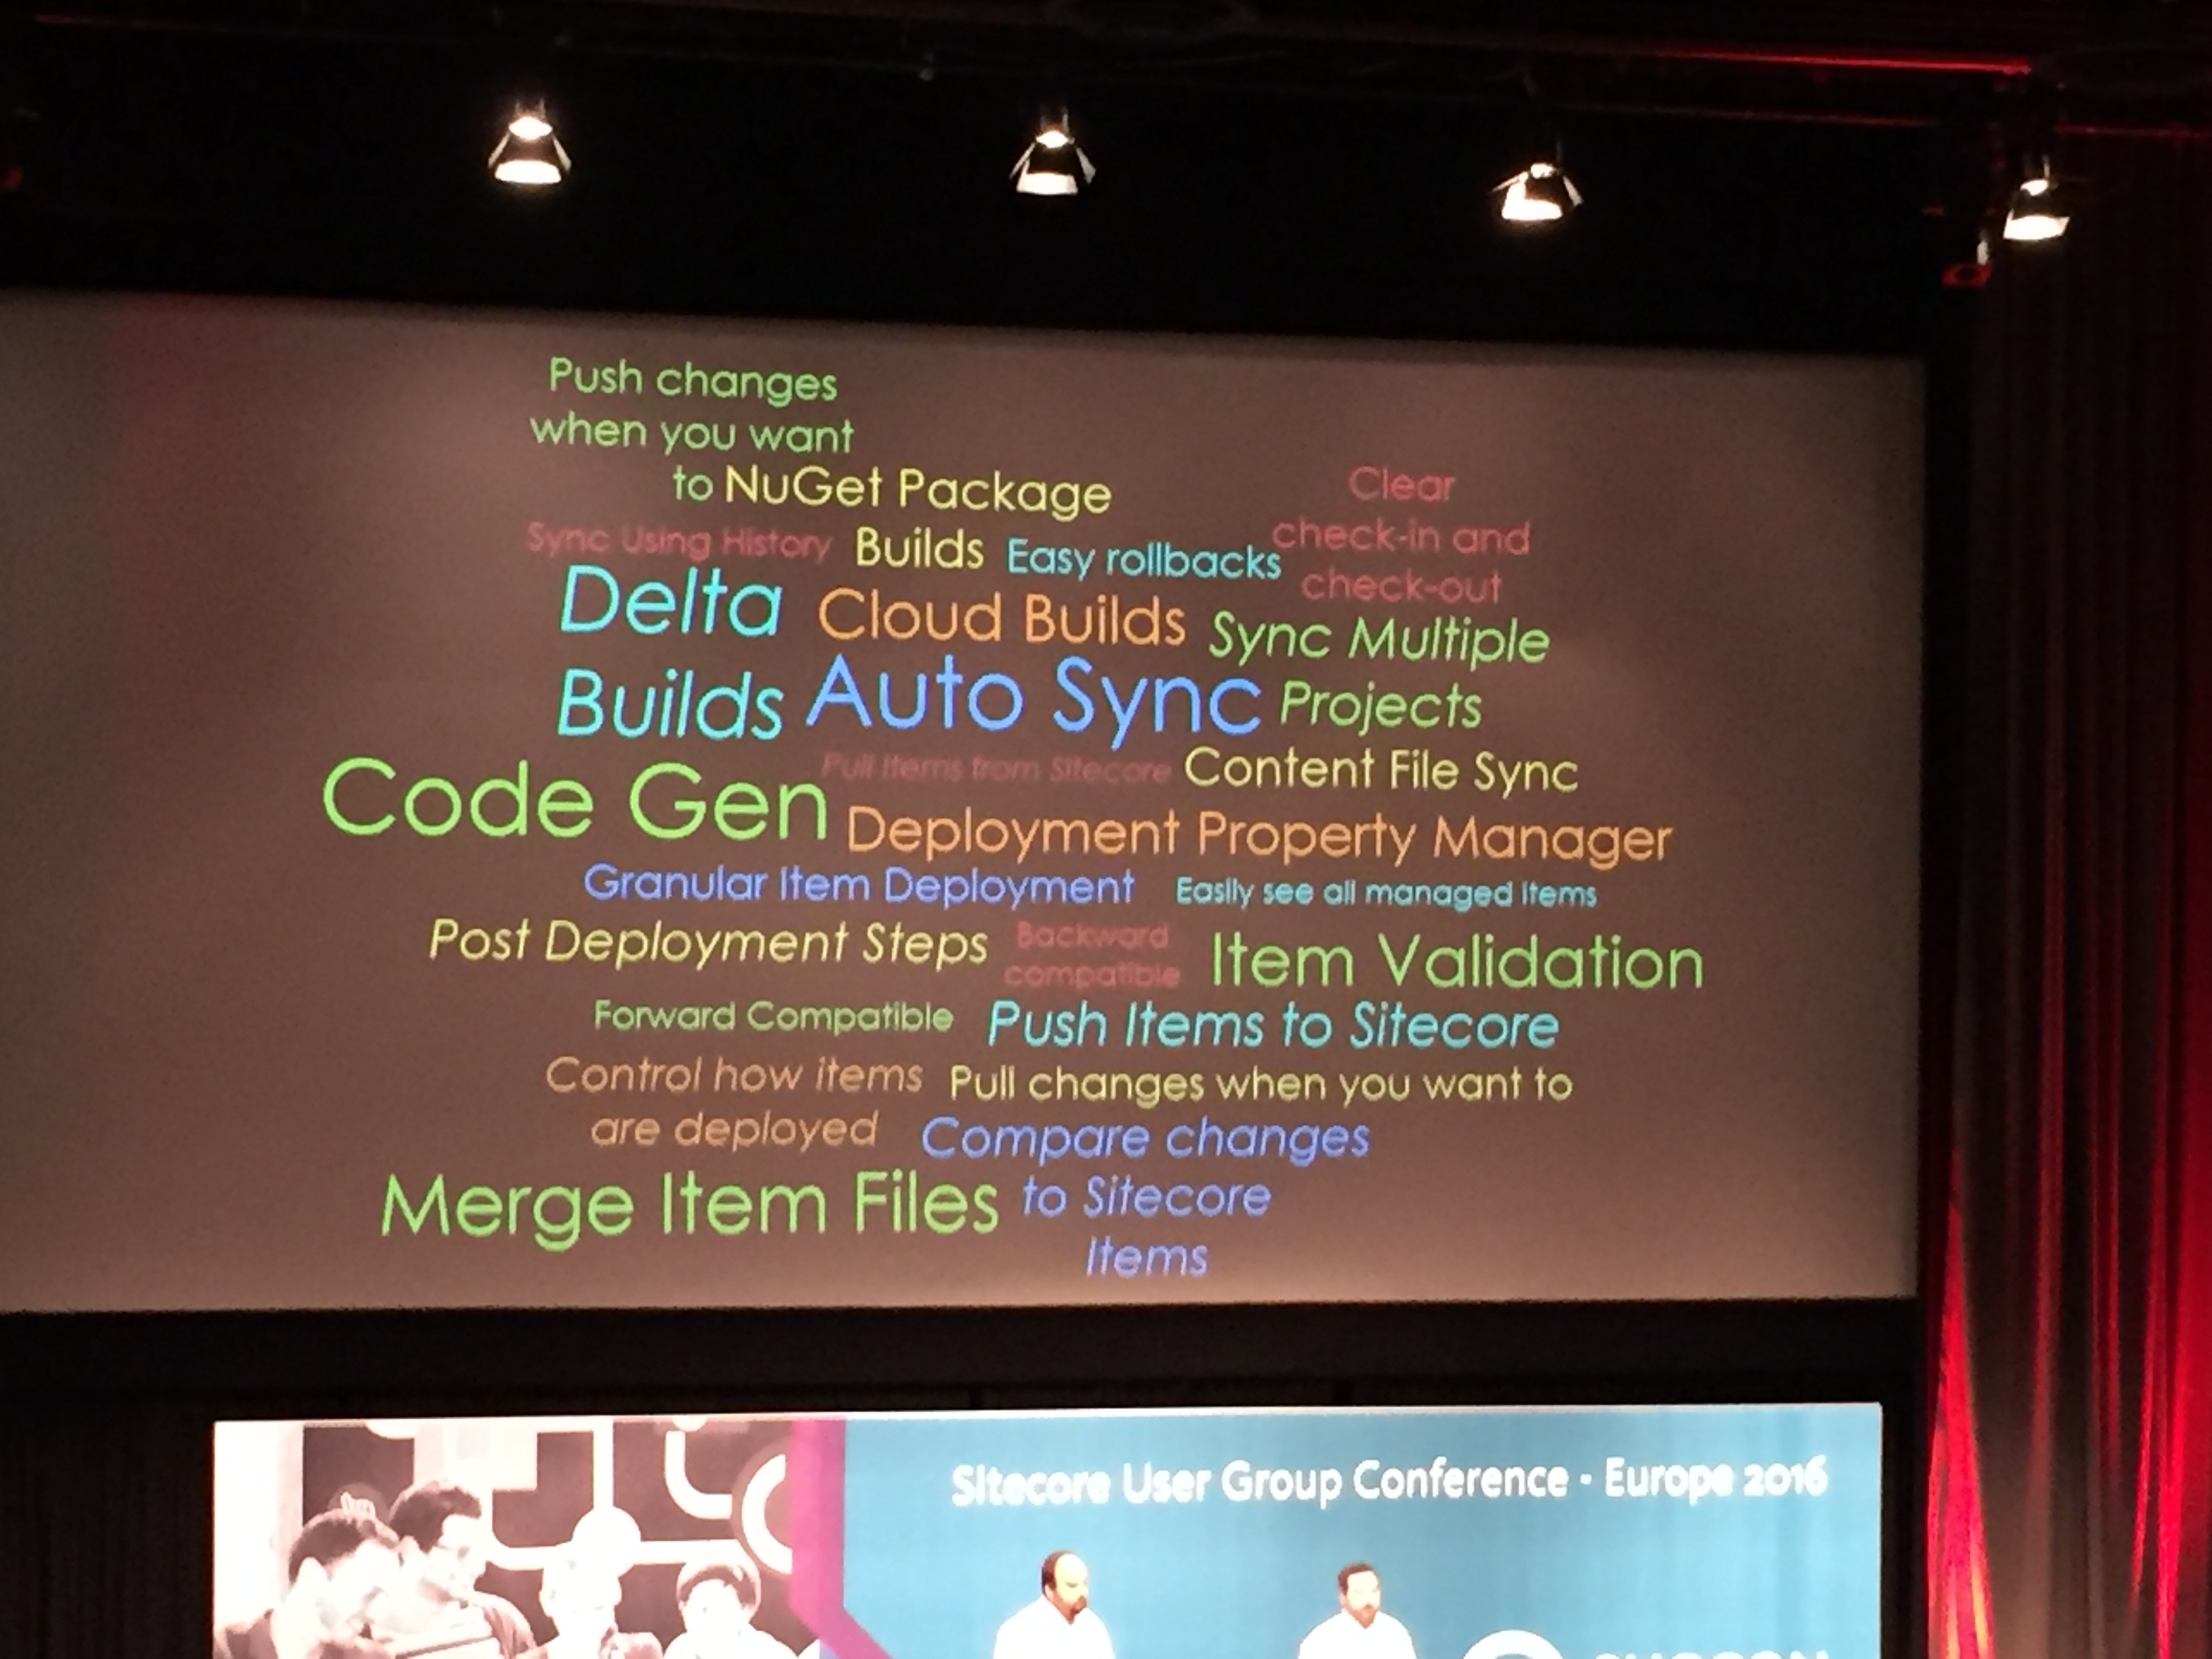
Hedgehog then did a quick talk on their TDS product and helped to answer the question a lot of developers might have, “why should I pay for TDS instead of using Unicorn”. The answer is probably in these two slides, maybe go and show them to your Boss :-).
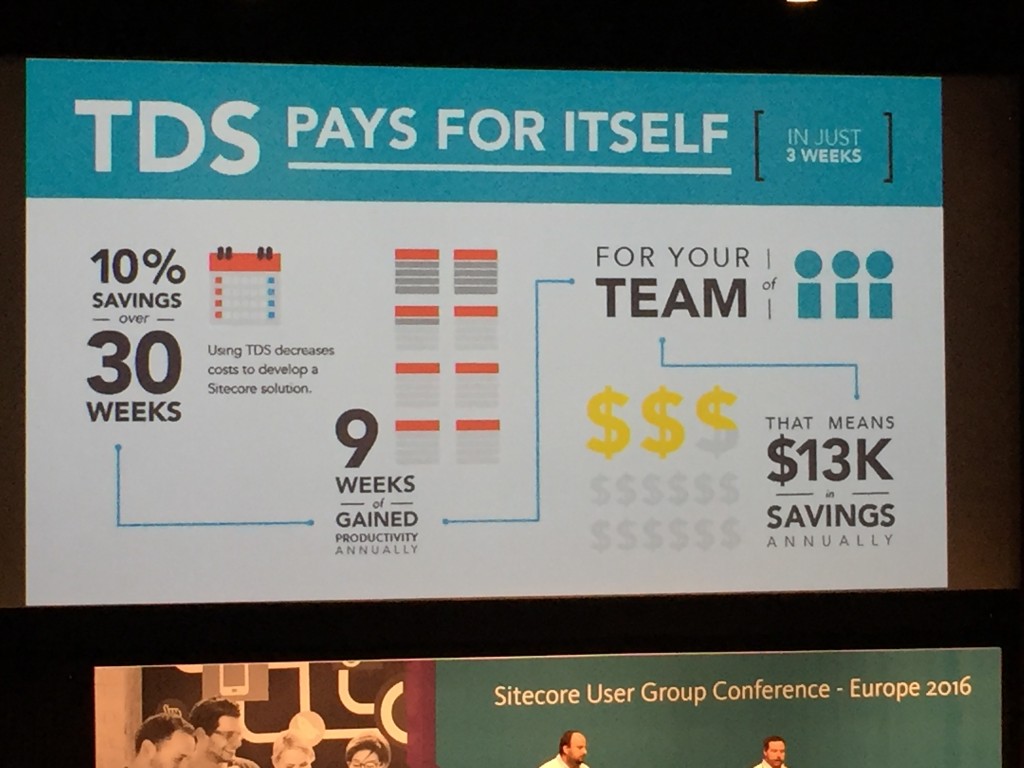
Essentially it does a lot more besides just syncing items between sitecore instances:

I haven’t used it but I’ve head good things about it from other Sitecore Developers.
After lunch (which was excellent by the way) I opted to attend two talks on Sitecore Habitat. One by Ruud Van Falier called Introducing Sitecore Habitat and the 2nd by Anders Laub on Practical Habitat: Embrace the Architecture.
Introducing Sitecore Habitat
For those who don’t know what Habit is, it is an Architecture approach for Sitecore development and is designed to give best practice guidance on how to structure your Sitecore projects. I have taken a look at it a few times but not really used it and the feedback from other Sitecore developers I’d spoken to was that it was quite complicated, so I was interested in finding out more about it.
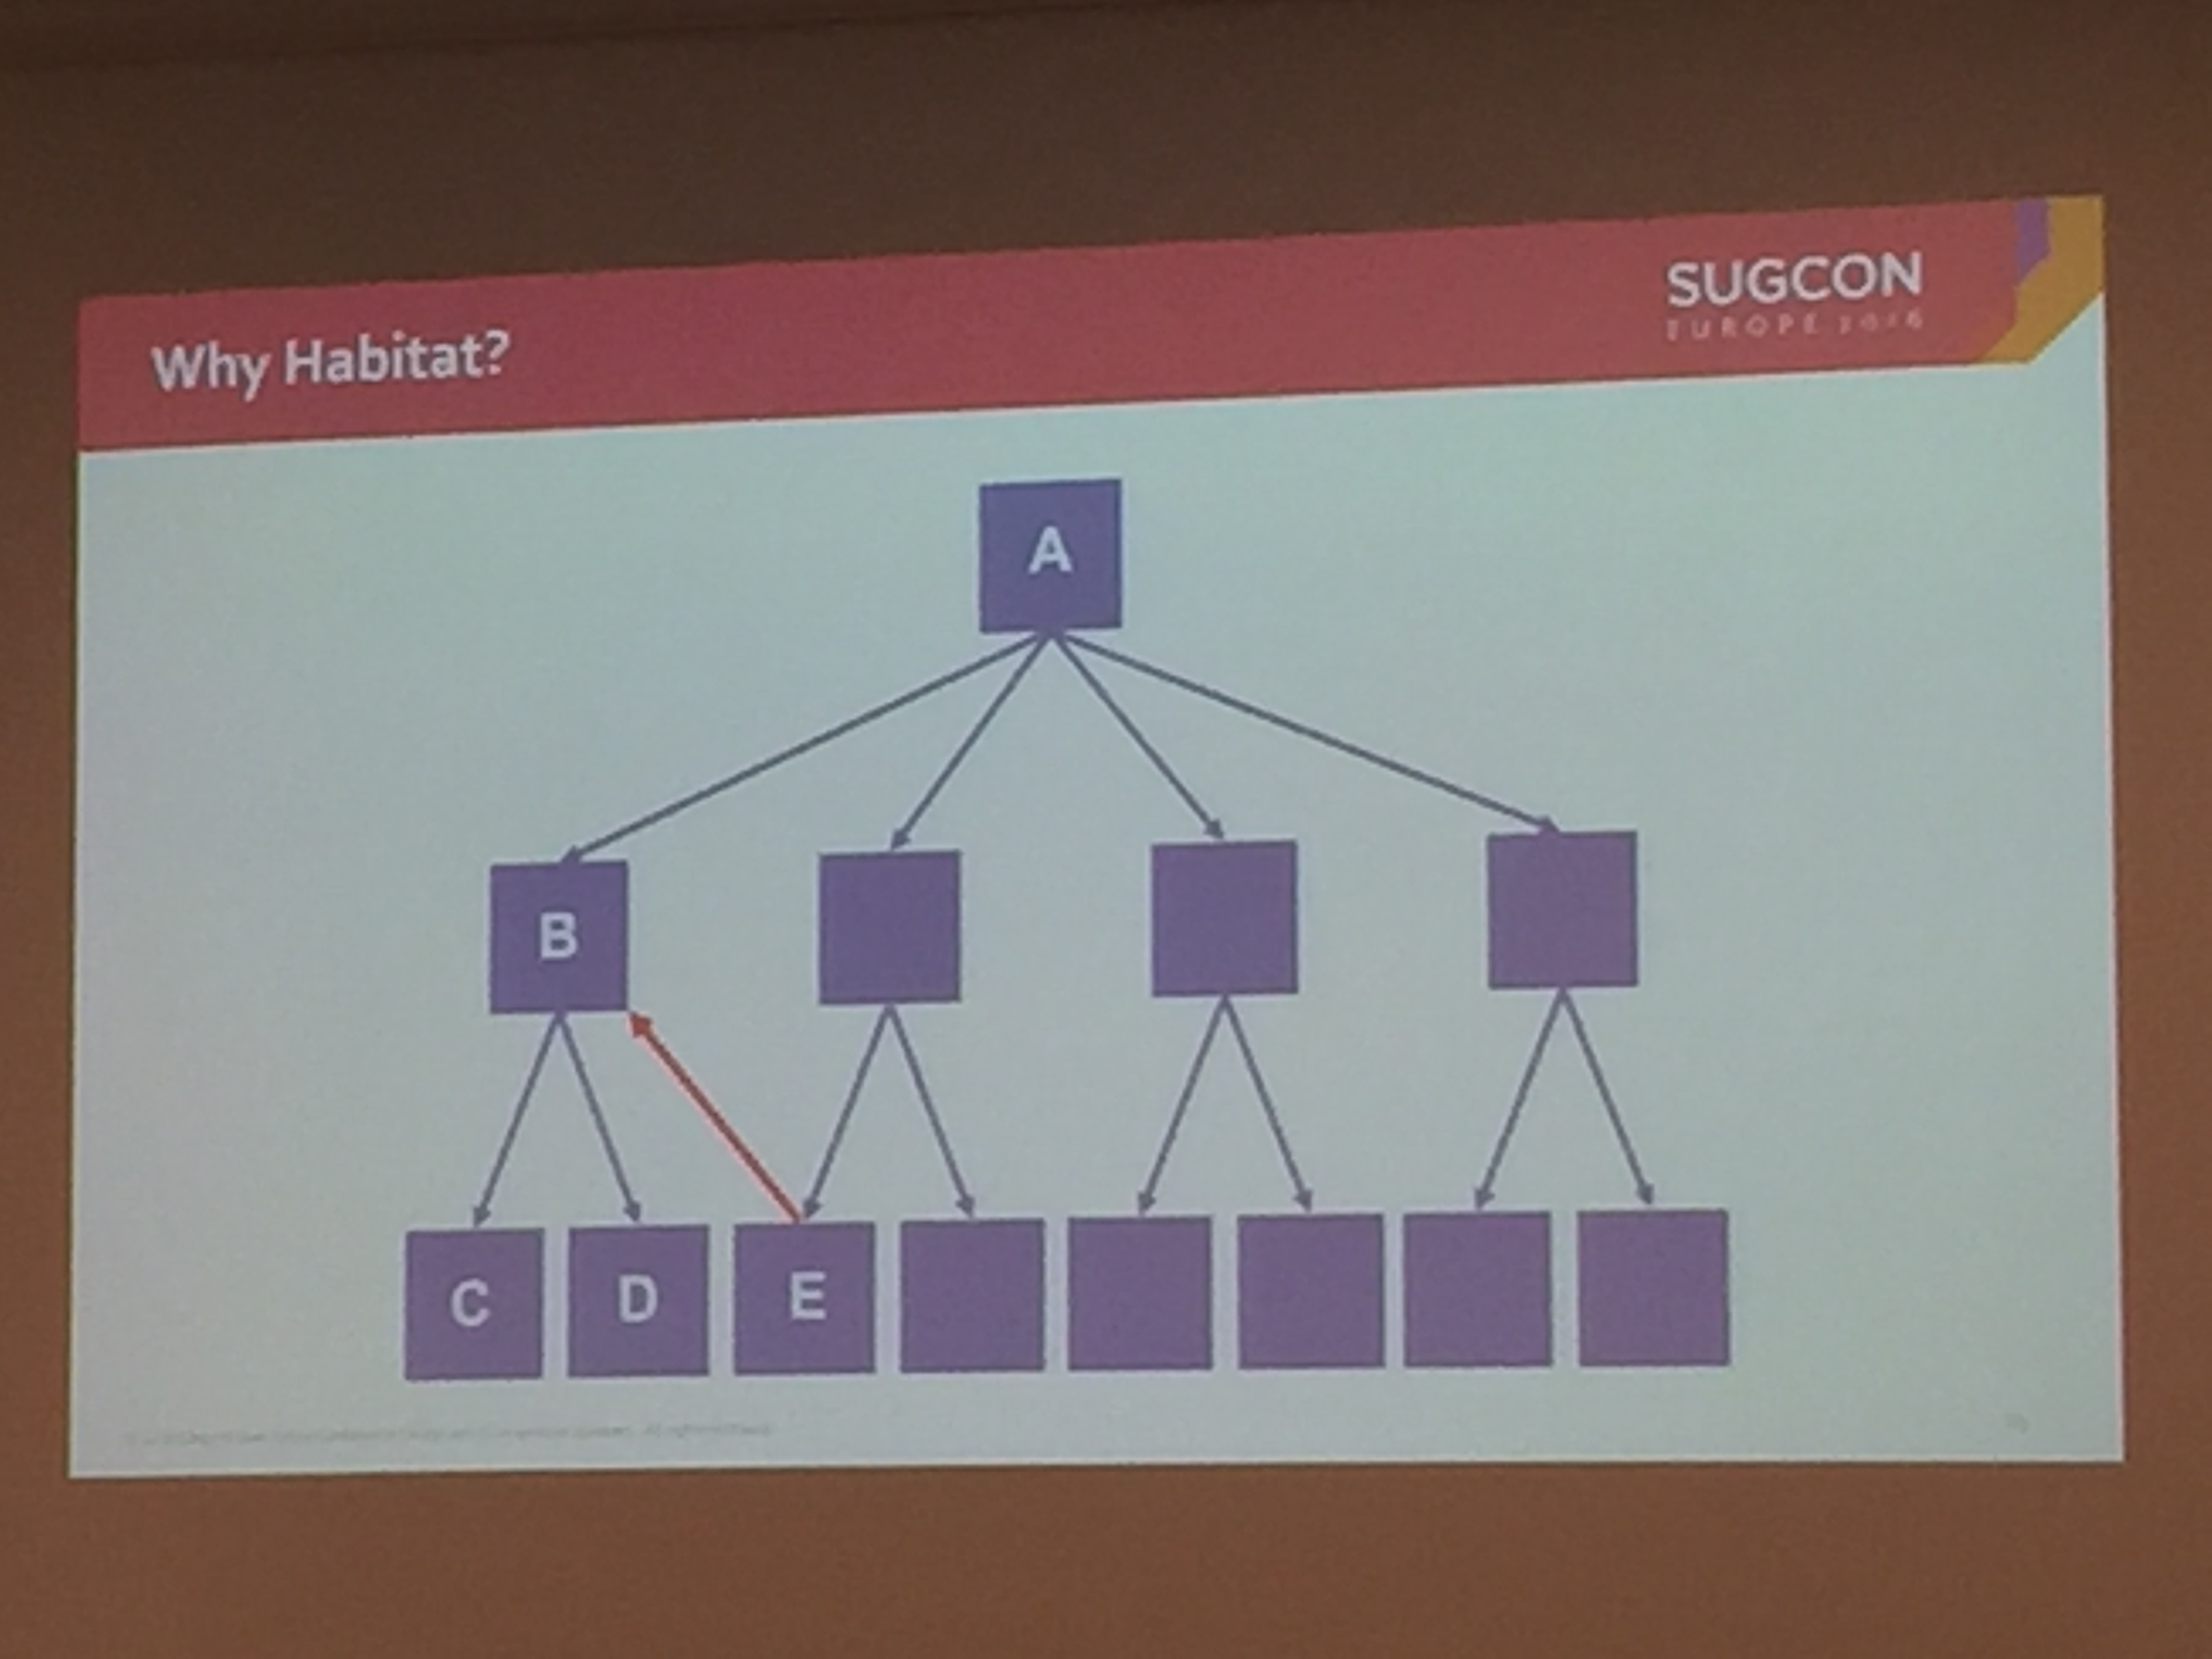
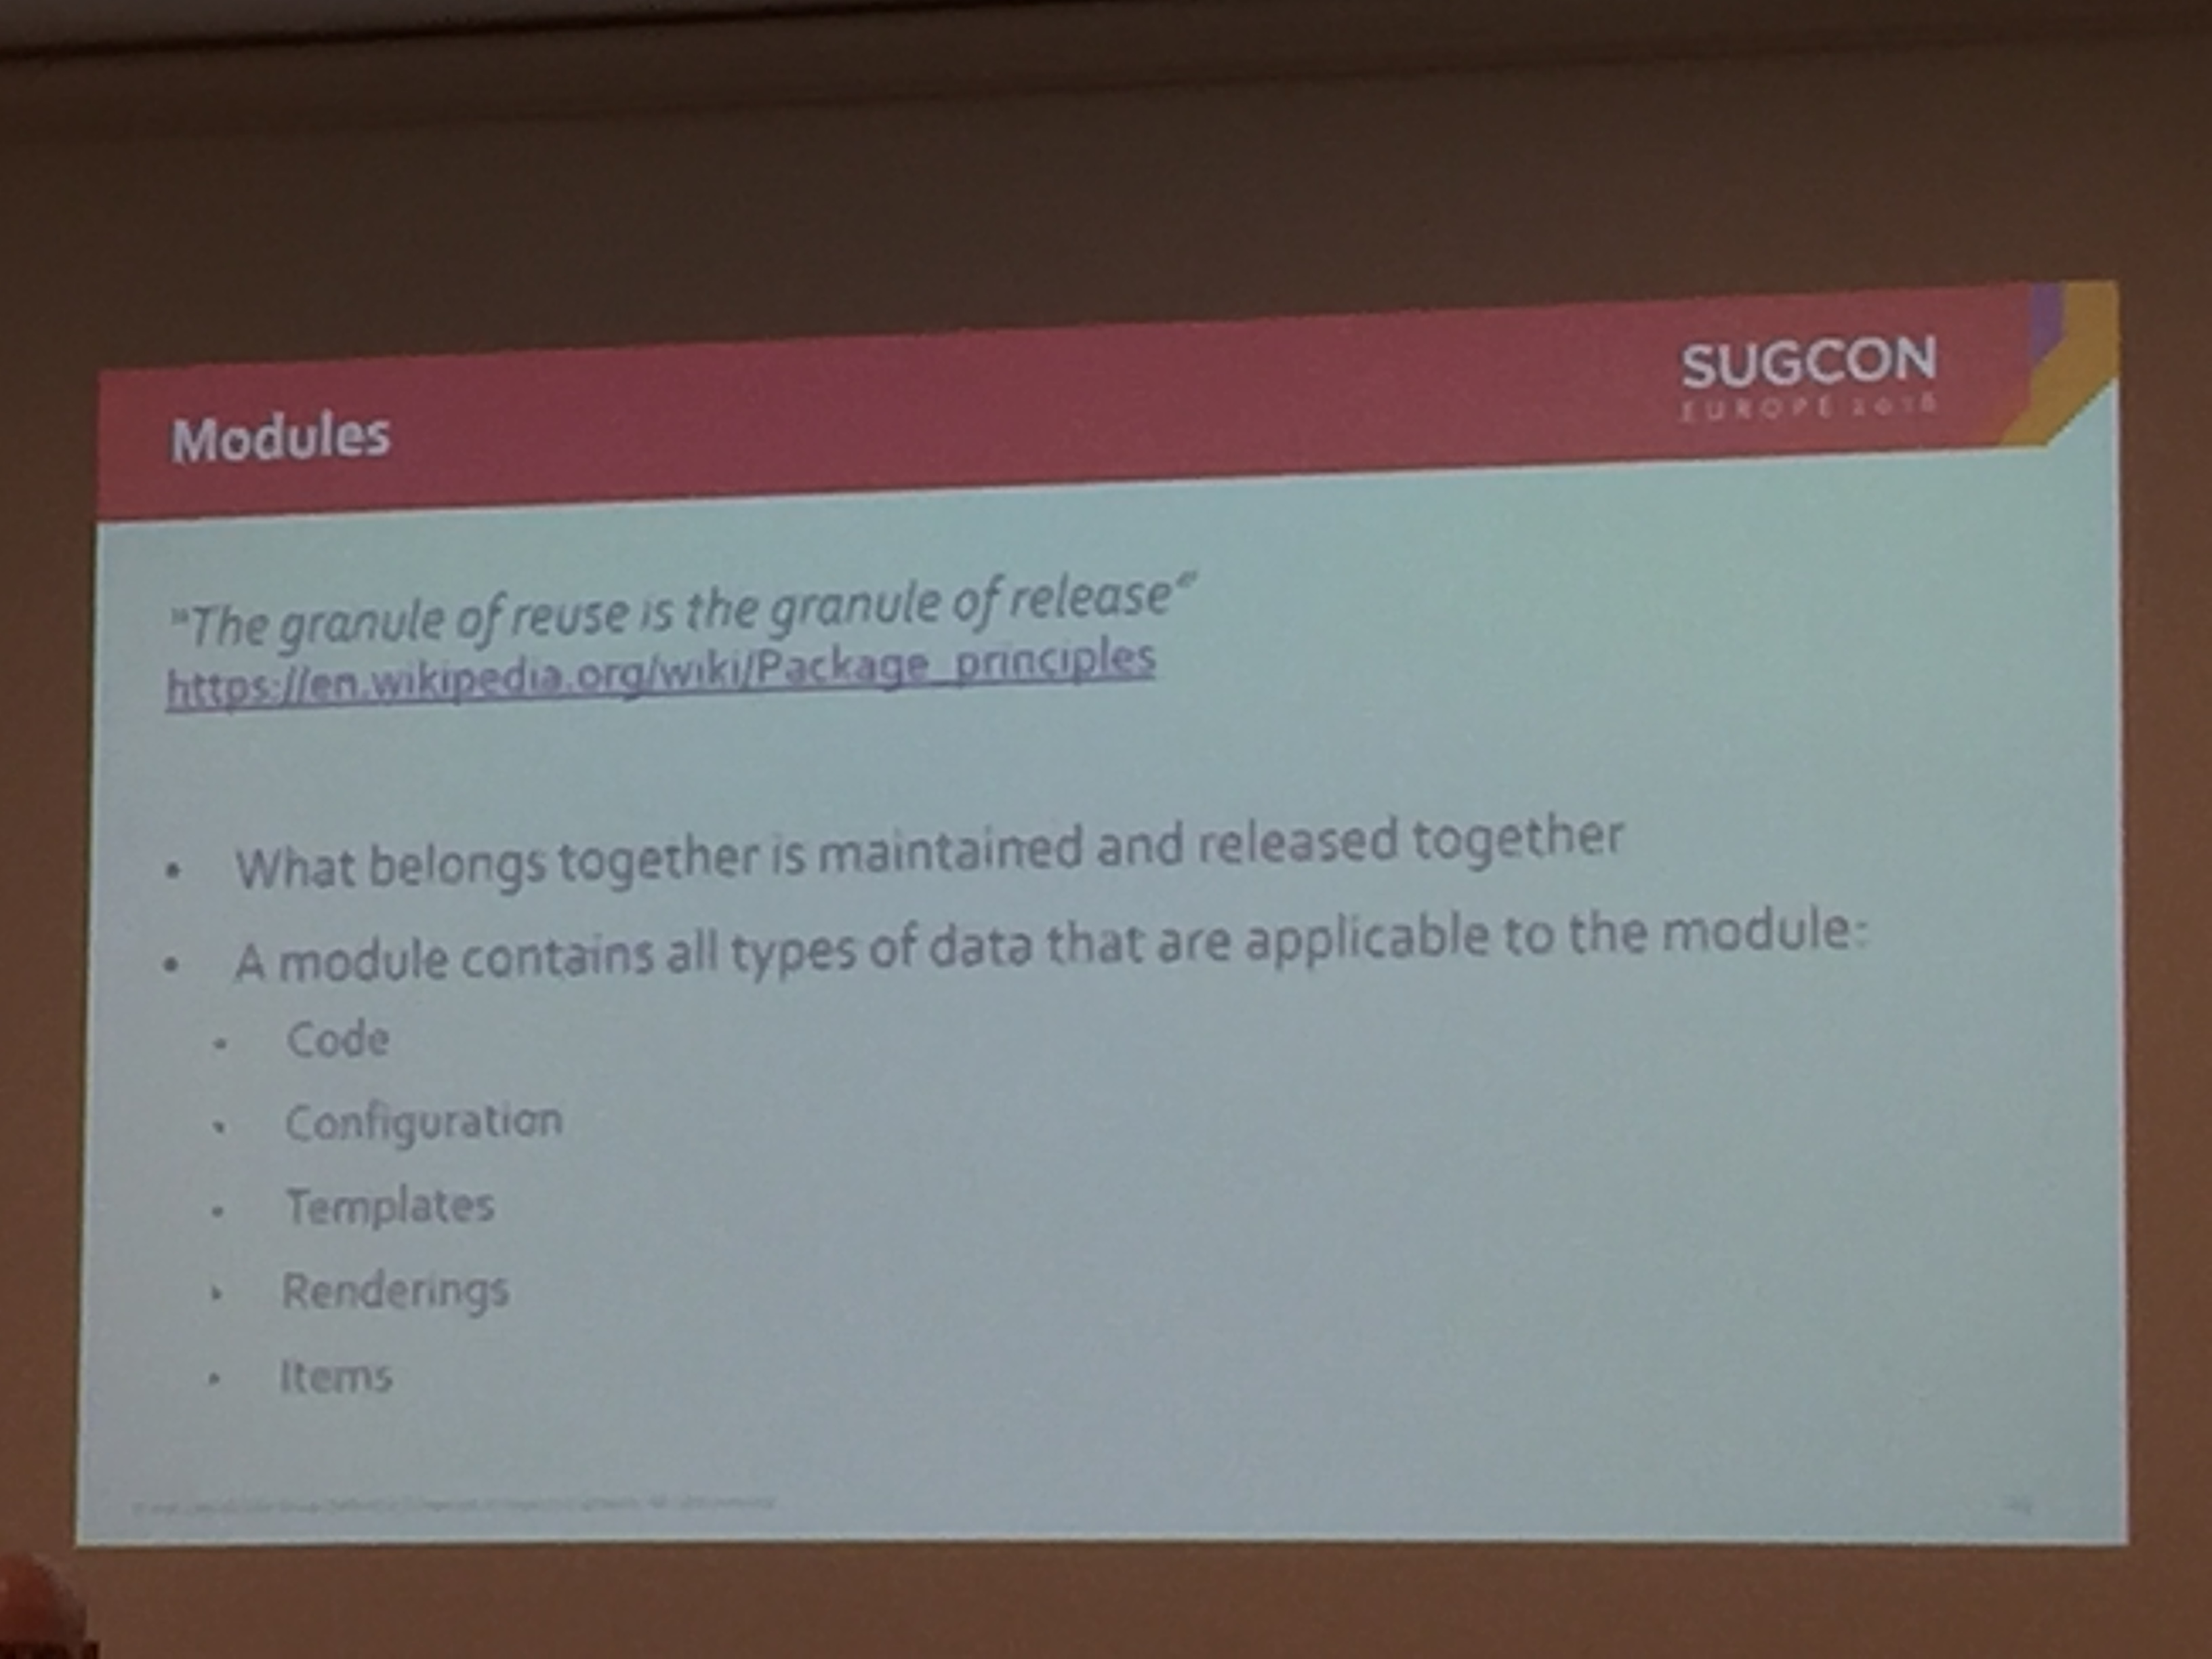
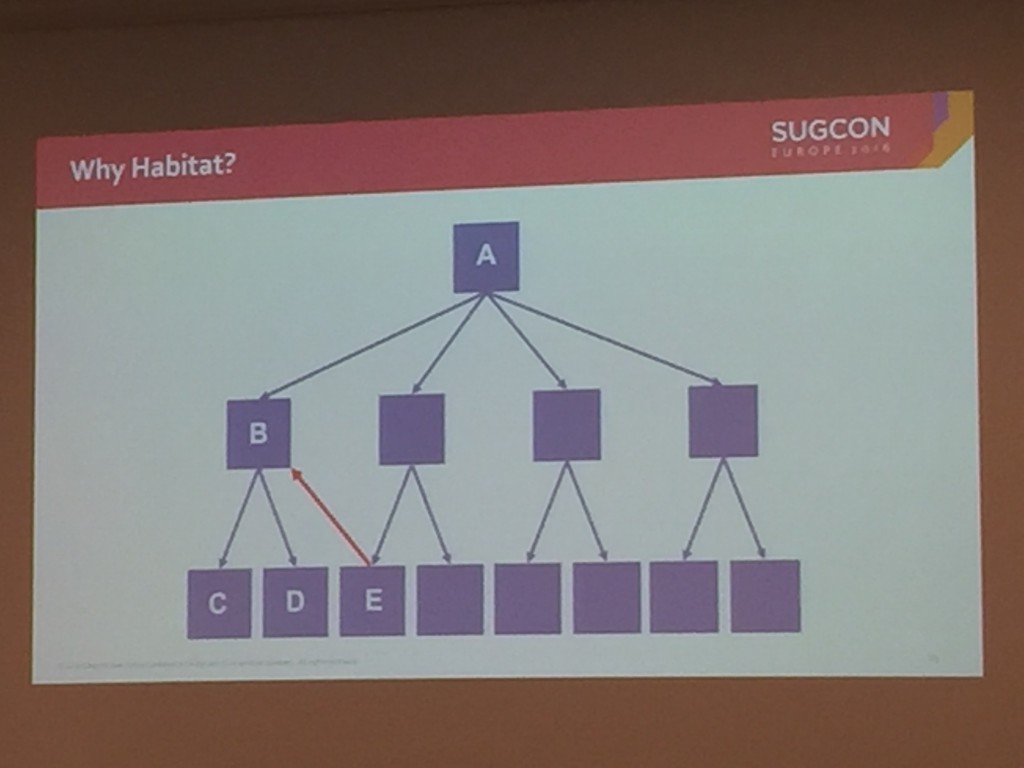
Ruud was presenting to a packed room with quite a few developers stood up at the back, obviously as keen as me to know more. He started with the basic concepts of Habitat, explaining how all modules are self-contained and that there should be no communication that goes upwards between modules.
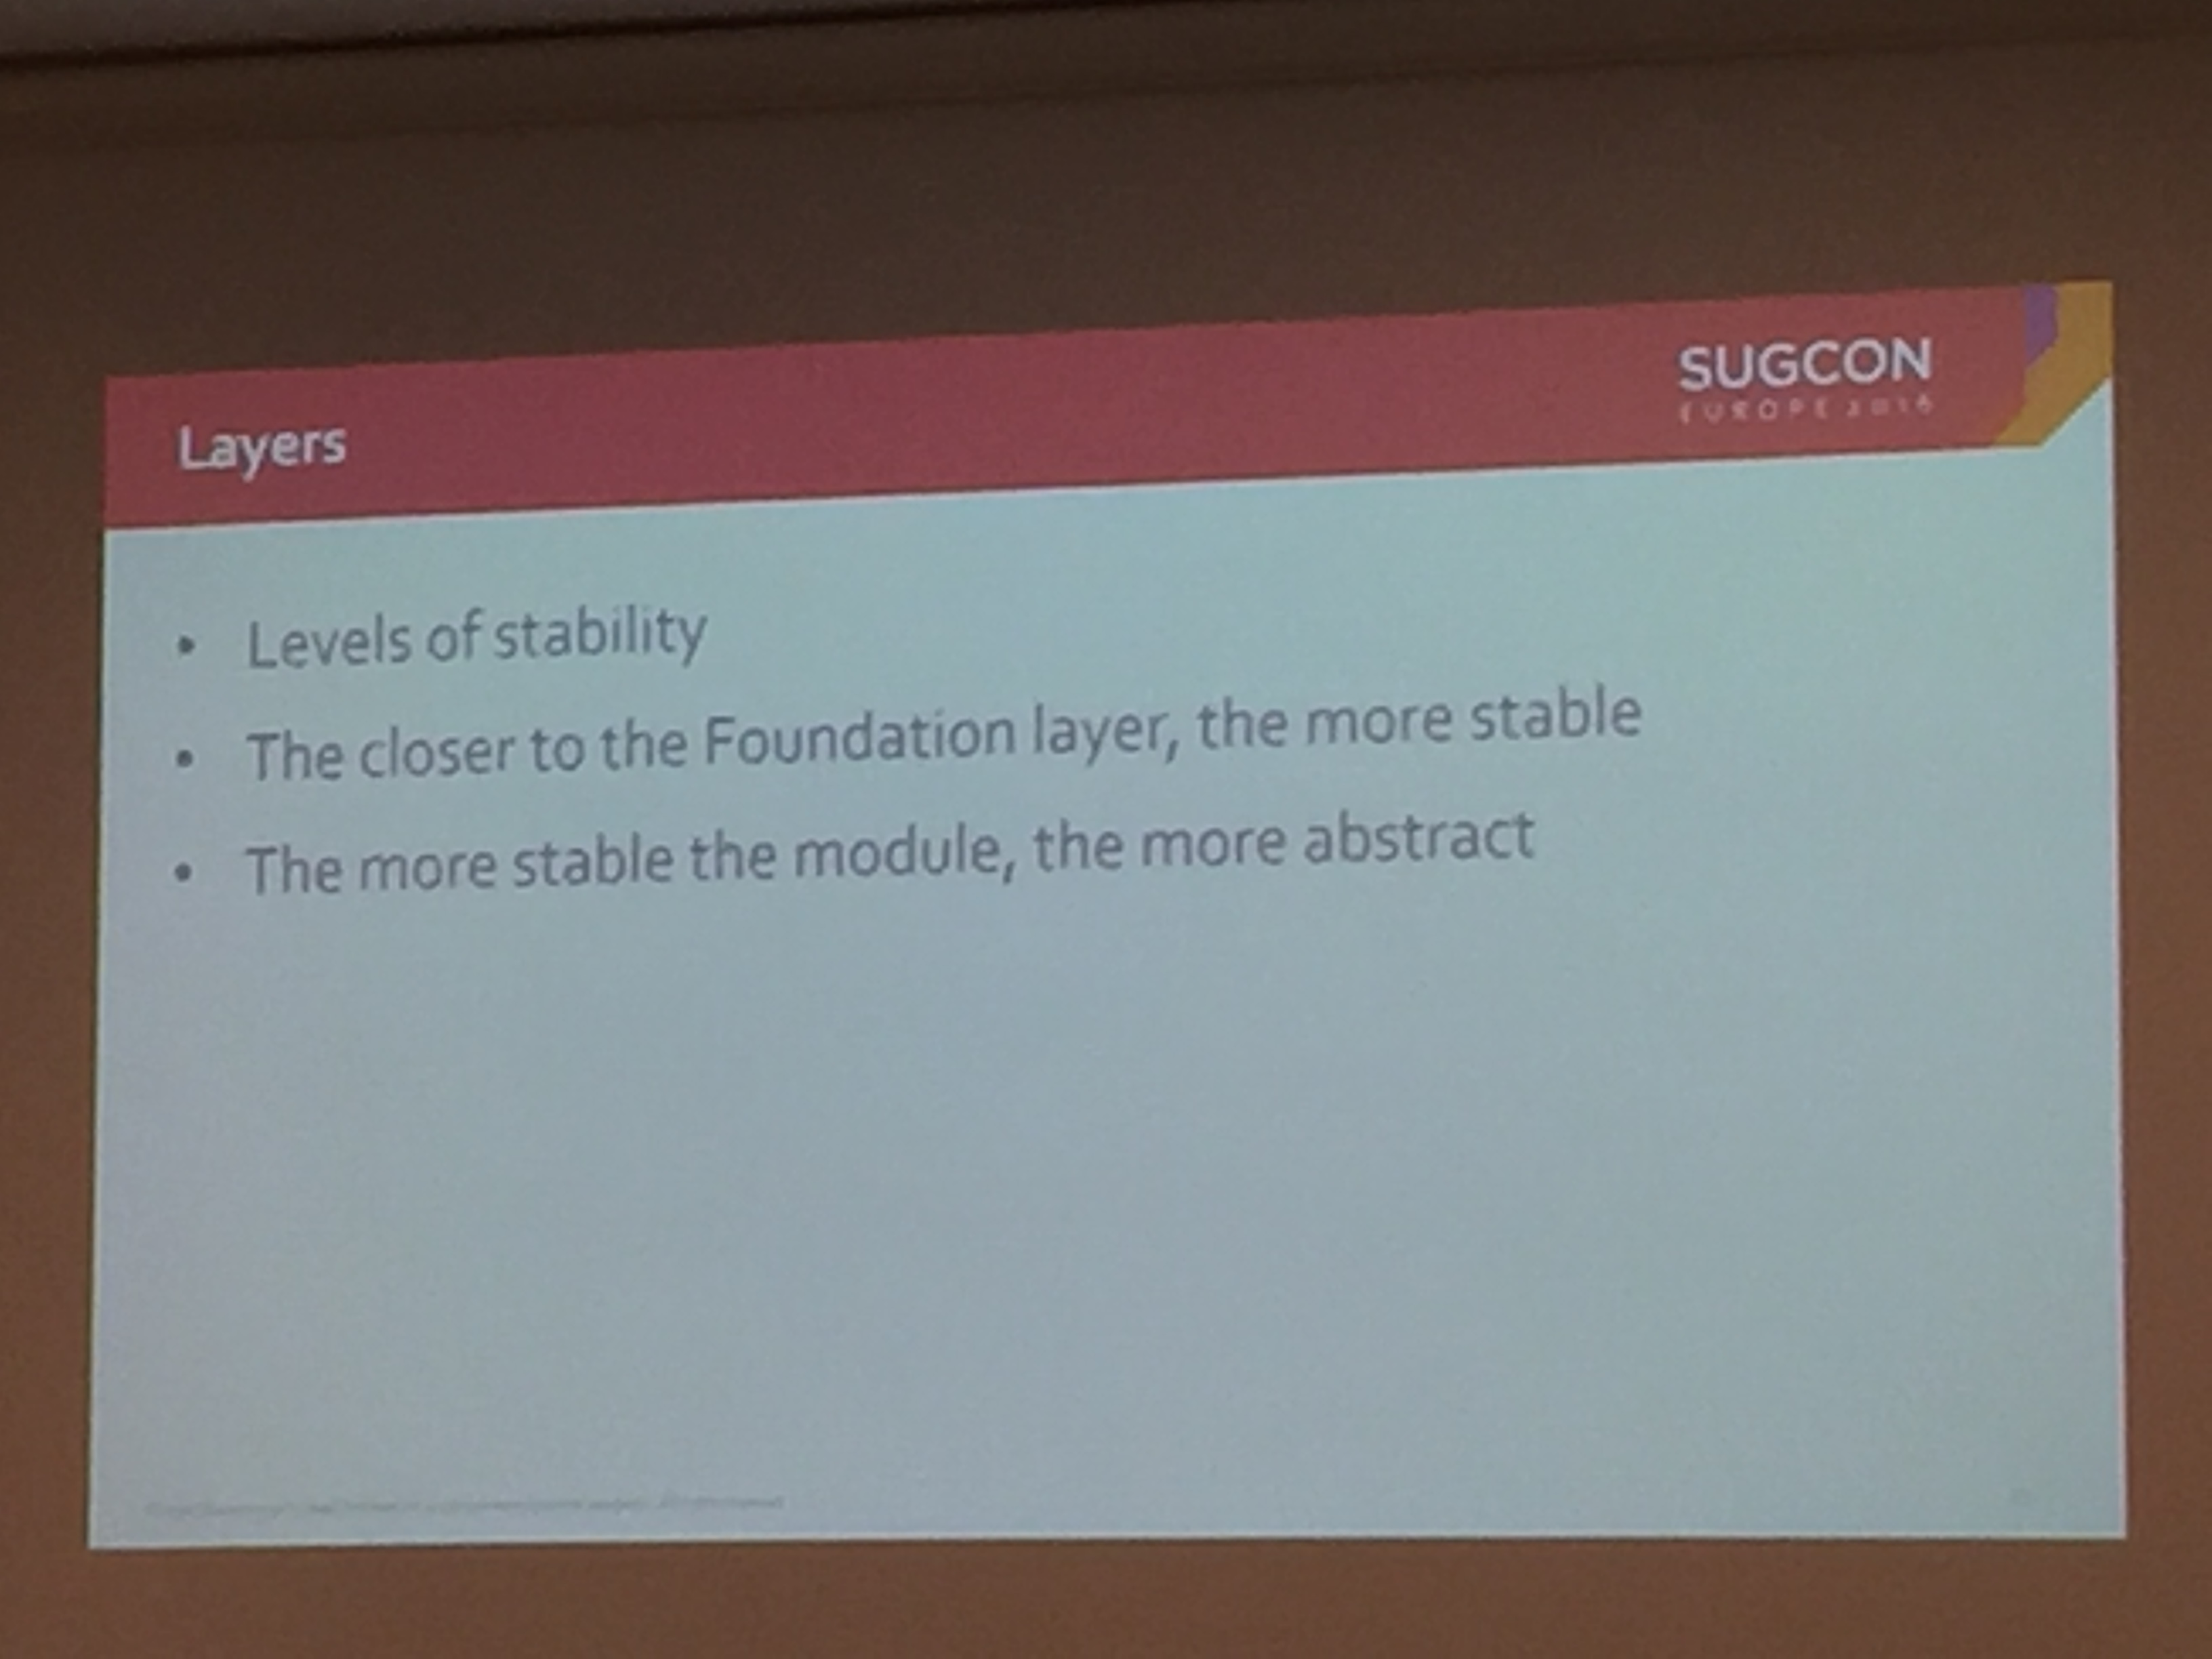
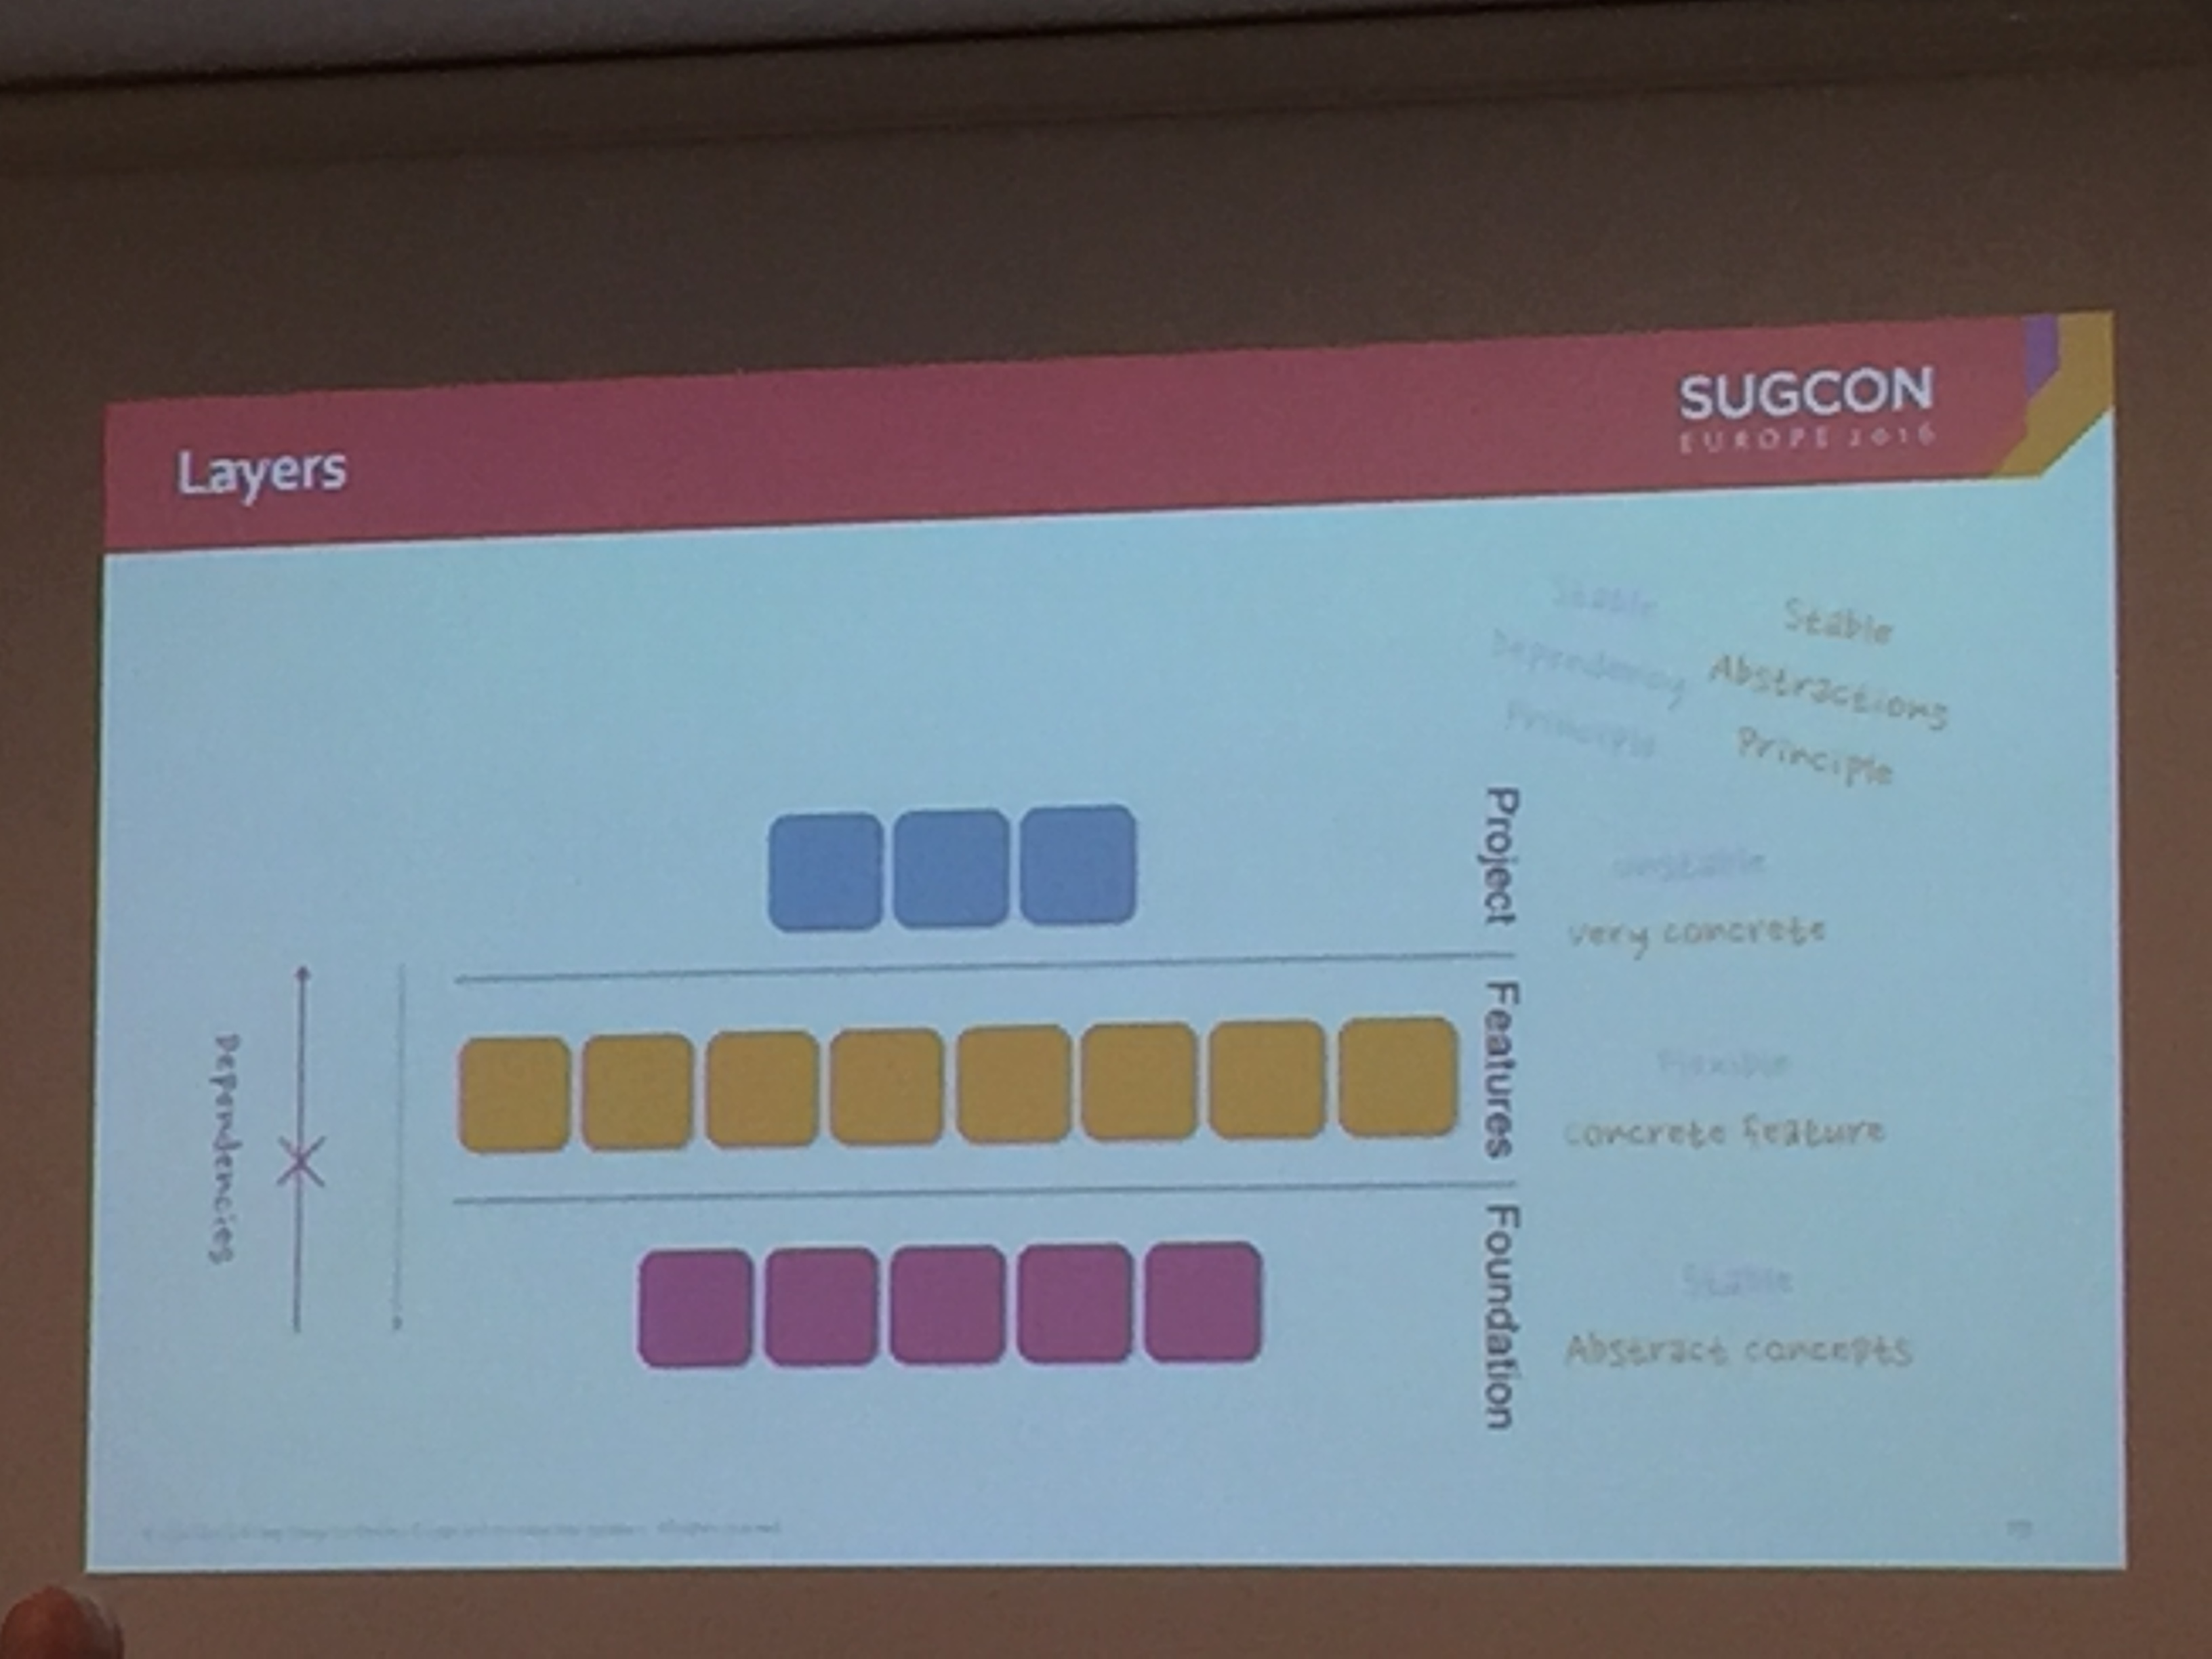
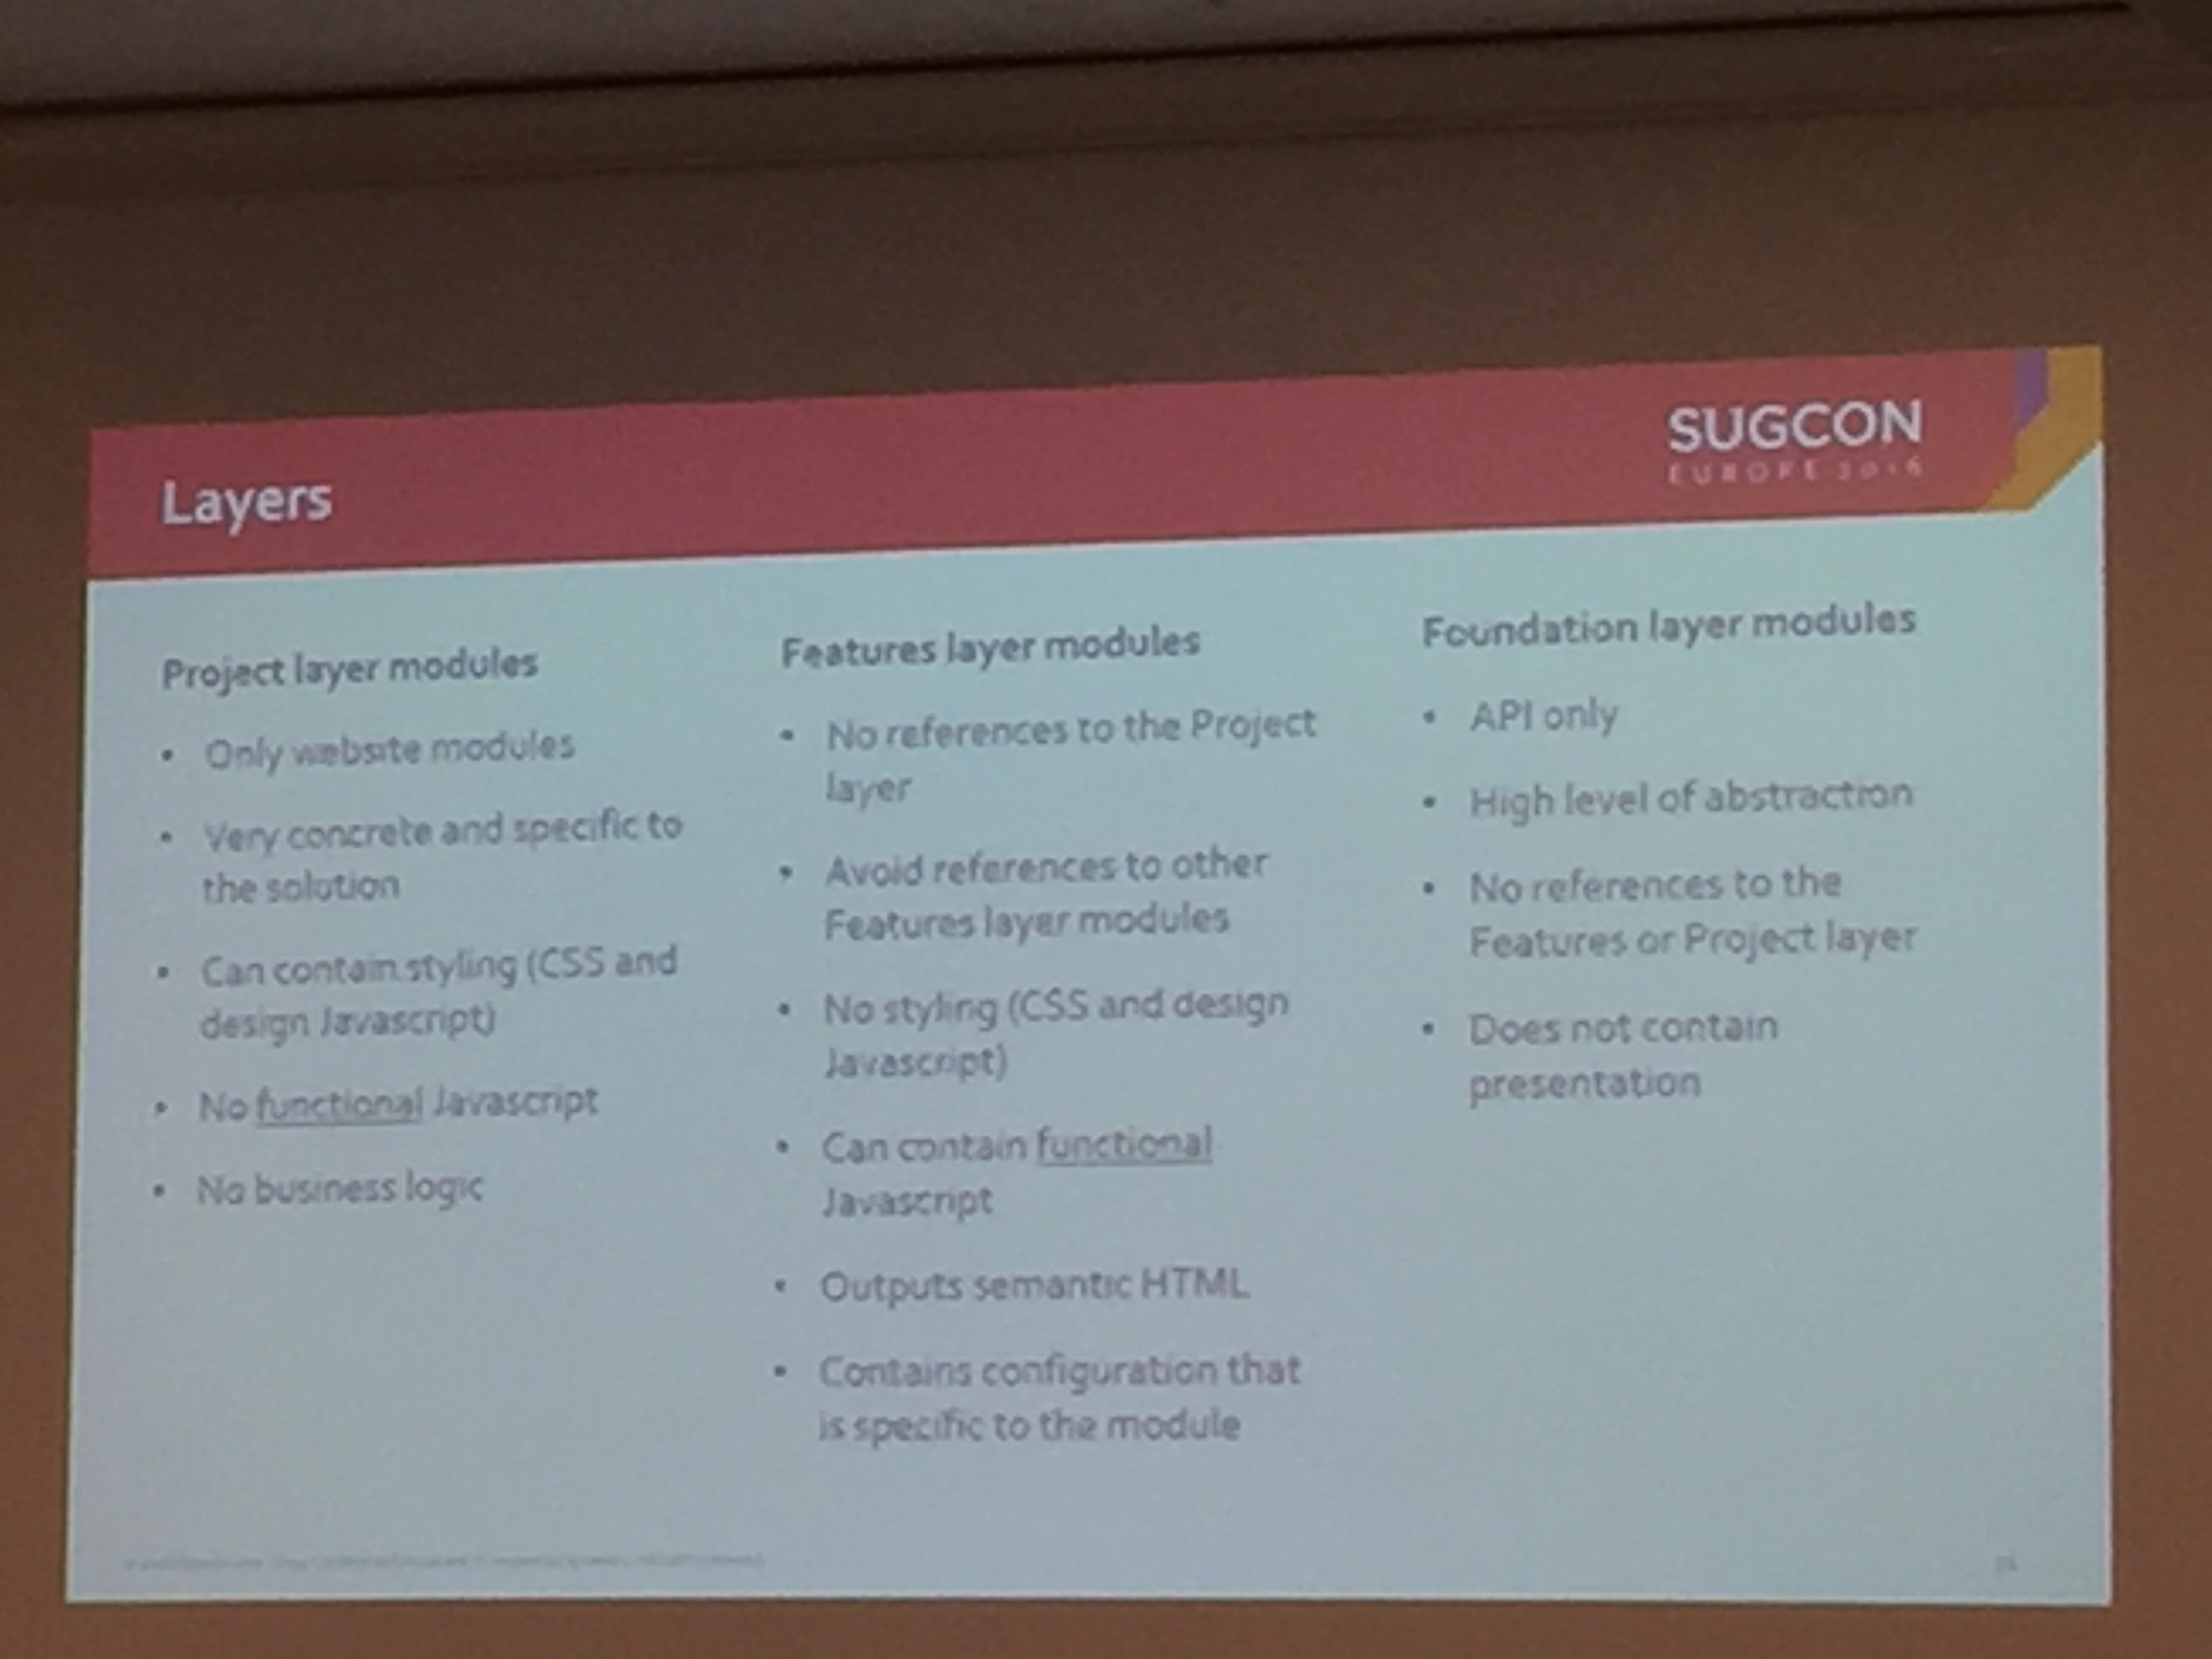
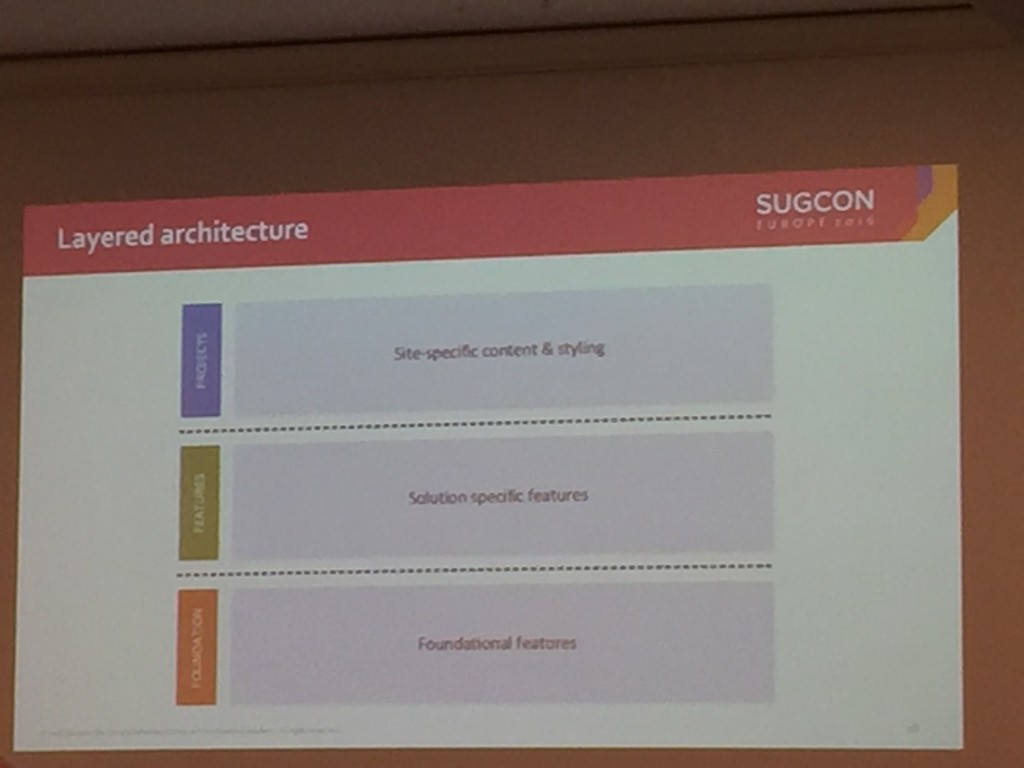
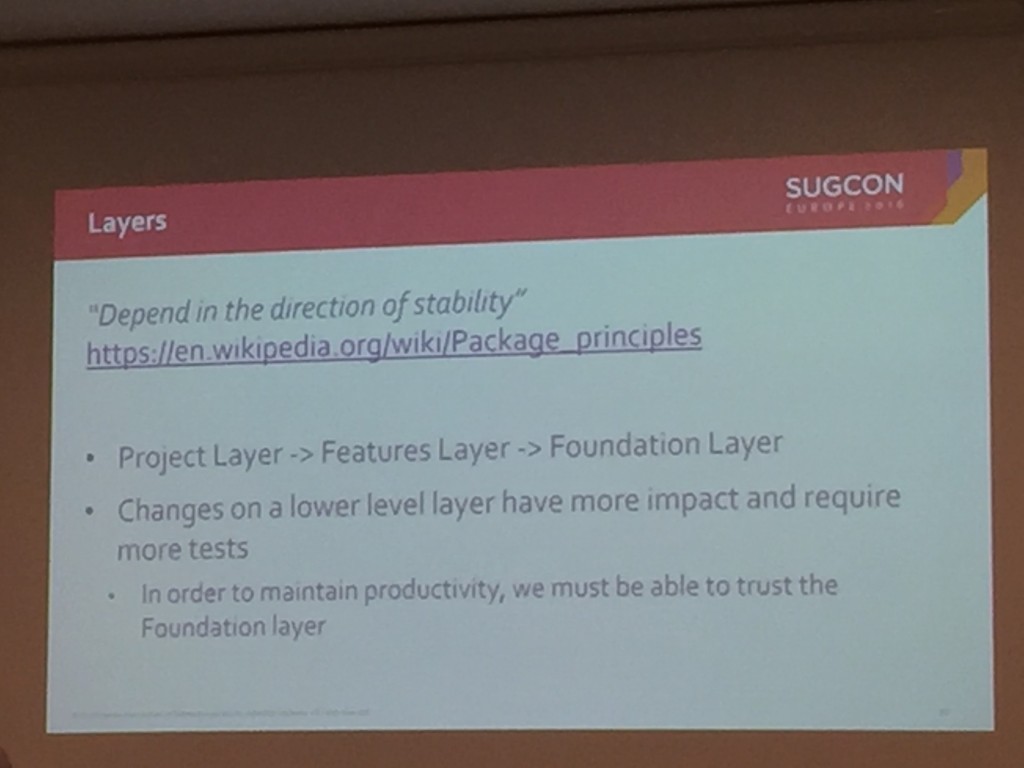
He also explained the the 3 layers of Habitat: Foundation, Features, Projects.
Ruud then discussed examples of elements that might live in these layers and how the dependencies flows downwards.
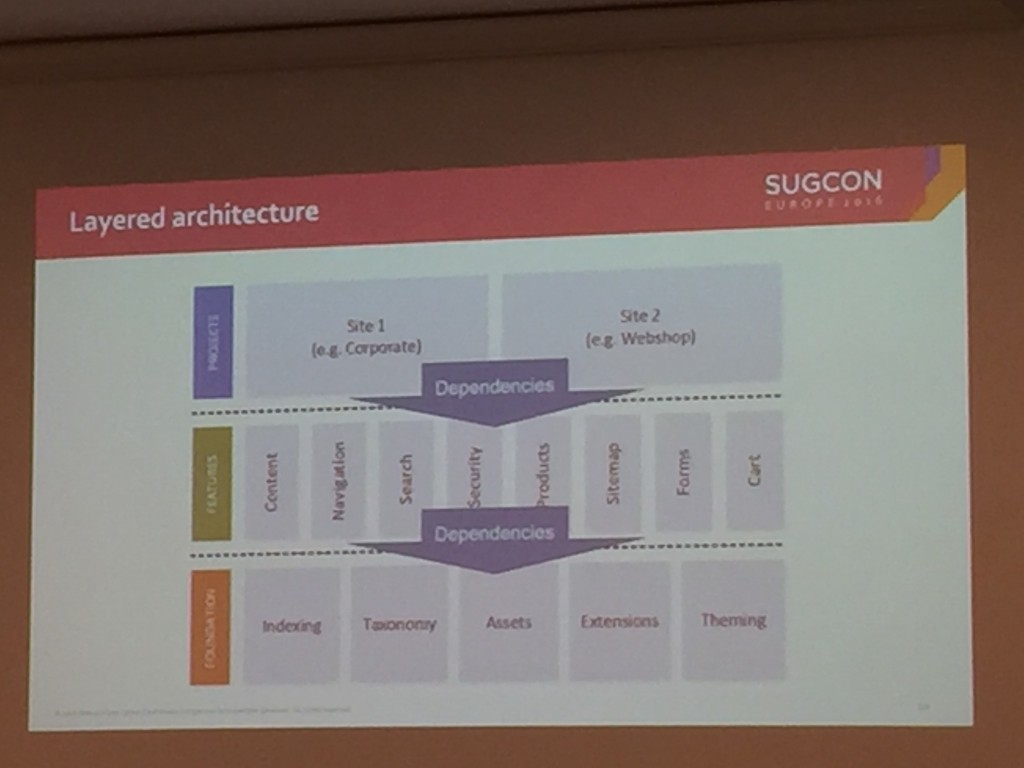
He then showed the technology stack, which are probably familiar tools to most of you. Sitecore 8.2, MVC, Dynamic Placeholders, Unicorn, Bootstrap, JQuery, Sass and Gulp.
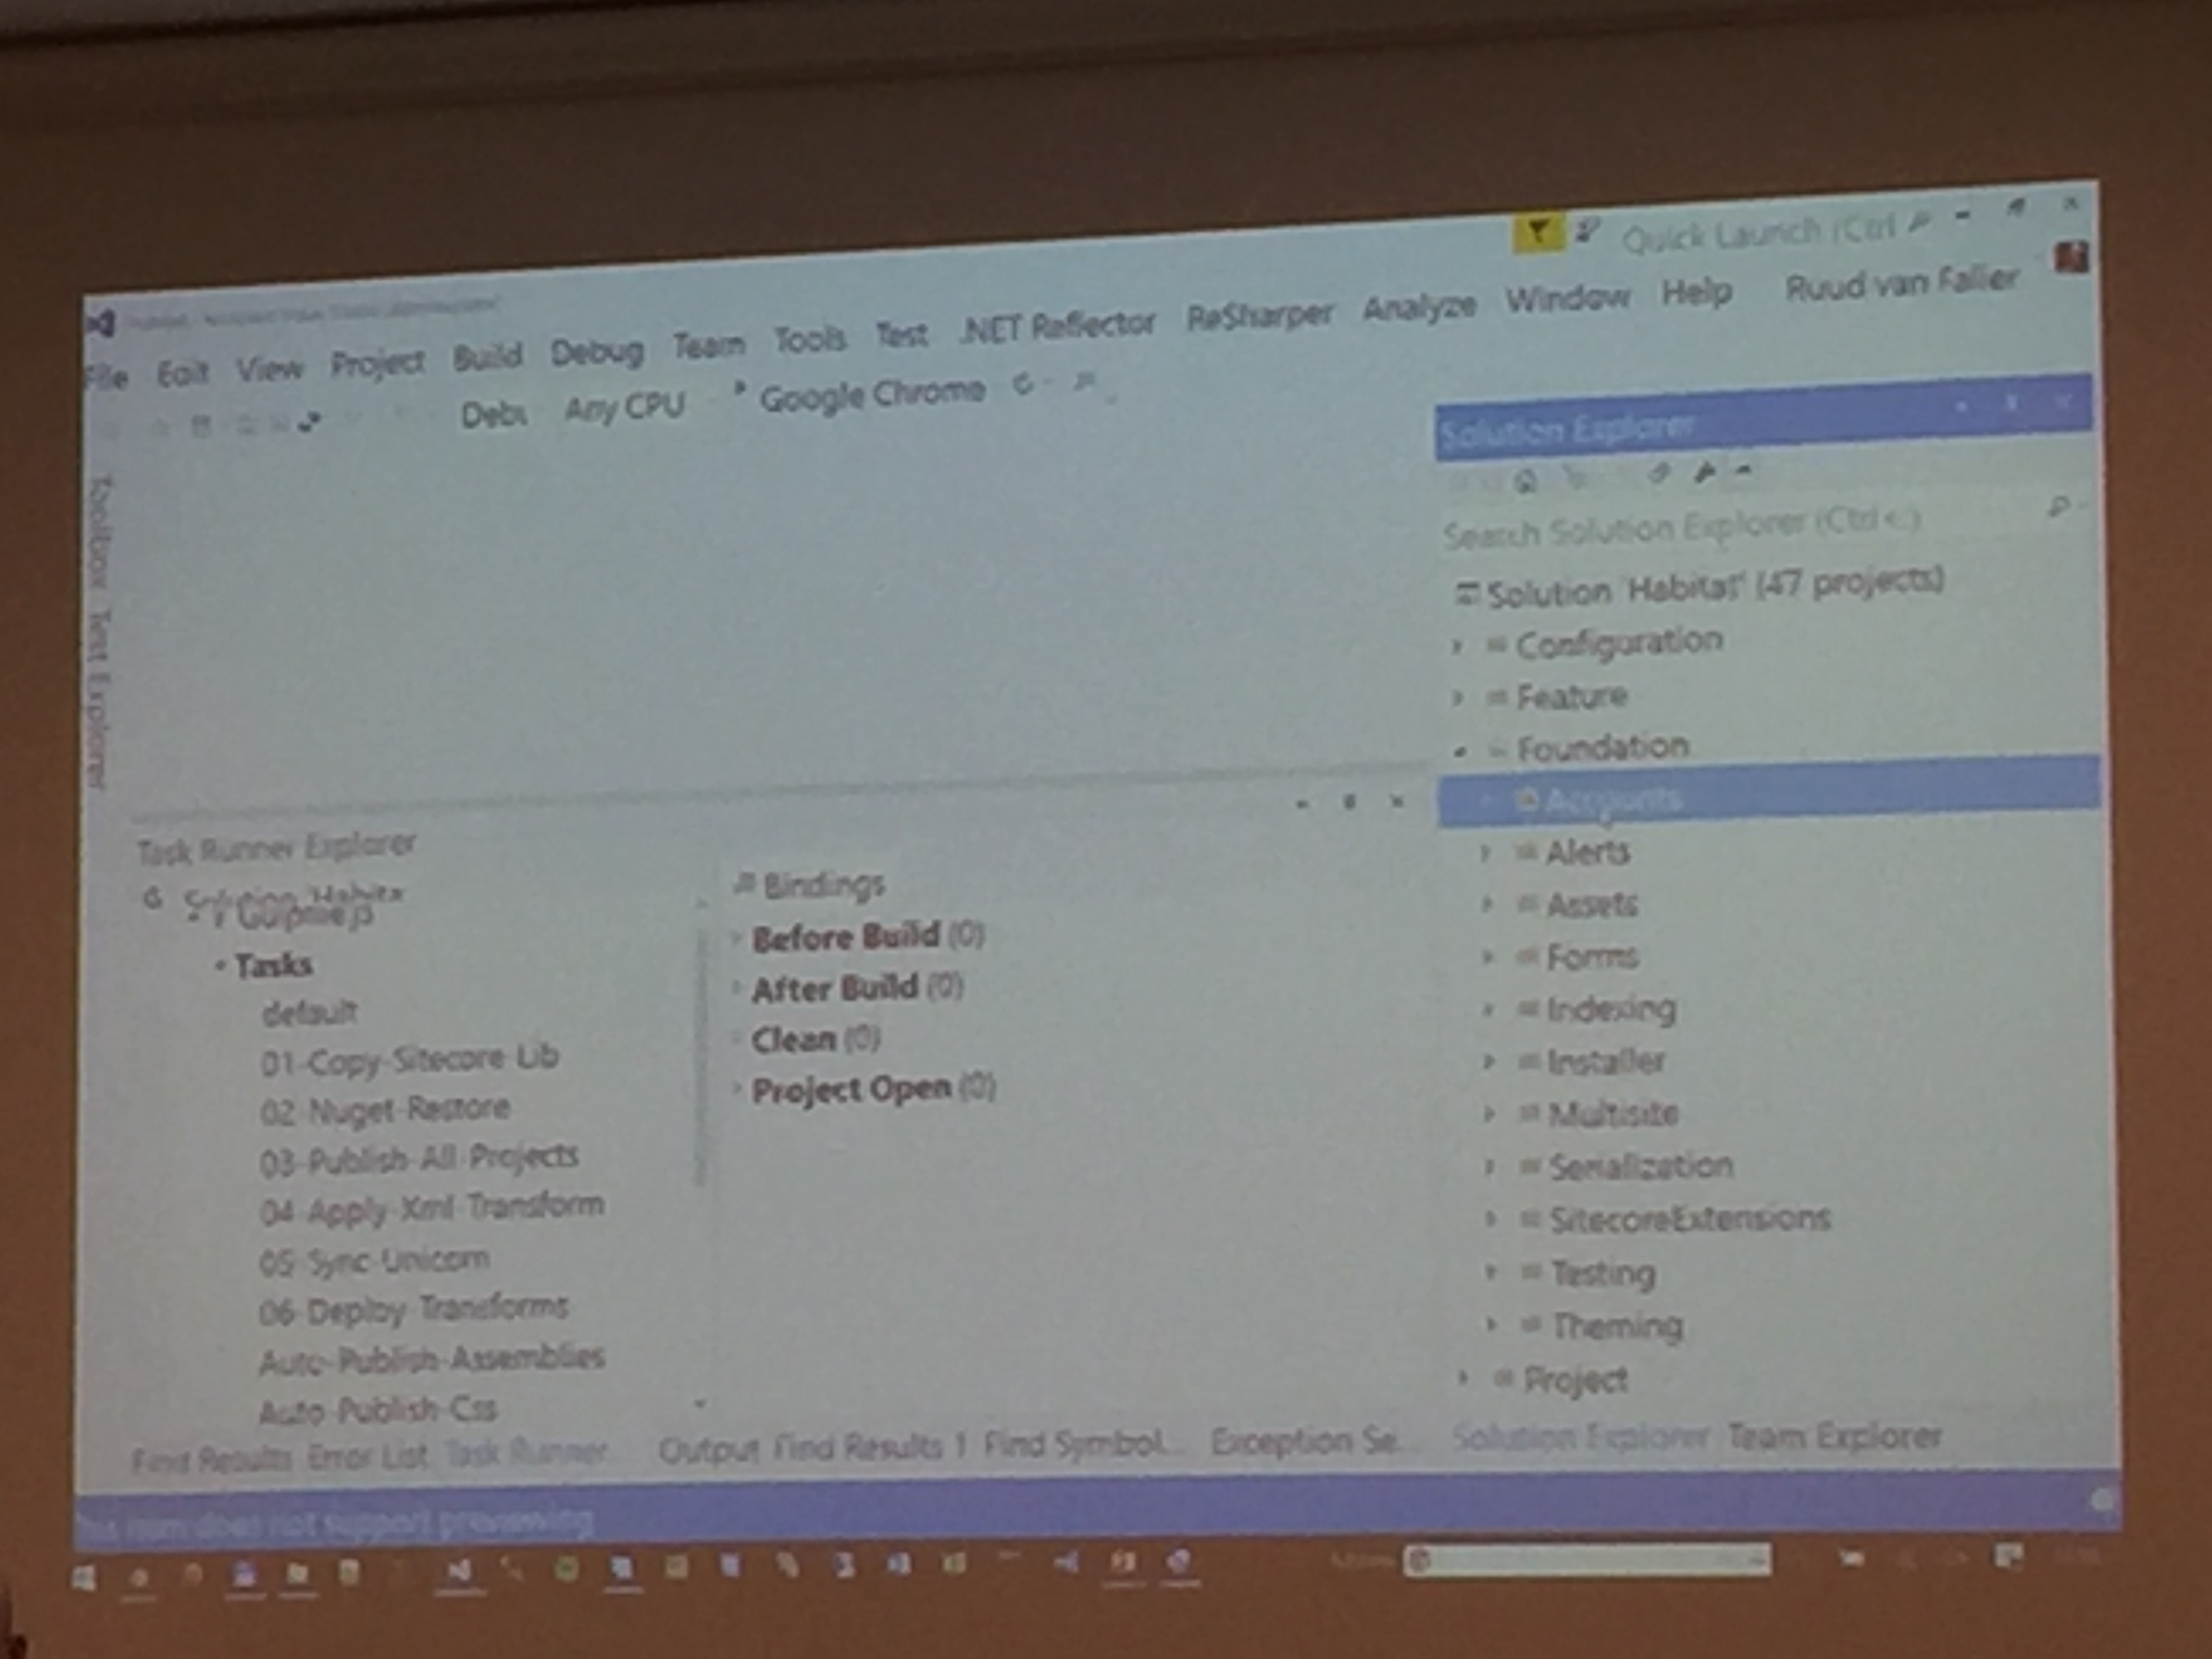
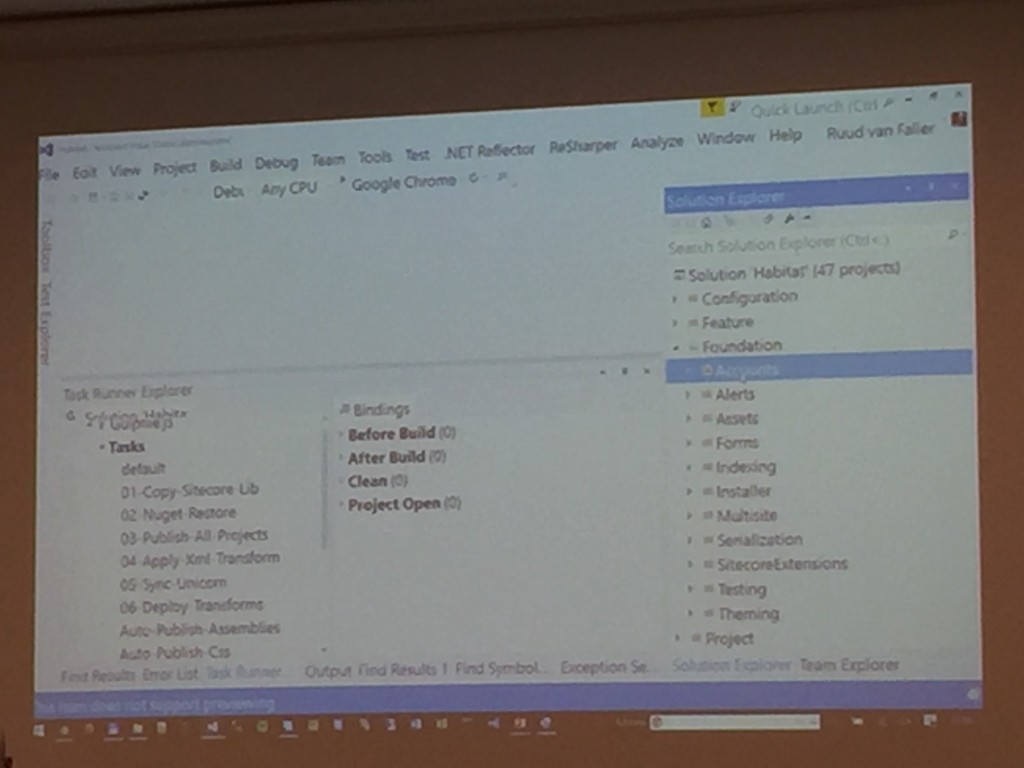
A run-through of the Habitat solution structure then followed and an explanation of the different build tasks used.
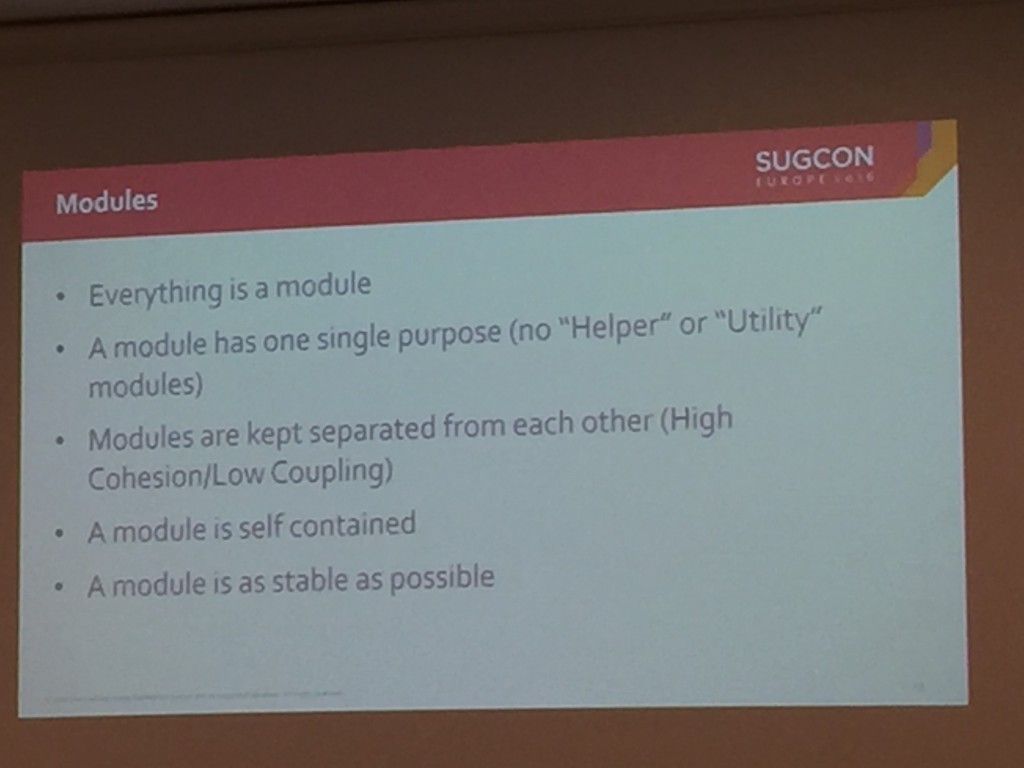
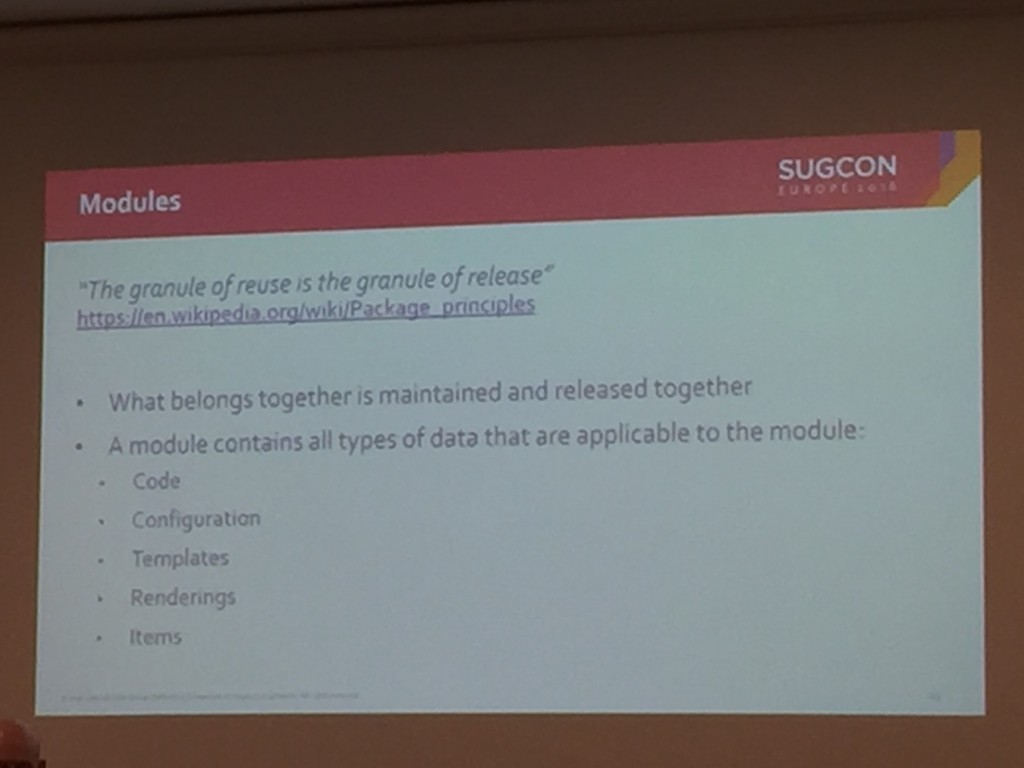
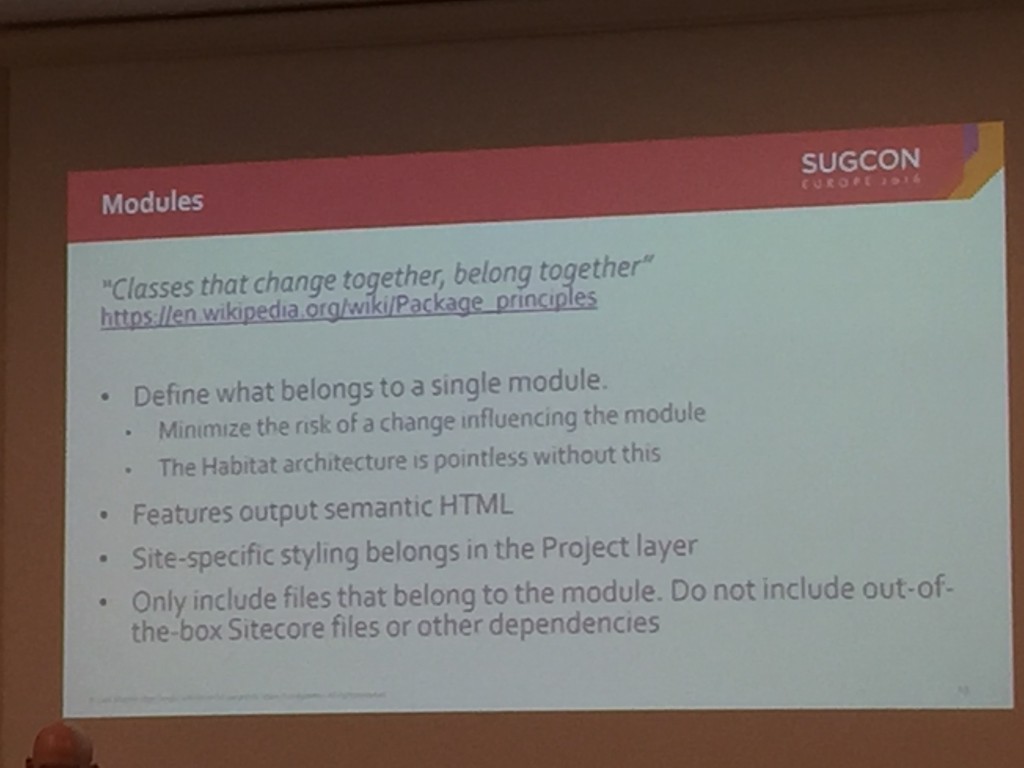
There was then a more in-depth explanation regarding Modules:
And then more detail on layers:


Finally, a pros and cons slide and questions:
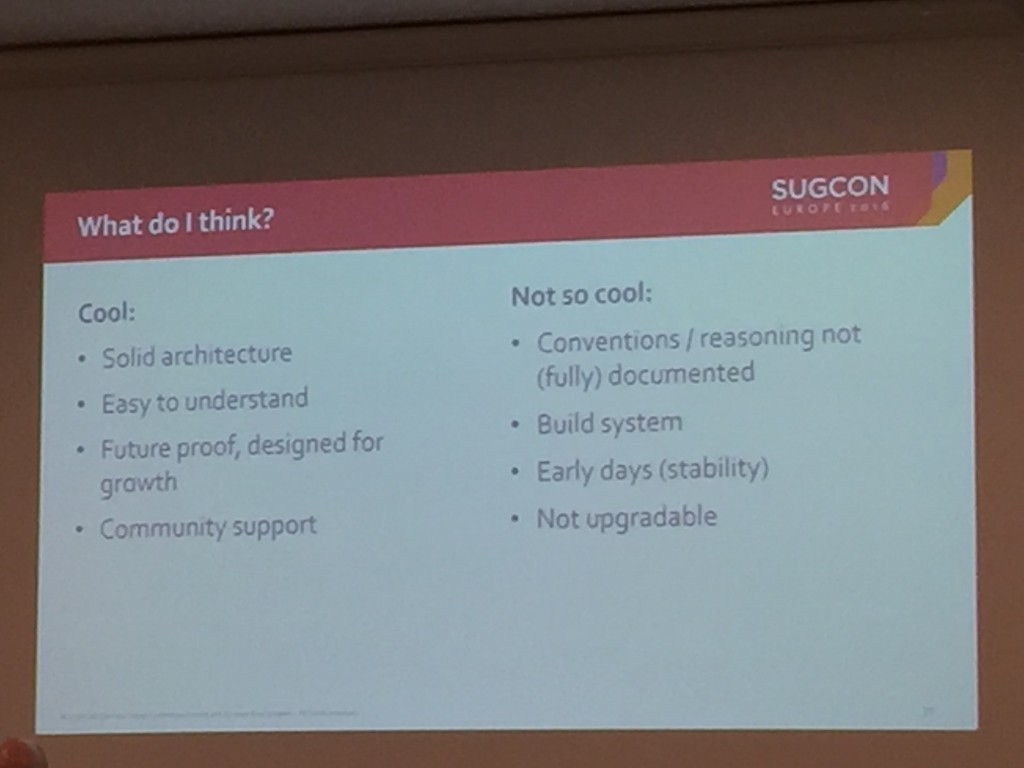
Ruud was honest about the fact that Habitat is in the early stages and is changing every day, he also said it’s not meant to be taken as a ‘Boiler Plate’ for Sitecore solutions – more a guideline. However, I left the session will a lot of things to investigate further and will definitely be taking a closer look at Habitat and how some of It’s concepts can be applied to the projects I am working on.
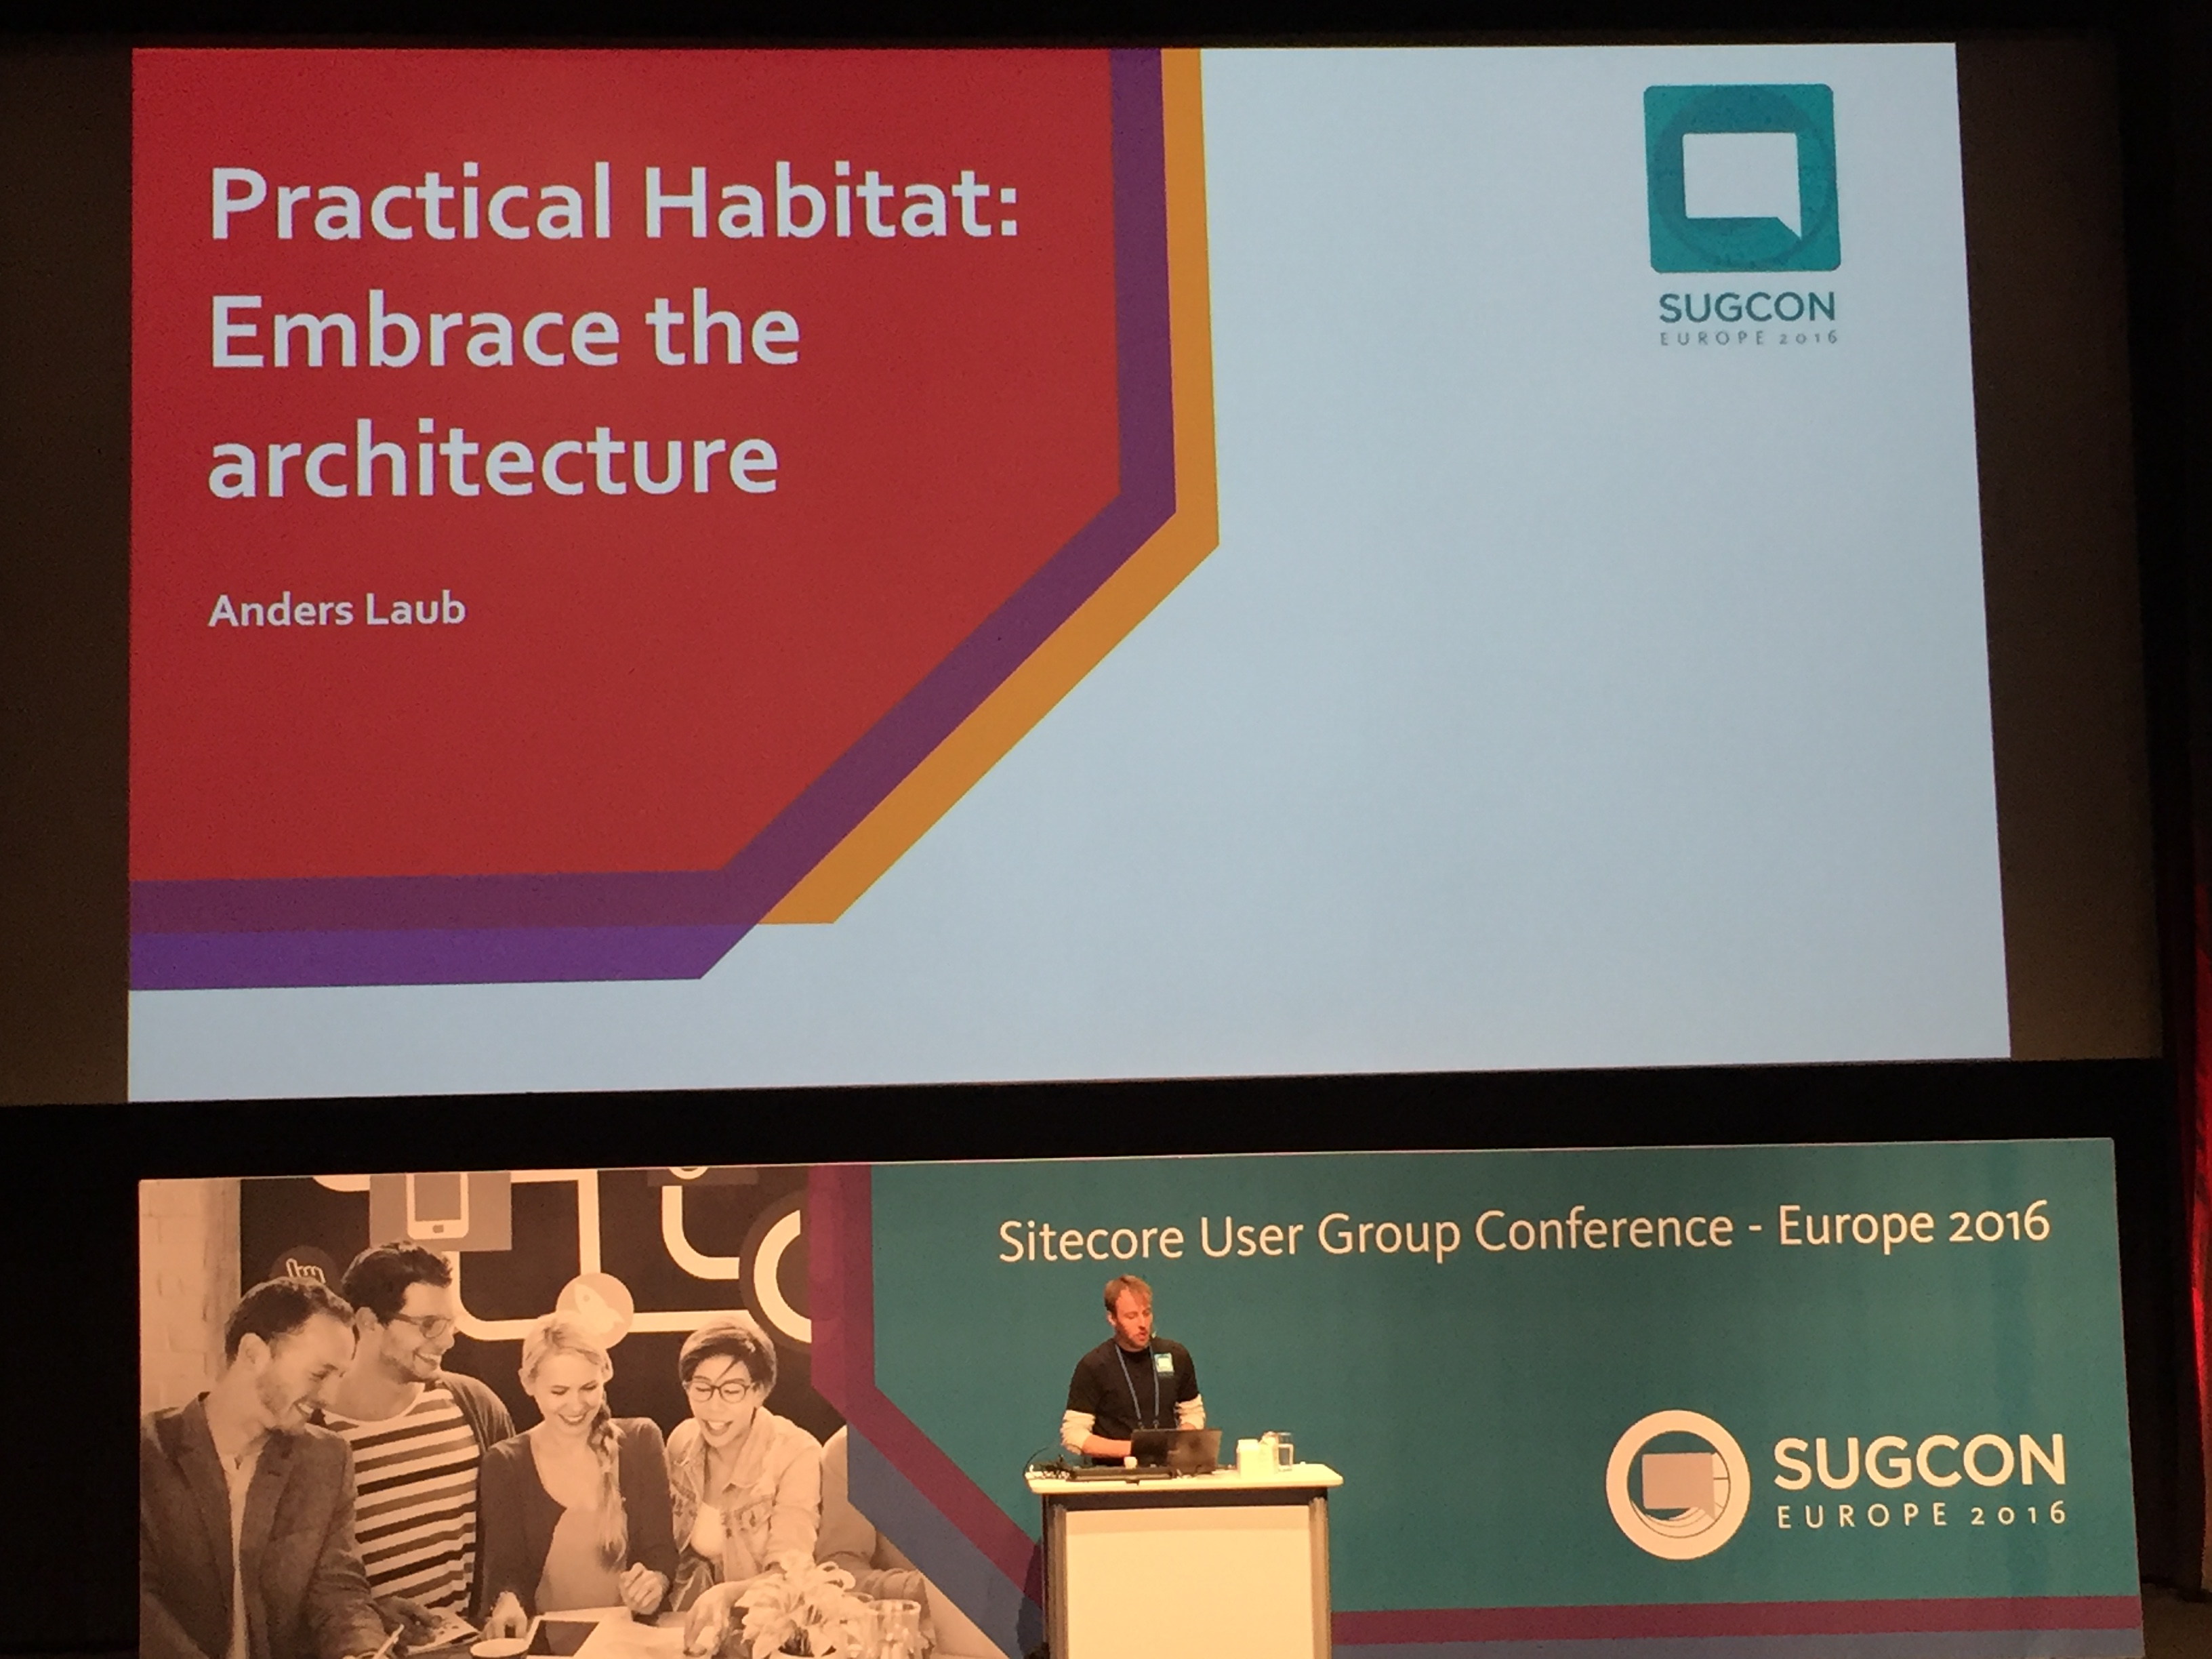
Practical Habitat: Embrace the Architecture
With my appetite now whetted for Habitat I went straight to the next session on embracing the architecture.
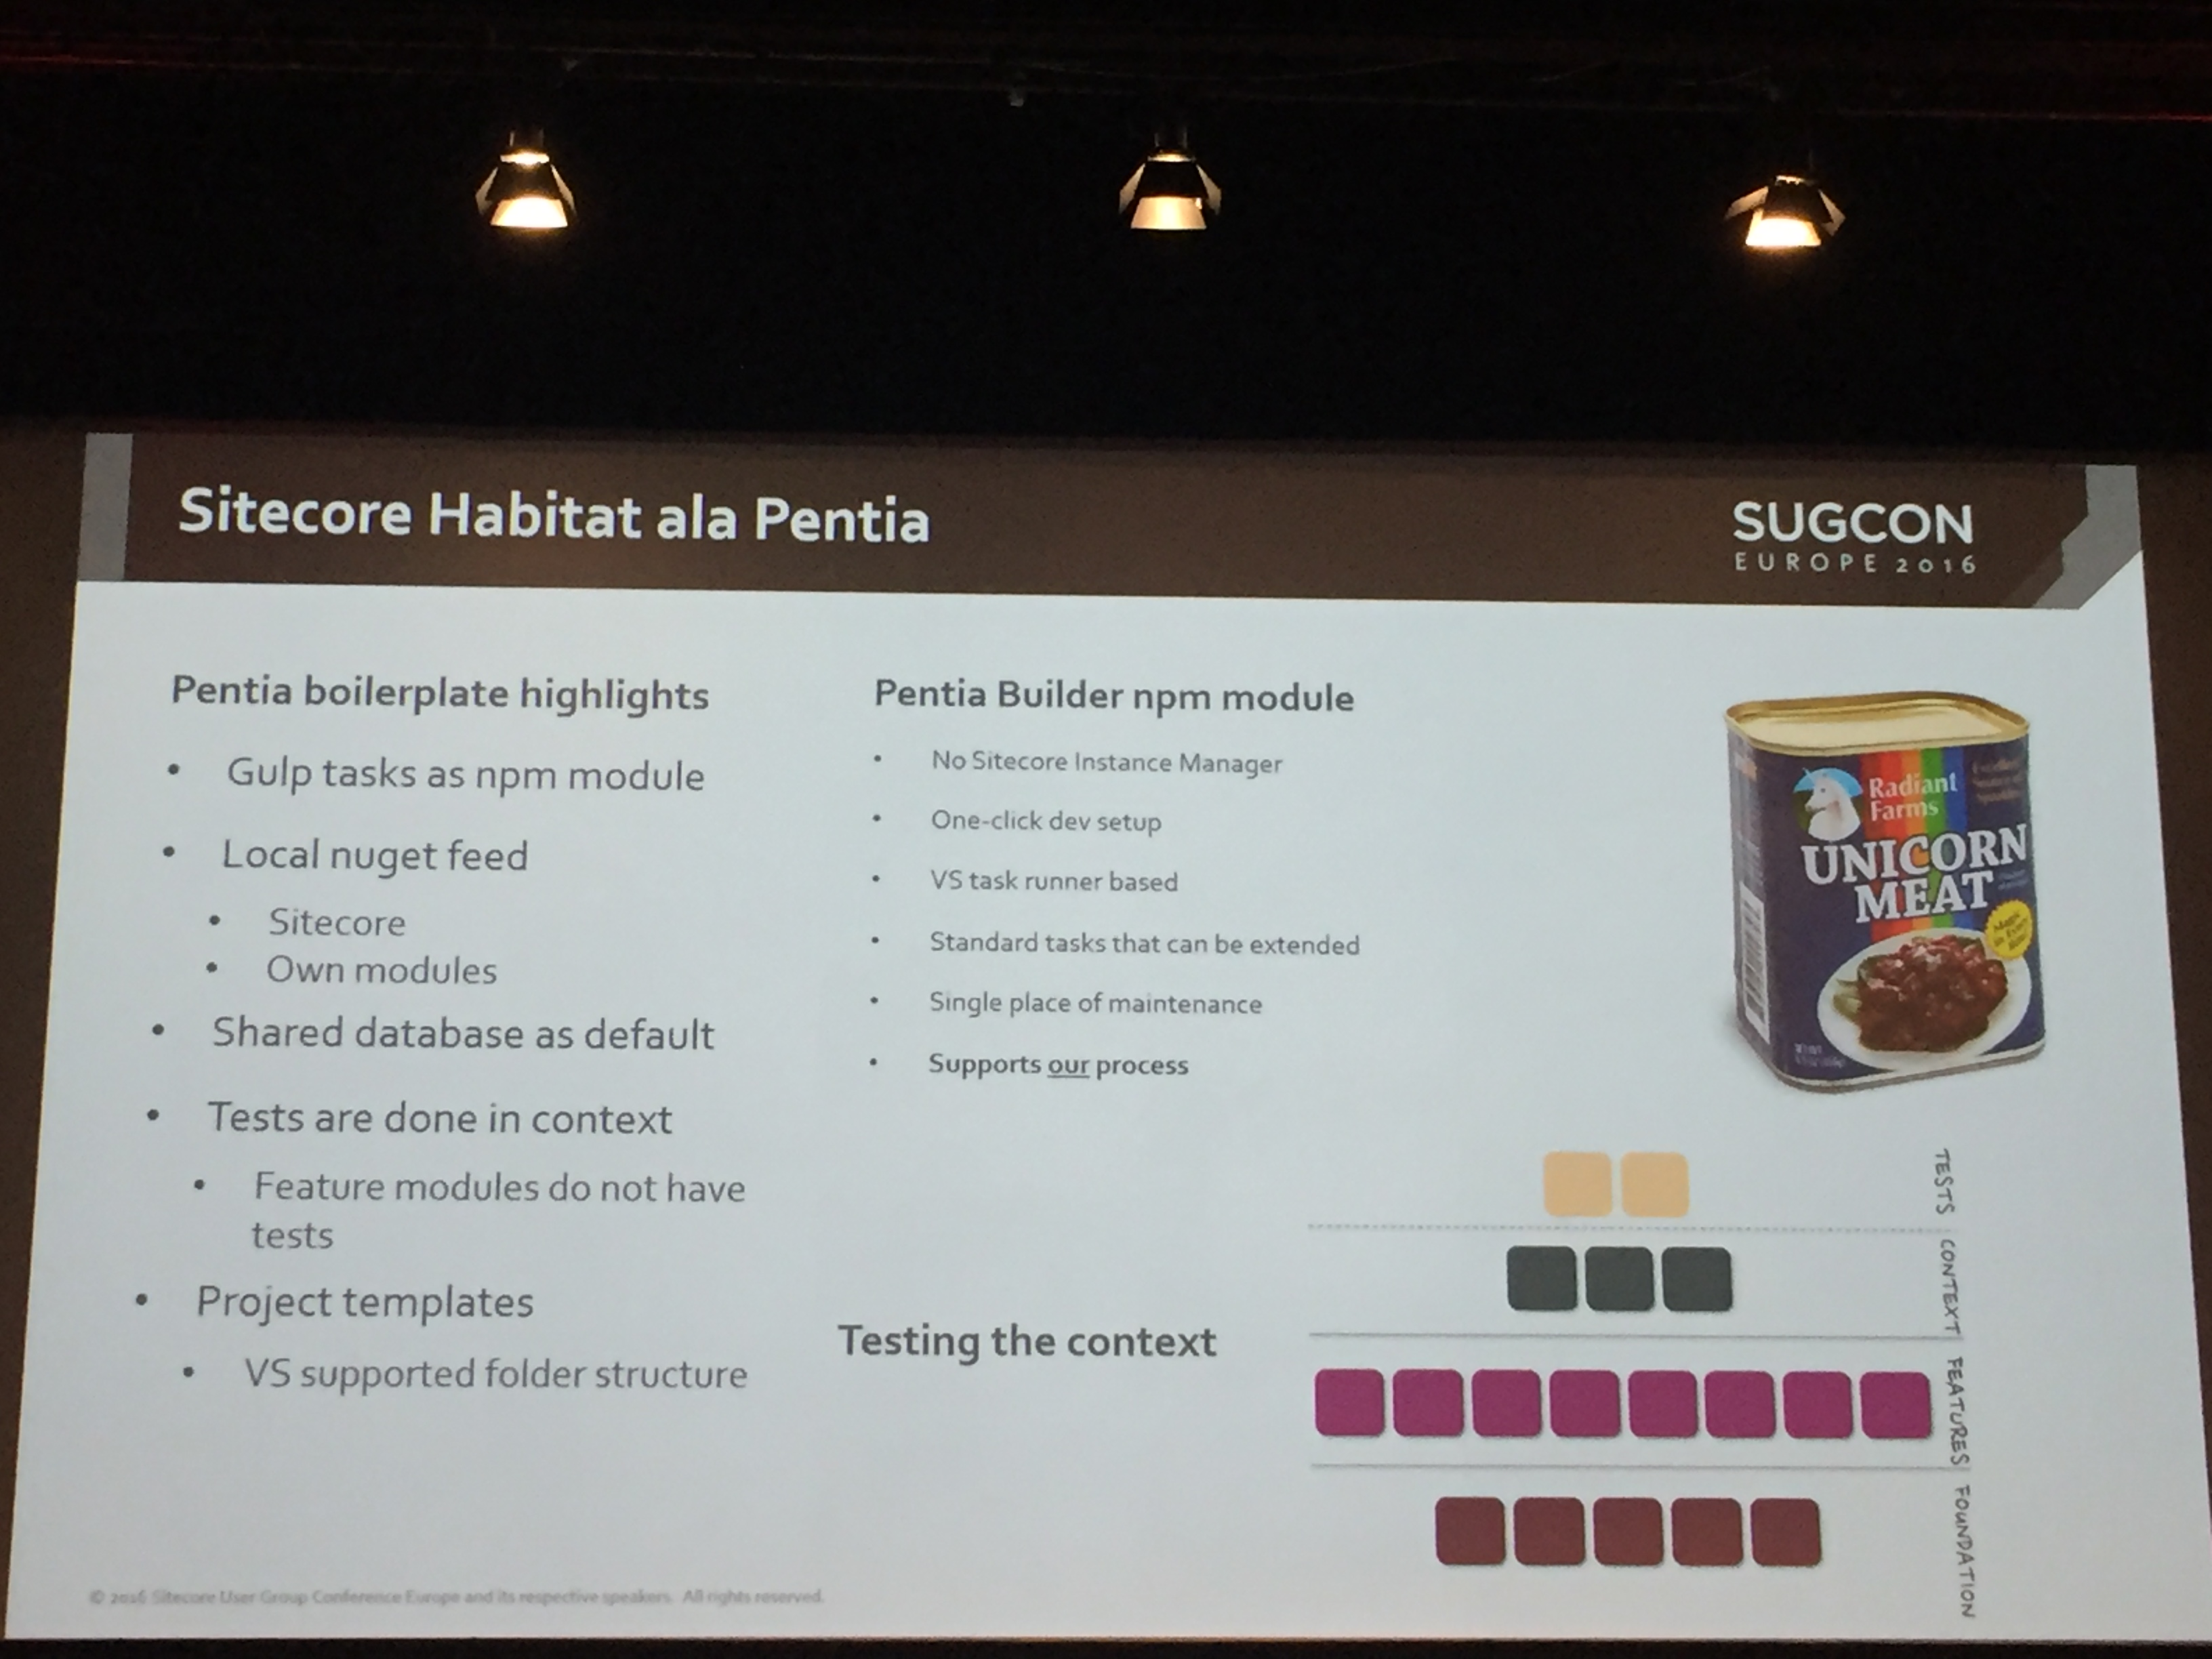
Anders talk started with a general discussion around Architecture and then moved to Habitat and why Pentia use it as an architecture for their solution:

He then dived into a demo of their solution and explained how it differs to the default Habitat setup. I have a video of this somewhere which I’ll try and add here when I get a minute.
He then discussed a few foundation modules they have created and how it really works well for them as an approach.

Anders took some tough questions from the crowd well (such as the number of projects in Habitat – which is many) and I think by the end of the session most of the room will be taking another look at Habitat.
Ladies and gentlemen start your testing.
Testing in Sitecore can be notoriously difficult and for some Sitecore developers this means that unit and integration tests that involve the Sitecore context or items are sometimes skipped. I was interested to see if Alastair had some other ways to implement testing and I wasn’t disappointed :-).

Alastair Deneys ran us through 4 ways in which to Unit test with Sitecore. The first was an interesting one and was to essentially install Sitecore in your application and then run the tests from an asp.net web page test runner.
The 2nd and 3rd were to add a minimal or full Sitecore config files and the Sitecore dlls you need to your nunit test project and run It. This worked pretty well but as Alastair said, isn’t proper unit testing as it’s using real data.
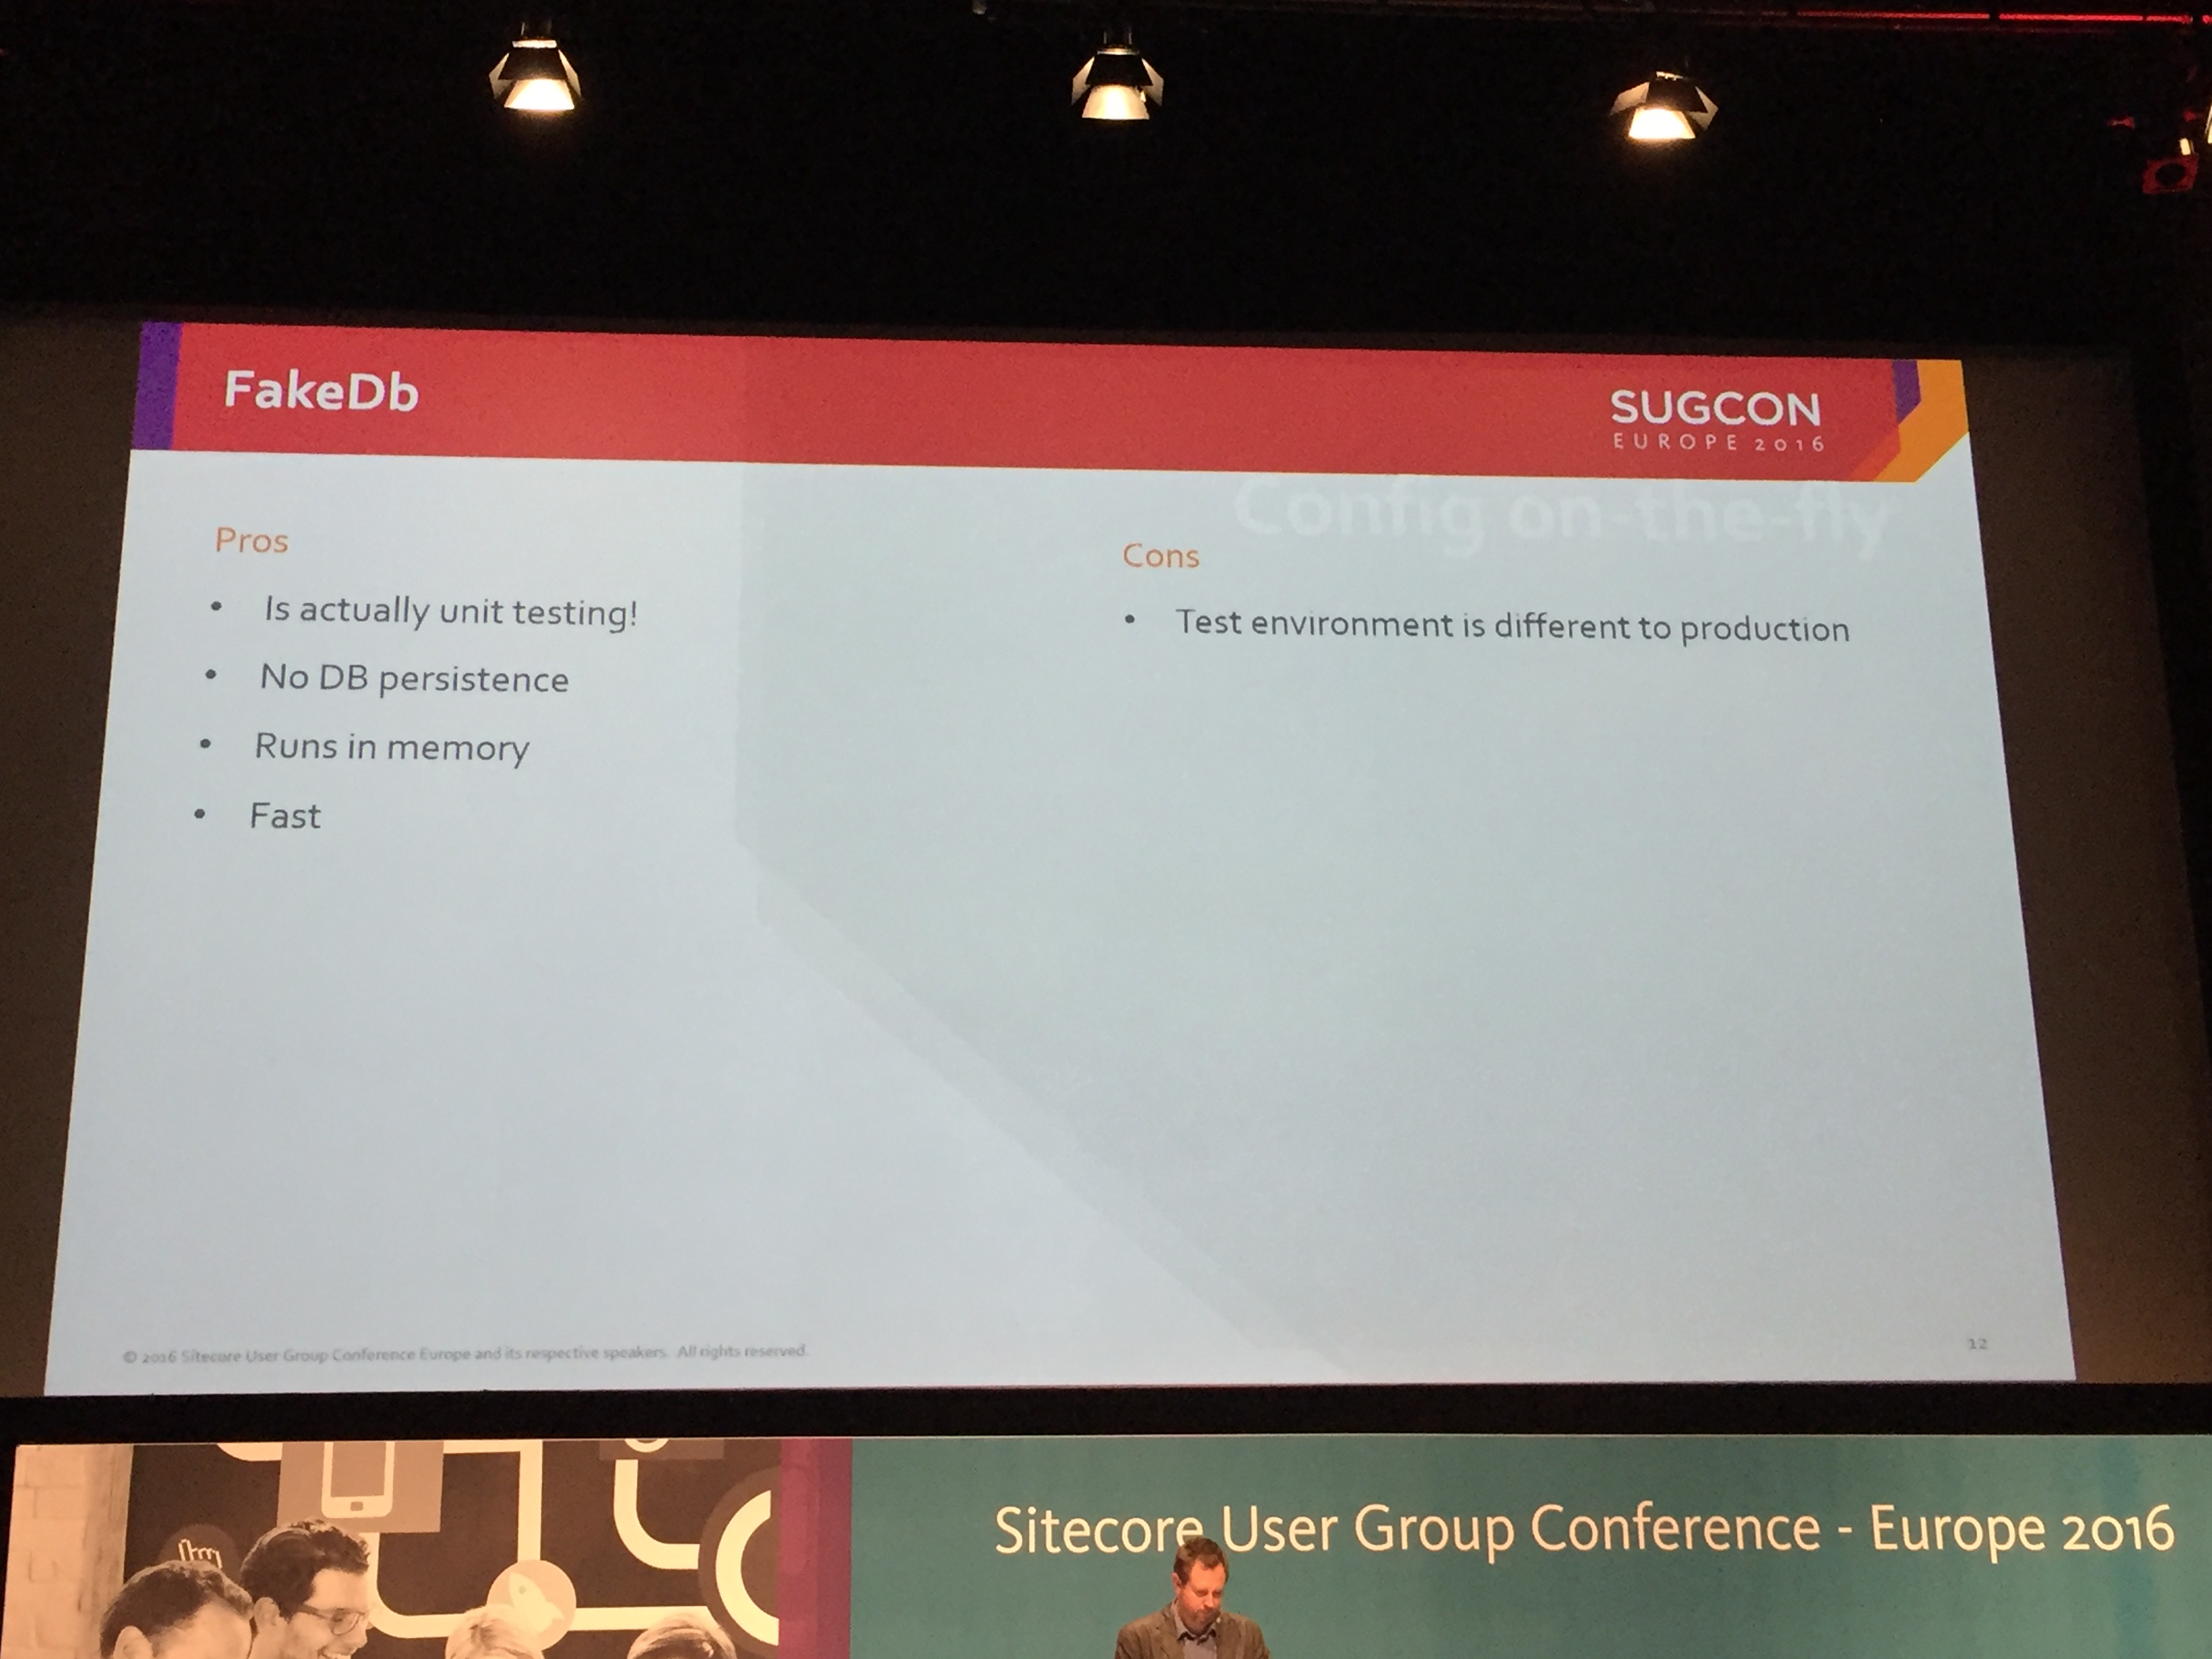
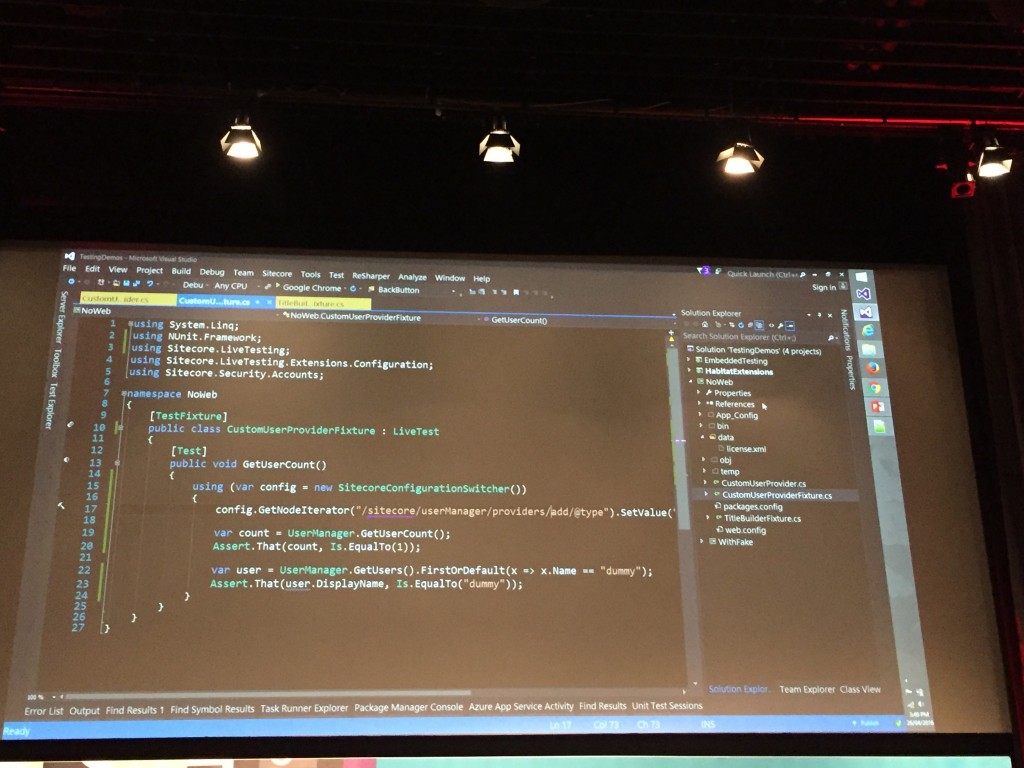
The 4th was to use FakeDb to mock the Sitecore items you need to run your tests. I’d heard about FakeDb before but not used it so it was nice to see an example of how this is done.

Alastair also showed us how Sitecore.LiveTesting can be used to spin up an instance of Sitecore in a container in the background to test against.
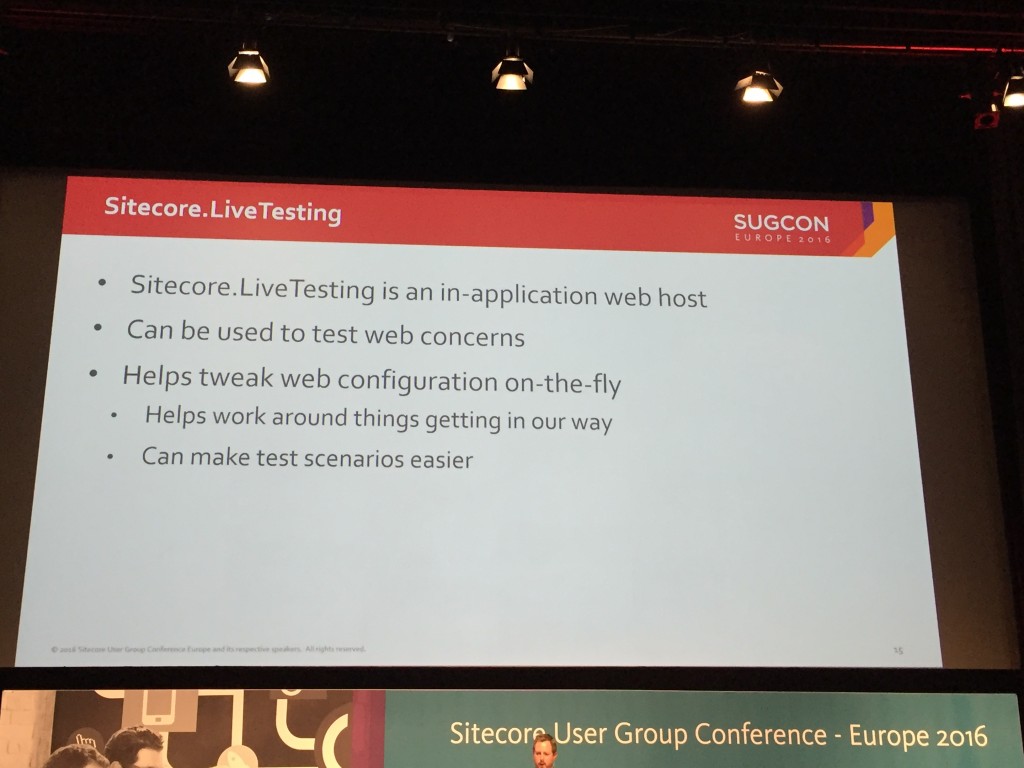
It was a bit slow but seemed really cool and definitely something I’m going to experiment with.
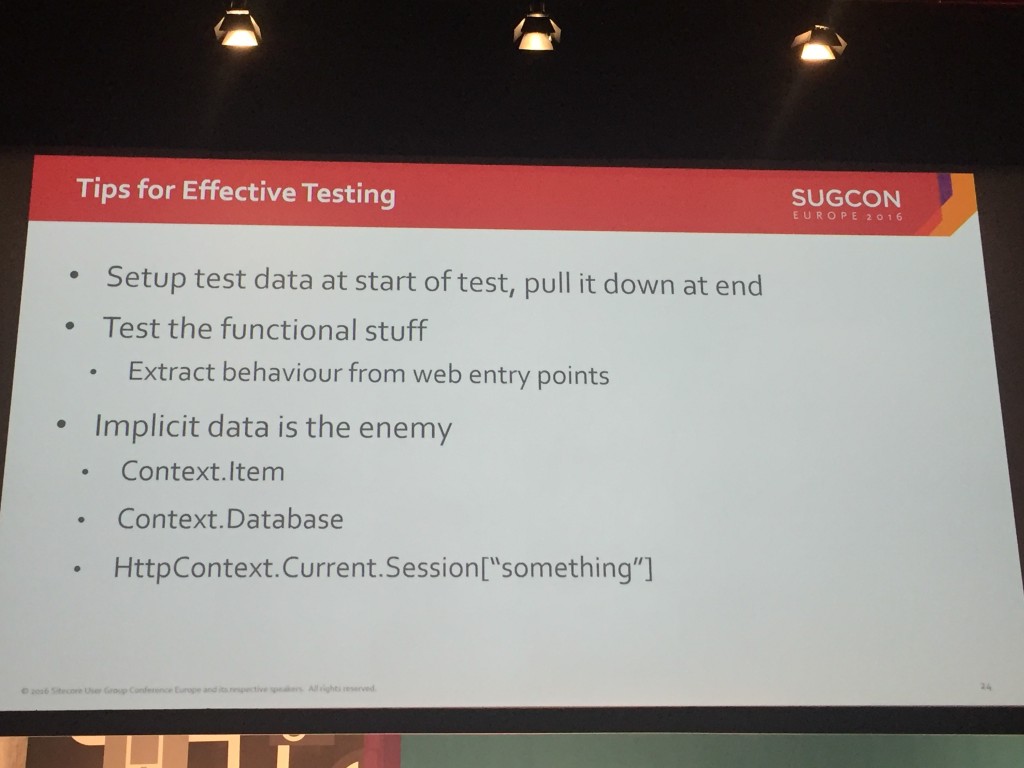
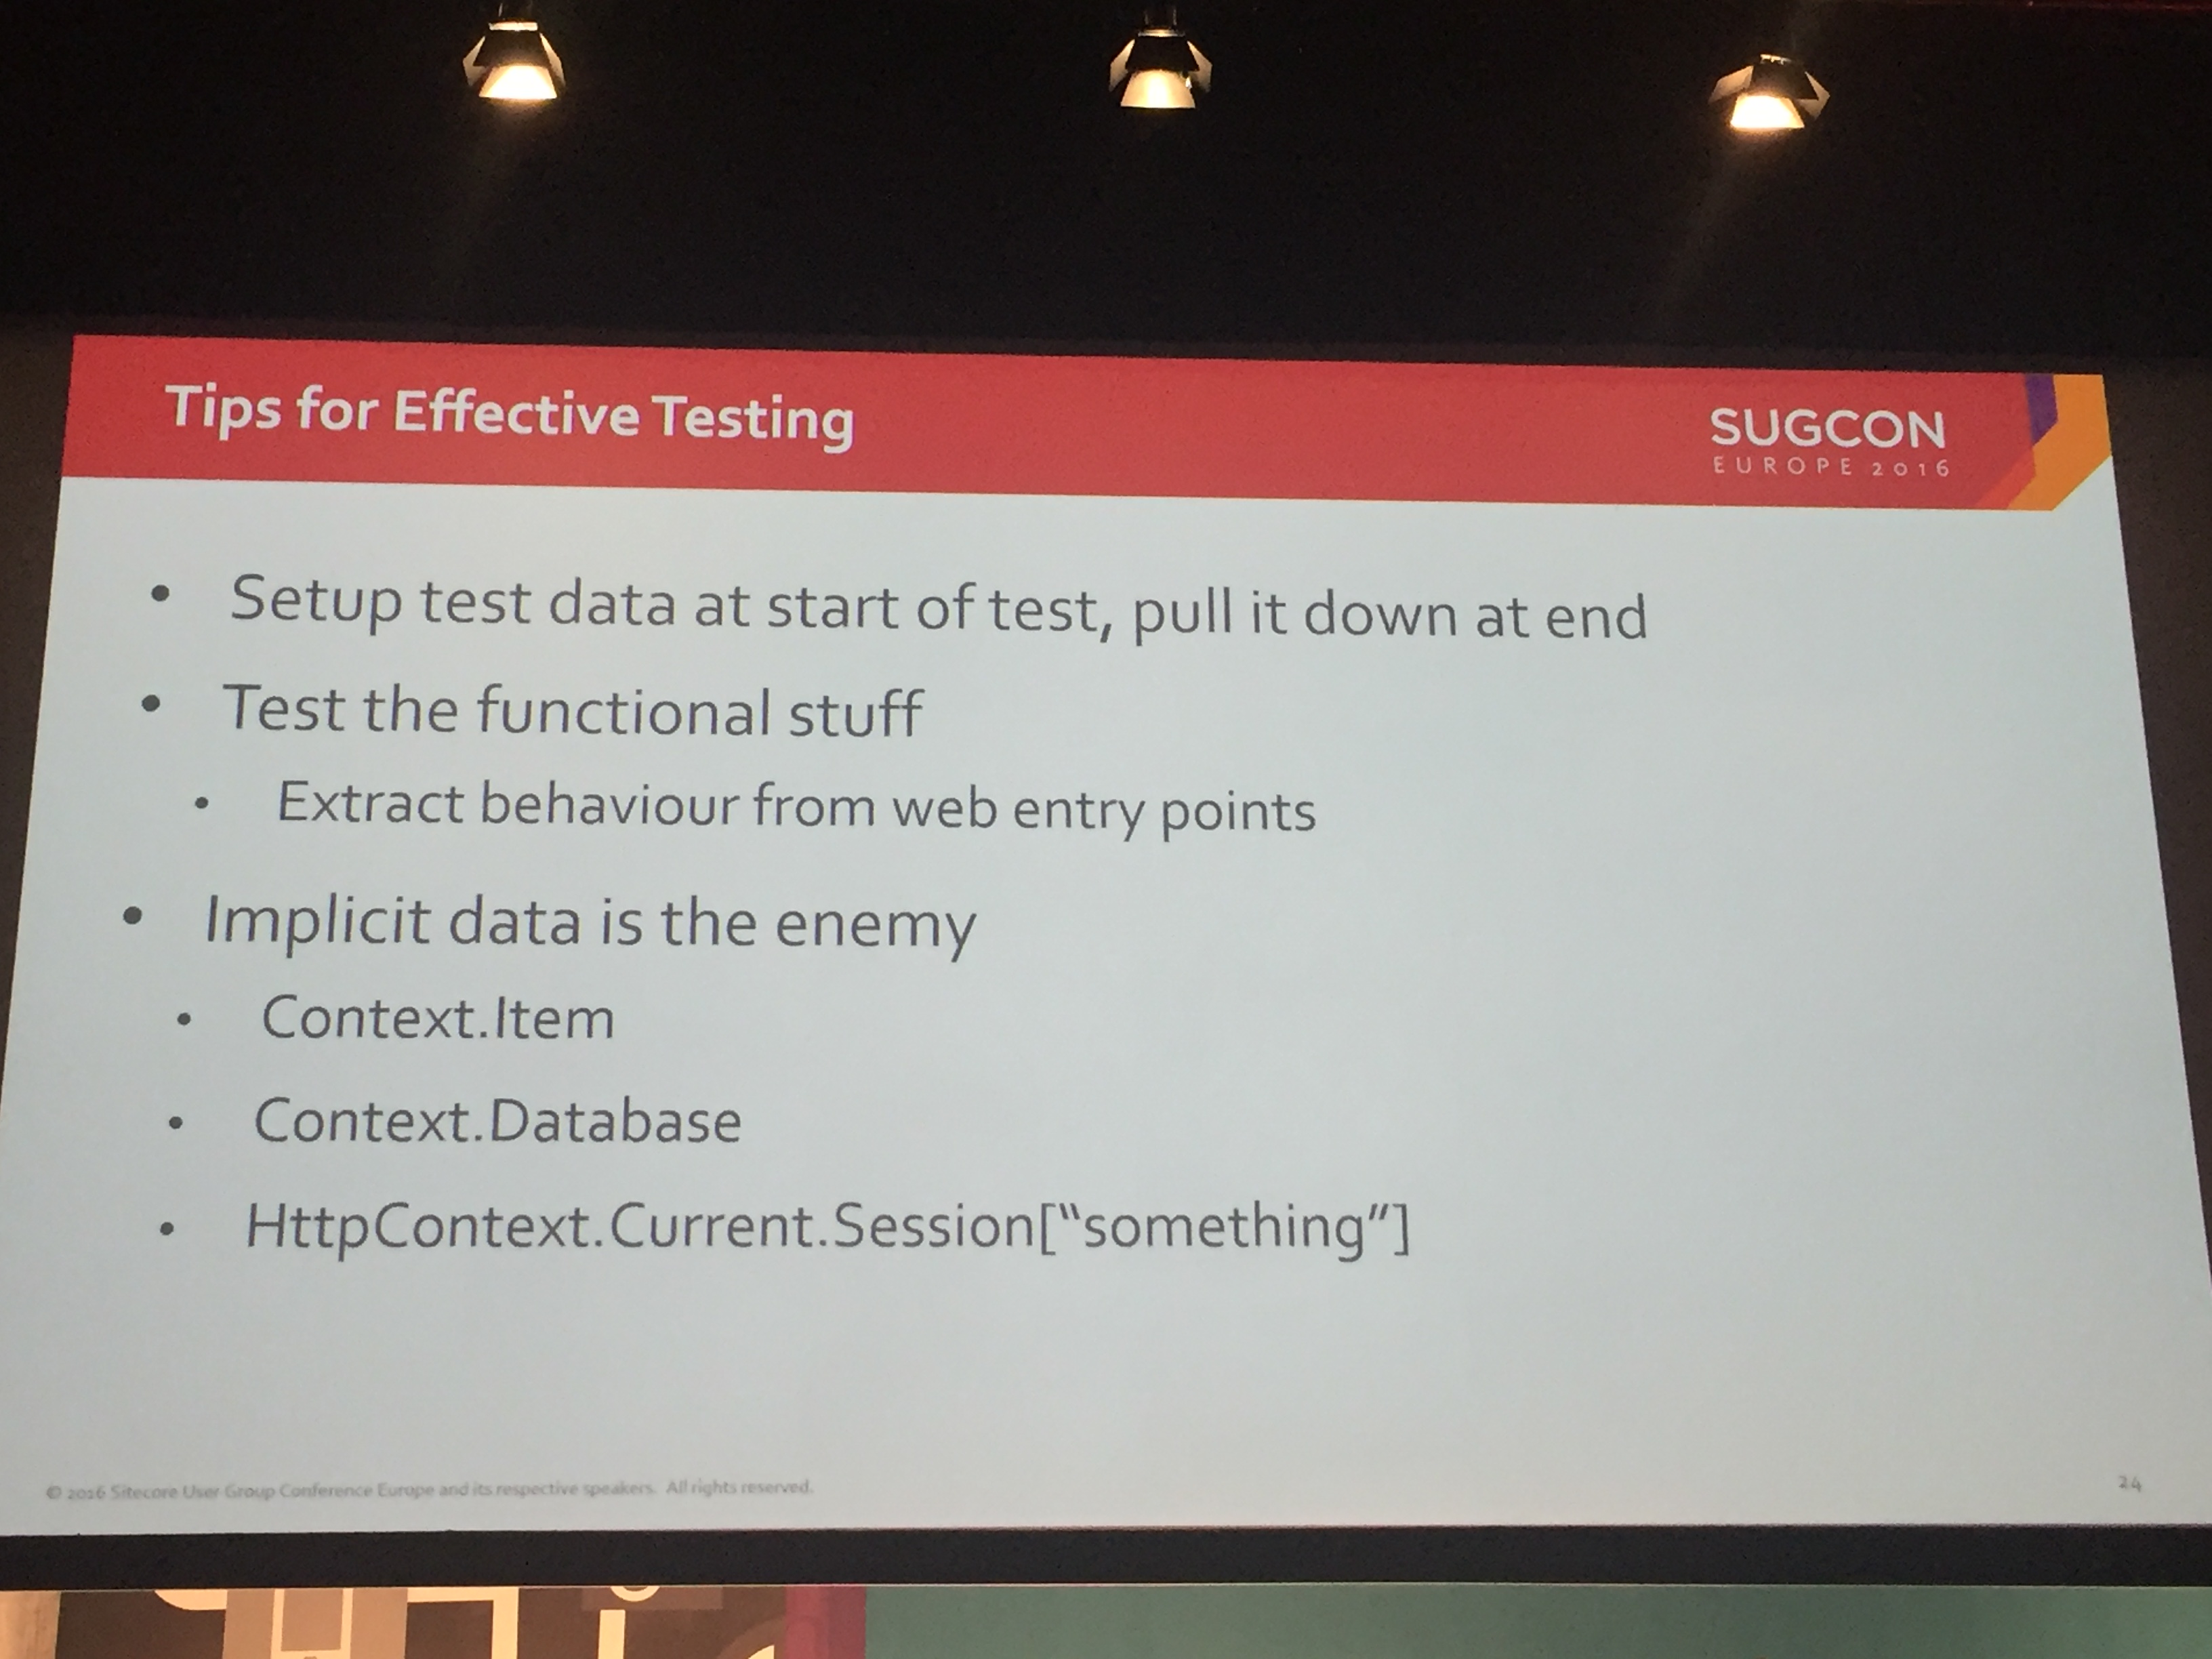
The key message here was, whatever you do make sure you create tests and don’t get hung up on if they are real unit tests or actually integration tests.
Sadly it was now time to head to get our flight home so I missed out on the last talk of the day by Martina Welander on refactoring doc.sitecore.net, hopefully I can find it on Google Hangout.
SUGCON was a great experience and It has given me a whole lot of ideas and things to look into for current and future Sitecore projects. Thanks to the Sitecore Community and the sponsors for putting on the event.
My only regret is not having chance to chat to any of the MVPs who have been so helpful on Slack and on their blogs, but I’ll definitely be back next year so I’ll buy you a beer or two then instead.
Till next time.


 This week I needed to change a number of navigation items from an old navigation item data template to a new one. I didn’t want to have to do this by hand as I have quite a few items to update, so I decided that Sitecore Powershell Extensions (