My Sitecore SUGCON 2023 Takeaways – Day 2

> DAY ONE - If you haven't read about Day One you can read it here.

SUGCON DAY 2

IMG_0478

The 2nd Day of SUGCON started bright an early so after a quick breakfast and cup of tea at the hotel I headed down to the first session I’d planned to see.

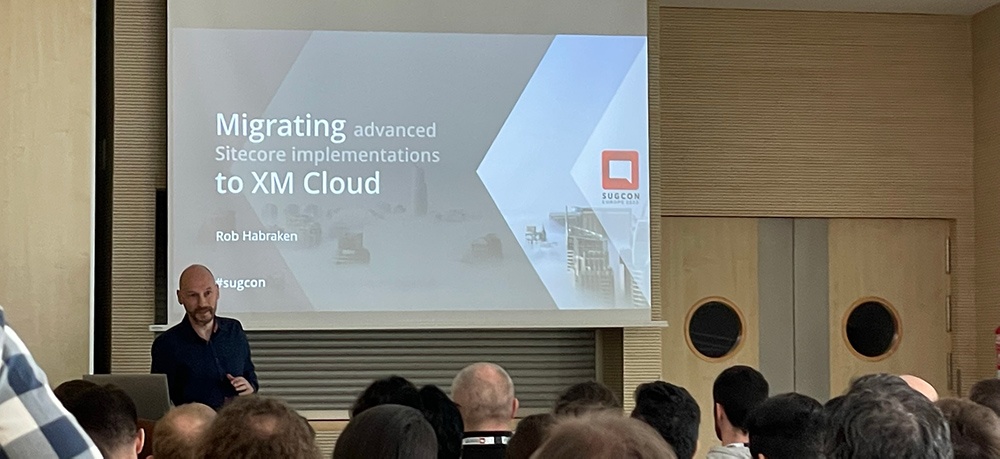
Rob’s session is one of the key sessions I really didn’t want to miss this year. A few clients I’ve spoken to recently (and other Sitecore Dev’s I’ve chatted to at SUGCON so far) are facing this challenge:

‘How do we move to XM Cloud from XP and what do we need to consider?’

– so I was keen to learn from Rob’s experiences.

Migrating advanced Sitecore implementations to XM Cloud – Rob Habraken

rob-xm-cloud-banner

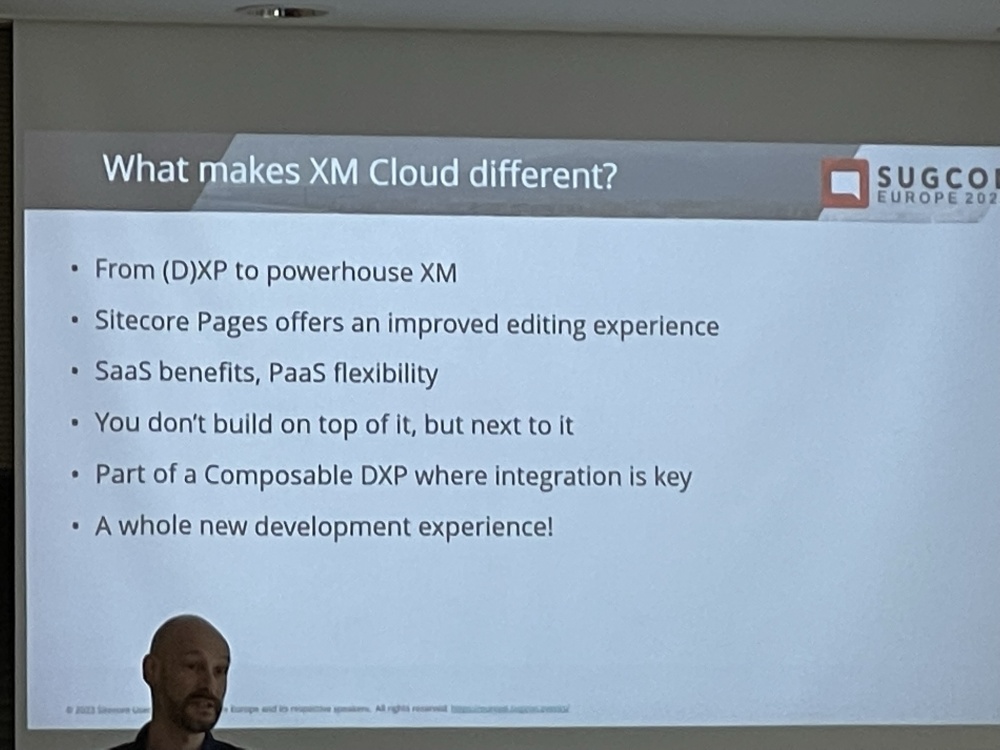
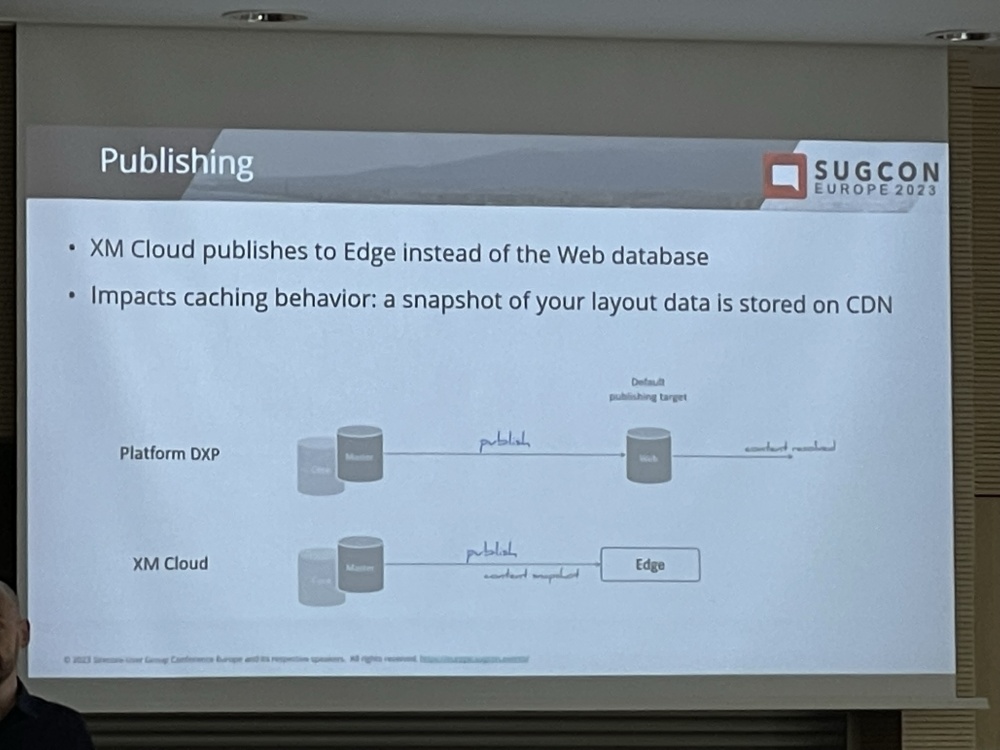
Rob started with telling us the differences with XM Cloud and explaining how publishing works differently (given you publish to the Edge):

IMG_0638
IMG_0640

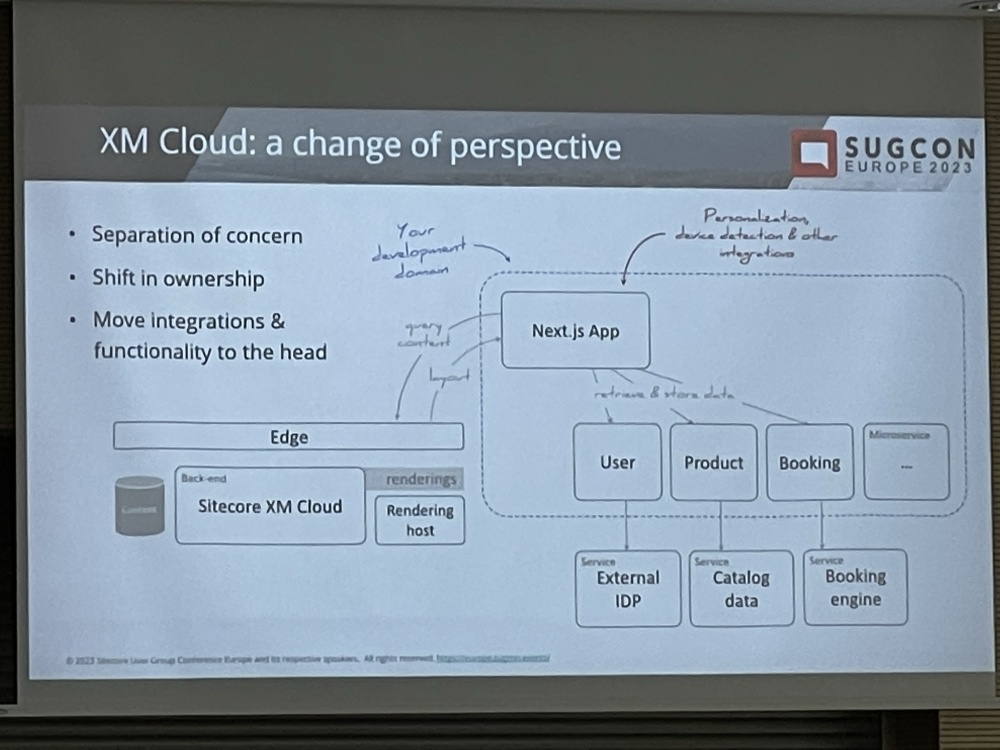
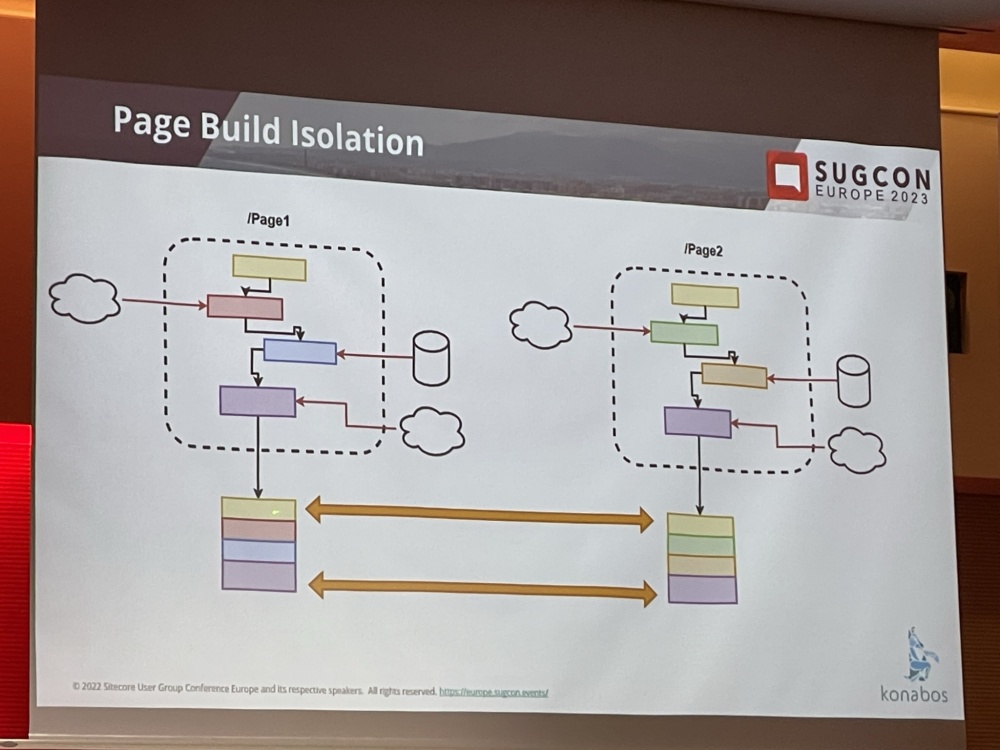
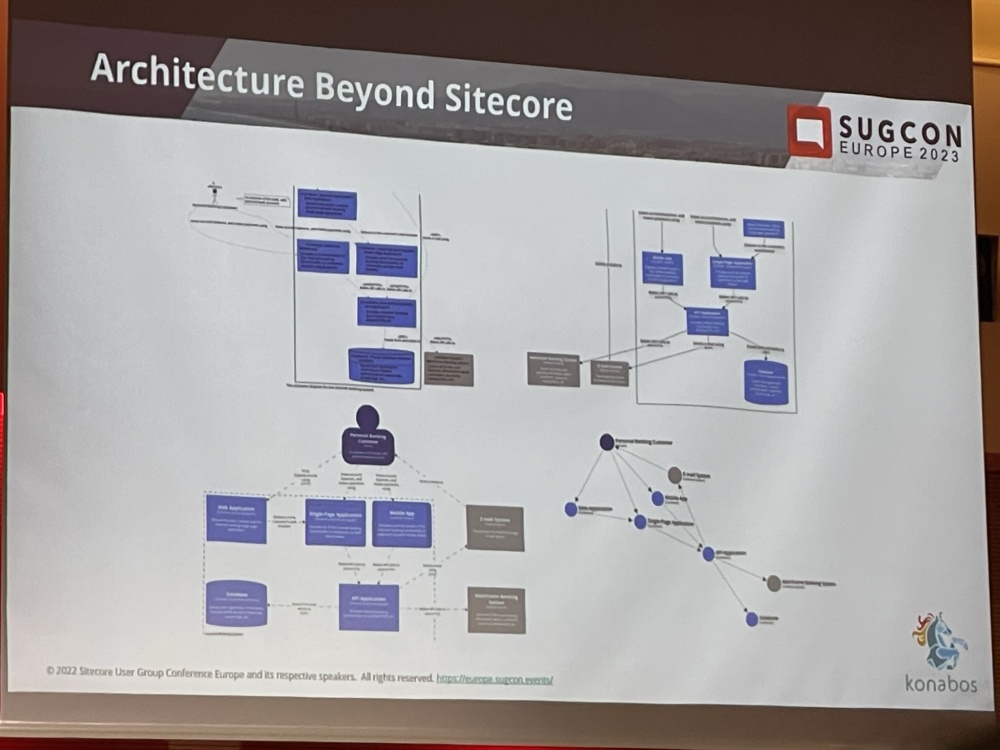
Rob then shared a typical XP implementation diagram and showed how XP Differs as integrations and functionality is moved into the head application:

IMG_0642

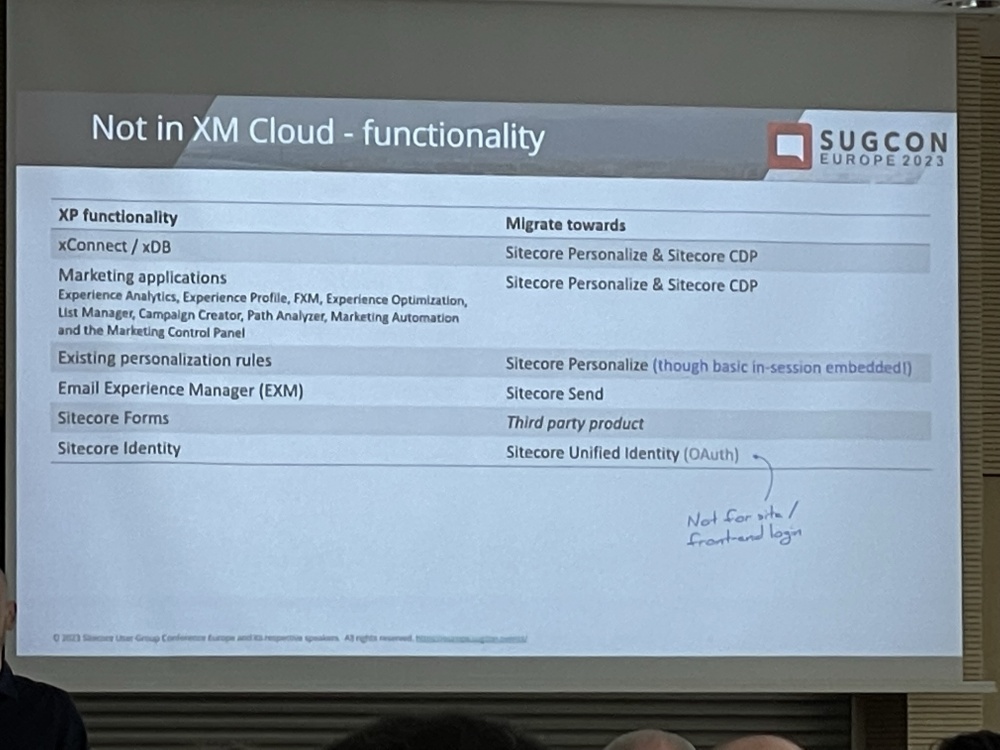
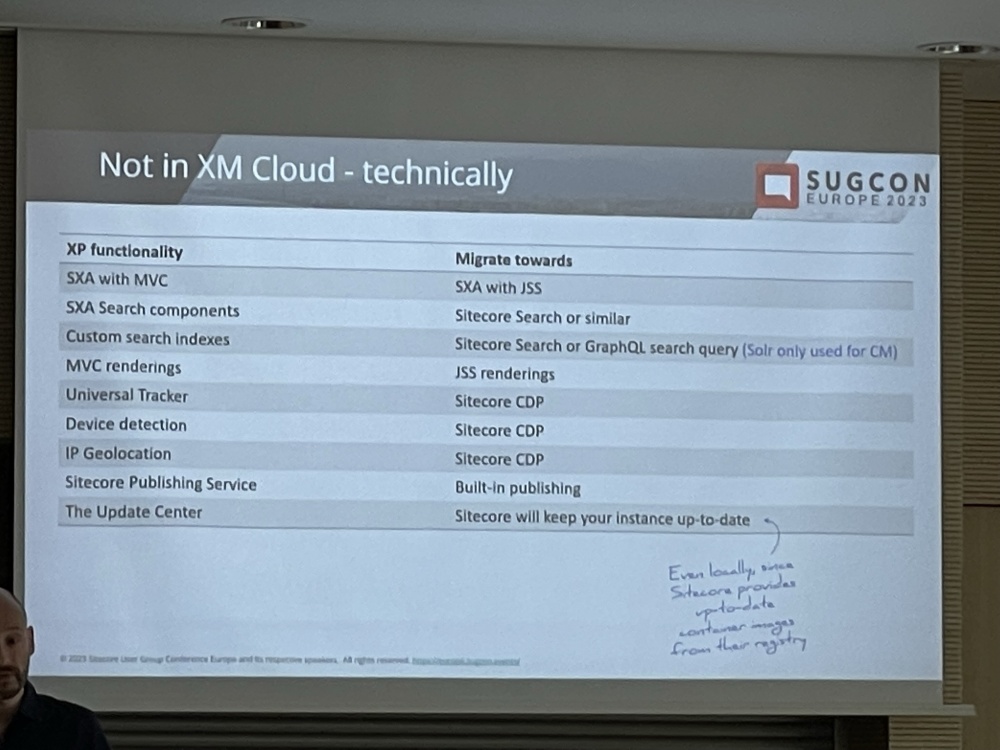
He then discussed what is included and not included in XM Cloud in detail. Martin shared some similar slides the day before, but I think these were a little clearer so I didn’t include them in the previous post:

IMG_0644
IMG_0645

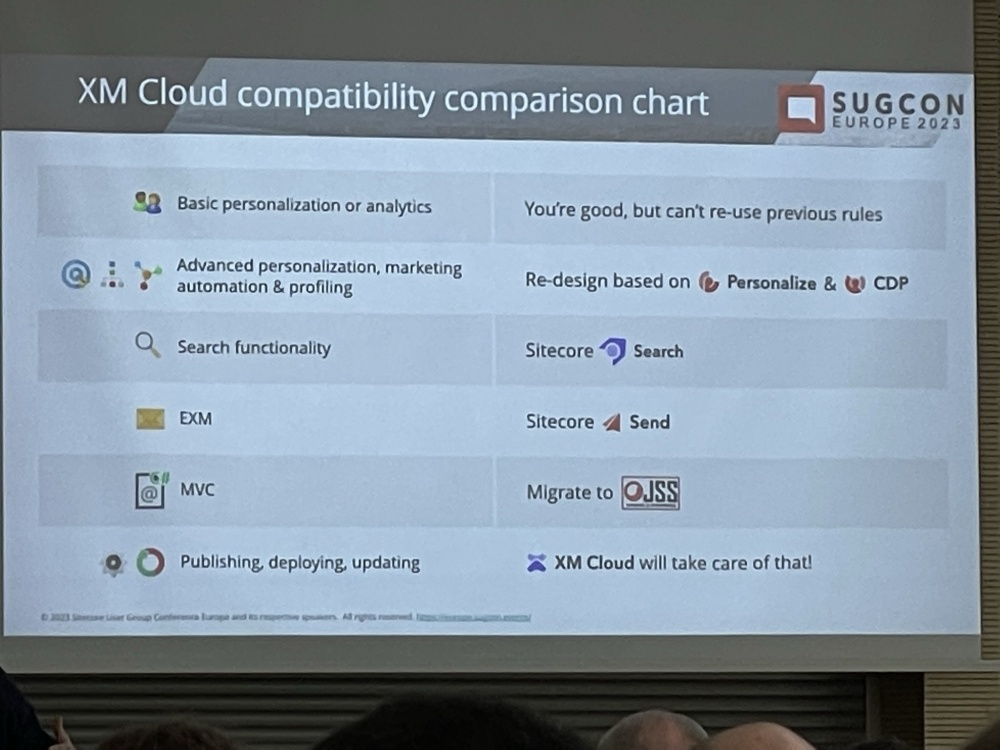
This was also a pretty cool comparison of XP vs XM Cloud equivalent features:

IMG_0646

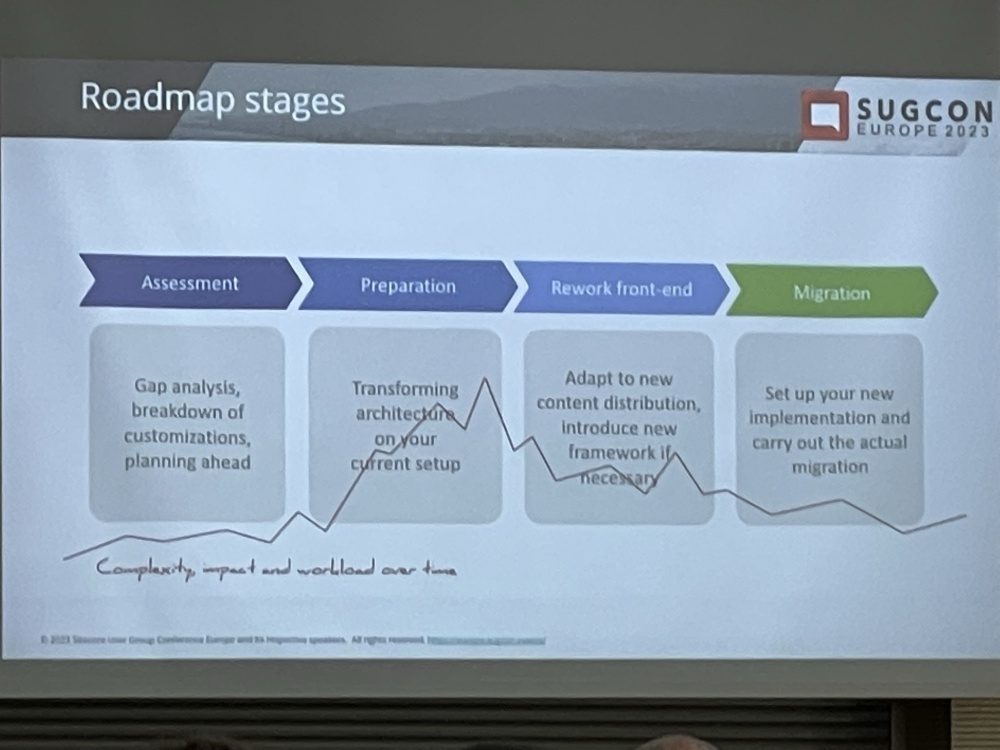
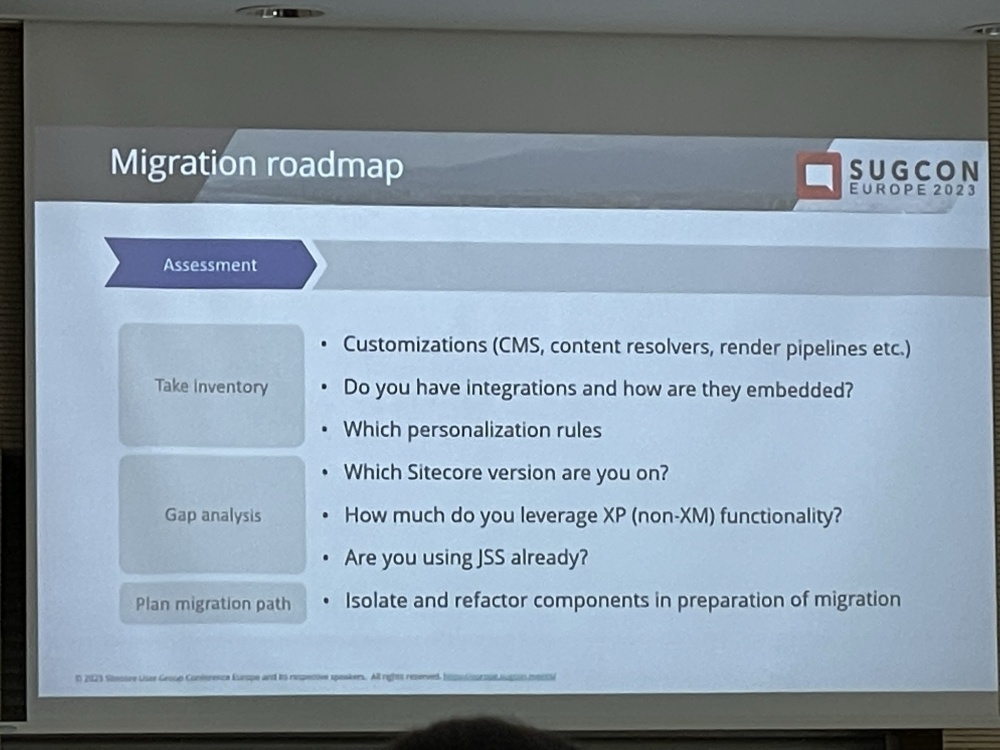
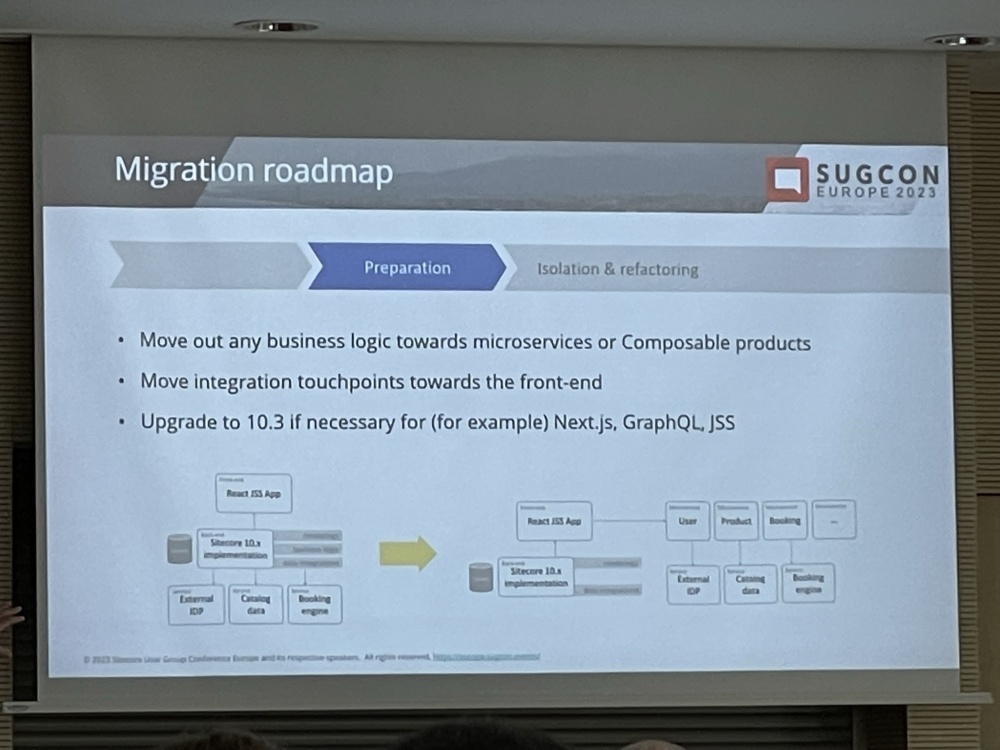
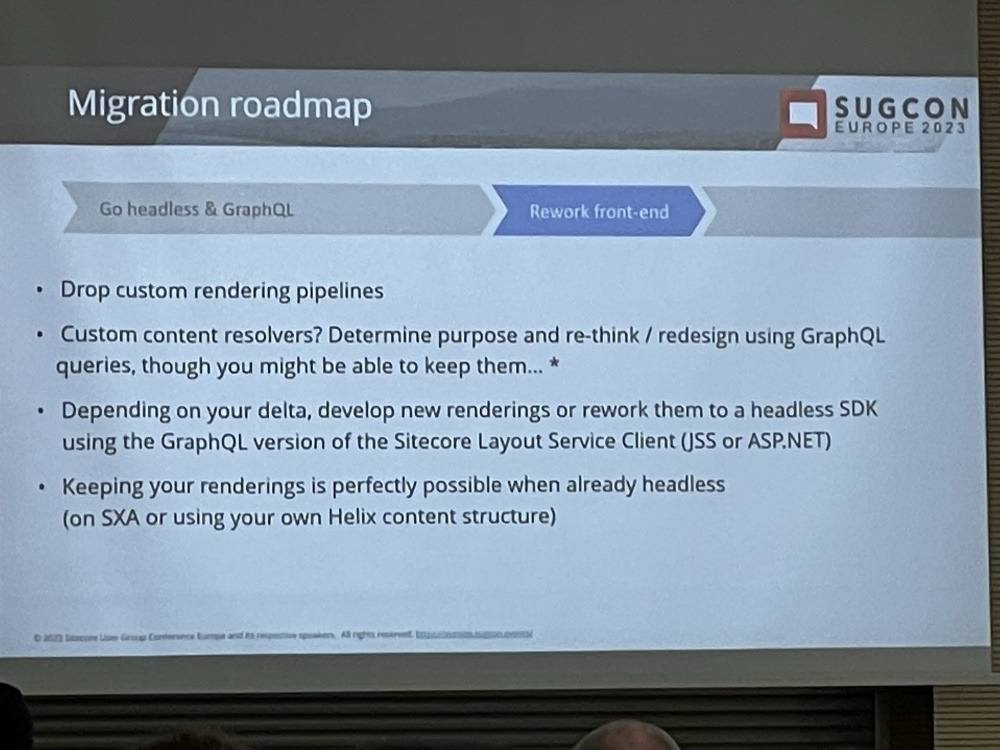
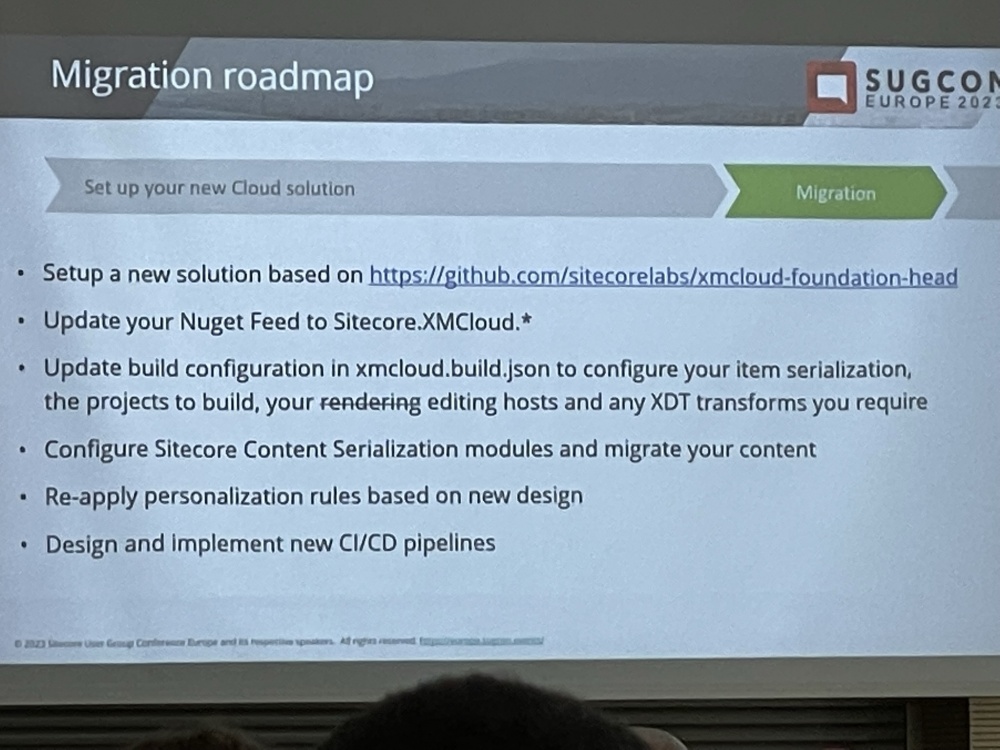
Rob then discussed the Migration approach to XM Cloud. There was a lot of really useful info here about things to consider and how to get your project prepared for the migration and how to tackle it:

IMG_0648
IMG_0649
IMG_0650
IMG_0652

IMG_0653

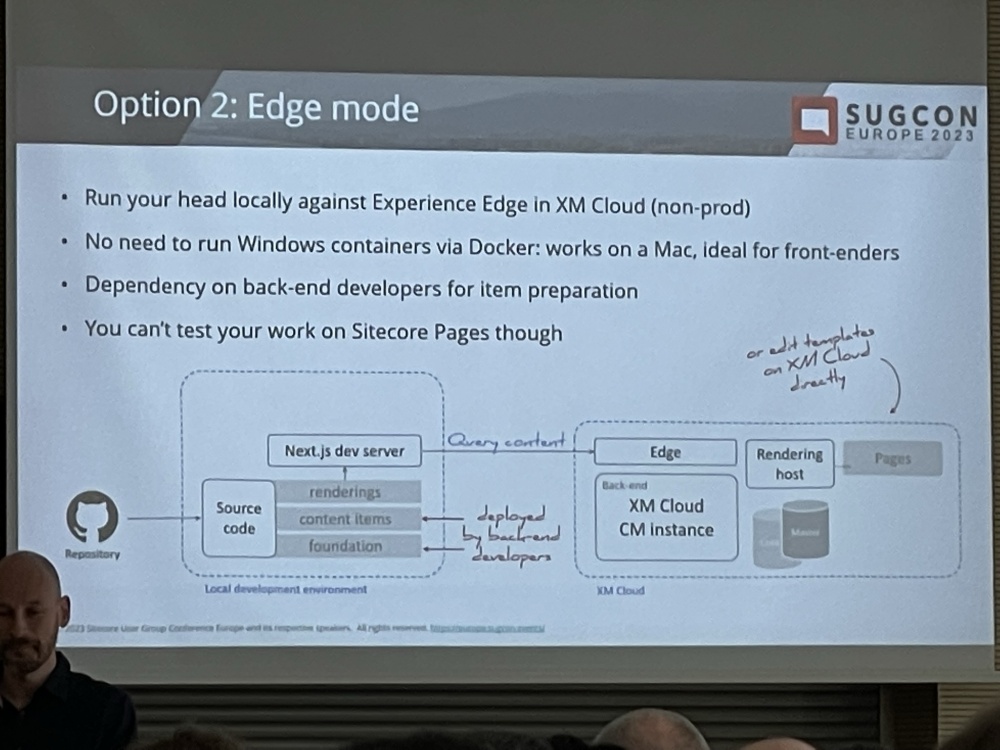
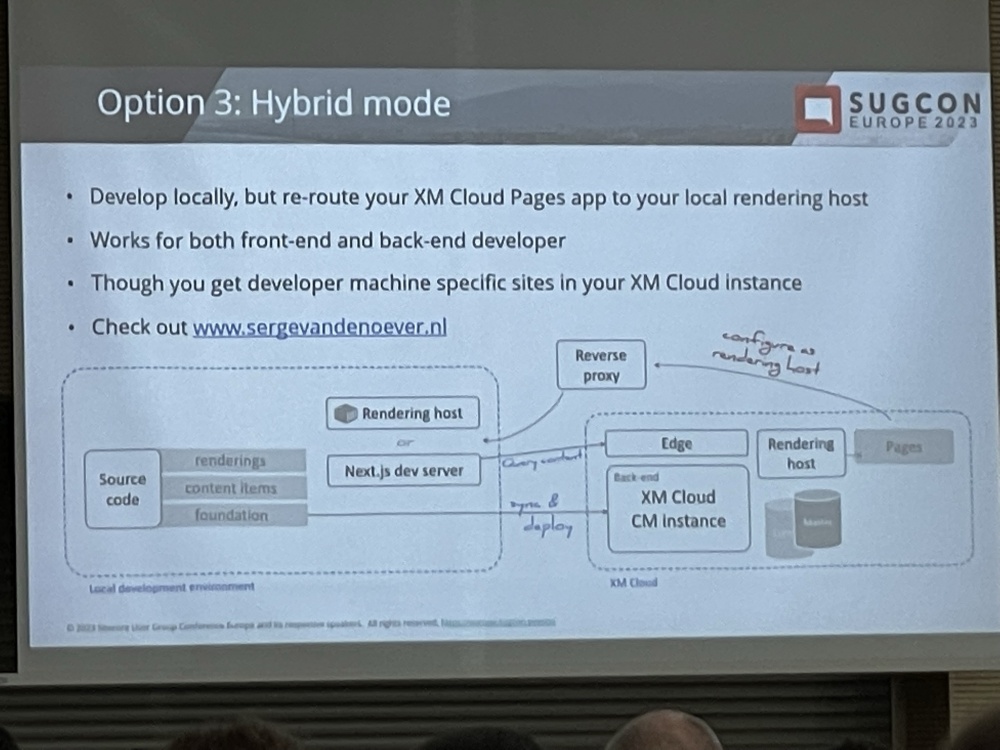
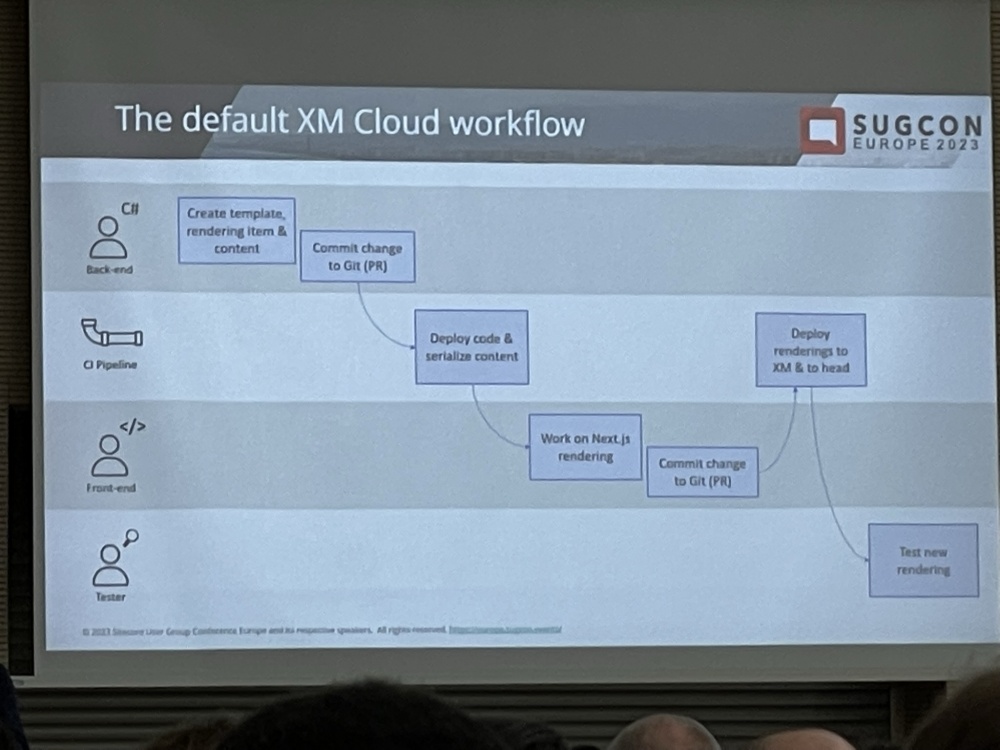
Next up was the the different development approaches and workflow. I’ve talked about these before but I didn’t know much about option 3 at all. I guess most Sitecore developers (especially in a small team) will use option 1, but option 3 is a really good approach for being able to use local content for your development without having to push it to XM Cloud:
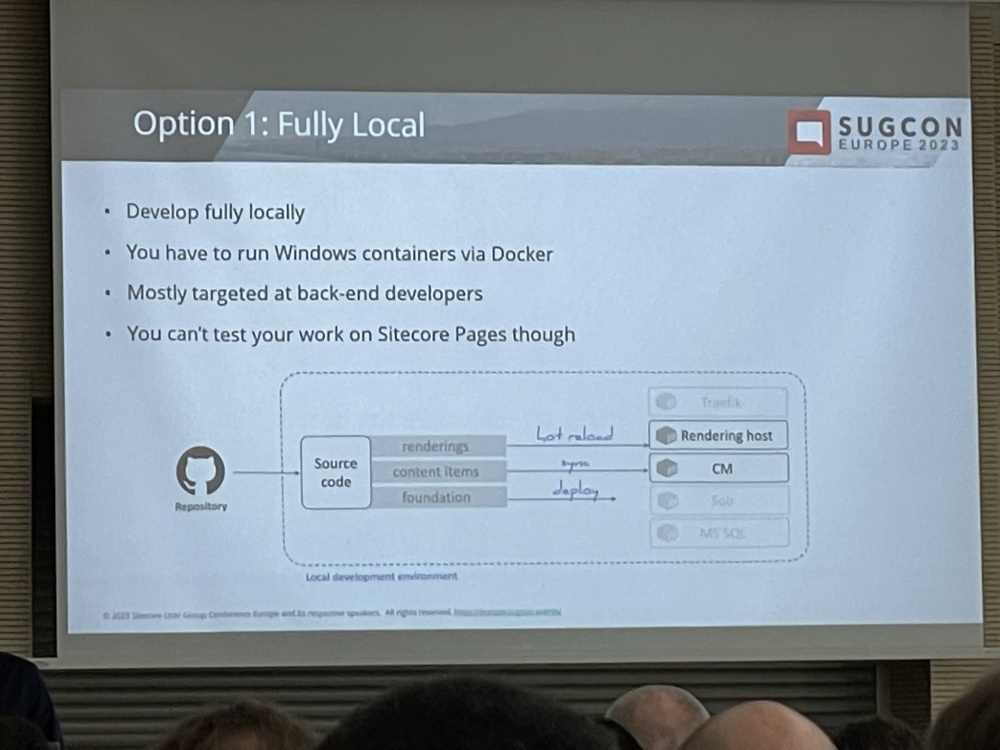
IMG_0654
IMG_0655
IMG_0656
IMG_0657

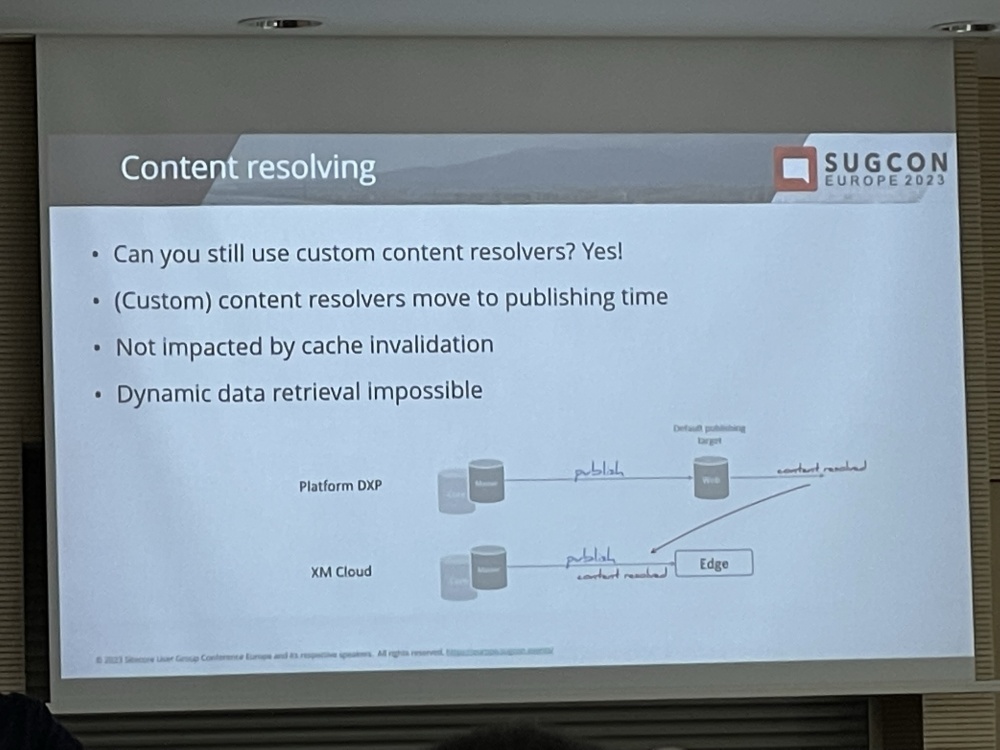
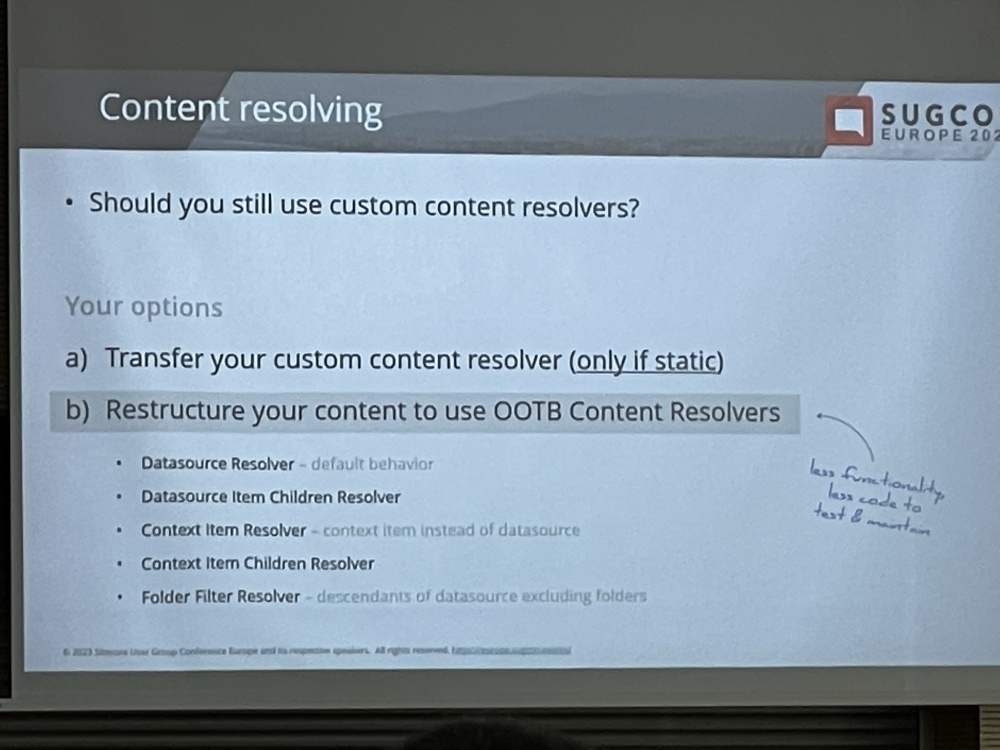
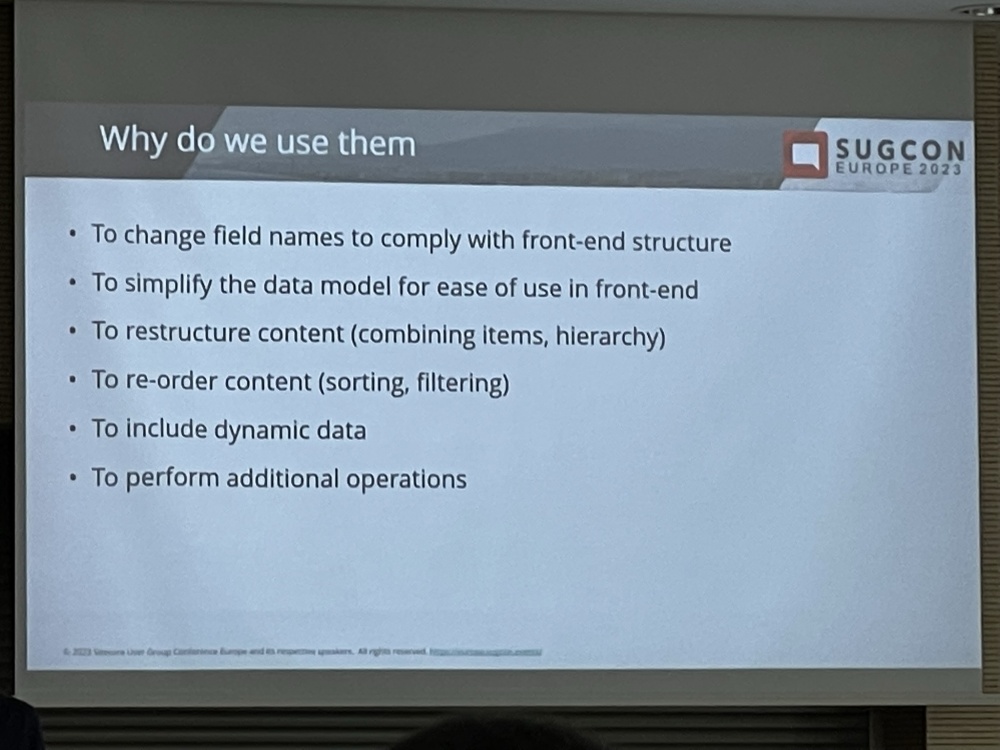
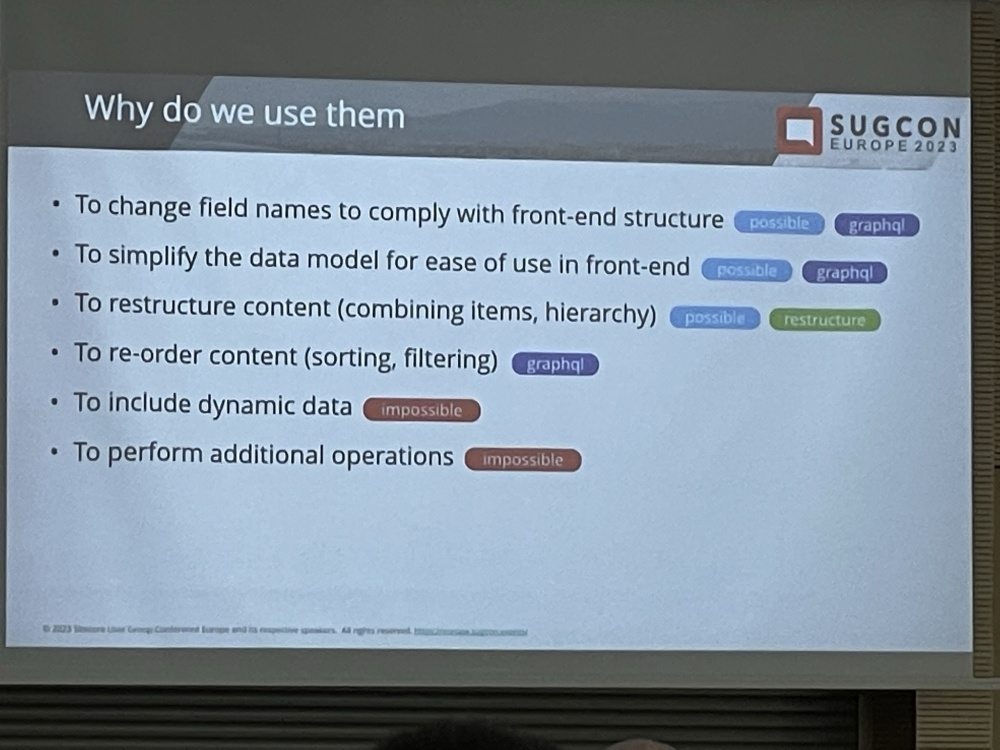
Rob then went on to explain in detail about how Content Resolvers don’t work if they are dynamic and only static ones do. It’s possible to use some out of the box ones or implement your own GraphQL Content Resolver:

IMG_0659
IMG_0662
IMG_0663
IMG_0664

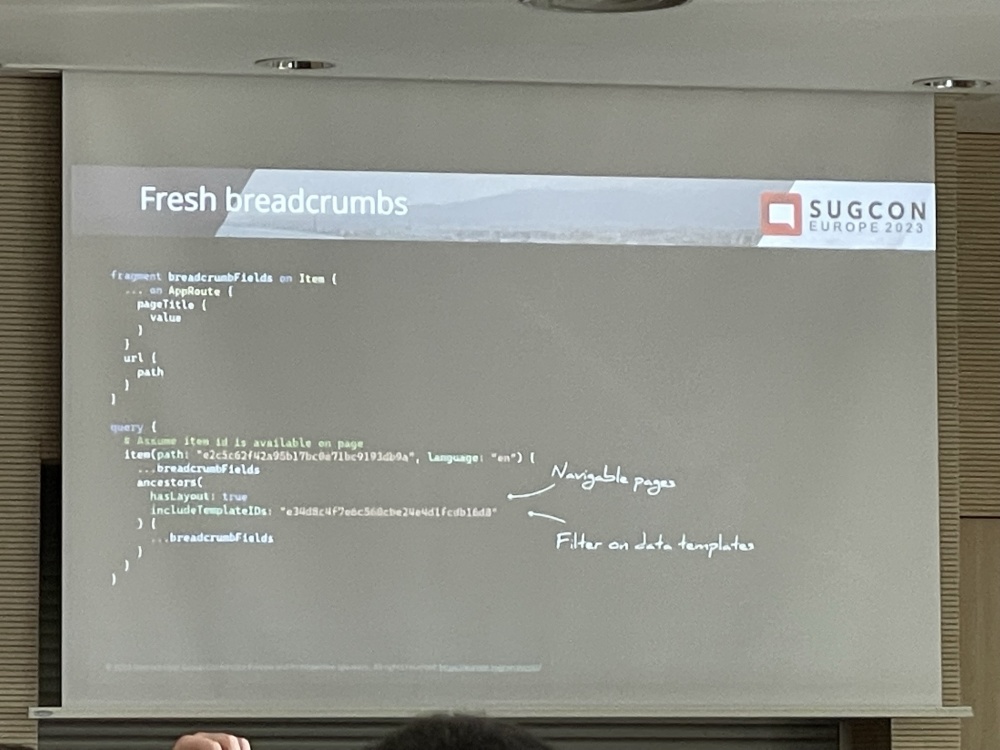
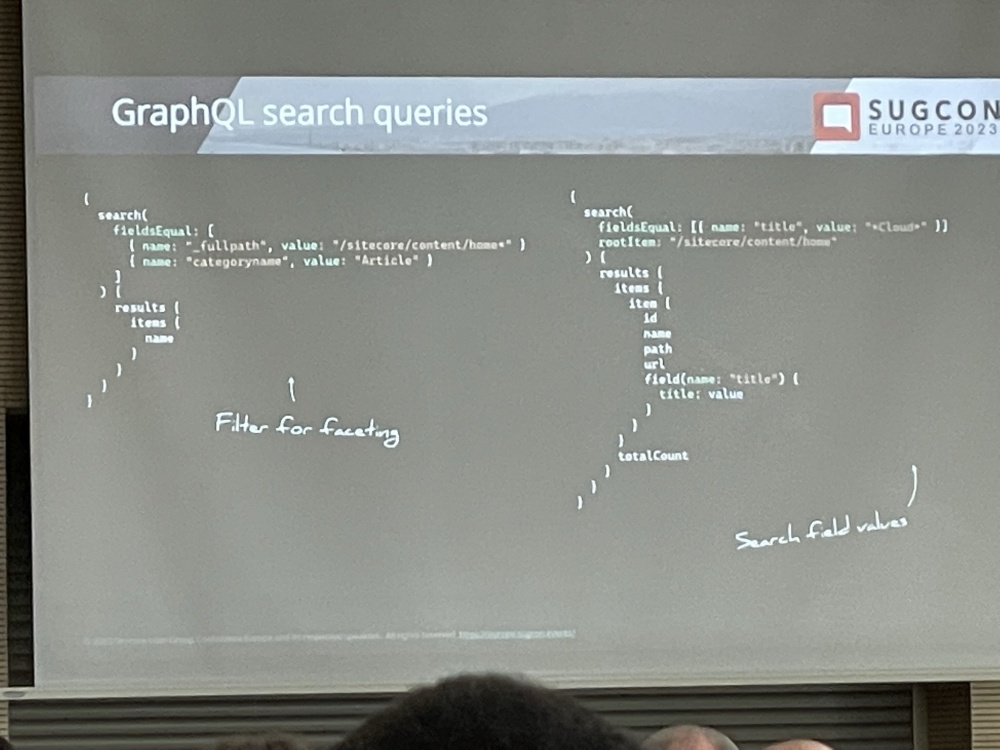
This is an example of Bread crumbs in XM Cloud and a GraphQL search query:

IMG_0666

IMG_0667

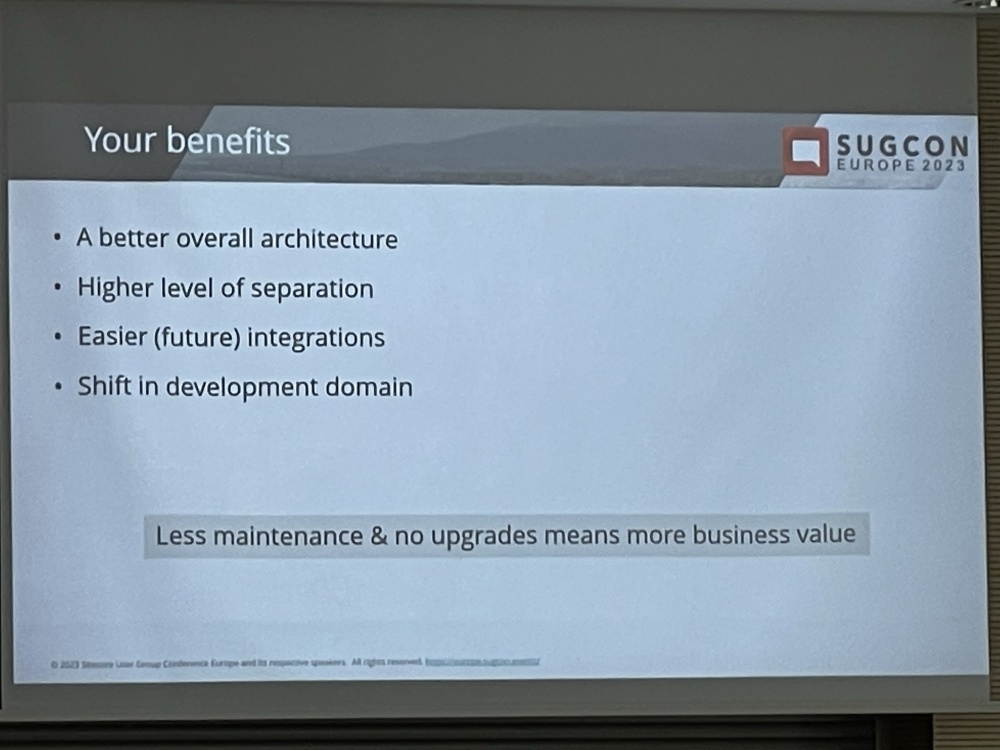
Rob finished his talk with a summary of the benefits of XM Cloud. The shift in Development domain and thinking is the tricky part for a lot of Sitecore Developers I feel:
IMG_0668


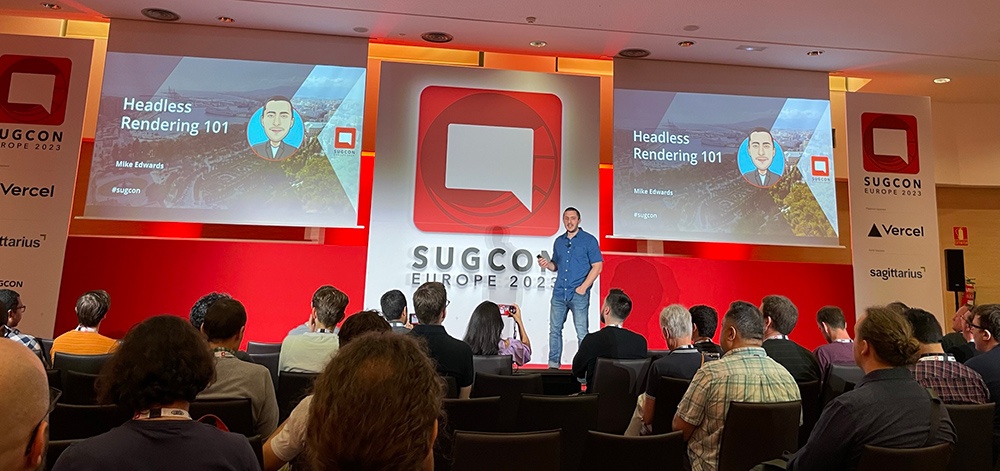
Rendering your data in headless – 101 different ways
– Mike Edwards

mike-headless-banner

I’ve known Mike for a number of years now and he’s always an good speaker so I was looking forward to Mike sharing his learnings from his headless journey.

IMG_0673
IMG_0674

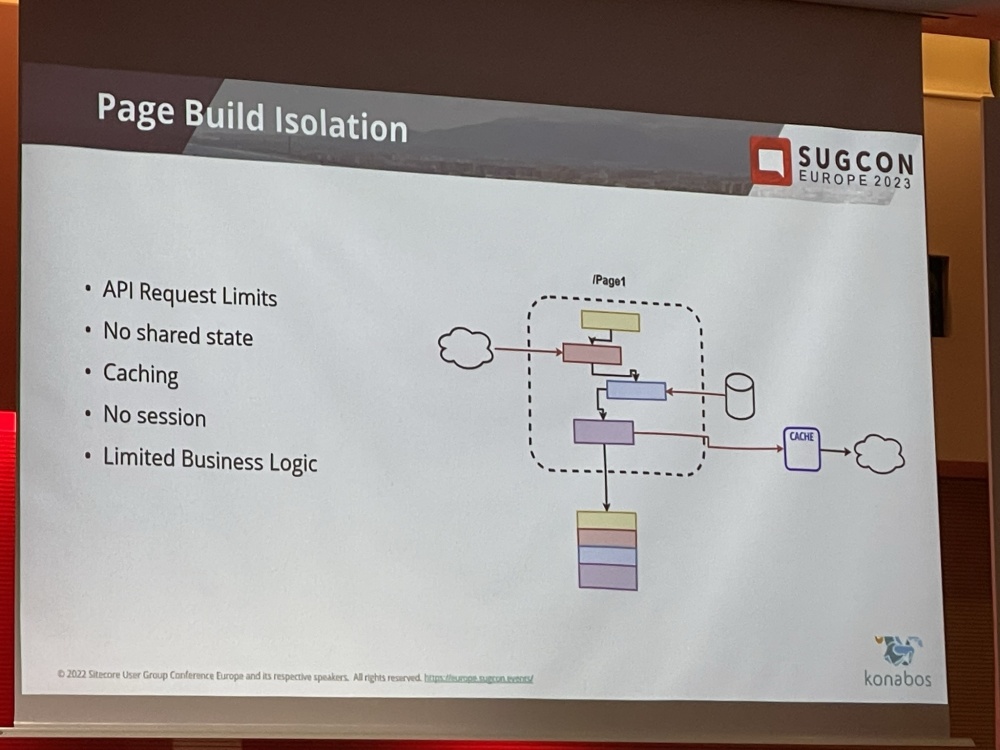
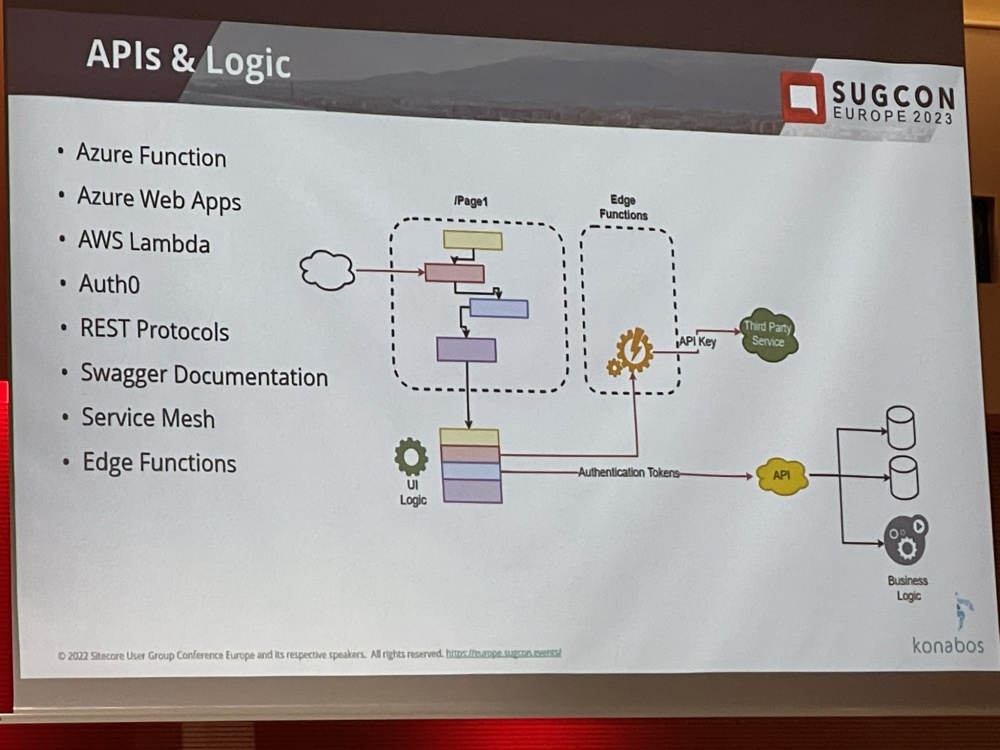
Mike started by lamenting how things used to be easy in the World of MVC and server-side development and then with all the JQuery and JS frameworks things became pretty bloated.

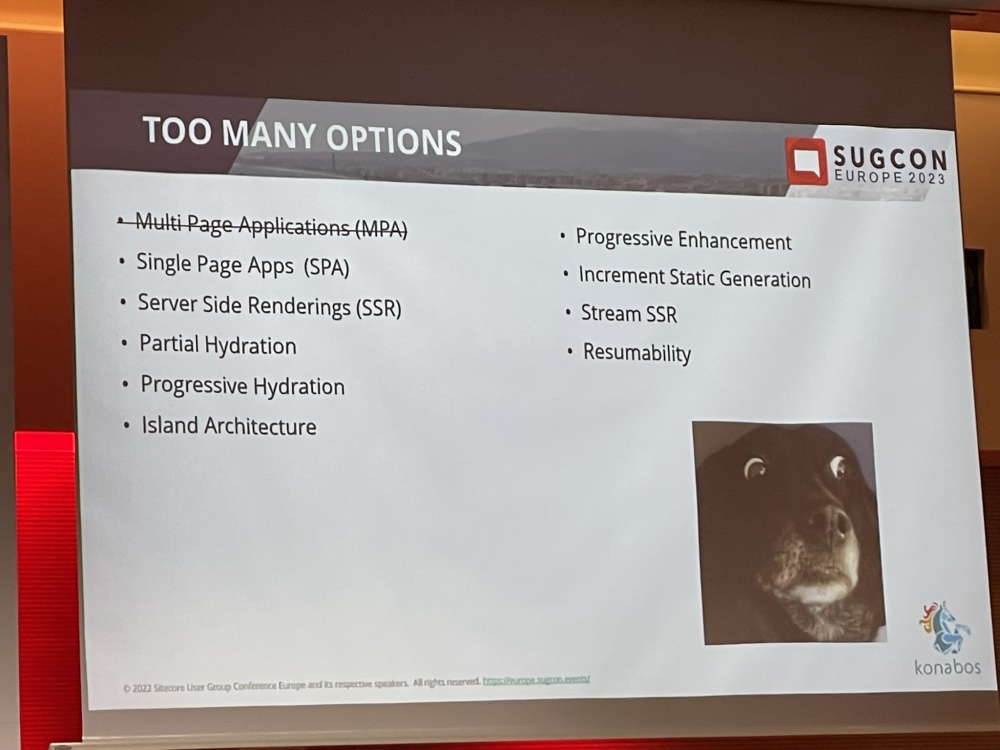
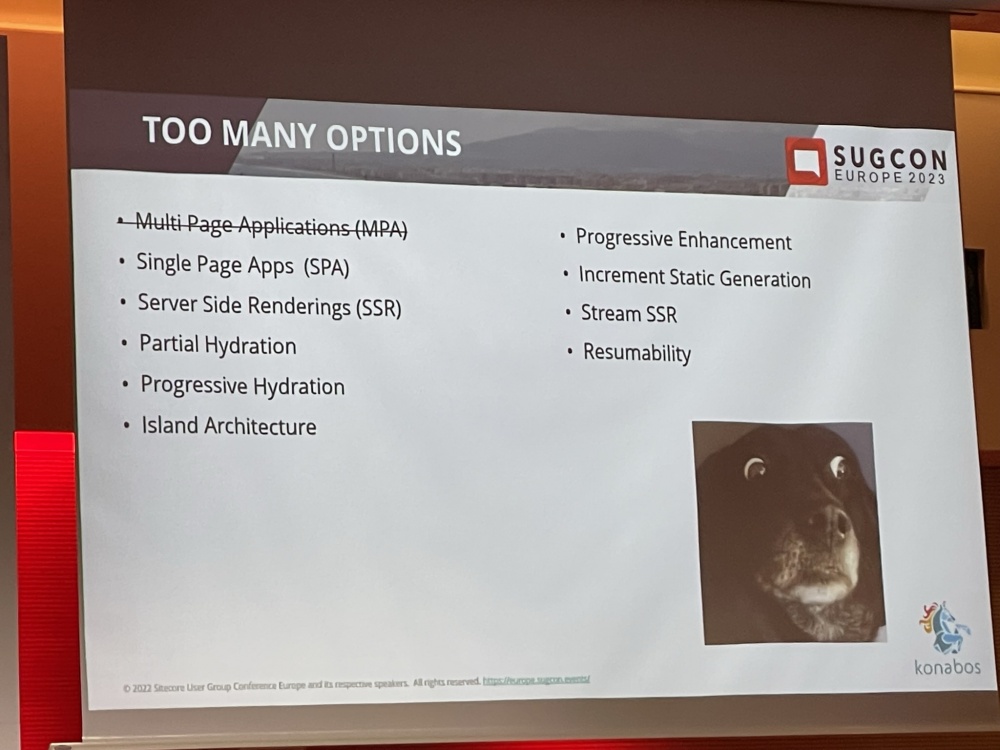
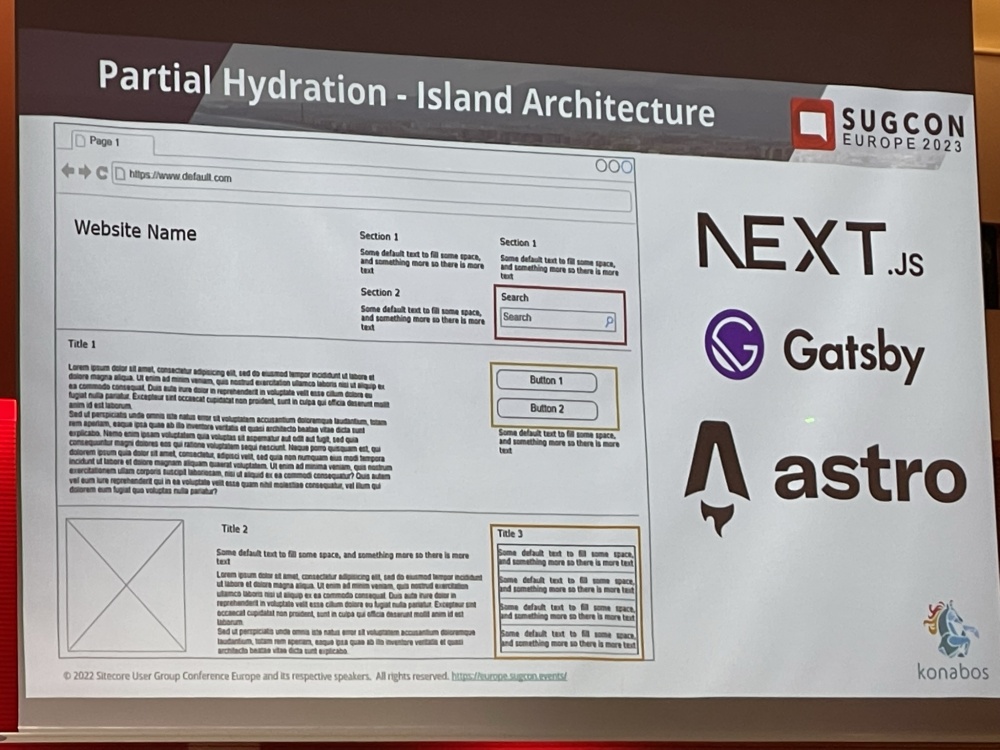
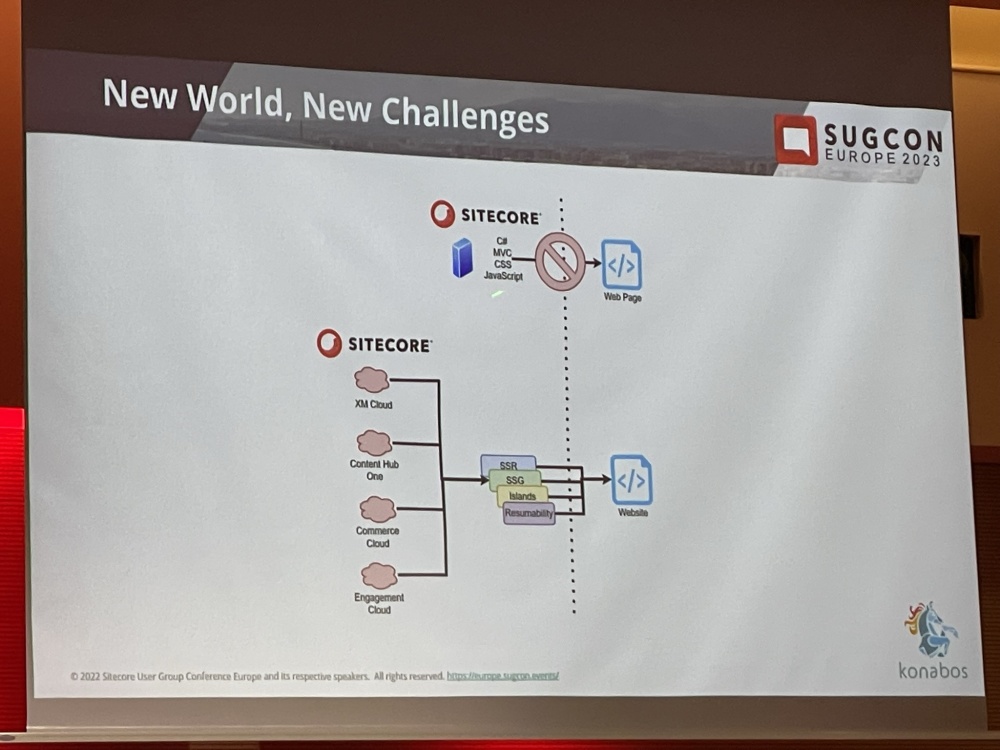
Things have moved on a lot now in FE development though and there are now many different options for building Headless websites in Sitecore, some of these I’m aware of or have experimented with – Others I’ve not heard of, such as ‘Island Architecture’.

IMG_0674
IMG_0676
IMG_0677
IMG_0678

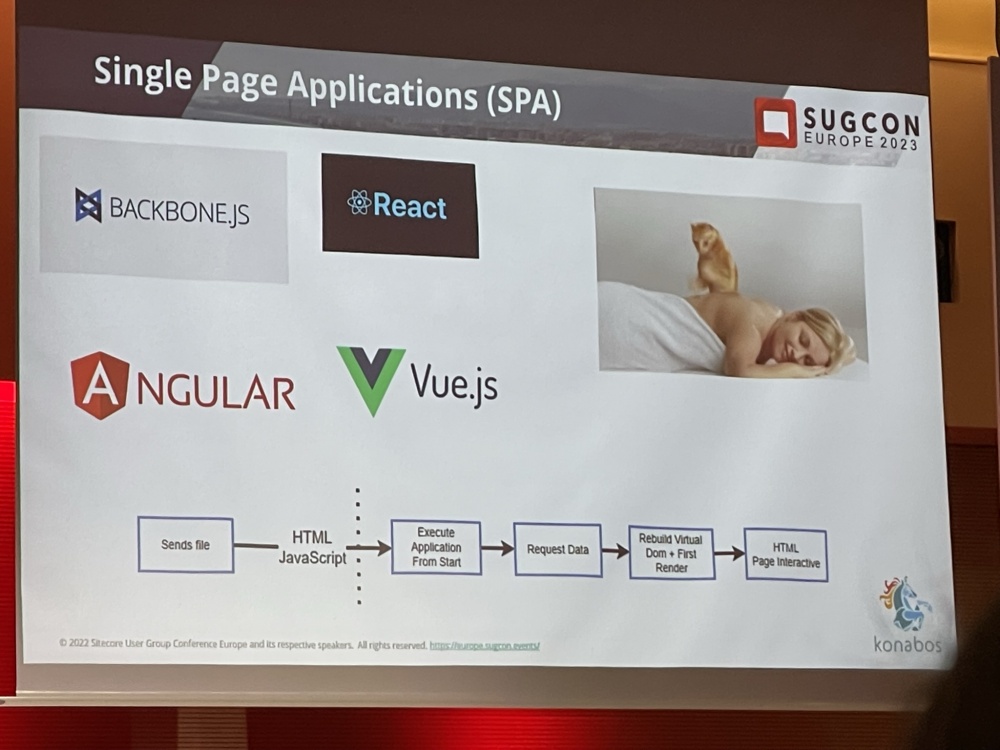
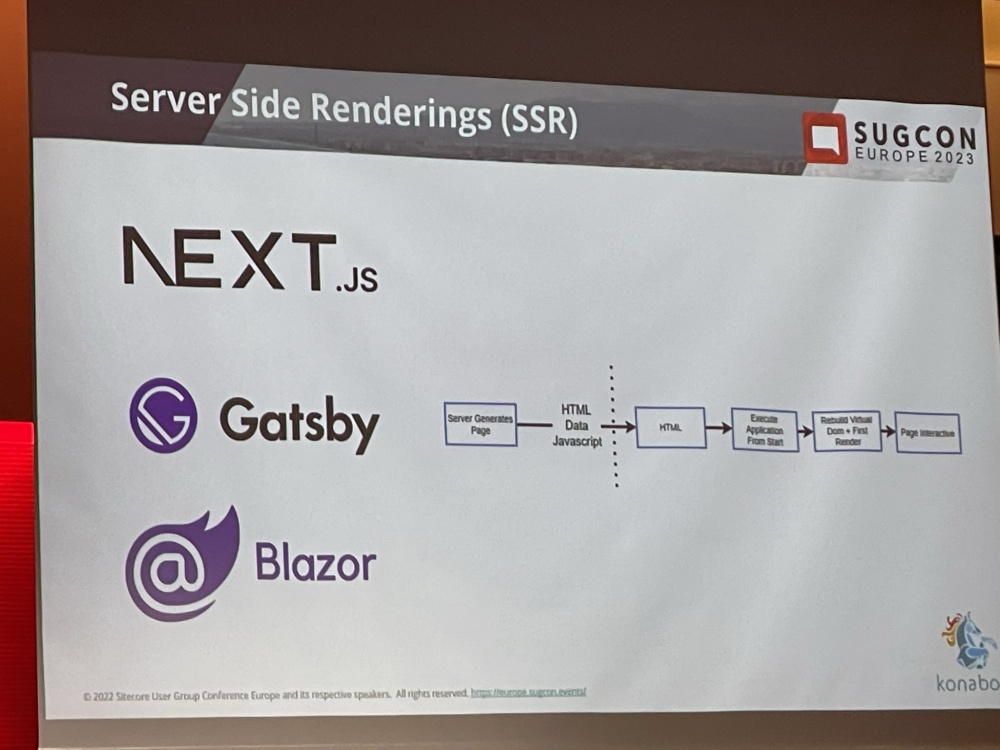
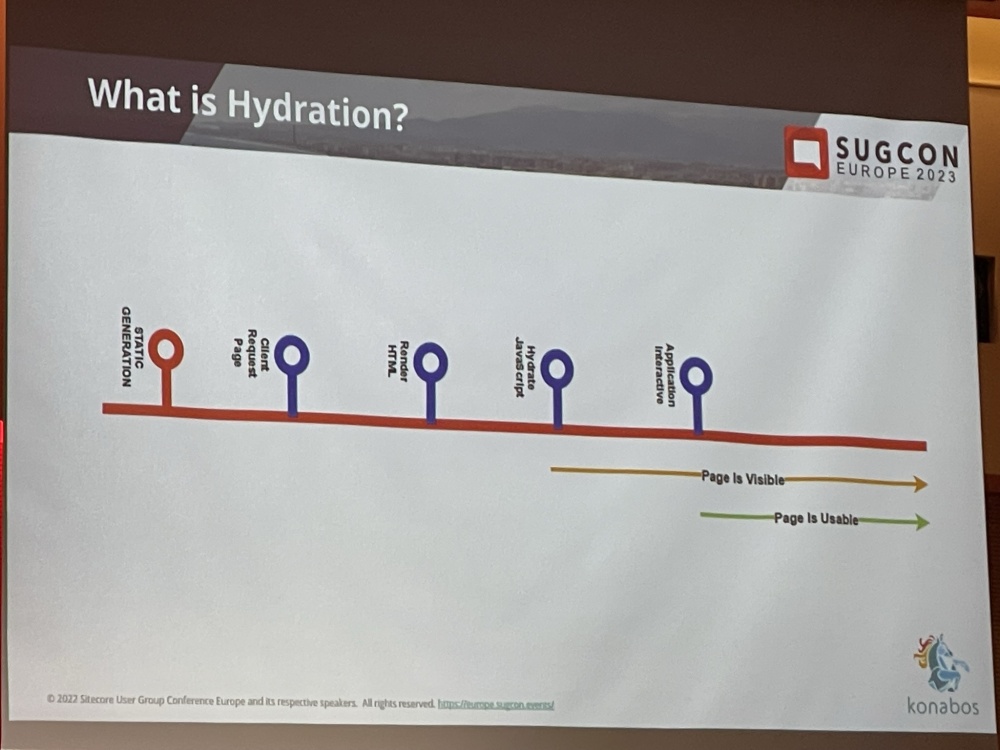
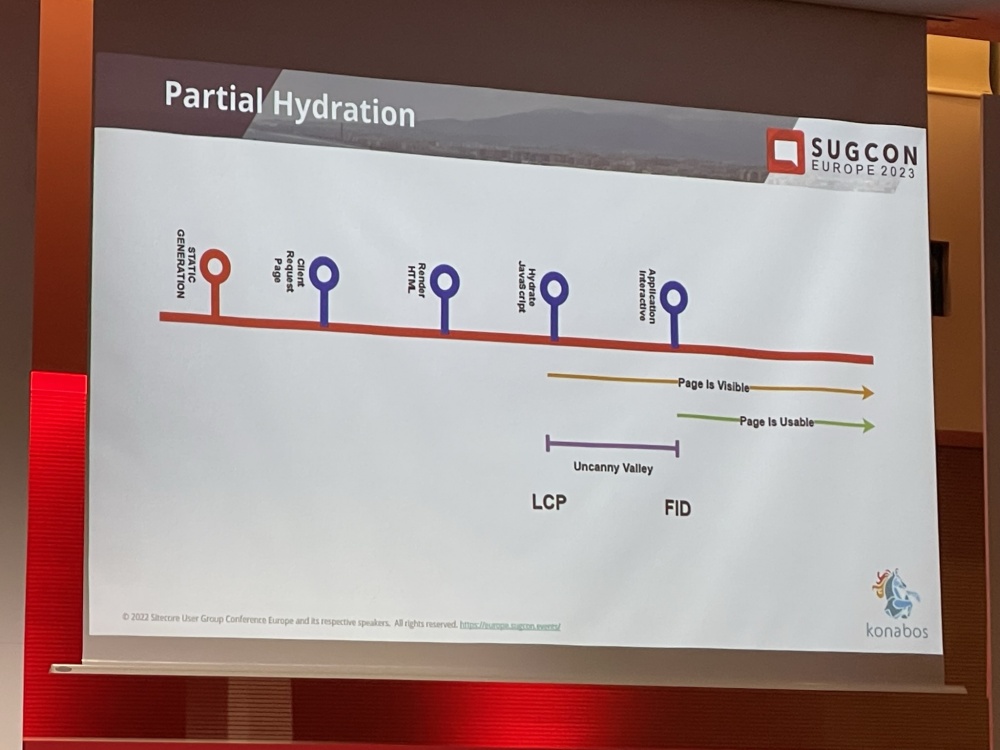
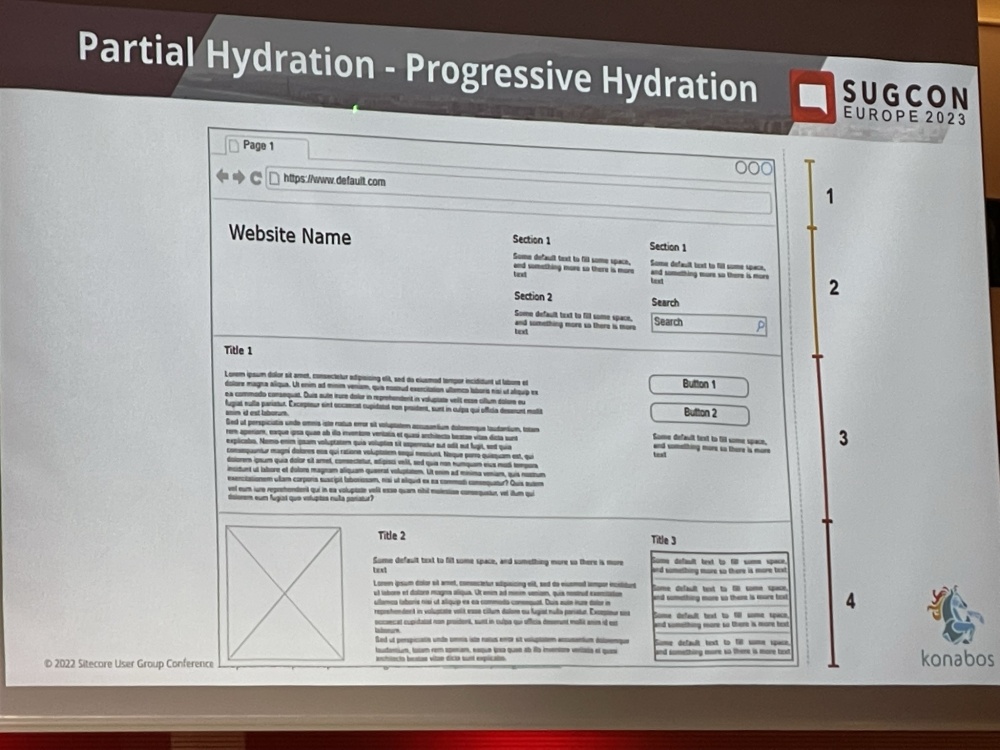
SPAs bring their own set of problems in terms of page load times and indexability so Mike went into Hydration and Partial Hydration techniques and approaches that try to solve these issues:

IMG_0679
IMG_0680

Then Mike explained more about Partial Hydration examples and Island Architecture. Island Architecture lets you create your web app with pure HTML and CSS for all the static content but then add in regions/placeholders of dynamic content to support interactive ‘islands’ of content. Given the rest of the page is static it downloads really quickly and is available to use faster.

IMG_0681
IMG_0683

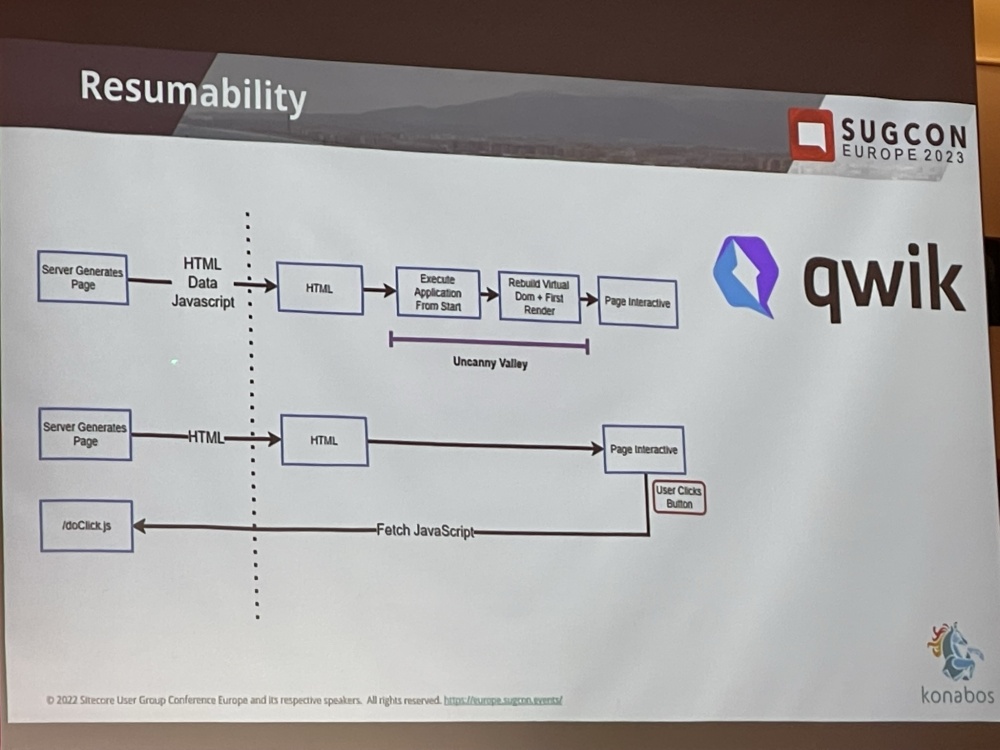
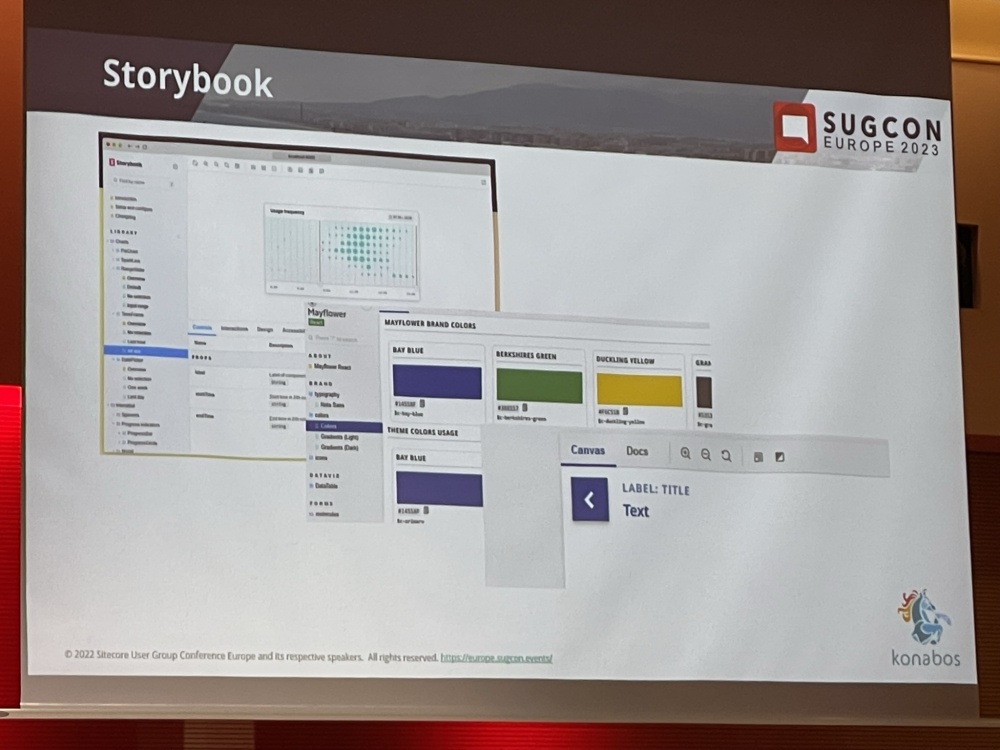
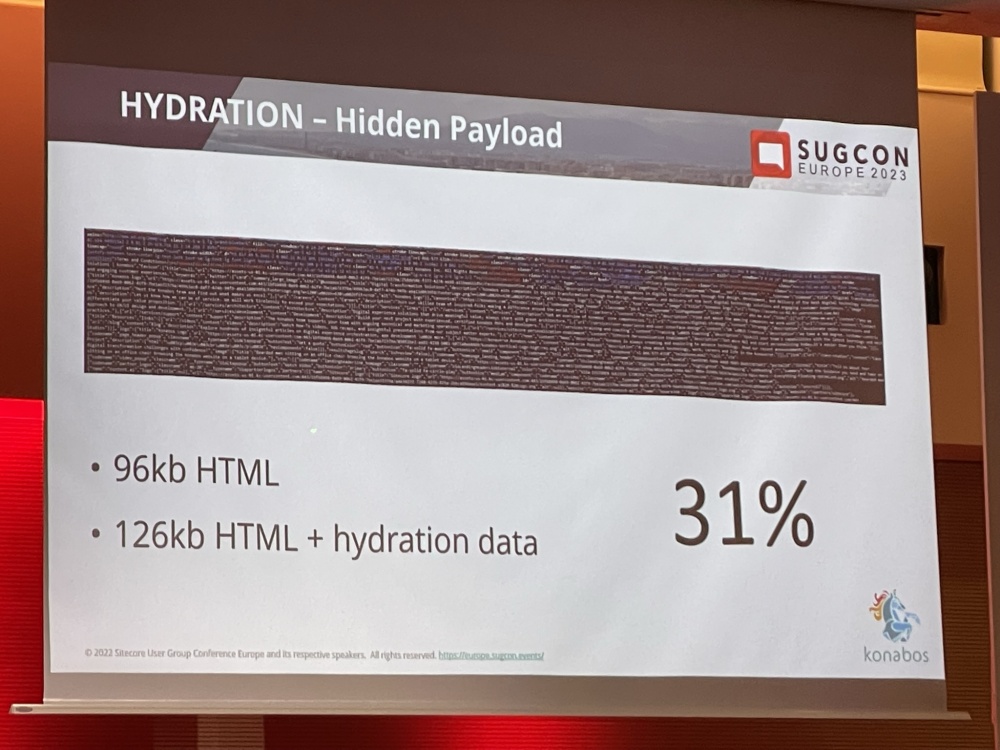
Mike then covered Resumability, Edge/Serverless and tools such as Storybook and Hydration Payload.

IMG_0684
IMG_0685
IMG_0686
IMG_0687

There are some Challenges and limitations which need to be re-address:

IMG_0689
IMG_0690
IMG_0692
IMG_0693

Finally Mike ended with saying that this is the future and we need to embrace the new world.
IMG_0694

It was a really interesting talk and gave me a lot to think about and research further. The following talks were 15 minute lightning talks until lunch.

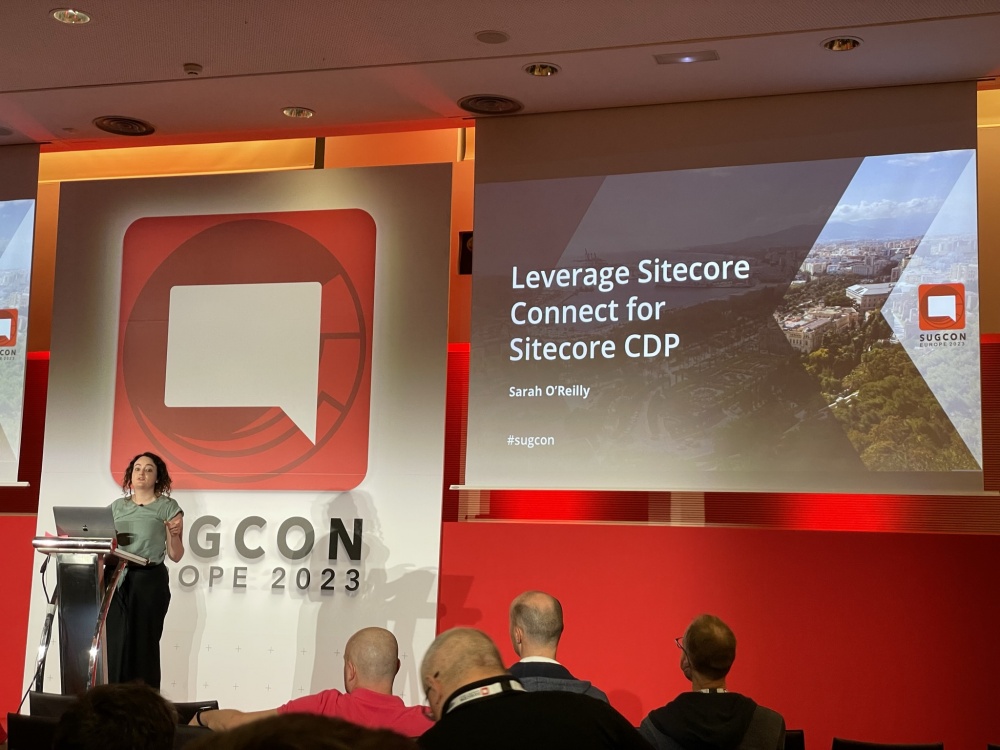
Leverage Sitecore Connect for Sitecore CDP – Sarah O’Reilly

IMG_0695

I’d heard a fair bit about Connect but I’ve not really seen much about how it actually works. So I was looking forward to this session

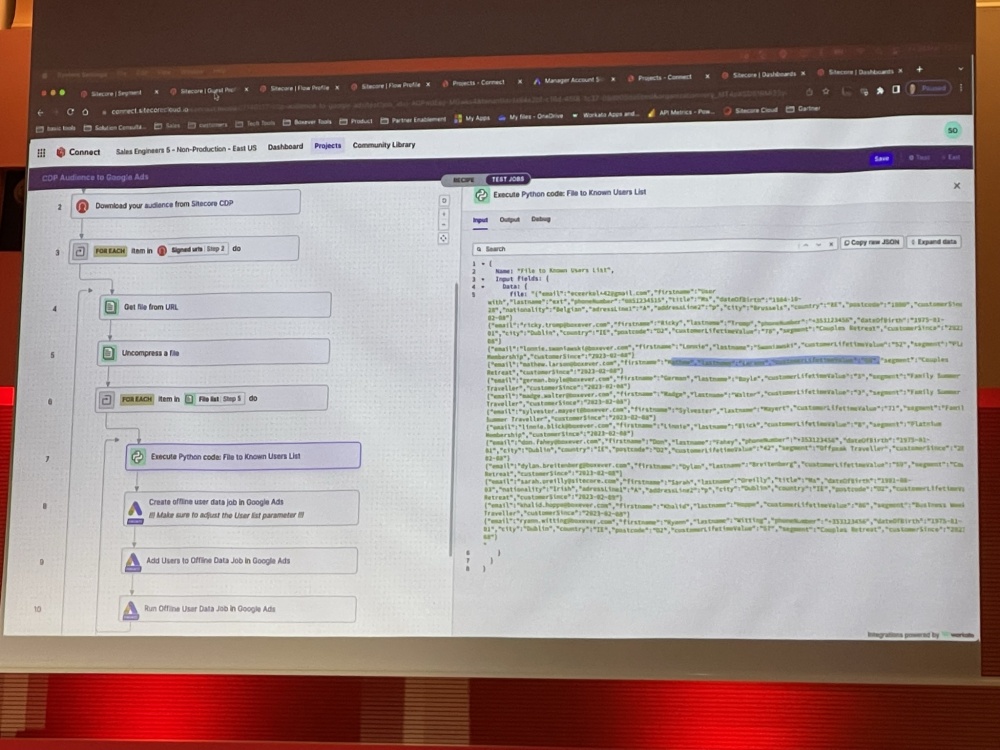
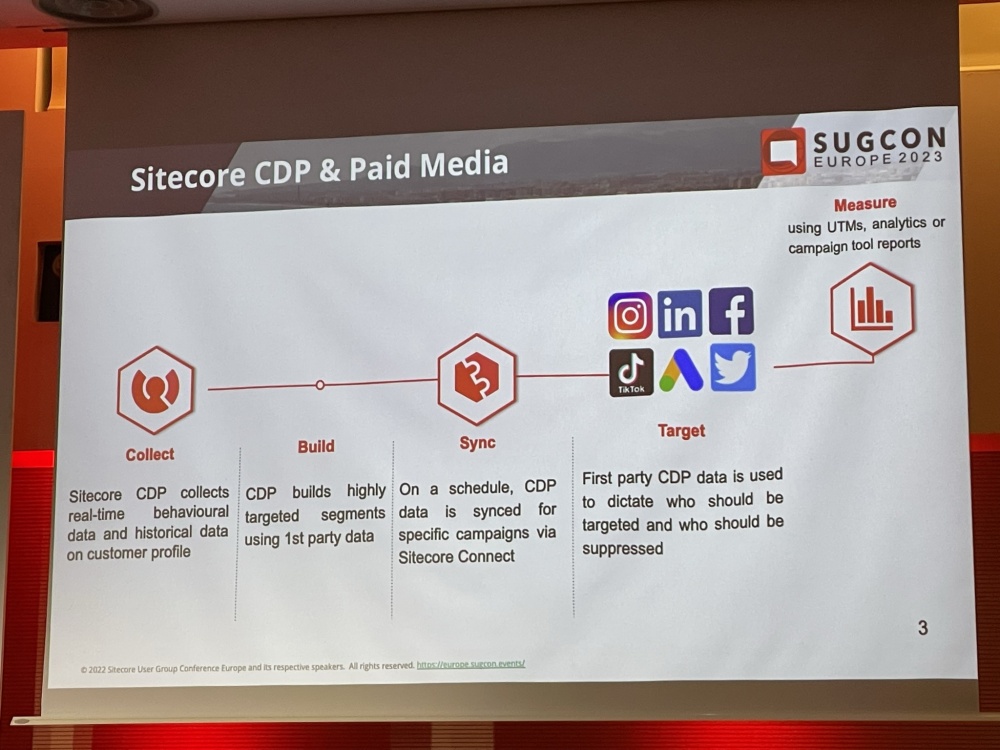
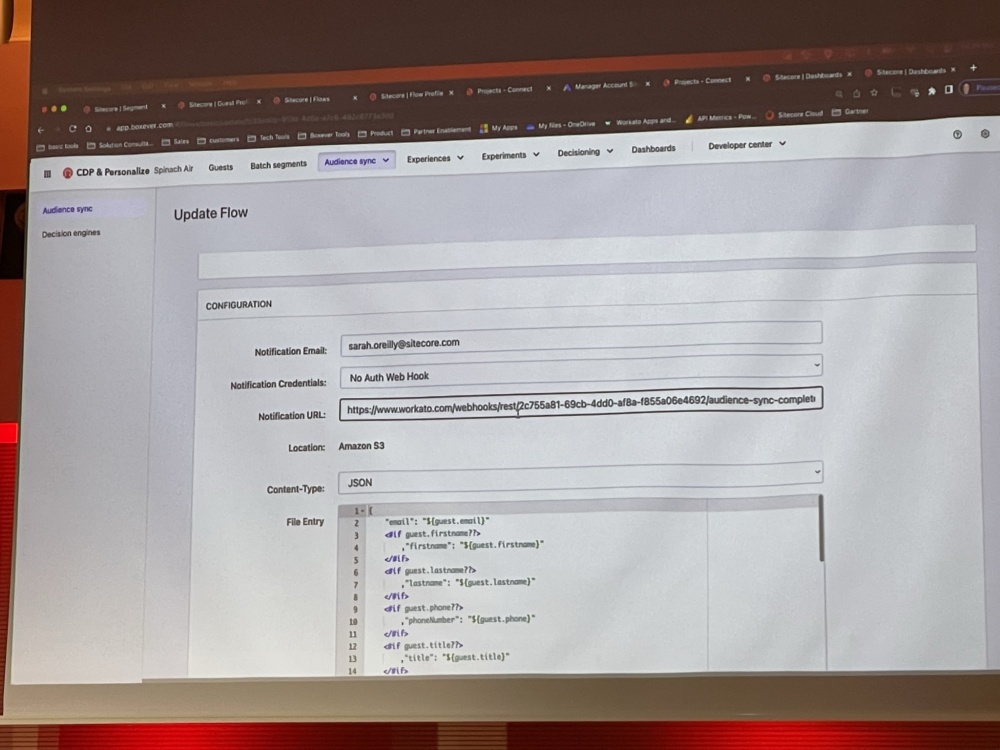
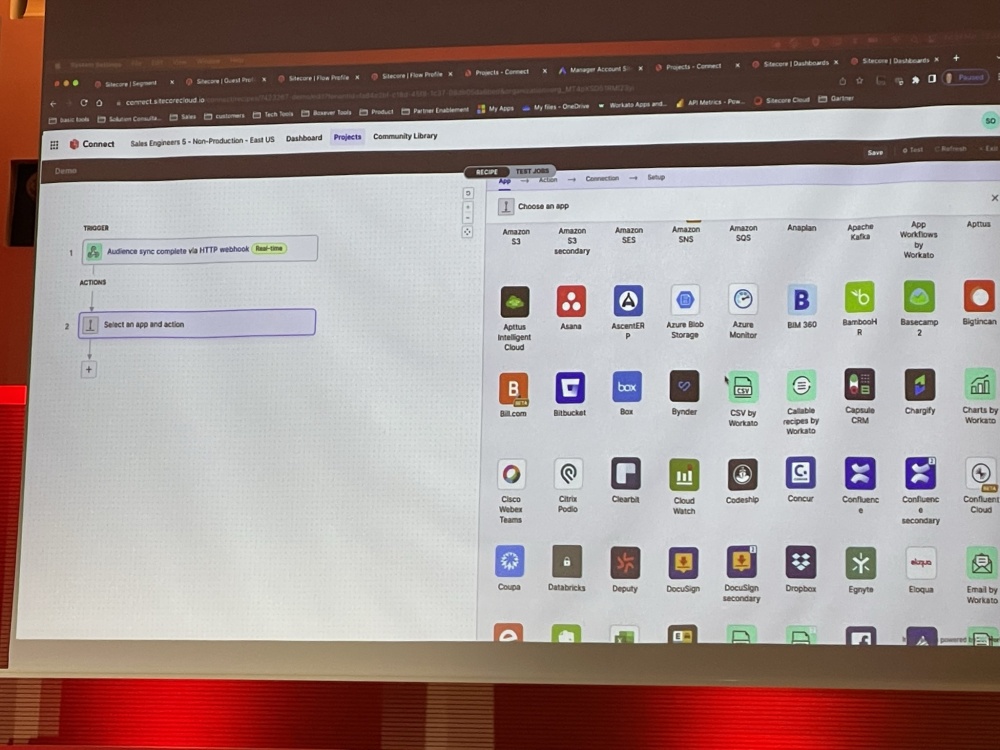
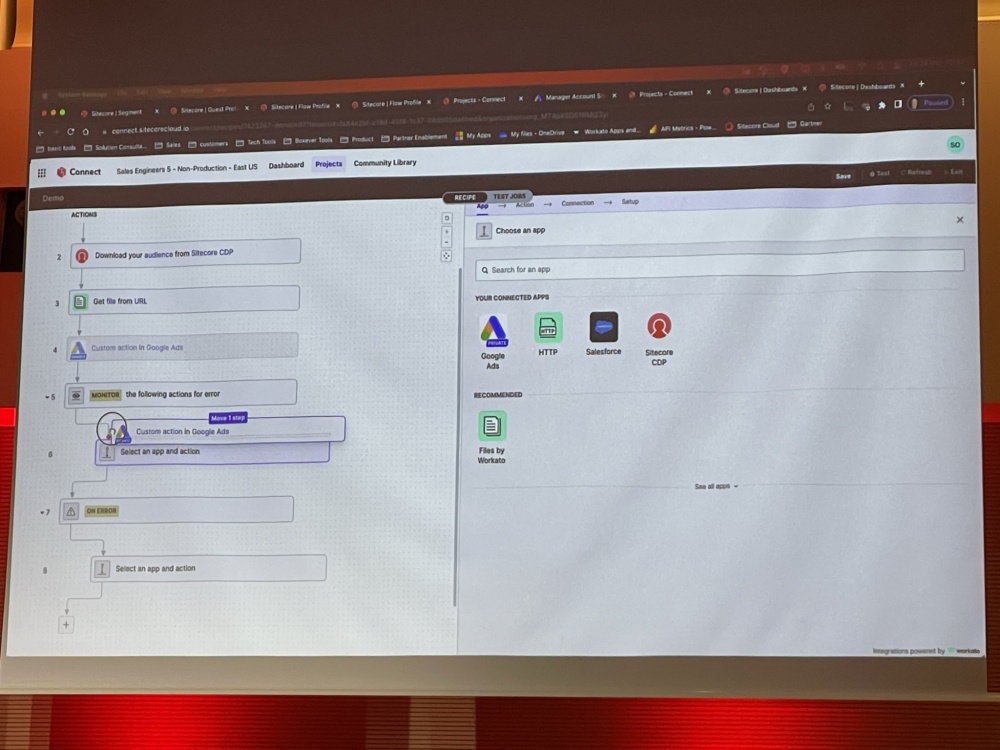
Sarah took us through an example of using Connect to import user segment data from CDP into Google Ads.

IMG_0696 IMG_0703

Once the export was setup to build from CDP the steps were then configured in Connect to sync to Google Ads:
IMG_0712
IMG_0714

There are tons of Apps supported and different recipes defined and it was impressive to see the options for building logic such as if statements / for loops data mapping and manipulation all within Connect.

IMG_0709

This was an insightful session and really interesting to see how it works. I can see how it could be used to help with migrating to XM Cloud from XP or another CMS platform.

Sitecore components explained for your marketers – Ugo Quaisse

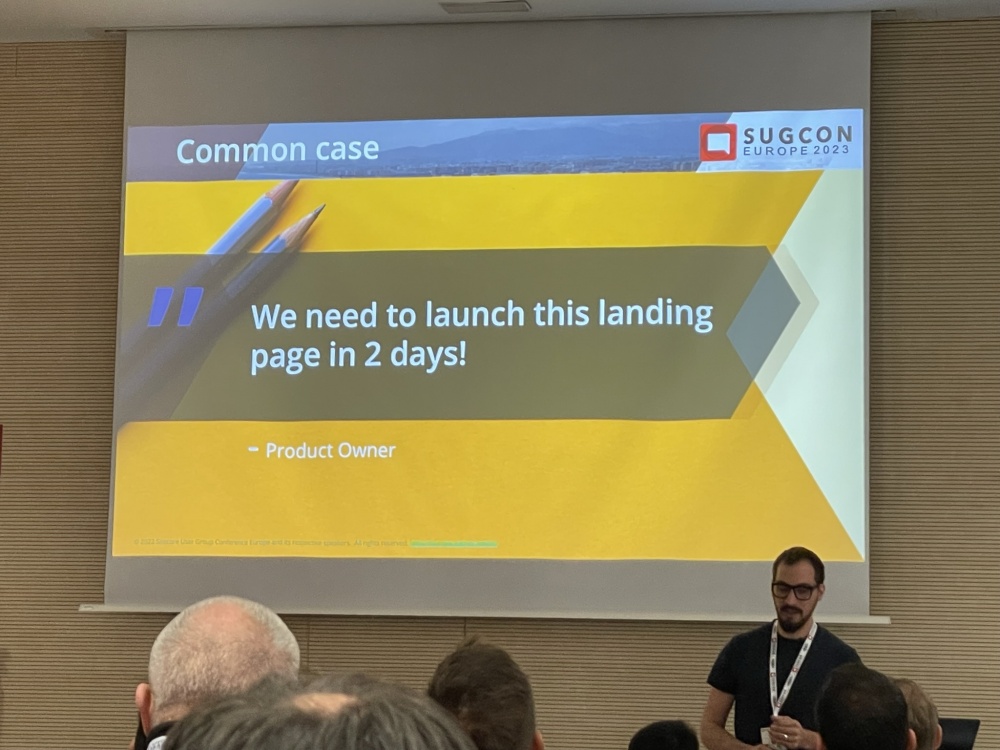
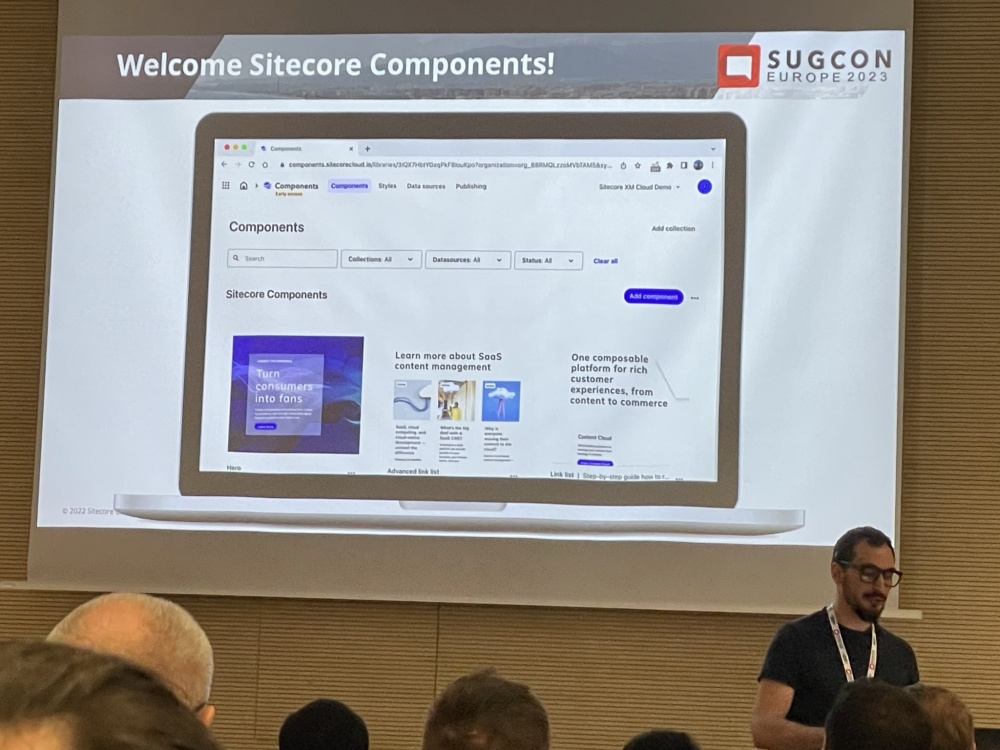
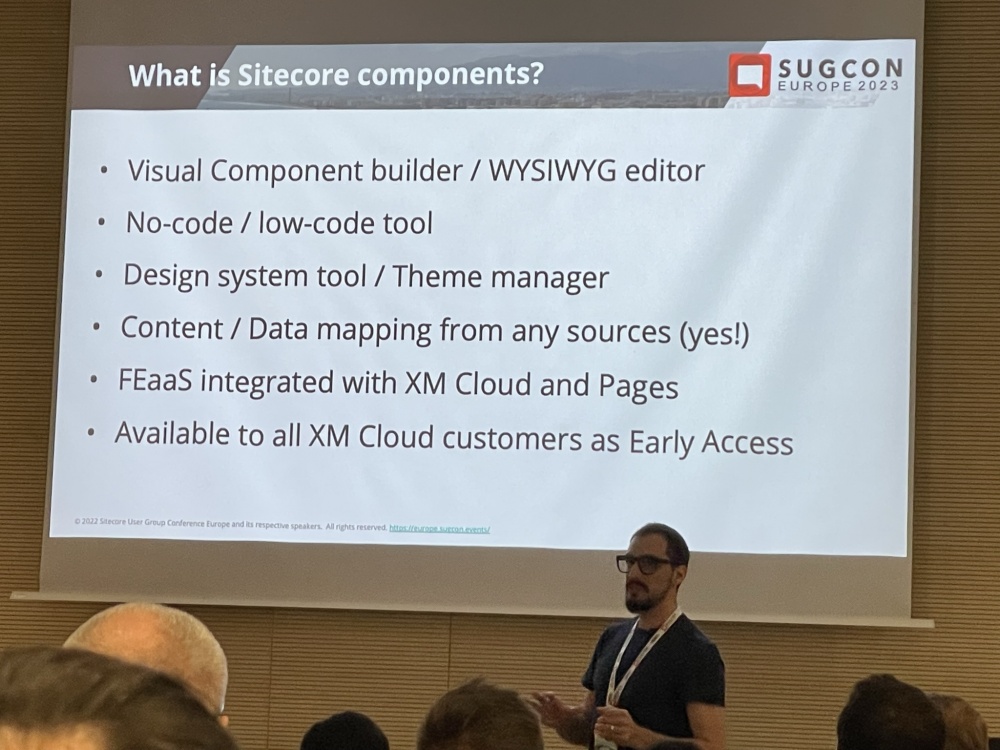
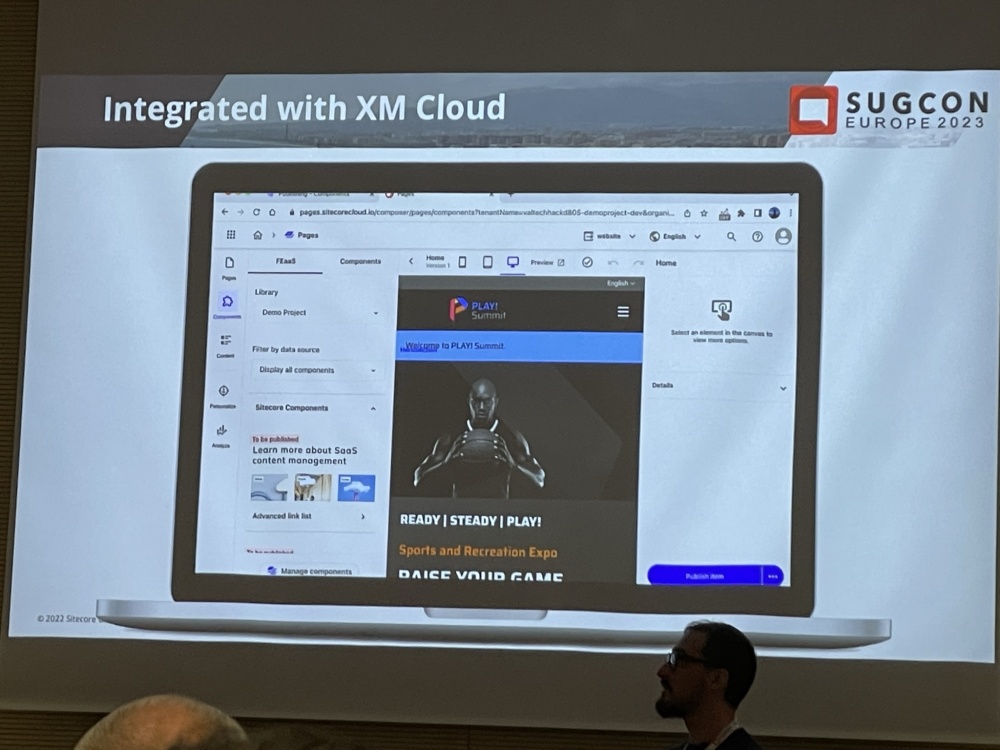
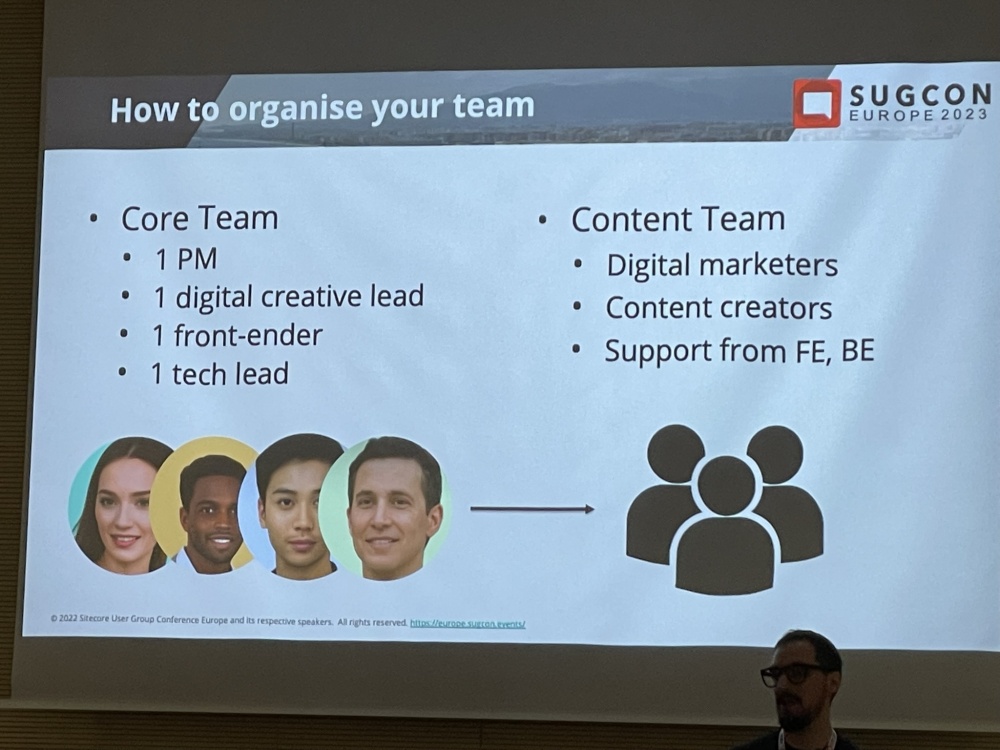
The next session was about the Sitecore Components builder in Pages in XM Cloud. I’ve heard a bit about this but not seen much of it in detail. I was hoping to see a full demo of it. I guess at the session was only 15 minutes there wasn’t time, but I still learned quite a bit about how it works.

IMG_0715
IMG_0716
IMG_0717
IMG_0719

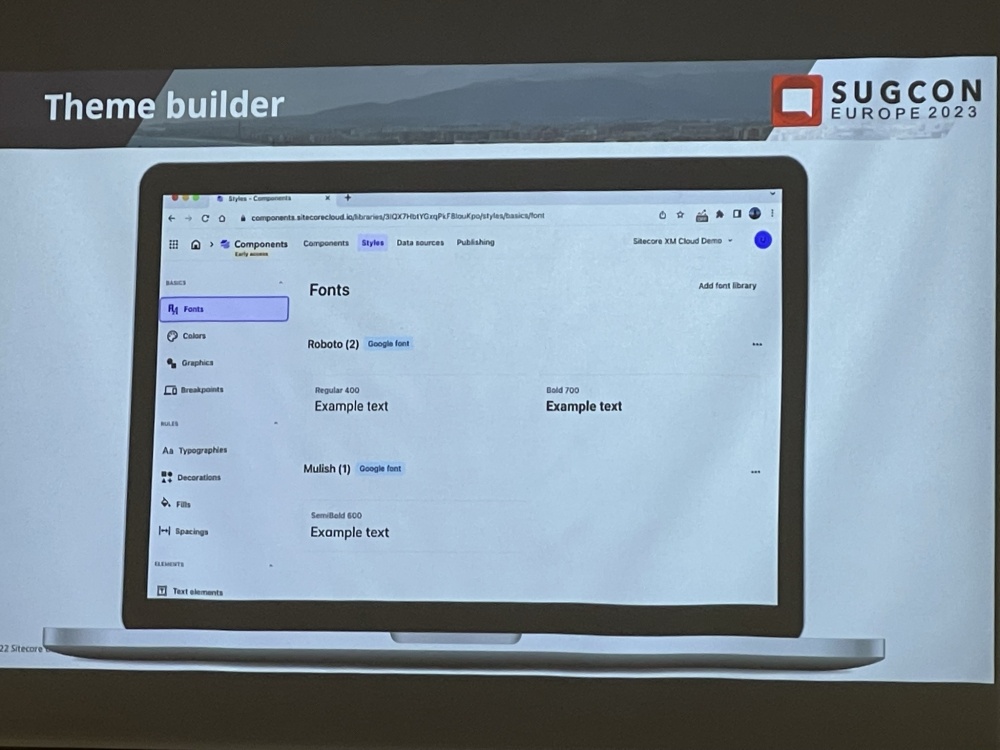
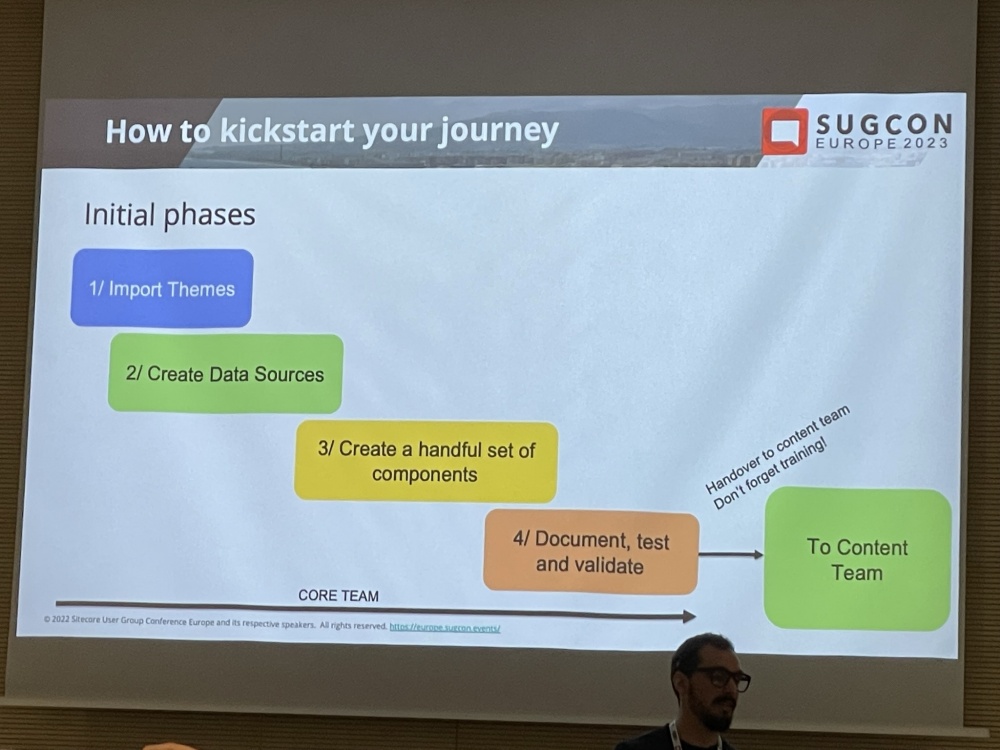
The Component Builder can be used without any development or code required at all. First Themes are setup with colours, fonts and breakpoints configured.

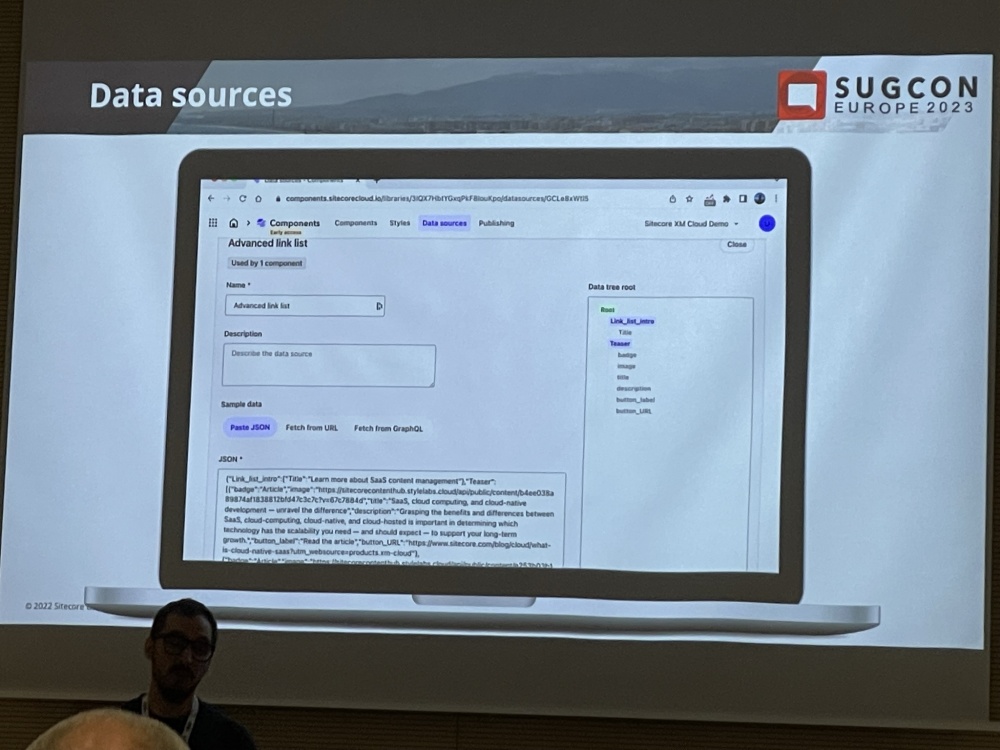
Then datasources are setup and mapped from either a url or json or GraphQL.

IMG_0720

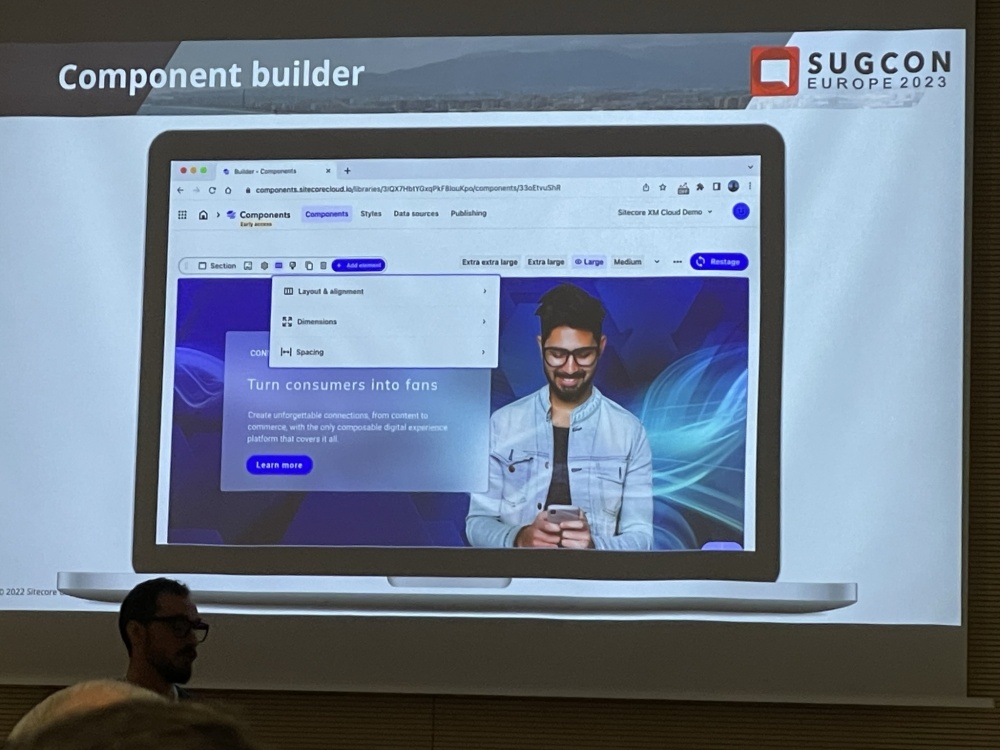
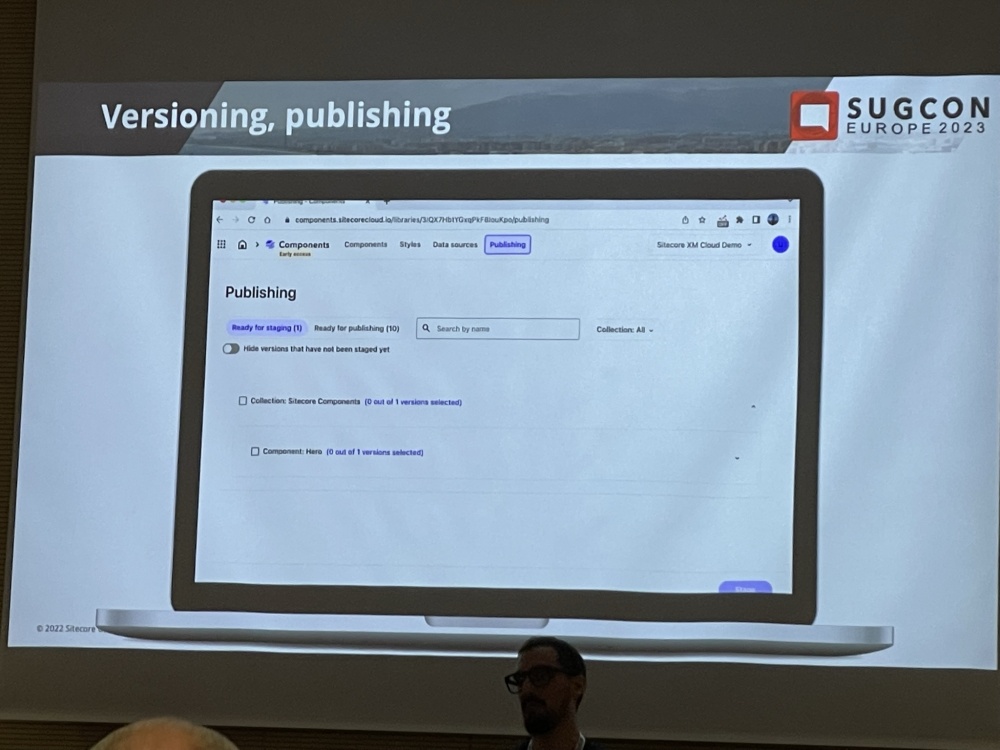
Then the components ‘look and feel’ – layout, dimensions and sizing can be configured in the Builder. This looks pretty neat. Then versioning and publishing is setup for the Component.

IMG_0721

IMG_0722

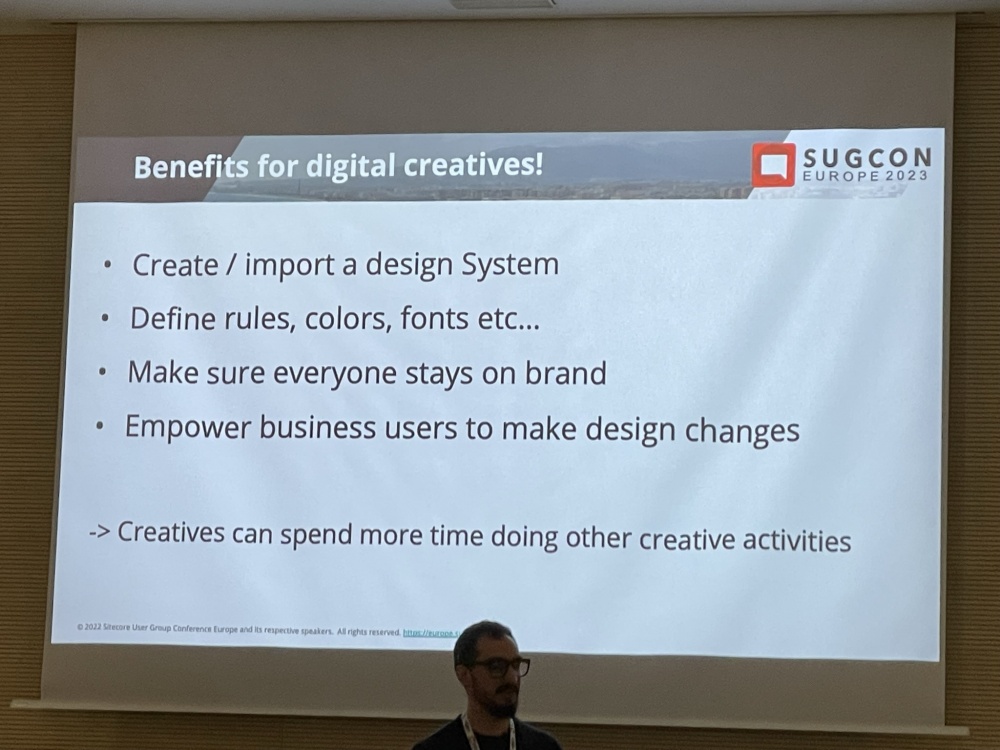
Lastly some details were shared around the benefits for digital creatives, it’s possible to get Sites built very quickly and easily using Components Builder.

IMG_0723
IMG_0724
IMG_0726
IMG_0727


Leveraging XM Cloud APIs and Webhooks to powerup integrations – Ramkumar Dhinakaran & Elakkuvan Rajamani

IMG_0740

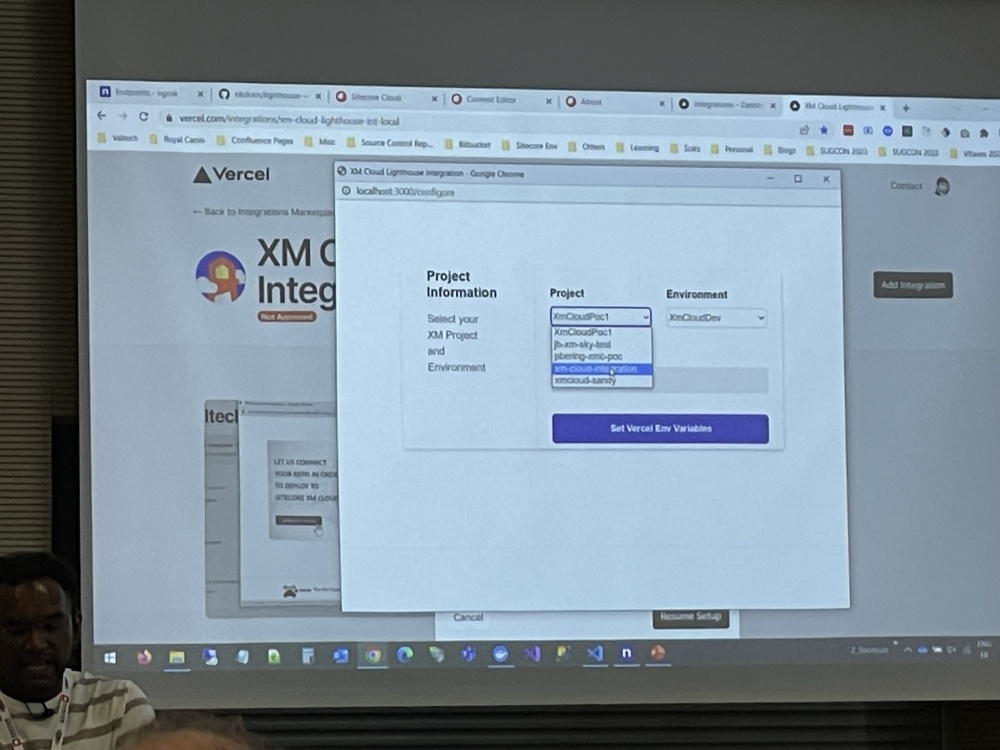
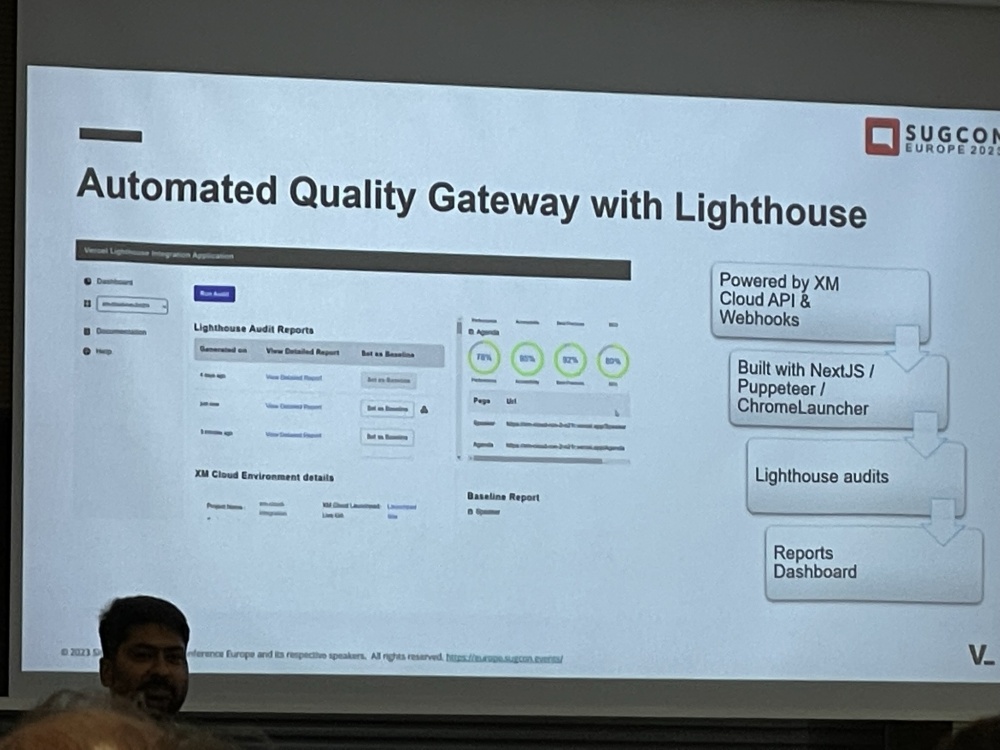
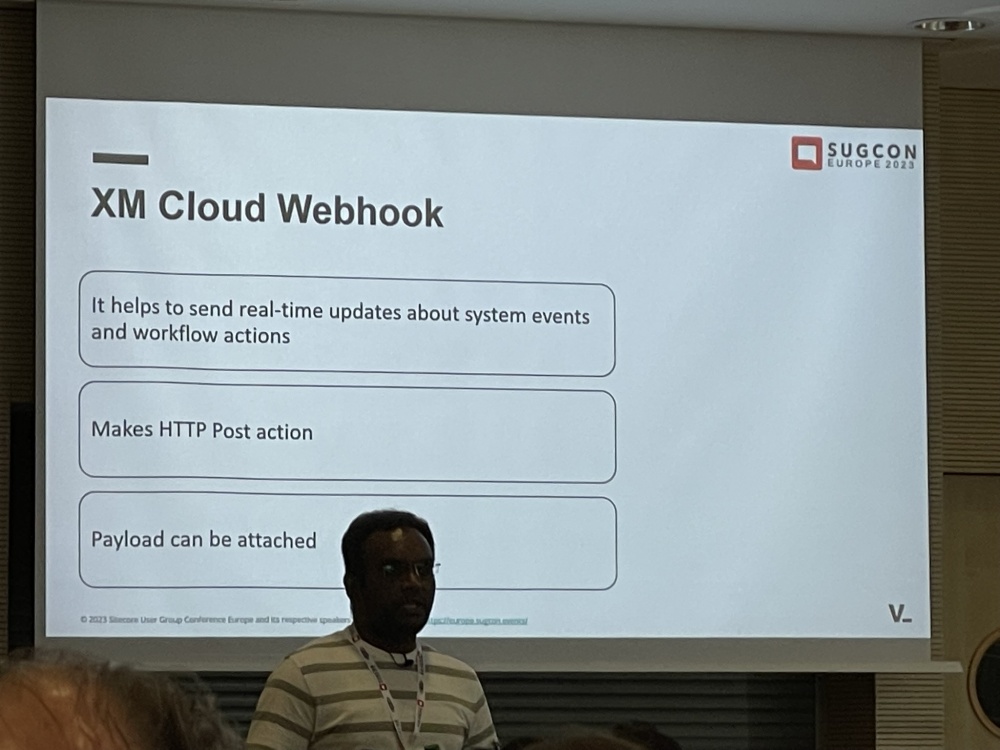
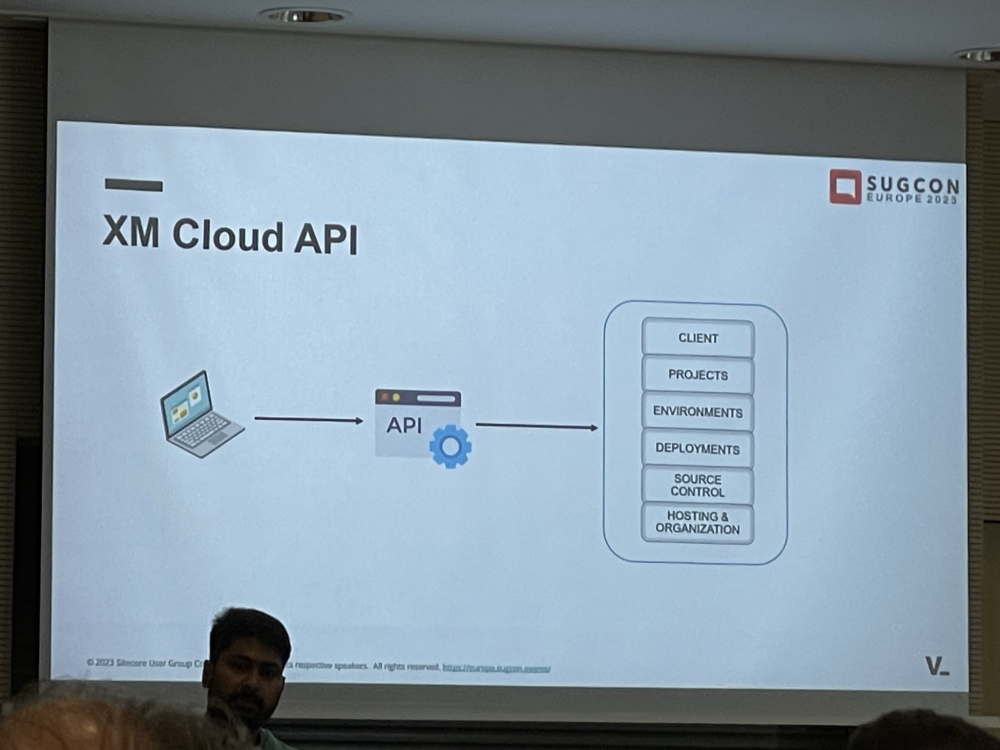
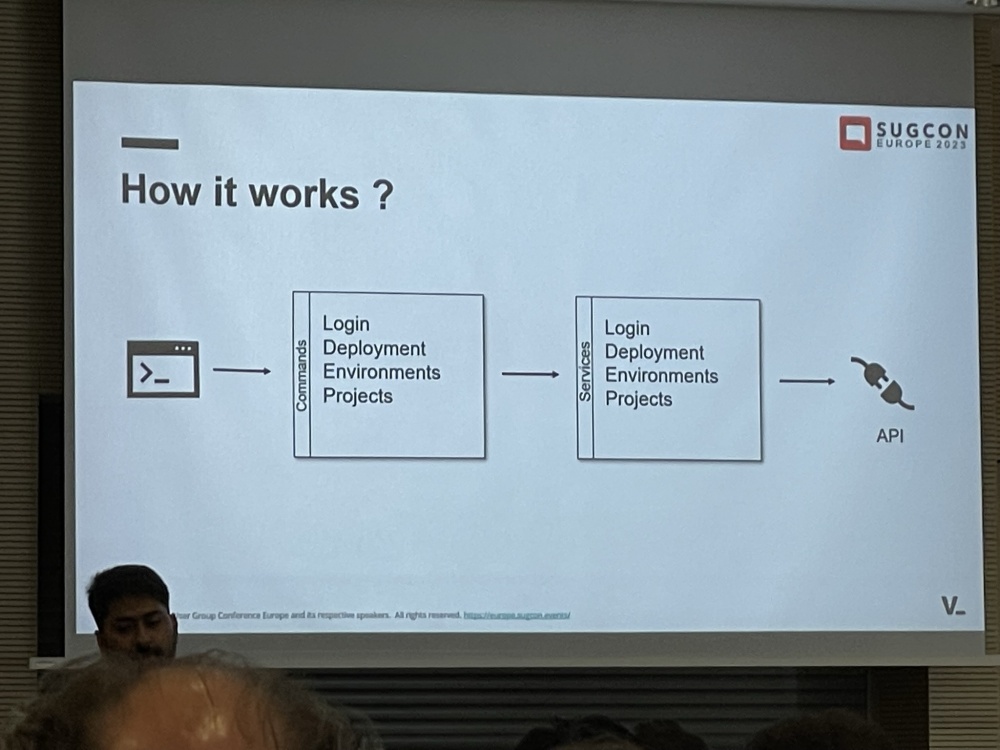
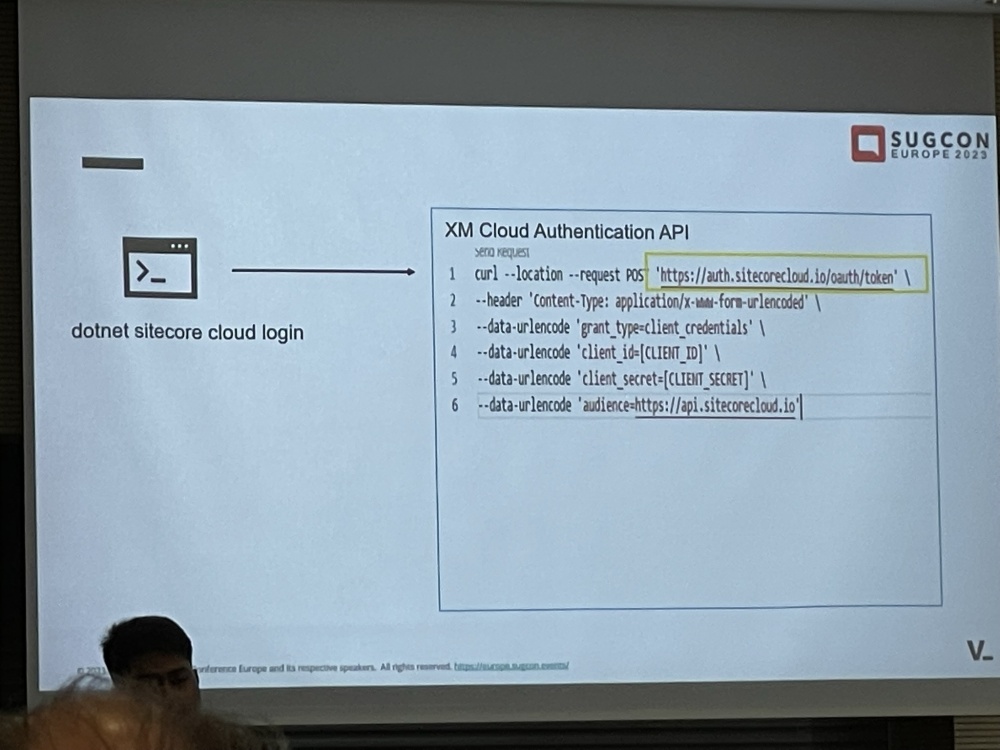
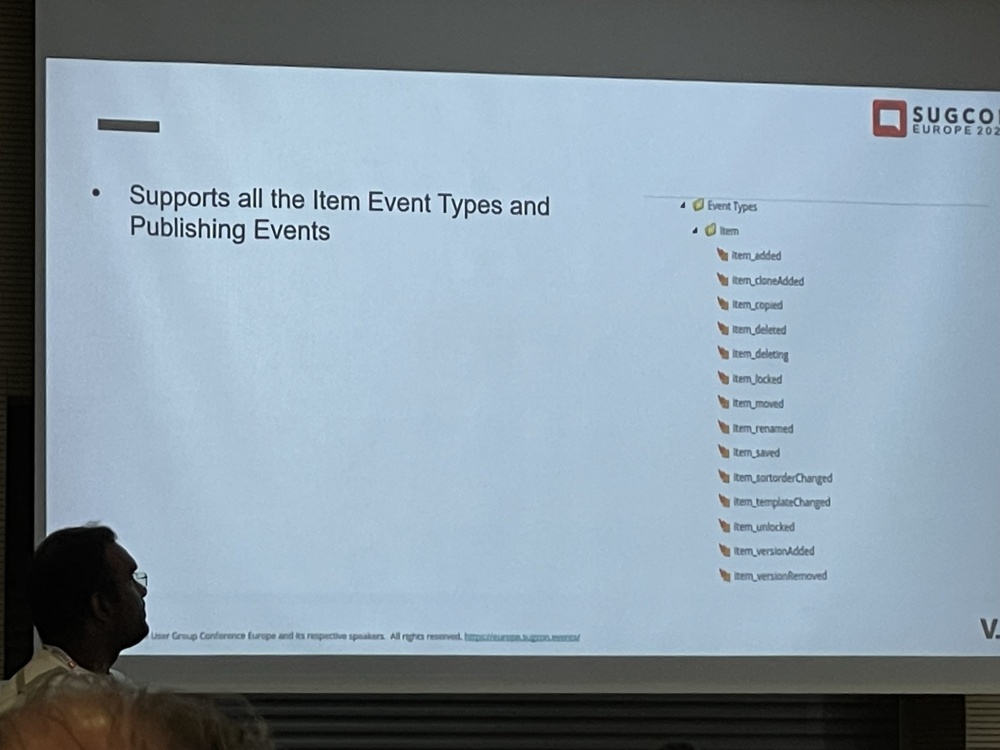
After lunch it was time for another session, this time on Webhooks. The use-case here was the XM Cloud Lighthouse Integration which would do an automated quality check of pages using Webhooks and report on it.

IMG_0731

IMG_0742
IMG_0745

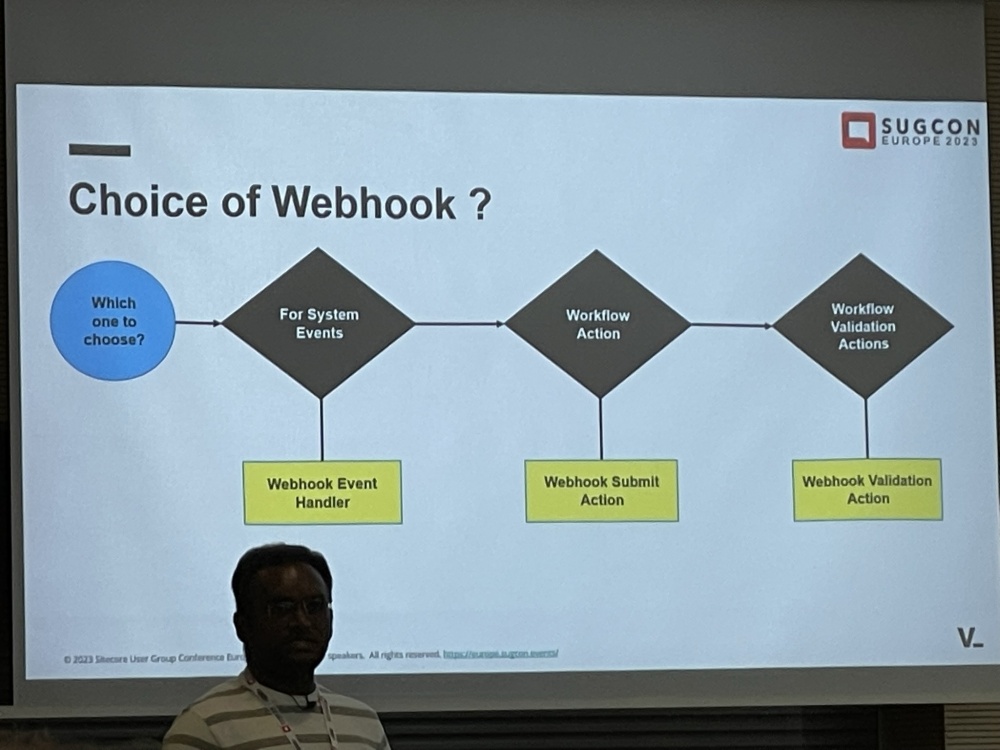
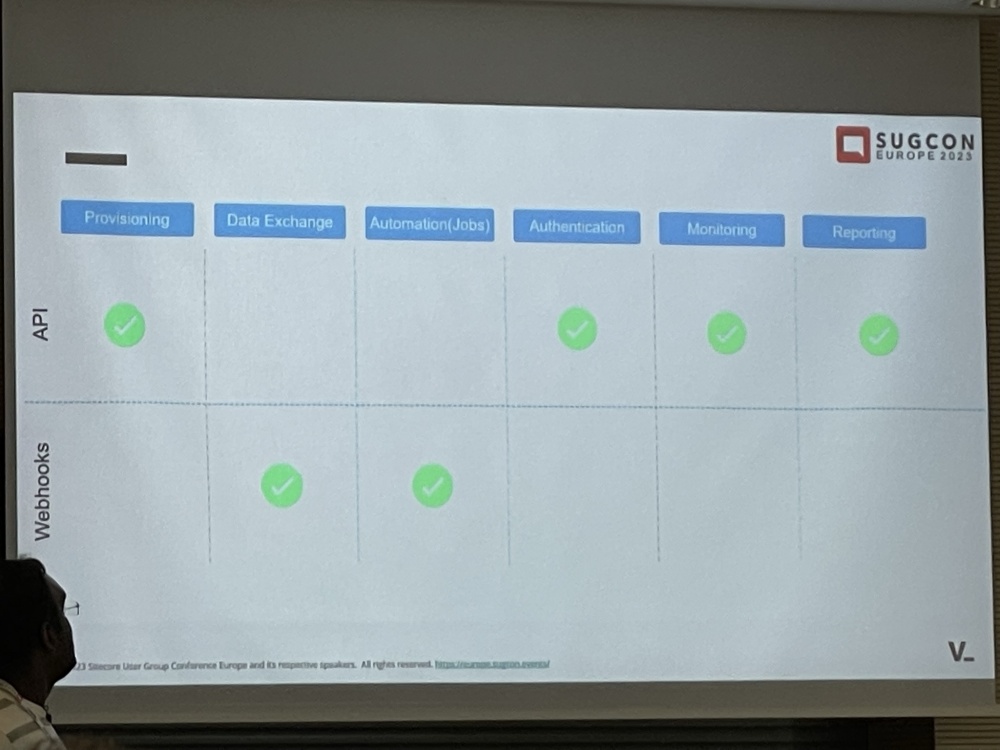
Depending on the integration required it might not be best to use a Webhook:
IMG_0756
IMG_0758

Quite a lot of detail was shared with how this all works and integrates.

IMG_0735
IMG_0736
IMG_0737
IMG_0747

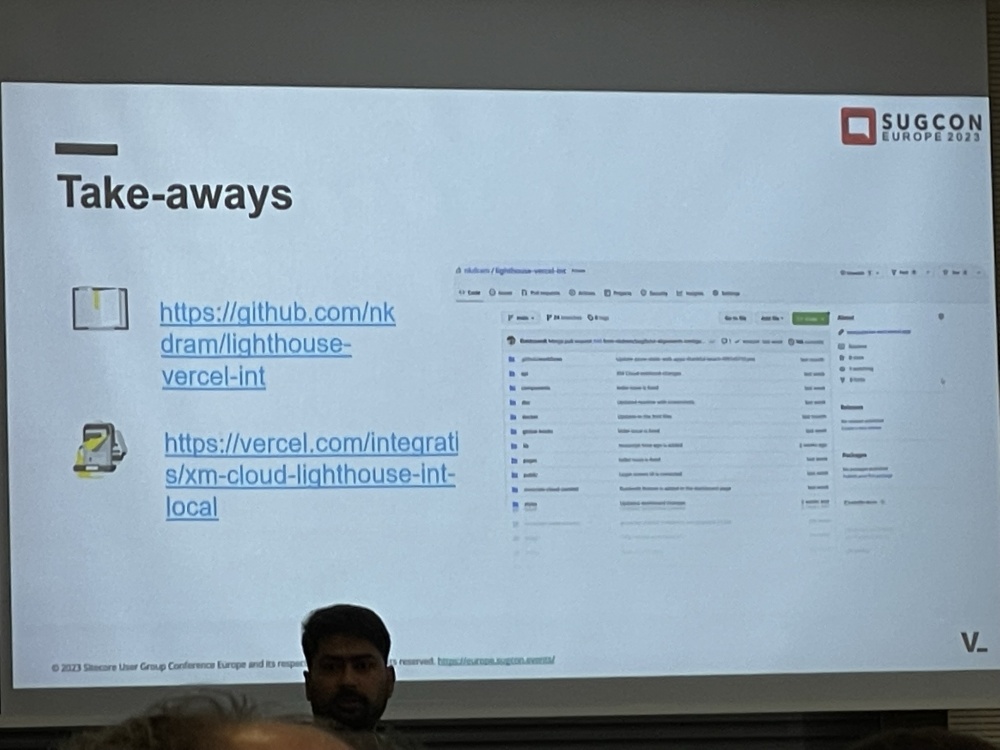
There were some links and takeaways shared at the end.

IMG_0763


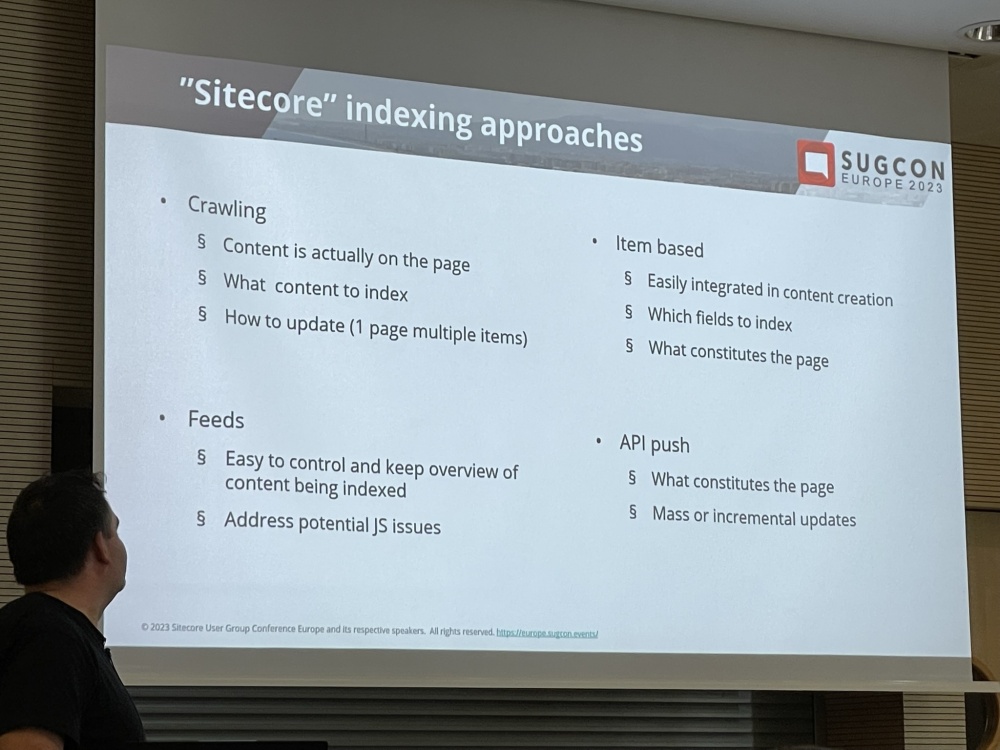
Sitecore Search: Real case PoC – Sebastian Winslow & Jesper Balle

IMG_0766

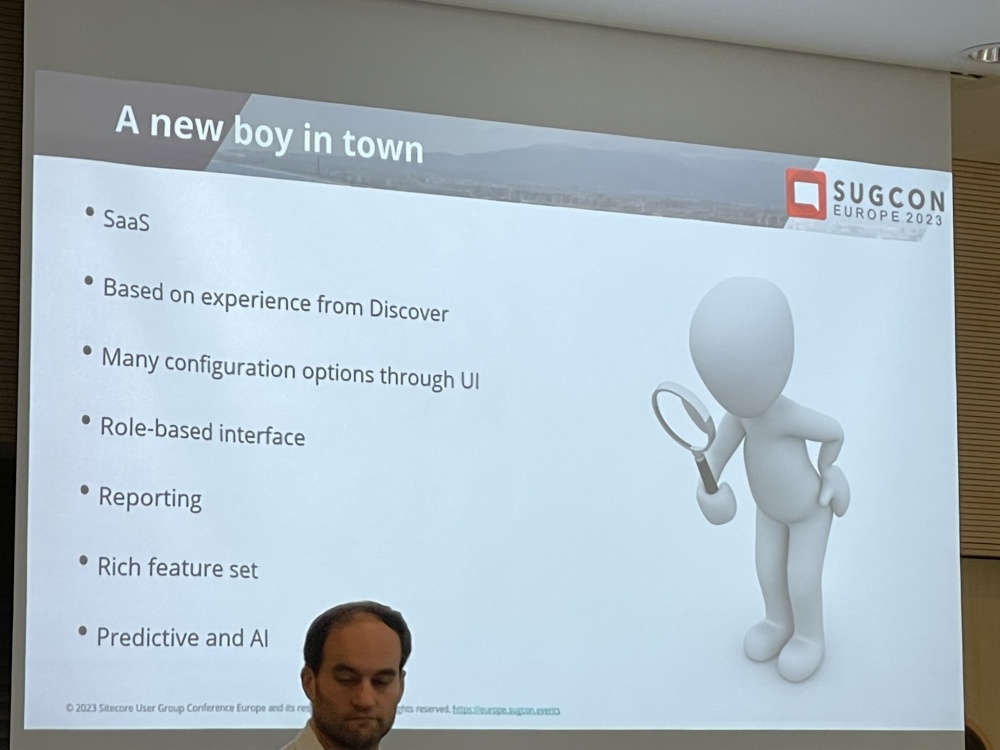
The 2nd to last session for the day was on the Sitecore search (based on Discover) which I was keen to learn about more as I didn’t know much about how it worked.

IMG_0770
IMG_0772
IMG_0773

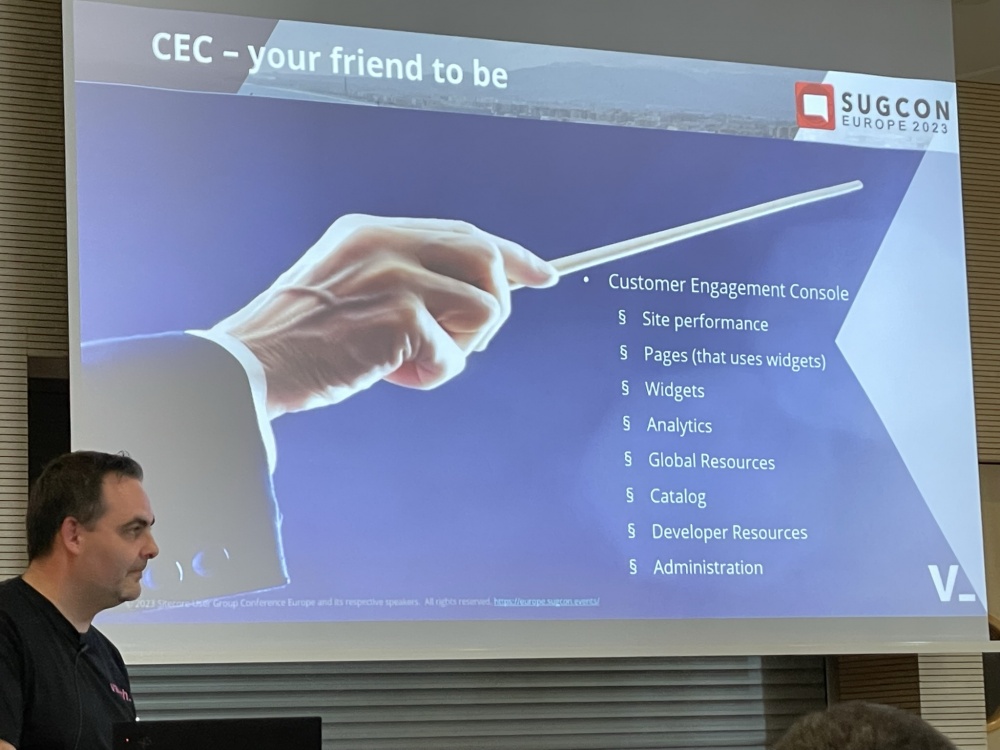
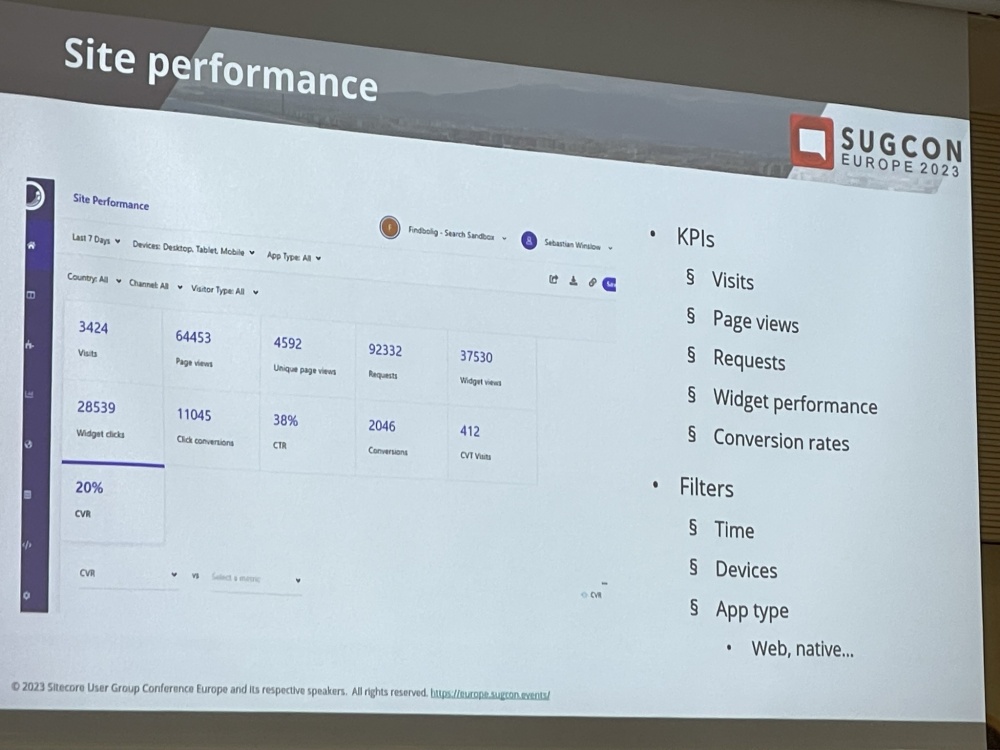
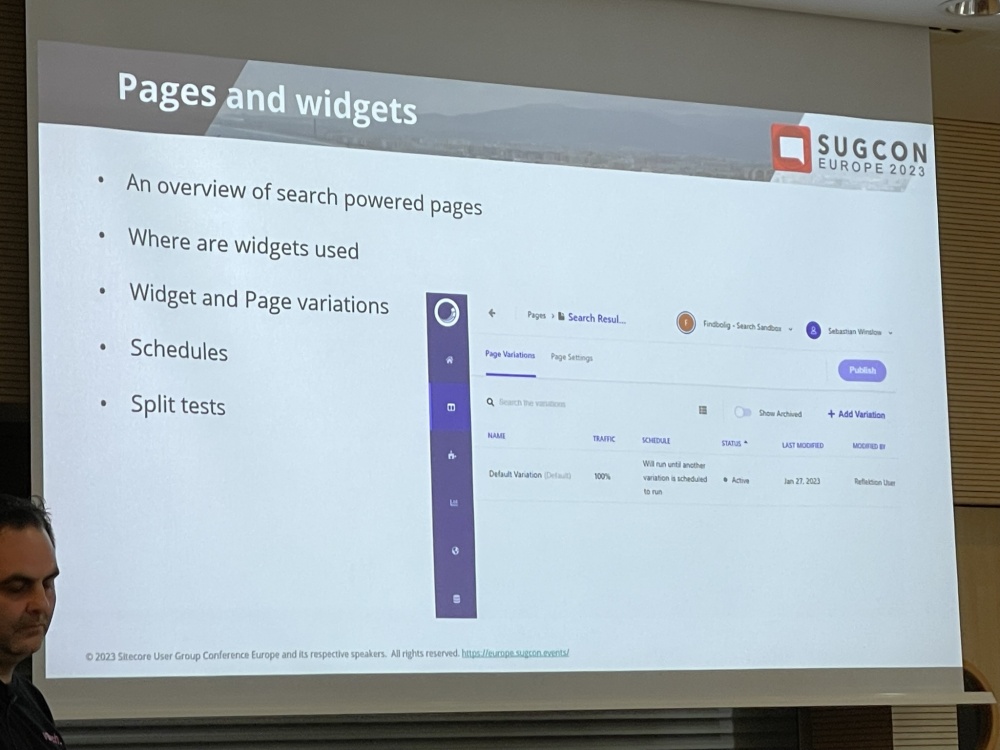
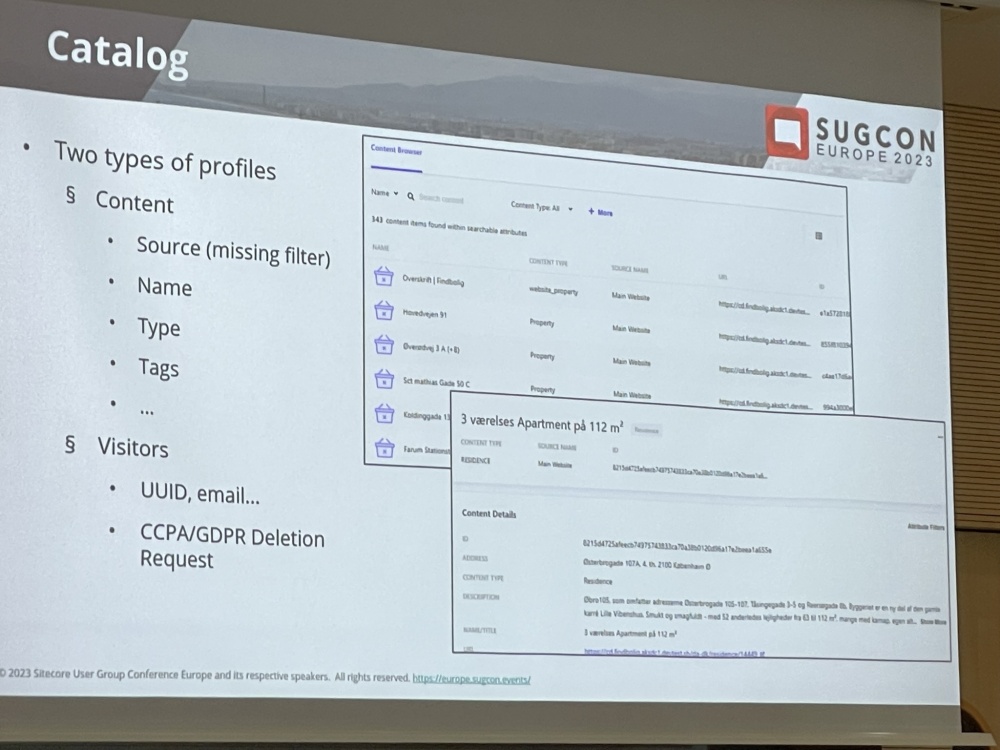
CEC looks pretty powerful and can be used to manage search, performance is key and widgets can be configured for search and catalog:

IMG_0774
IMG_0776
IMG_0778
IMG_0779

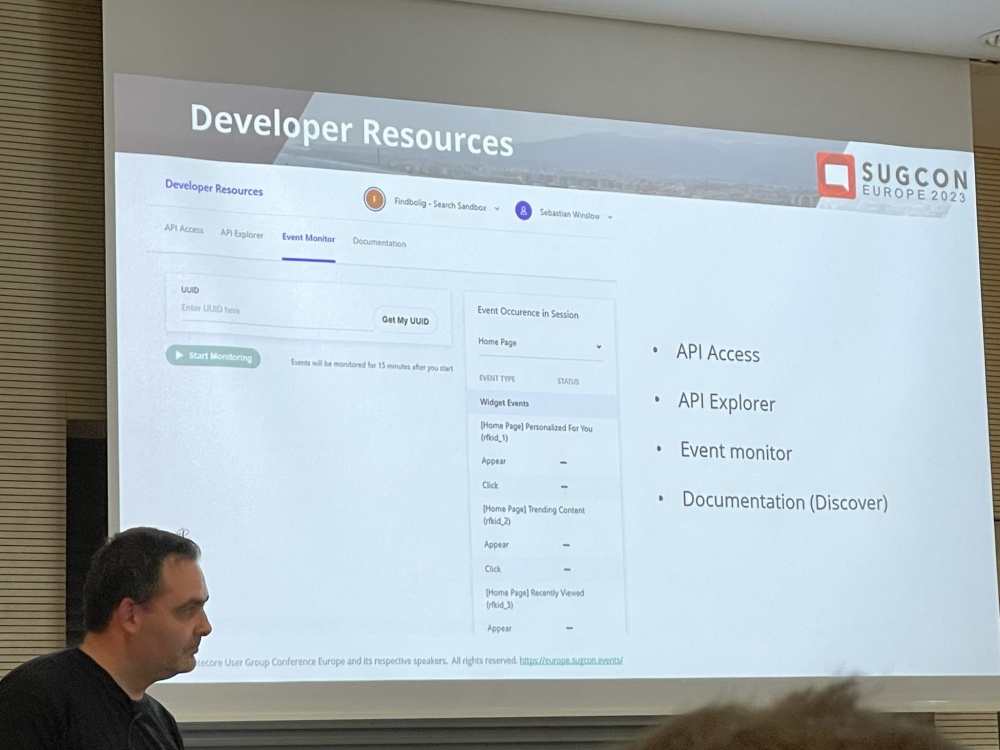
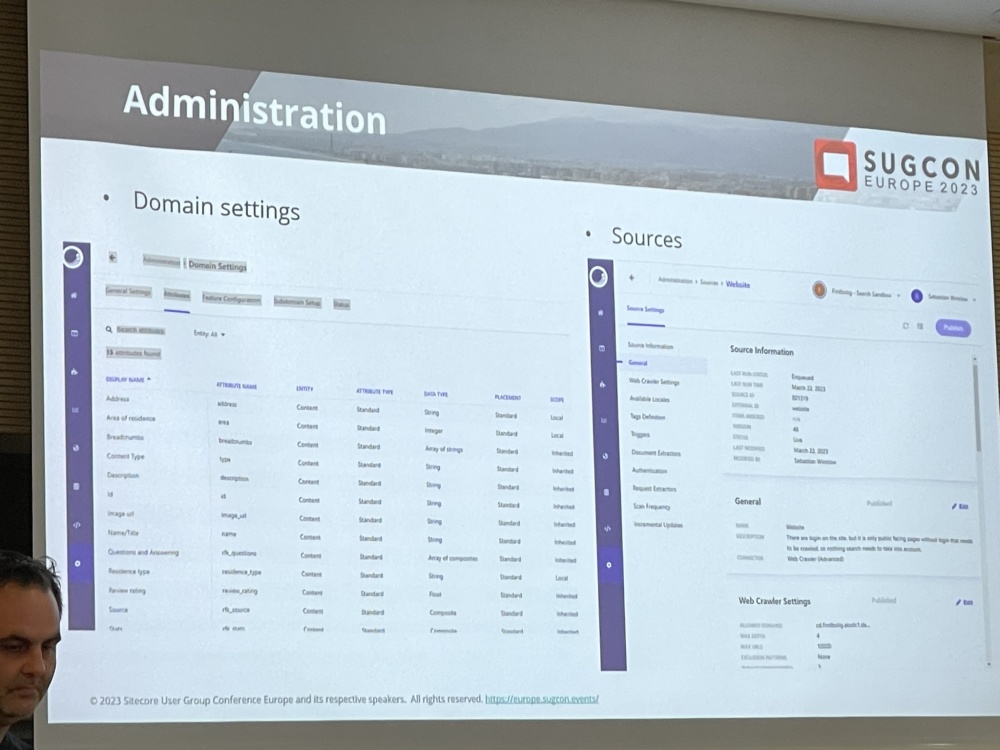
Some dev resources and admin info were shared:

IMG_0780
IMG_0782

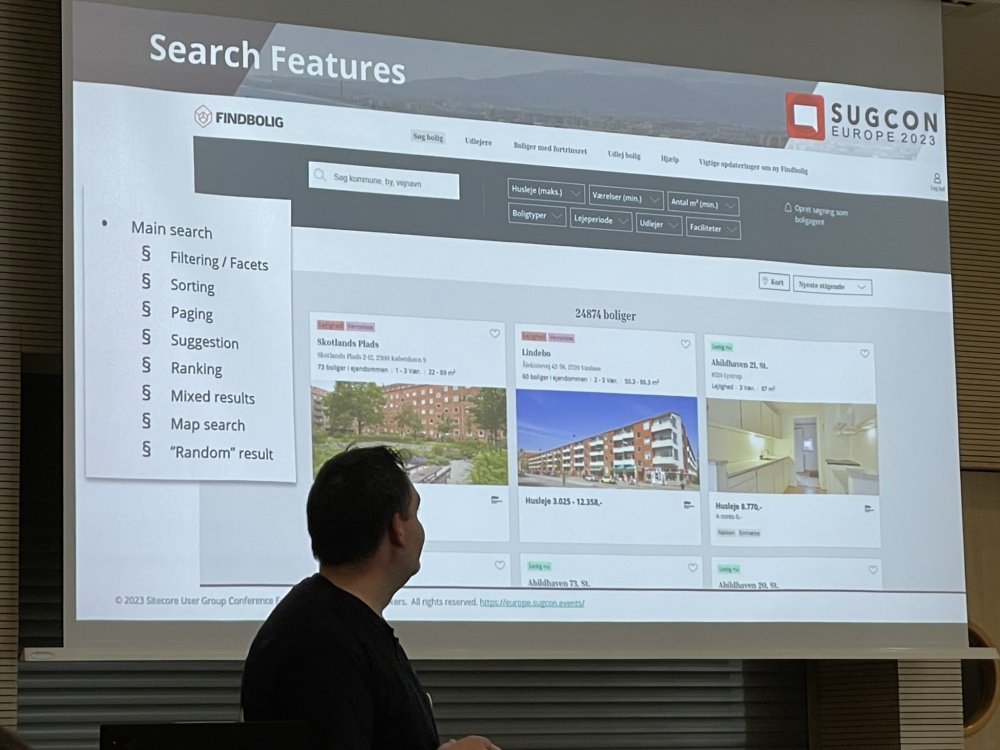
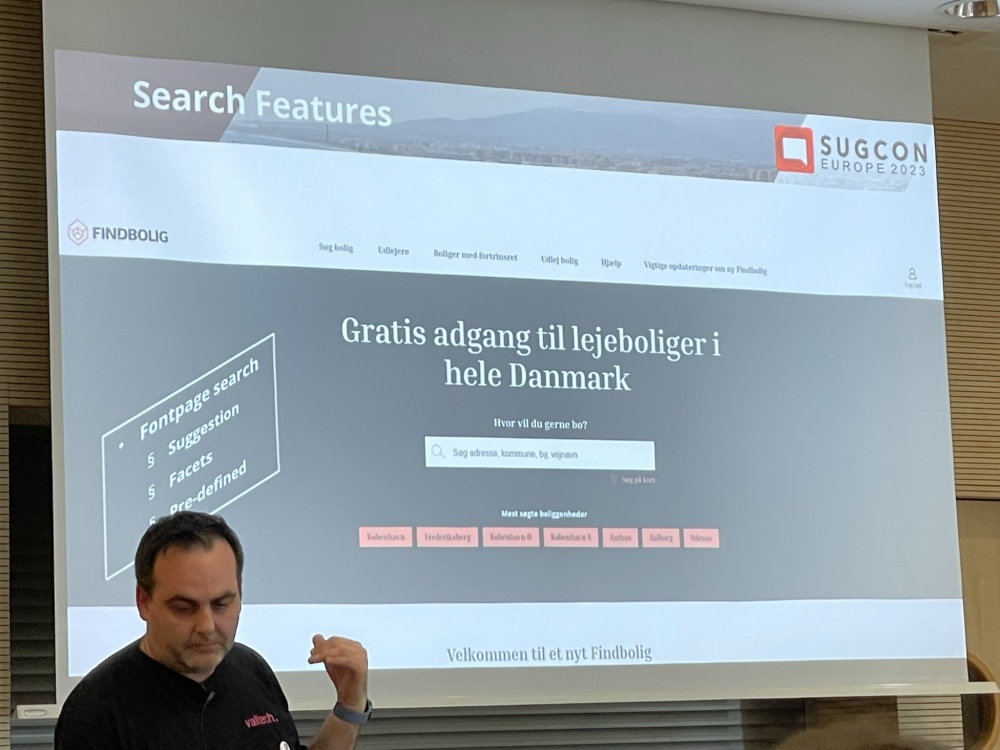
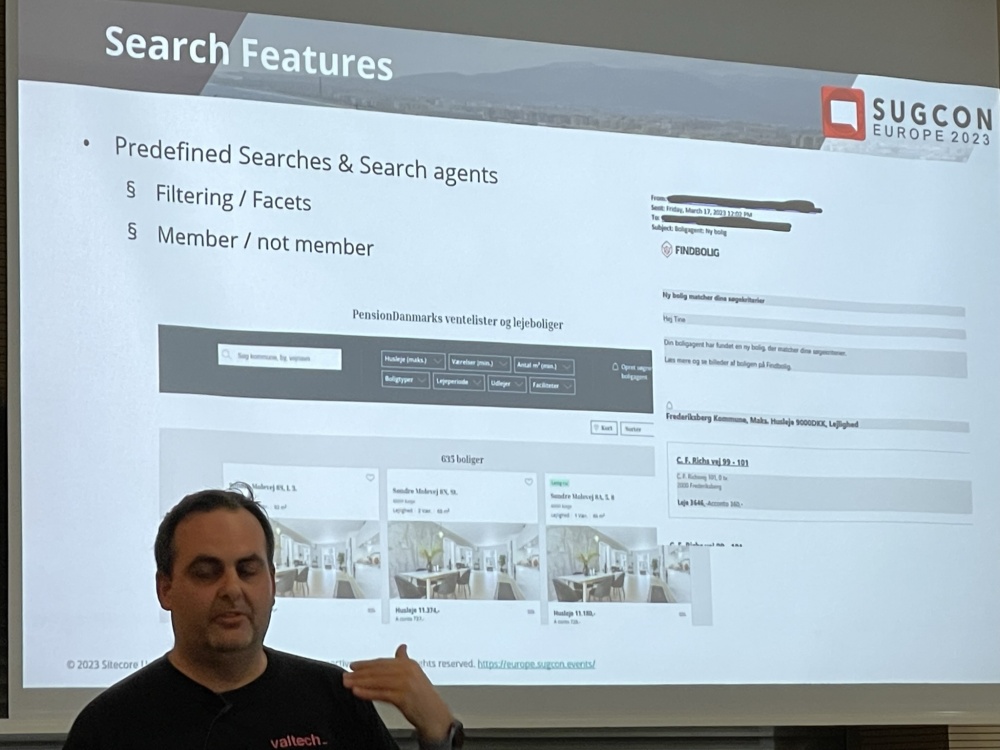
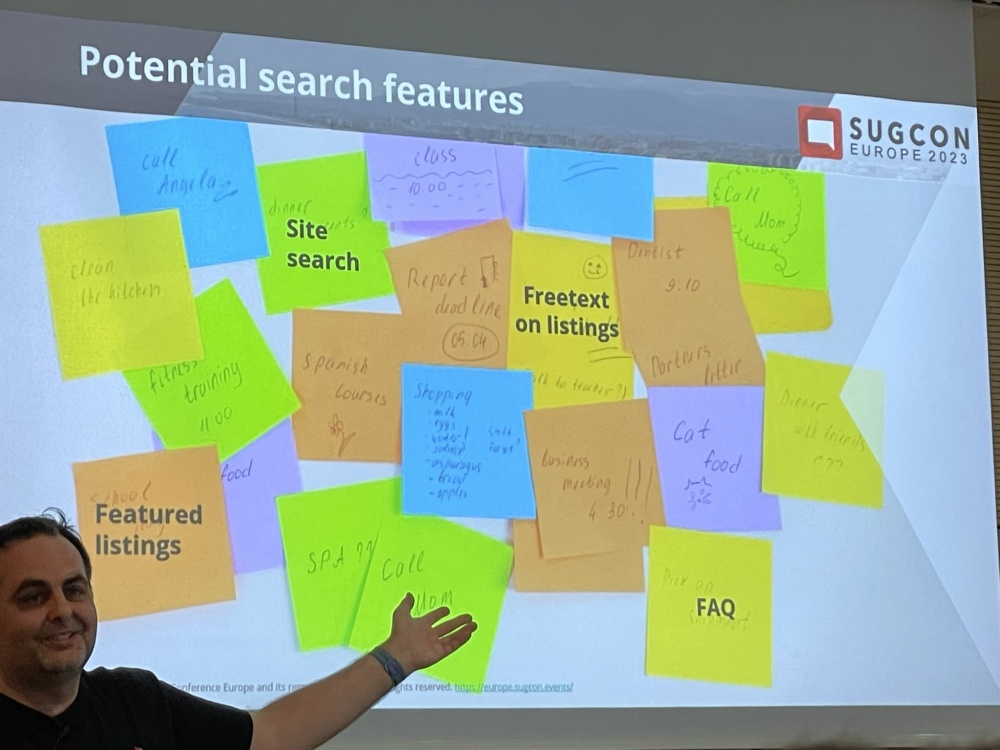
The use case for search was a property Site. There is still some features that need to be built.

IMG_0783
IMG_0785
IMG_0789
IMG_0790

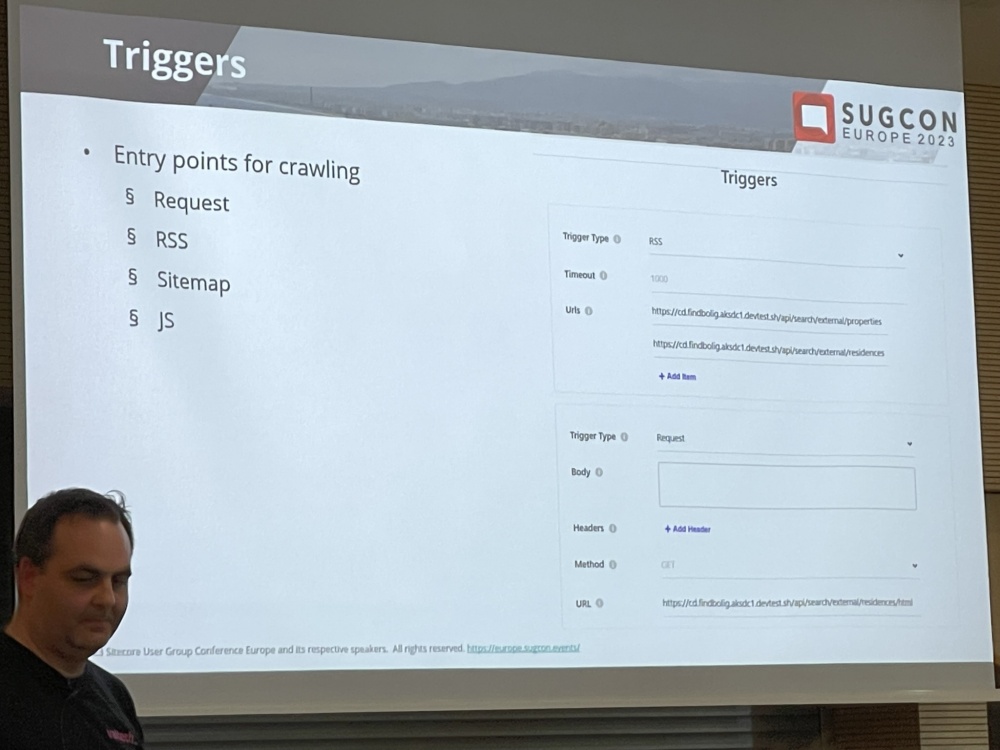
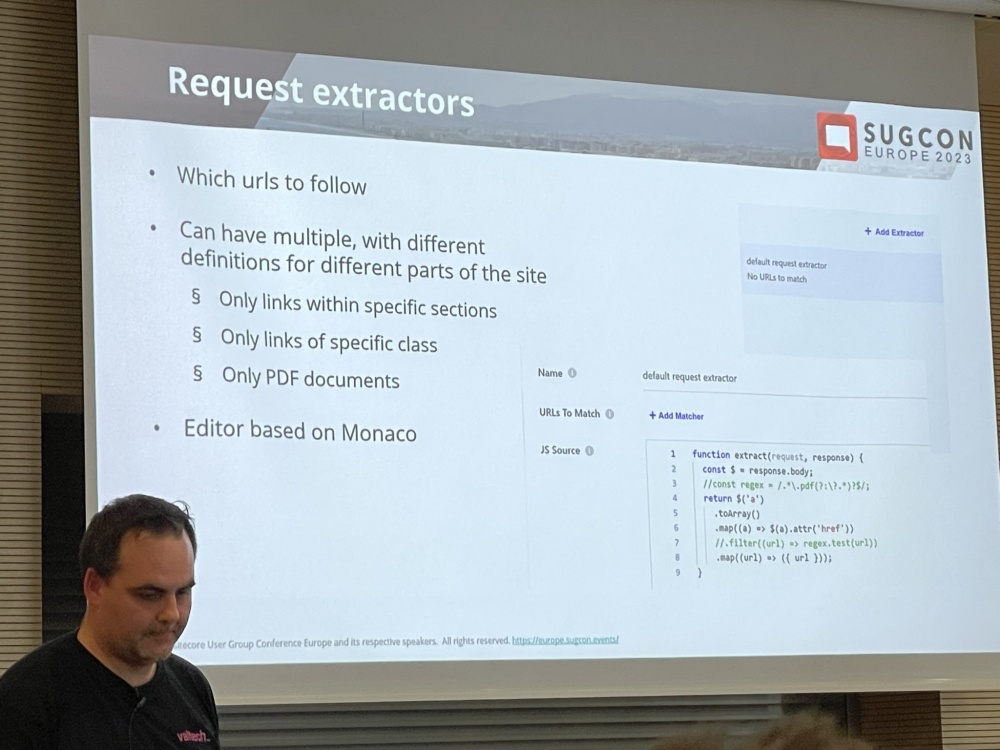
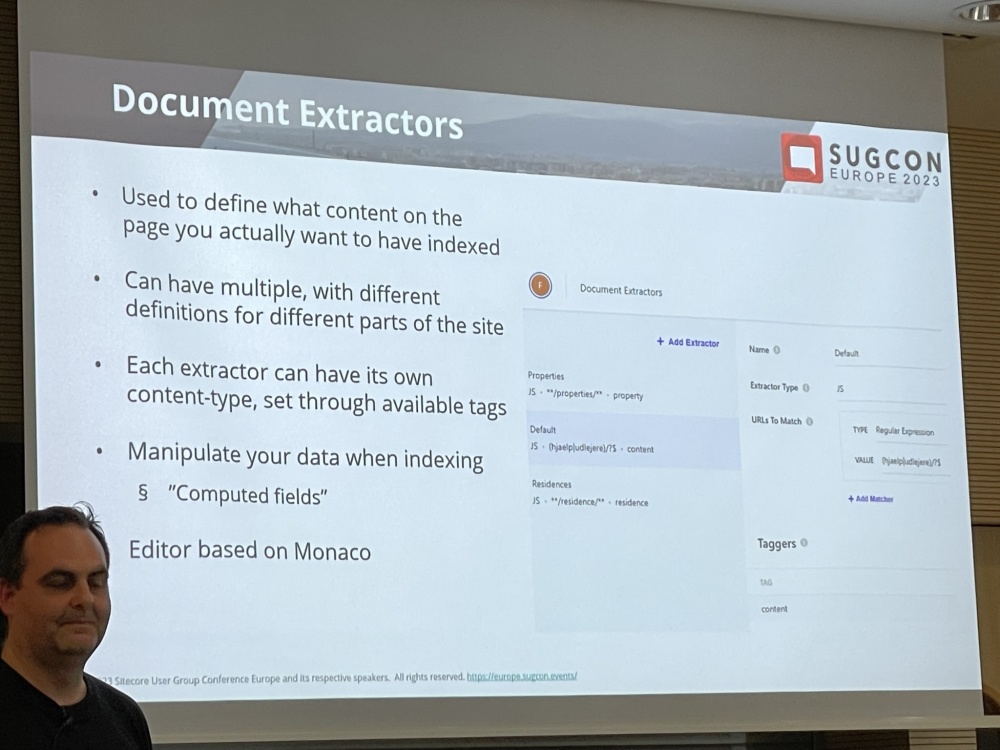
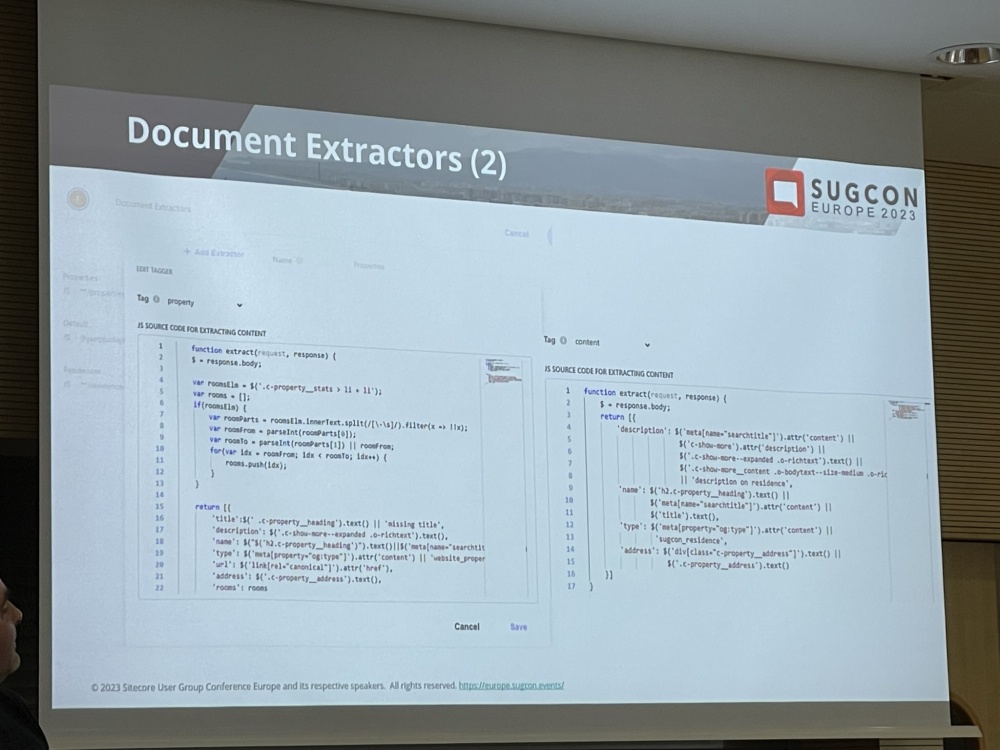
Some info was then provided on Triggers to get the content, Request and document extractors to process and manipulate the content.

IMG_0791
IMG_0792
IMG_0793
IMG_0794

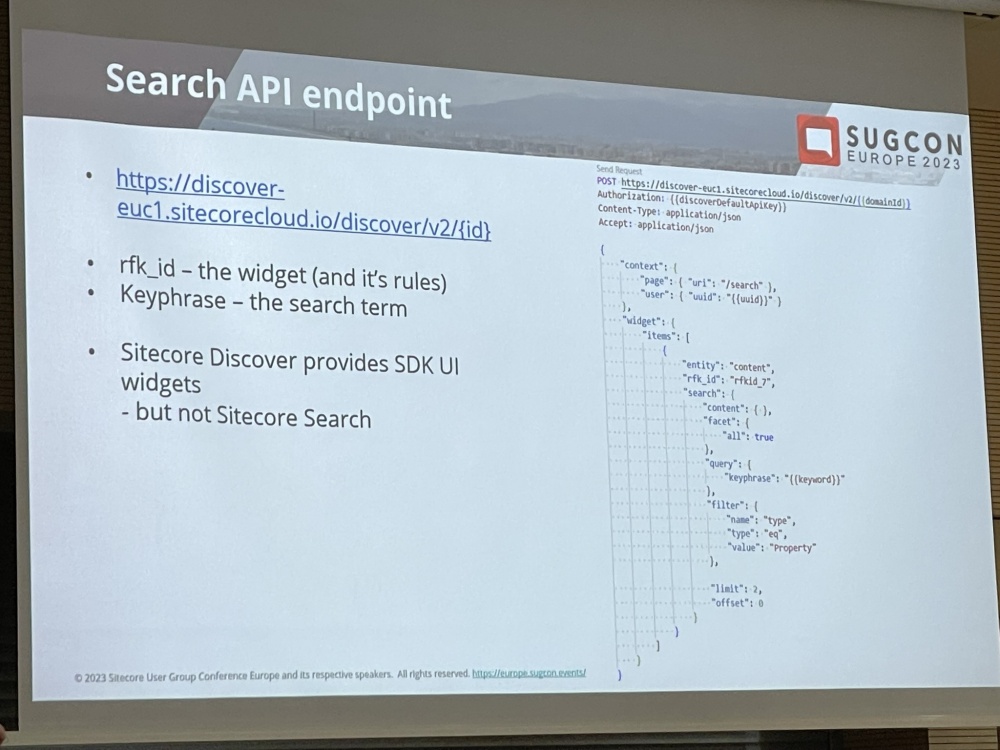
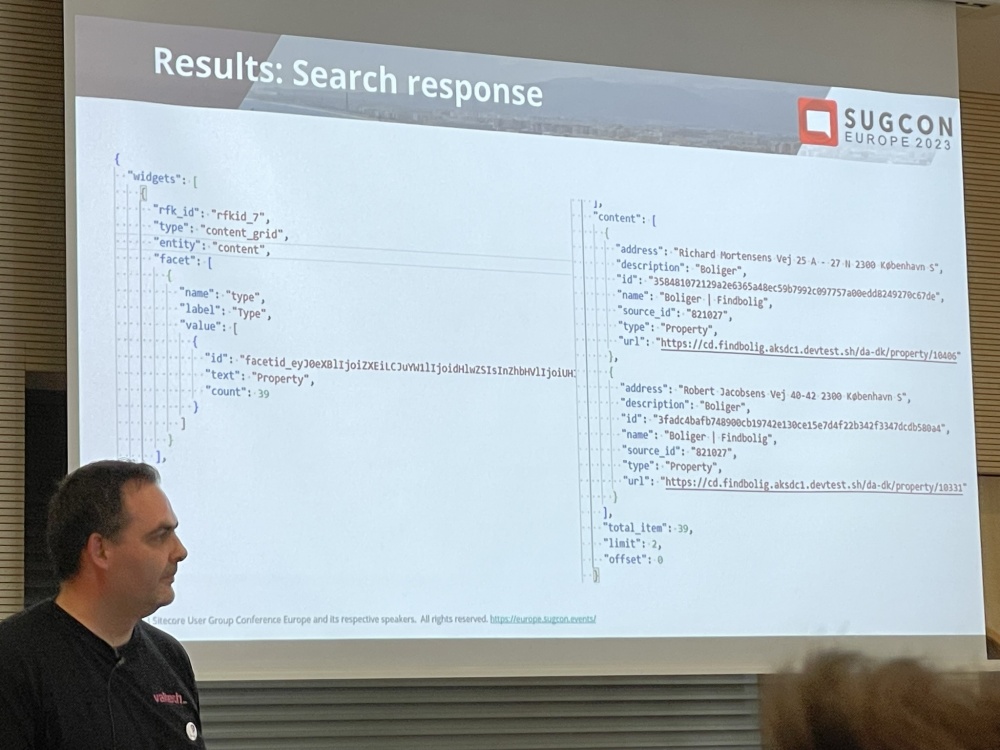
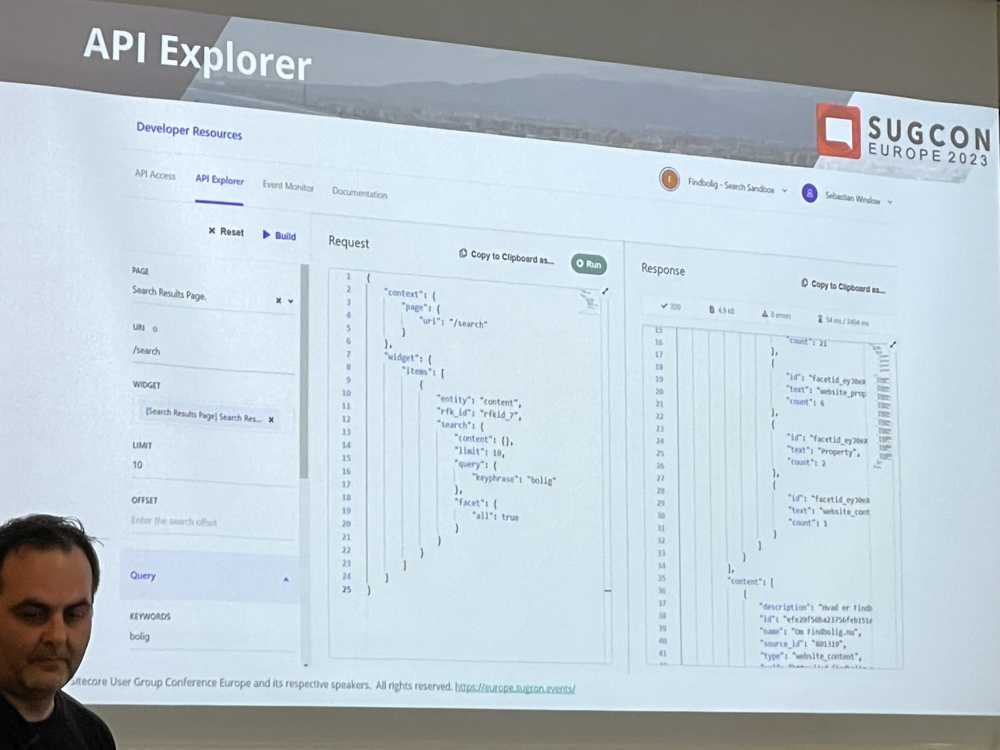
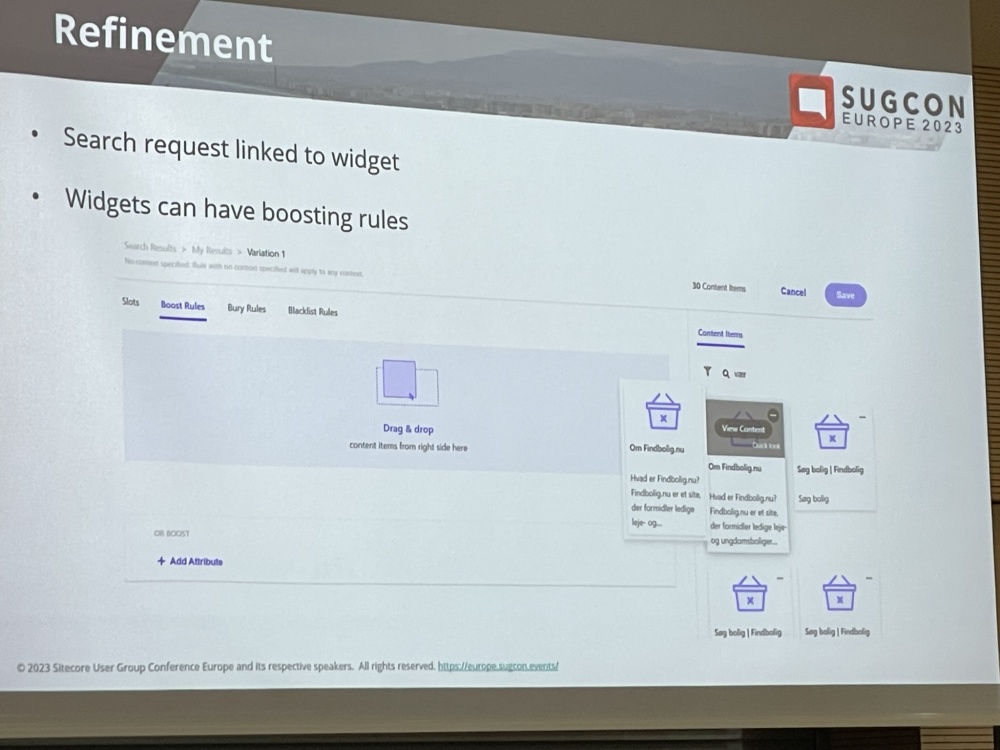
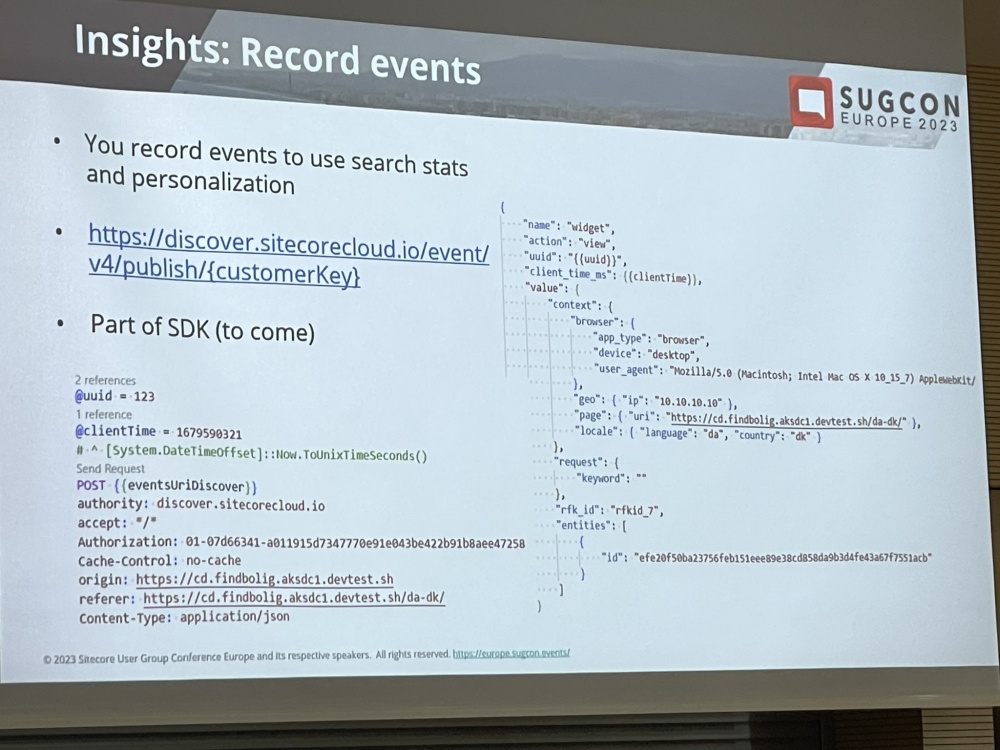
Search API endpoints, results response, API Explorer and ability to refine the widgets.

IMG_0796
IMG_0798
IMG_0799
IMG_0801

It’s early days and the search SDK is still not there yet but it’s coming. Be careful with how much content you try and index when testing but there are some significant benefits to using it.

IMG_0803
IMG_0805

This was a really informative session and gave me all the info I was looking for about how to go about implementing search.

Experiences with Content Hub One – Journey of relaunching our Usergroup website – Katharina Luger & Christian Hahn

IMG_0807

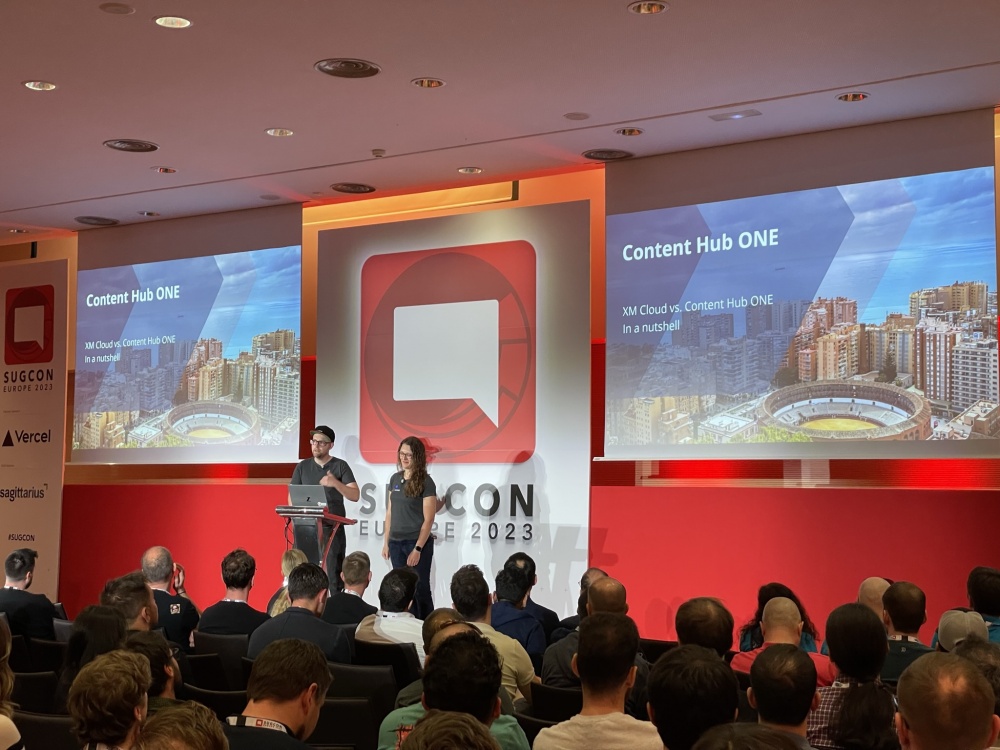
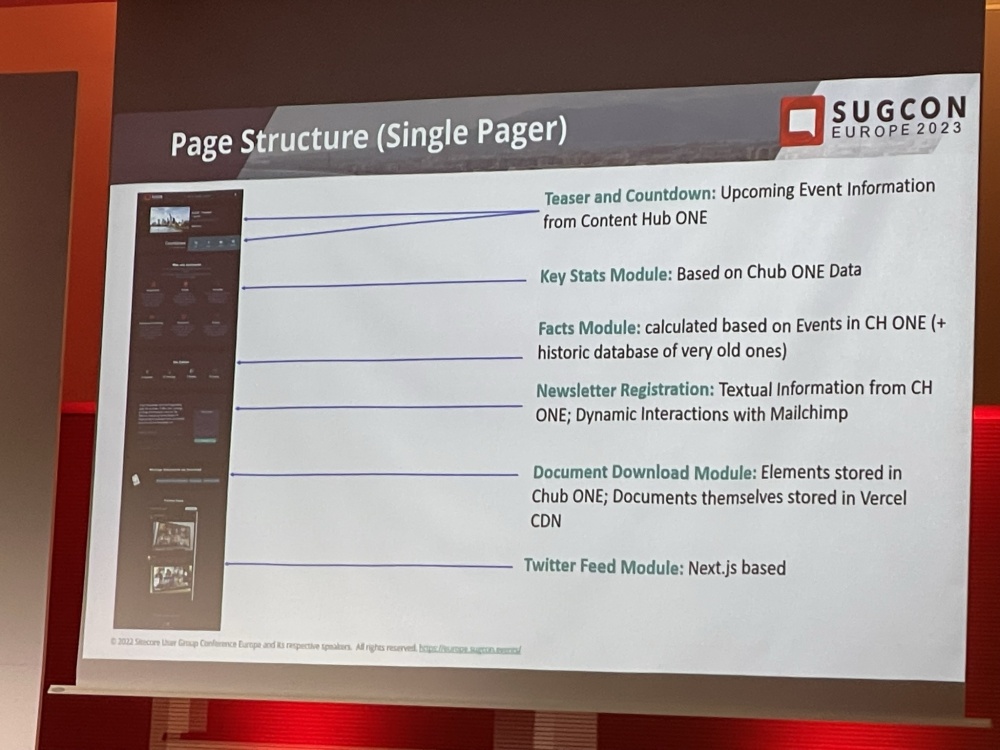
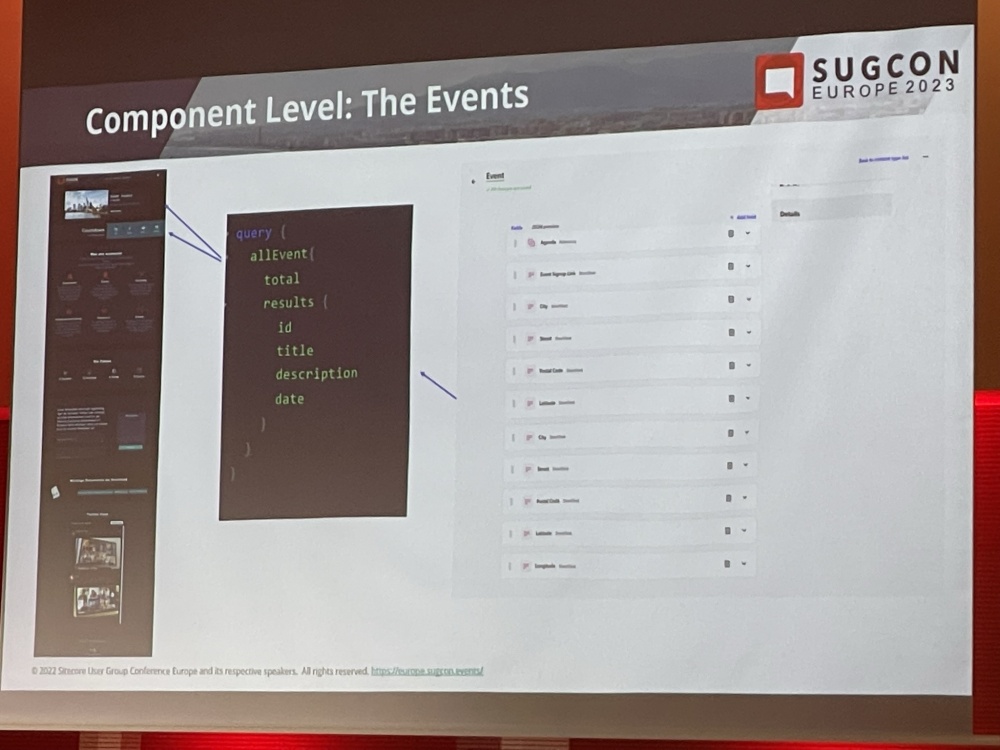
Then it was time for my last session of the day on how the Sitecore User Group Germany rebuilt their site as an SPA using Content Hub One.

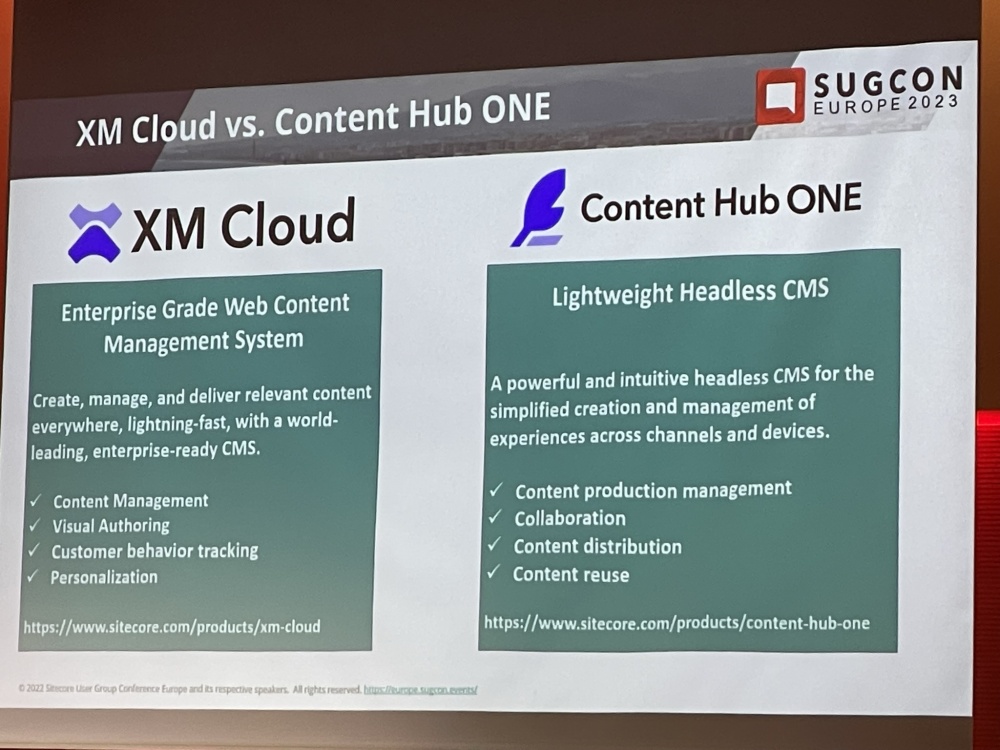
The slide below was probably the simplest comparison I saw all SUCON of the differences between XM Cloud and Content Hub One.

IMG_0808
IMG_0811
IMG_0816
IMG_0818

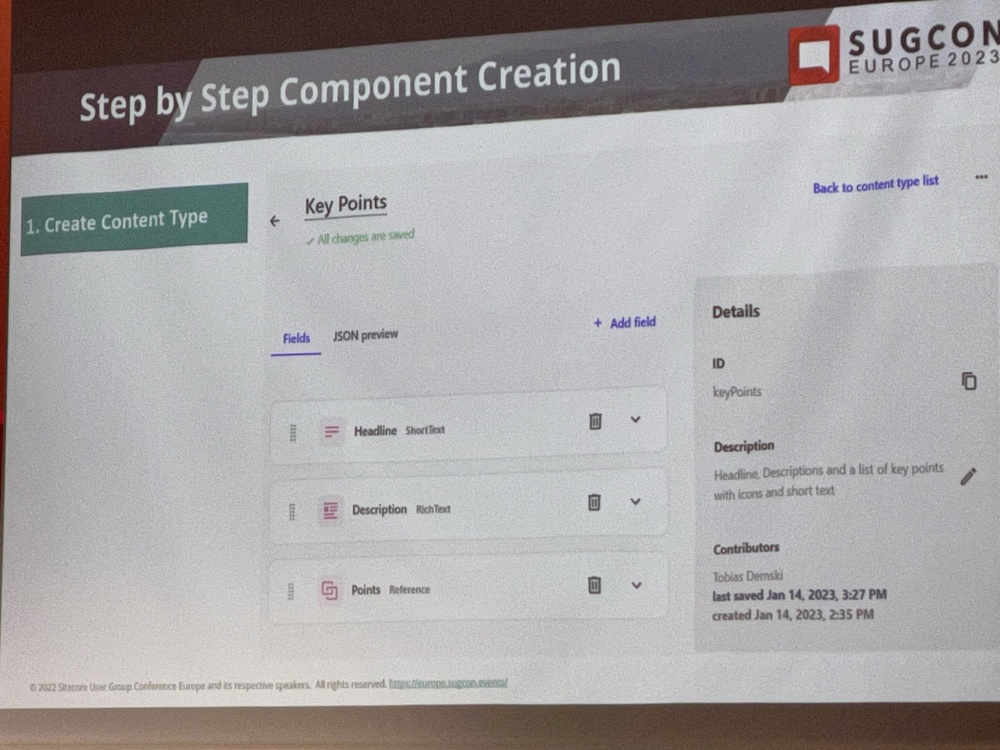
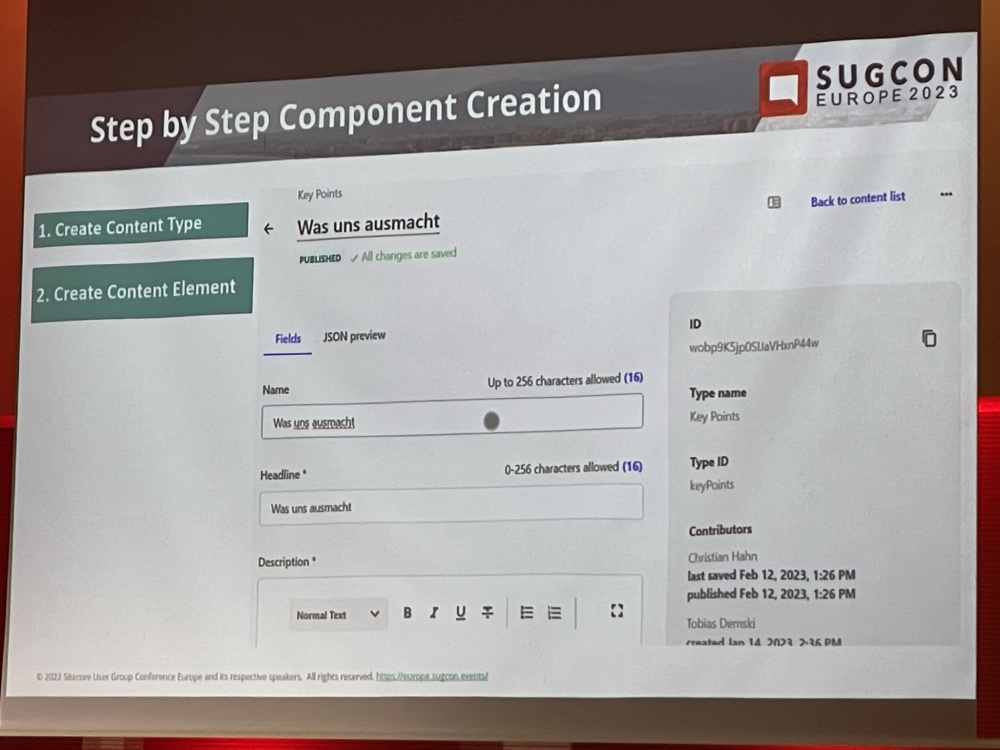
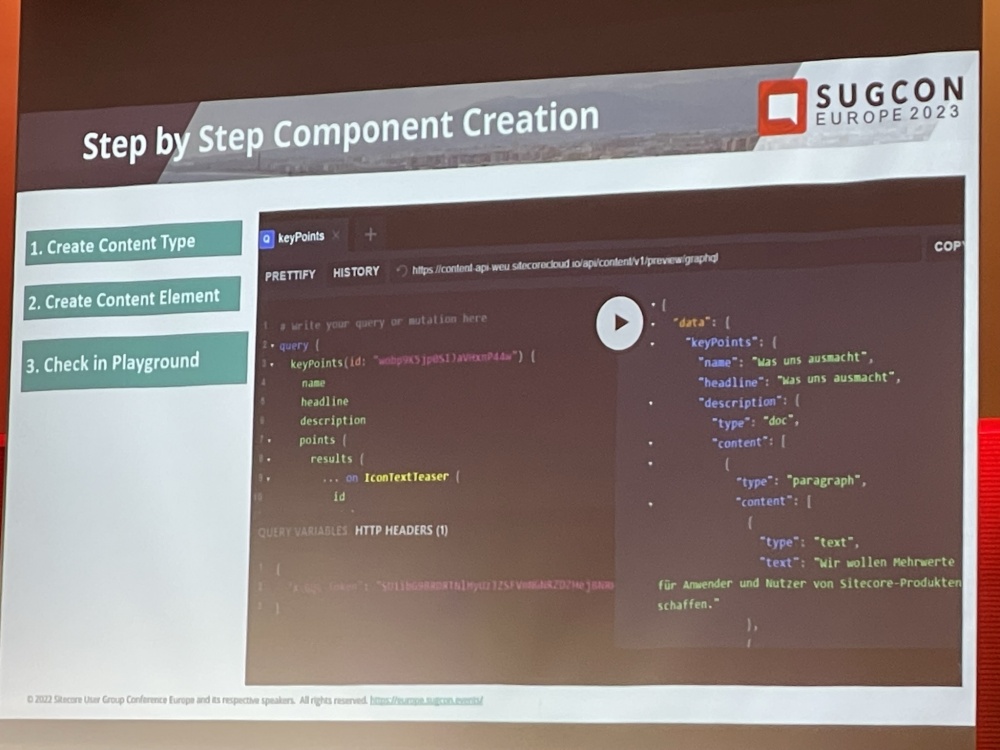
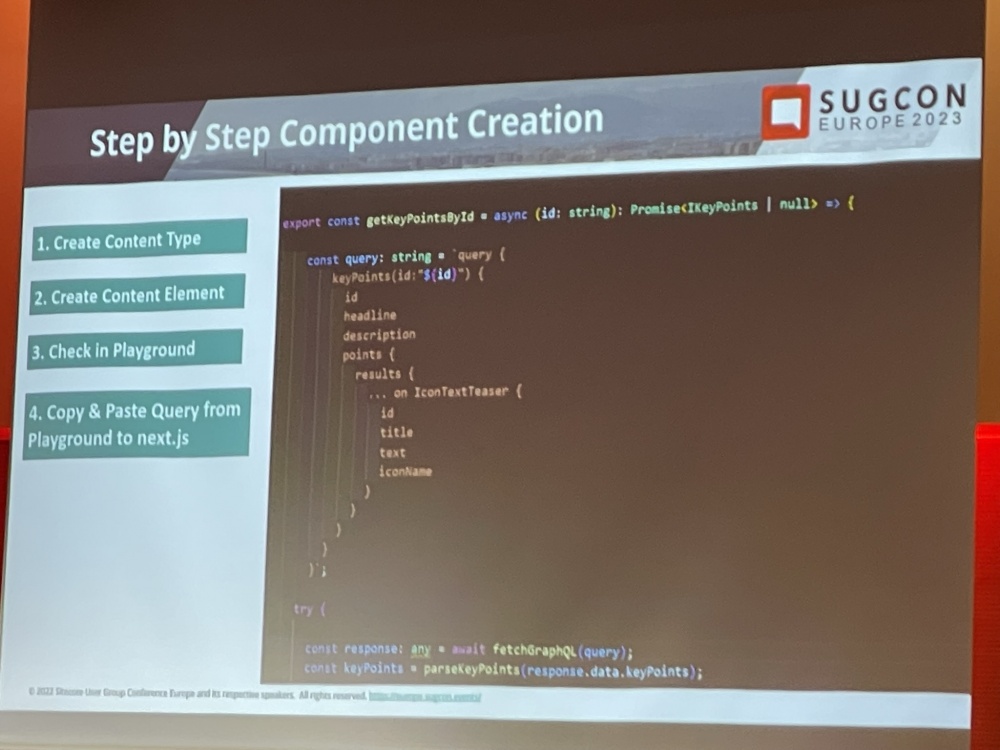
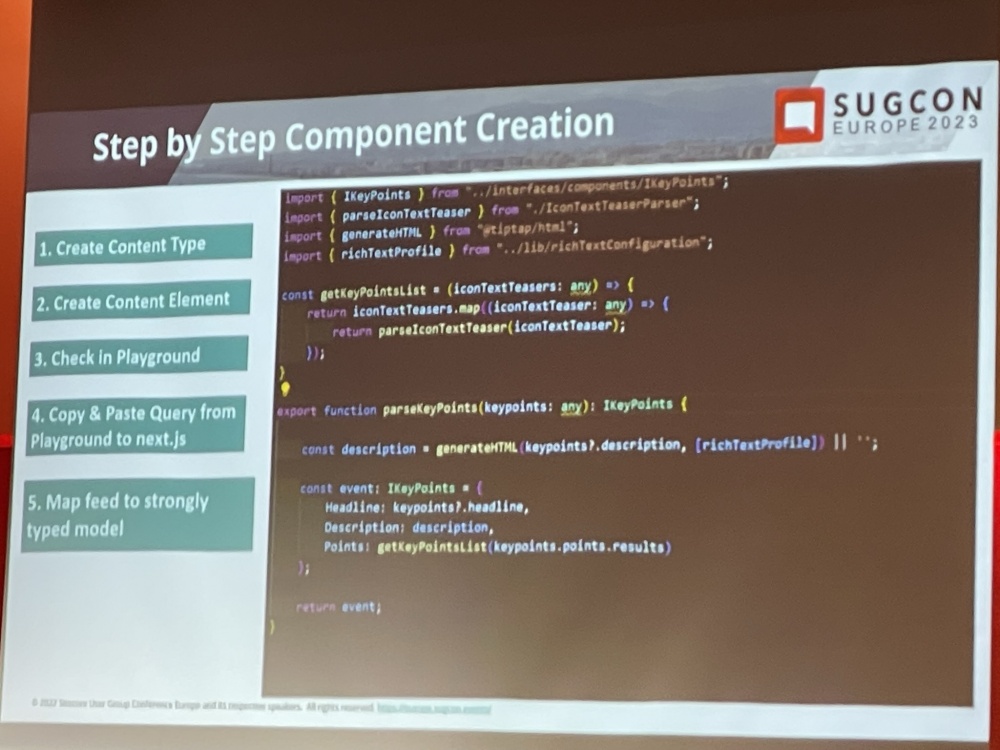
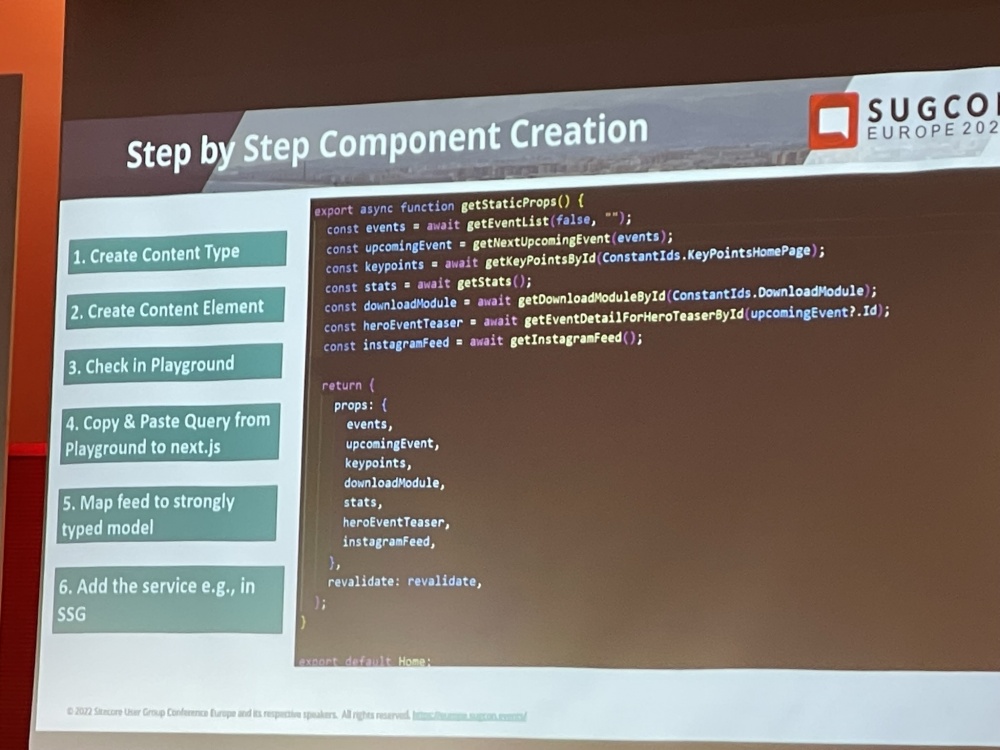
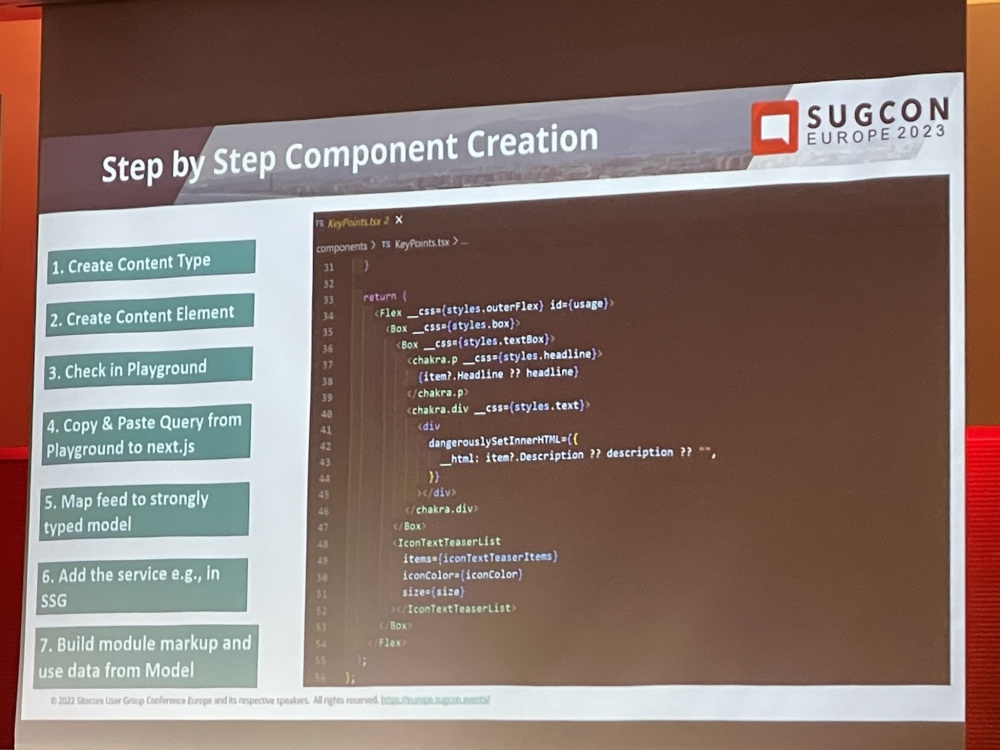
There are 7 Steps to component creation:

IMG_0821
IMG_0822
IMG_0823
IMG_0824
IMG_0825
IMG_0826
IMG_0828

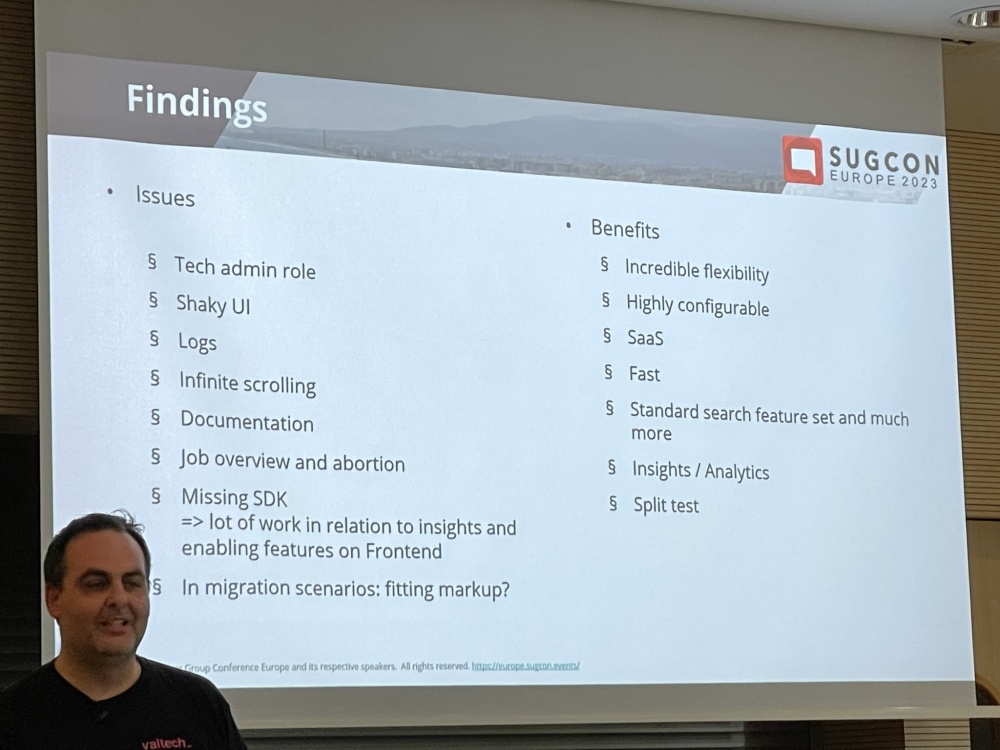
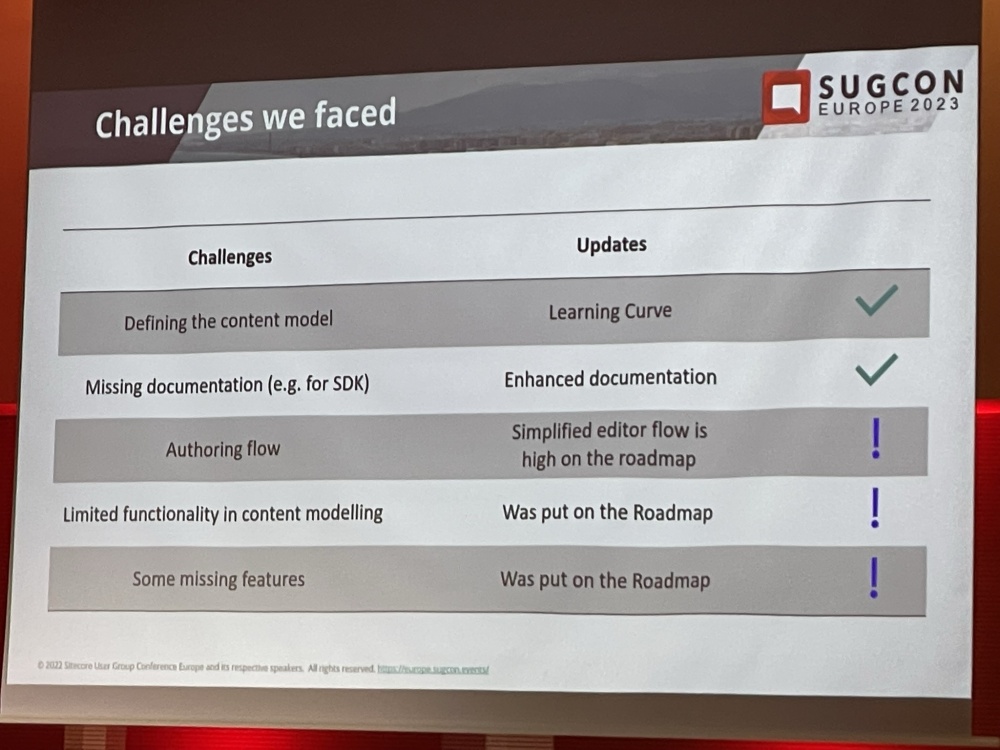
Lastly there were some challenges faced.

IMG_0831

This was a really great session and I’m looking forward to working with Content Hub One in the future.

Virtual Closing Keynote by Scott Hanselman
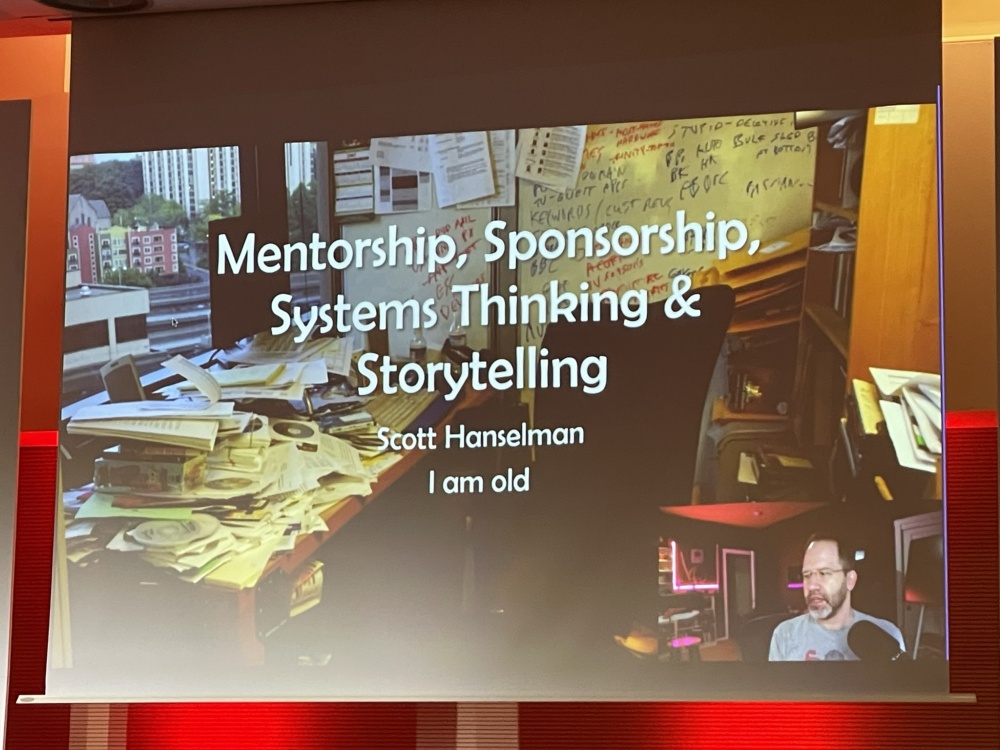
IMG_0833

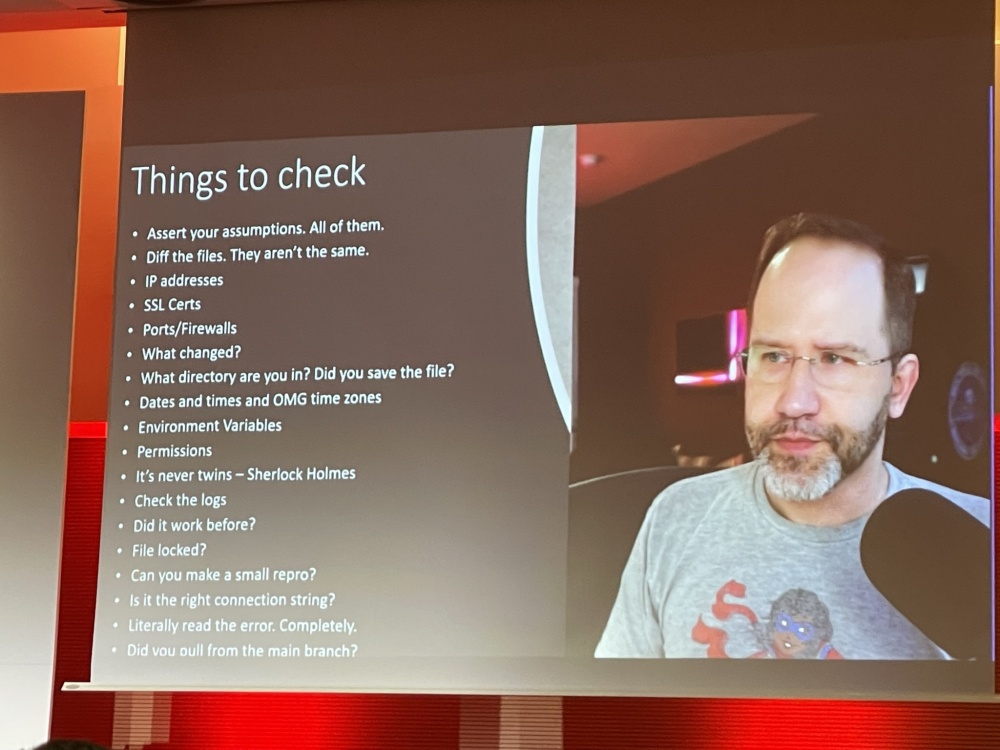
There was then an really entertaining and insightful talk from Scott Hanselman. He had some great advice, wisdom and stories to tell to us and I think everyone in the room was pretty captivated by his talk.

IMG_0848

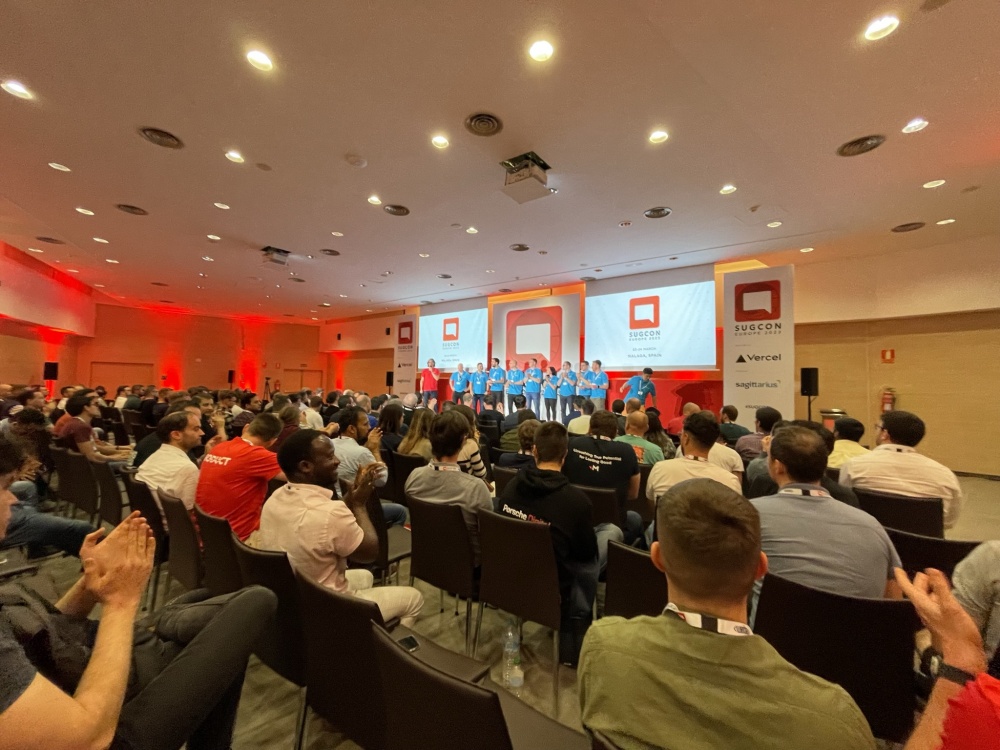
With that it was the end of SUCON 2023, there was a big round of applause for all the organisers. These events take a hell of a lot of organising and a real commitment from everyone involved.


IMG_0855

It was time to go and have a few beers and reflect on what was a another brilliant SUGCON.

IMG_0862
Hopefully this is useful info for anyone that couldn’t attend this year or had too many beers and forgot what they learned :-).

What I’m looking forward to seeing at SUGCON 2023

sugcon-2023-banner-hotel

I’m really looking forward to SUGCON 2023 in Malaga in a couple of days time and have decided I’d take an more in-depth look at the conference sessions.

At previous SUGCON’s I’ve generally planned the talks I want to go to on the plane flight over, so this time I thought I’d try and do so up-front and share my thoughts on why.

Bear in mind that I’m a Sitecore Developer and Consultant so I naturally lean towards more technical tracks. You can find the full agenda here and you can read more about the sessions here.

Thursday

After the Opening Keynote by Steve Tzikakis and Dave O’Flanagan and the other initial sessions we need to decide on which of the parallel talks to attend. As usual there are a few clashes here, but these are my selections for the rest of the day:

Selected Talk Title Rationale Notable Alternative
3:10 pm – 3:55 pm
Martin Miles
Accelerate website builds with Headless SXA and XM Cloud
Martin has been Blogging a lot on XM Cloud over the past year and has a lot of Knowledge to share so I’m really keen to learn more about how to build headless websites with Headless SXA and XM Cloud and what Martin has learned from doing so. Andy Cohen
Innovations in Deploy
4:40 pm – 5:25 pm
Jason Wilkerson
SXA MVC & Headless SXA – a MOVING tale…
 Jason is always a really engaging speaker and I’m intrigued to know more about transitioning MVC-based SXA sites to a headless implementation of SXA. Thomas Stern
Hacking Sitecore
5:30 pm – 6:15 pm
Rick Bauer

Richard Seal
XM Cloud and Content Hub ONE Battle Royale
This sounds like and interesting session and having learnt a fair bit about XMCloud recently I’d like to know more about Content Hub ONE and how it compares. Vasiliy Fomichev
Crafting rock-solid secure composable Sitecore SaaS-based applications

Friday

There is an Content Hub ONE – Insights session to start the day but these are my choices for the rest of it. The first talk selection was a tough one!:

Selected Talk Title Rationale Notable Alternative
9:50 am – 10:35 am
Rob Habraken
Migrating advanced Sitecore implementations to XM Cloud
I feel this is a must-attend session for any Sitecore developer who might be working on projects that plan to move to XMCloud from XP/XM. Kiran Patil
Sheetal Jain
Upgrade path for a Monolithic Developer to a Composable Developer
11:15 am – 12:00 pm
Mike Edwards
Rendering your data in headless – 101 different ways
Mike will no doubt have a lot of knowledge to share on Headless so I’m interested to learn more about the different rendering patterns and pros and cons of each approach. Bart Plasmeijer
Keep the door open when transforming from Sitecore XM to composable DXP using XM Cloud!
12:10 pm – 12:25 pm
Chris Sulham
Grappling with the Many Heads of Headless
I’m interested to hear more about the considerations for headless and benefits and drawbacks to each. Mark Lowe
A Road Trip to Composable Canyon
12:30 pm – 12:45 pm
Sarah O’Reilly
Leverage Sitecore Connect for Sitecore CDP
I don’t know very much about Sitecore Connect yet (other than that it’s based on Workato) so I’m keen to learn more about it and how it works. Himadri Chakrabarti
What is Flexibility Over Features Philosophy in Sitecore OrderCloud Architecture
12:50 pm – 1:05 pm
Kingsley Hibbert
Mathew Evans
DevOps Composability in a Composable World
This session sounds very informative and not something I’ve really considered too much. Nicky Vadera
Using External Components in Content Hub 4.2
2:20 pm – 3:05 pm
Ramkumar Dhinakaran
Elakkuvan Rajamani
Leveraging XM Cloud APIs and Webhooks to powerup integrations
 Webhooks are a new feature in XMCloud and Sitecore 10.3 so it will be cool to see some examples of these in action. Daniela Militaru
Katharina Luger
Women in Sitecore Roundtable
3:15 pm – 4:00 pm
Sebastian Winslow
Jesper Balle
Sitecore Search: Real case PoC
 Search is tricky in a Headless world so I’m looking forward to learning about potential solutions and approaches to different search. Sebastian Winter
Sitecore Components in Action

Hope everyone who’s going enjoys SUGCON and hopefully I’ll see some of you there.

Building Components in Sitecore 10 with the ASP.NET Rendering SDK

Last Thursday I presented at the London Sitecore User Group Online. This was the first online UK Sitecore user group this  year, which was a response to the Covid-19 Pandemic.

I Demo’ed how to Build ASP.Net Core Components in Sitecore 10 with the ASP.Net Rendering SDK.  The Demo uses a modified version of the Getting Started template to do this. An overview of the ASP.Net Rendering SDK is also provided and some useful Tips too.

Video Of Presentation

You can find a pre-recording of my presentation on my YouTube Channel here:

Steps To Build a Component in Sitecore 10

Bellow I’m going to detail the steps involved with Building a component in Sitecore 10 using the ASP.Net Rendering SDK. These are covered in the video but I thought it would be useful to write them down too and provide some further information where applicable.

Development Environment Setup

The first step is to get a Sitecore 10 Development environment setup. For my demo video above I used the getting started template. The Demo Video and this Overview starts from the point of having this installed. You could use docker and install everything yourself or install Sitecore 10 directly on your local development environment instead. However you would need to create your own Visual Studio project for the Rendering Host so this is more complex if you are just looking to experiment with this like I was.

Fellow MVP Robbert Hock has a really helpful video on getting the getting started template all setup and working so I’m not going to go into this further here: https://www.kayee.nl/2020/09/25/getting-started-with-sitecore-headless-development-asp-net-core-docker-containers/

note: to use the new ASP.Net Rendering Host SDK you will need to have access to the Layout Service within your Sitecore Licence, I believe currently this means you need JSS included in your licence.

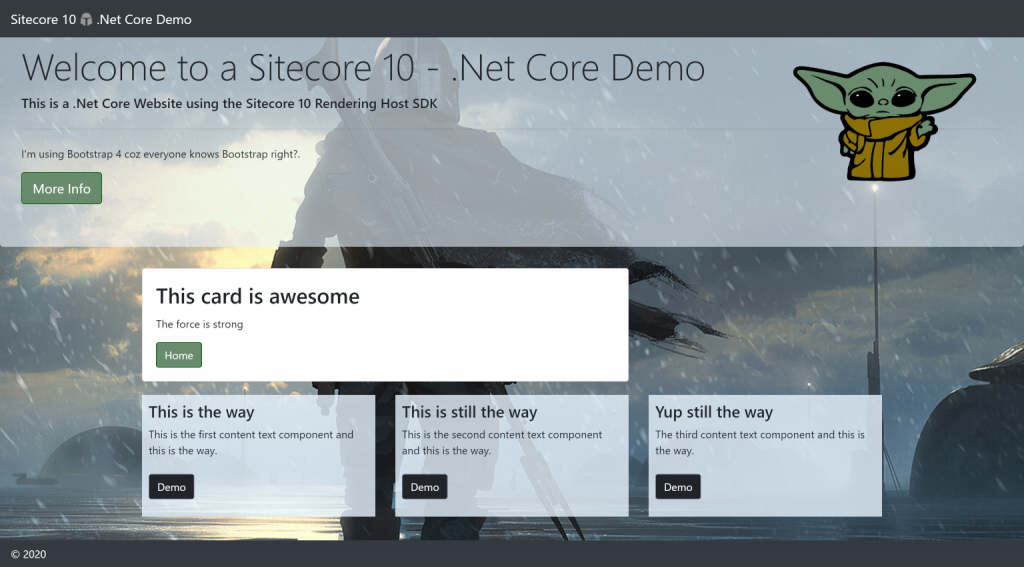
I modified the Getting Started Template a little to include Bootstrap 4, some custom CSS and some new placeholders and components to make things a bit more interesting, but other than that my demo follows this fairly closely.

mandalorian

Building a Card Component

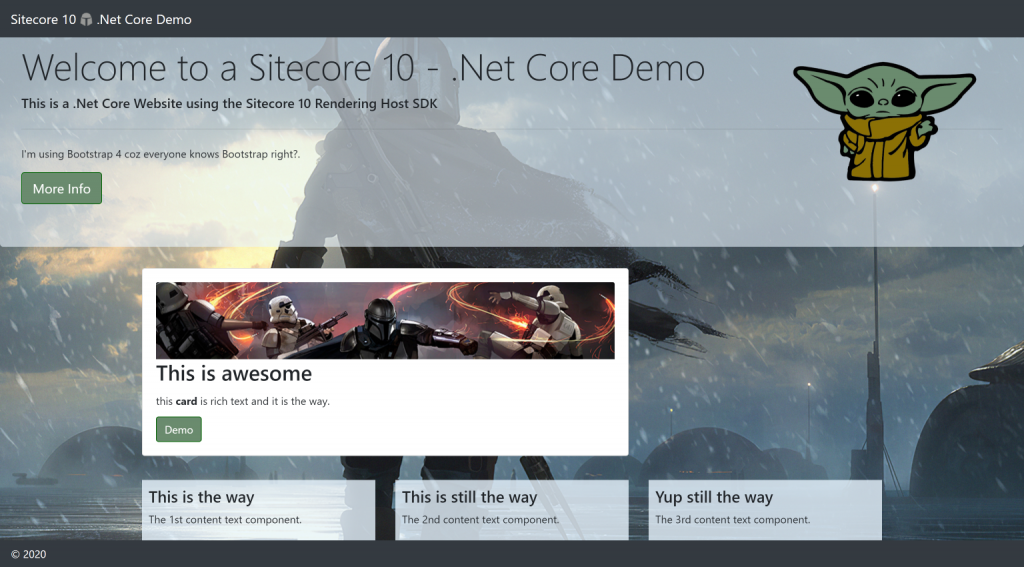
As covered in the demo we are going to build a Card Component (part of bootstrap) and follow a similar approach to the official documentation example for building a component. Assuming you’ve installed the getting started Template with the defaults the Sitecore CM instance will be visible here: https://cm.myproject.localhost/sitecore. If you wish you can add bootstrap 4 from here to the layout file in the Getting Started Template so that what you see will look more similar to the screen shot above. After completing all the steps below you could cerement your knowledge by adding an hero and some other components too (like I have above).

UPDATE (16/12/2020): 
I got asked if my version is available when I presented this at the Pittsburgh SUG Recently so I've uploaded it to Github here for those that want to replicate the look and feel of my demo or look at the code I used.

This version also uses Rich text for the Text field and and includes an image field: https://github.com/fluxdigital/Mandalorian.Sitecore.NetCore
mandalorian-netcore-demo

Create the Data Template

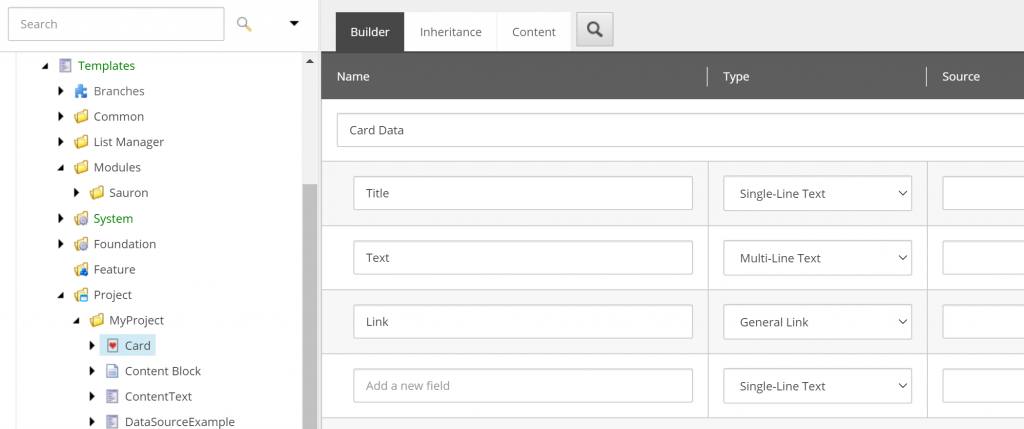
Create an data template called Card in the following location: /sitecore/templates/Project/MyProject. I called the data field section ‘Card Data’ but you can call it what you want.

Add the following 3 fields and set an icon:

  • Title  – Single Line Text Field
  • Text – Multiline Text Field
  • Link – General Link Field

template

Create the Json Rendering

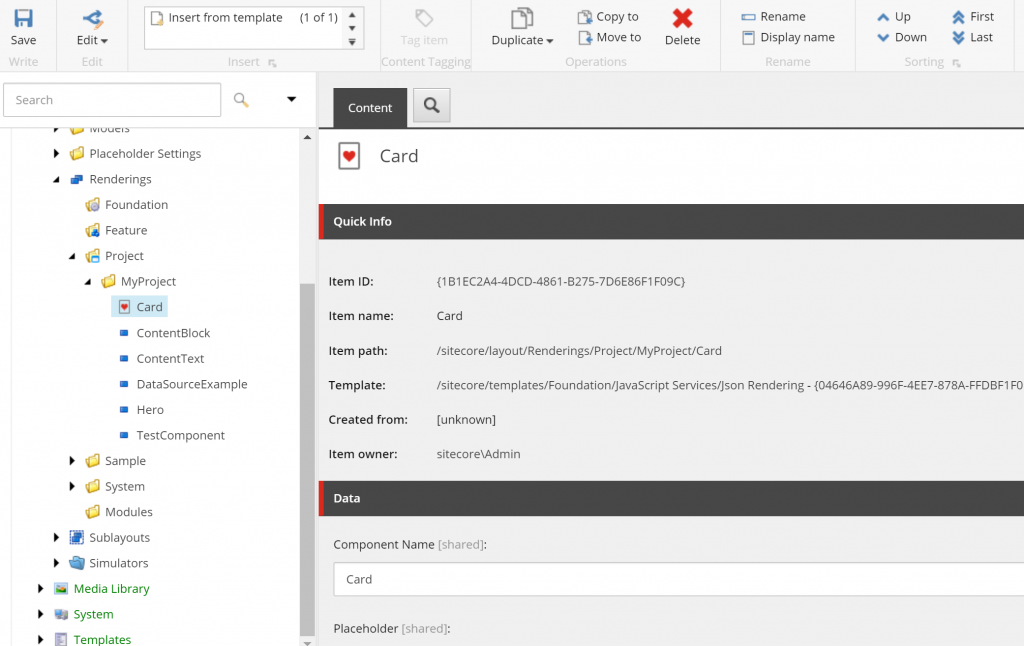
Create a new rendering using the ‘Json Rendering’ template called Card in the following location: /sitecore/layout/Renderings/Project/MyProject/Card. Leave the Component name as ‘Card’.

rendering

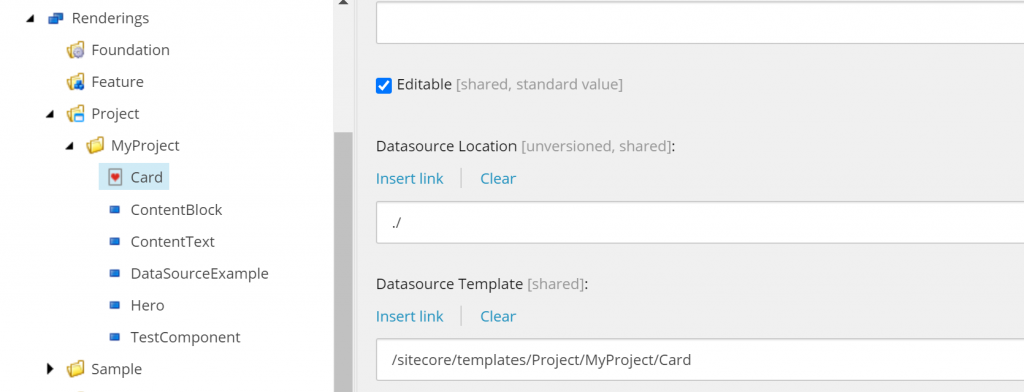
Set the Datasource Location to: ./ ,set the template to the Card template you just created and set an icon:

rendering2

Create a New Placeholder

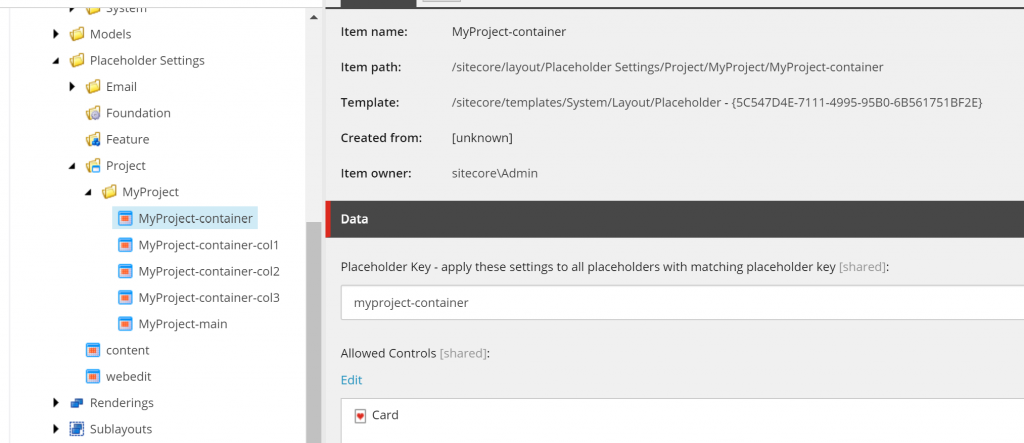
Create an new placeholder called myproject-container in the following location: /sitecore/layout/Placeholder Settings/Project/MyProject. Add the Card to the allowed controls.

placeholder

Add to Layout Service placeholders

The layout used by the Home item is as follow: sitecore/content/MyProject/Home. We need to Tell the layout service to return the placeholder.

Open the layout here: /sitecore/layout/Layouts/Project/MyProject/Main and add the myproject-container placeholder to the layout service placeholders field.

layoutservice

There is documentation on this here but it’s not 100% clear that this also applies to renderings: https://doc.sitecore.com/developers/100/developer-tools/en/layout-and-site-requirements-for-asp-net-core-rendering.html.

Add the Card Item in Sitecore

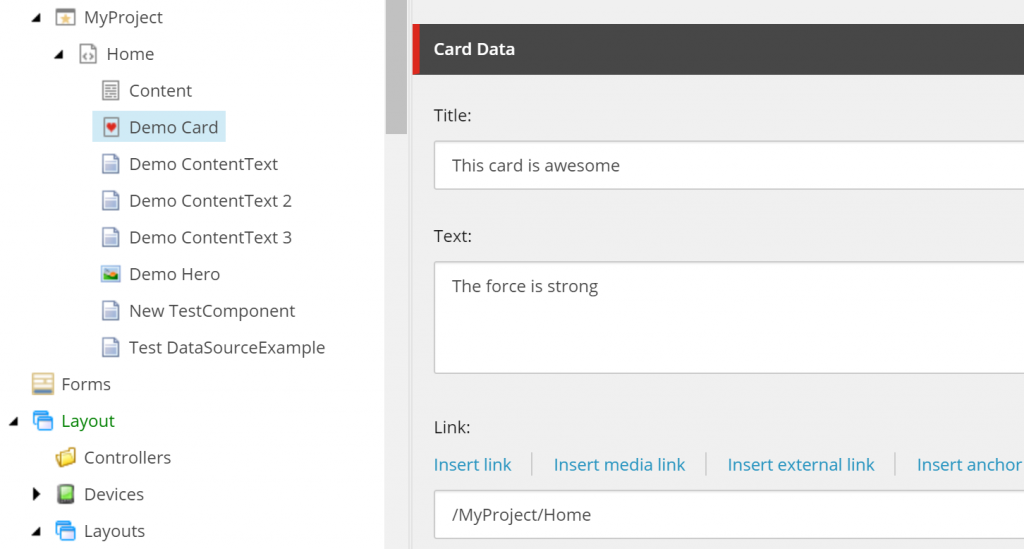
Add Card Item under the Home Item and populate the fields with some data.

demo-card

Add the Card to the Page

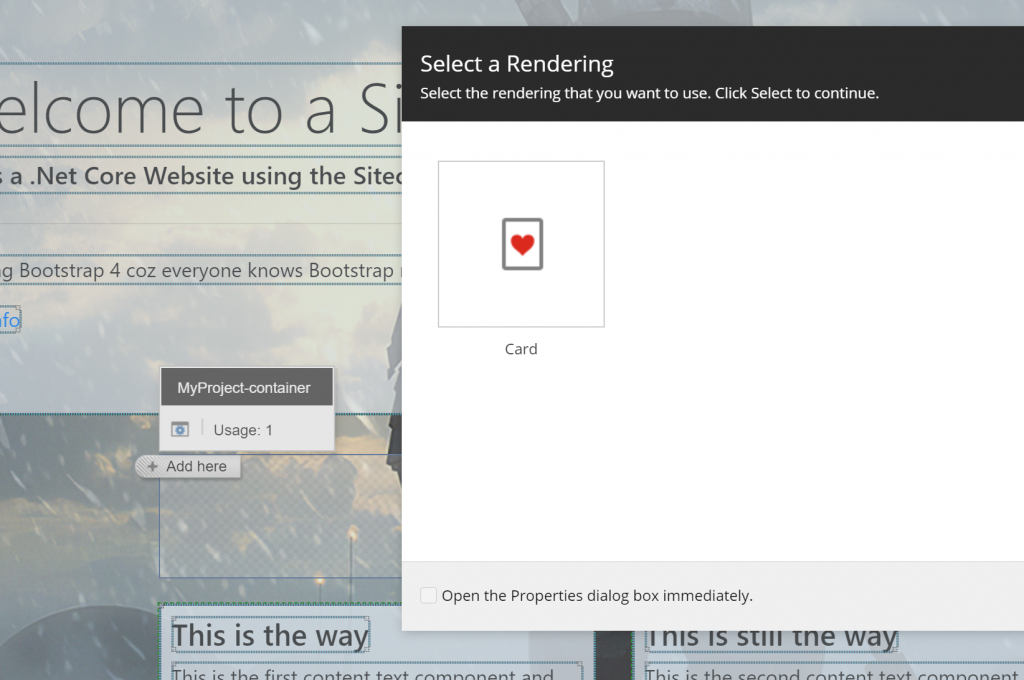
Open home item in Experience Editor and add the card to the placeholder and save the page.

exp

You will not see the card appear and will probably show an error message in place of the card at this point as we have yet to build the Component in Visual Studio and inform the Rendering Engine about our Component.

unknown

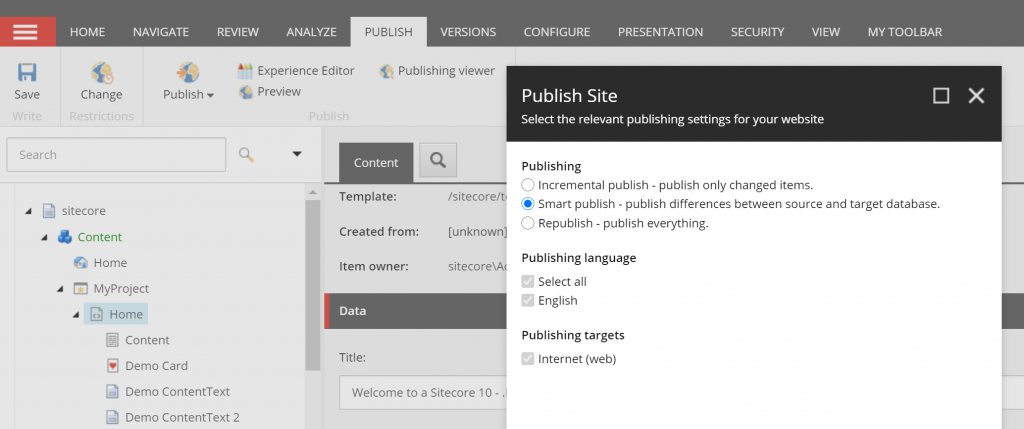
Publish the Site

Within the CM Smart Publish the Site.

publish

View Layout Service Debugging

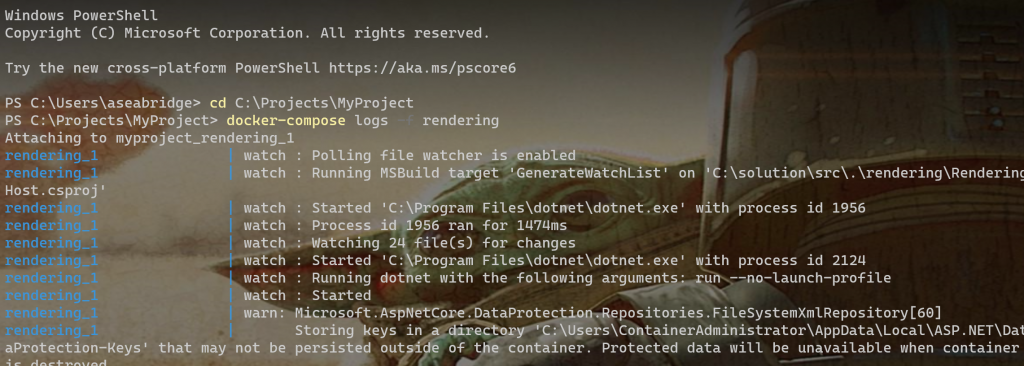
Within the console you can Show the layout service response by typing the following command:

docker-compose logs -f rendering

docker

If you scroll down the logs you should see an empty response in the layout service for the myproject-container as we need to do some work in Visual Studio now to get this working.

Create the Model

Within Visual Studio Create a new Model called CardModel at the following location: rendering\Models with the following contents:

 using System;
 using System.Collections.Generic;
 using System.Linq;
 using System.Threading.Tasks;
 using Sitecore.LayoutService.Client.Response.Model.Fields;
 namespace MyProject.Models
 {
   public class CardModel
   {
    public TextField Title { get; set; }
    public TextField Text { get; set; }
    public HyperLinkField Link { get; set; }
   }
 }

Note we are not using GlassMapper here we are using the new LayoutService Field Model. We use the TextField and HyperLinkFields for our Model.

Create the View

Create a new view called Card.cshtml within the following folder: rendering\Views\Shared\Components\SitecoreComponent\.

Add the following mark-up to include the 3 fields we created on our template earlier:

 @model MyProject.Models.CardModel
 <div class="card">
   <div class="card-body">
    <h2 class="card-title" asp-for="Title"></h2>
    <p class="card-text" asp-for="Text"></p>
    <sc-link asp-for="Link" class="btn btn-primary" editable="true"></sc-link>
  </div>
 </div>

Add Rendering Engine Binding

Within the Statup.cs file add the following line in bold to register the Card Model and Card View with the Rendering Engine.

// Register the Sitecore Rendering Engine services.
 services.AddSitecoreRenderingEngine(options =>
 {
 //Register your components here
 options
 .AddModelBoundView<CardModel>("Card")
 .AddDefaultPartialView("_ComponentNotFound");
 })

Add Placeholder to the Index Page

Update the index.cshtml layout file (rendering\Views\Default\Index.cshtml) to match the following. The main change here is to add the myproject-container placeholder:

 @model PageModel 
 @{
    ViewData["Title"] = Model.Title?.Value ?? string.Empty;
 }
 <main role="main">
    <sc-placeholder name="myproject-main"></sc-placeholder>
    <div class="container">
     <div class="row">
      <div class="col-md-8">
         <sc-placeholder name="myproject-container"></sc-placeholder>
      </div>
     </div>
   </div>
 </main>
 <nav class="navbar fixed-bottom navbar-expand-sm navbar-dark bg-dark" style="color: #fff;">
 &copy; @Model.CopyrightYear
 </nav>

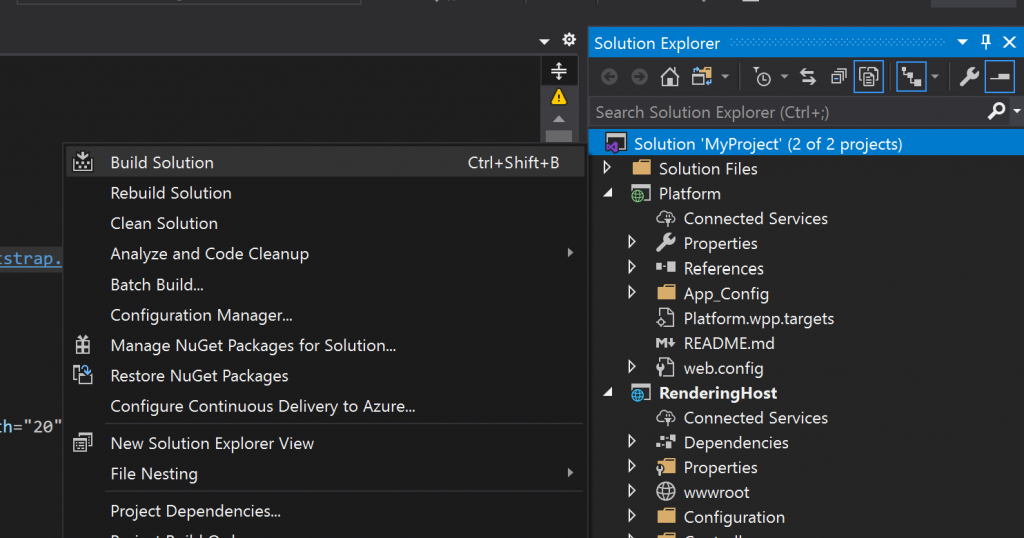
Build the Project

Save and build the project to deploy the changes to the Rendering Host. As the Rendering Host is configured to use dotnet watch it should build and deploy the changes to the rendering host on save, so an build shouldn’t be needed really.

vs

View the page

Refresh the published page (by default: https://www.myproject.localhost/) to view the Updated home showing the new card component.

final-card

Your card may look a little different to this but it should be similar. Well done you’ve just built your first component in Sitecore 10 :-).
Tips

There are a few tips I picked up during my experimenting with this.

  • Check the Docker Console & Logs for errors if you are having problems:

    docker-compose logs -f rendering

  • If you have issues with Rendering Host or CM not updating then restart them both like so (docker can assign a new IP if you don’t restart both):

    docker-compose restart rendering cm

  • Read Up On Tag Helpers – https://doc.sitecore.com/developers/100/developer-tools/en/tag-helpers.html

Hopefully the video of my presentation and overview are useful for those who are considering using this new functionality in Sitecore 10 or are interested in knowing more about how this works.

Lastly thanks to Nick Wesselman for his help with some issues I had along the way and some diagrams for presentation.

The Business Case & Considerations for a Sitecore 9.2 Upgrade

smoke-2551073_1920
I don’t often write Sitecore blog posts from a business perspective but I today I thought I would as I think some Sitecore customers are still on 8.x or 9.0 and are considering an upgrade to Sitecore 9.2.

With Sitecore 9.3 likely to be released later this year and mainstream support for 8.2 and below running out in December now is a good time to consider upgrading.

In this post I’m going to outline what the benefits of moving to 9.2 are and also the considerations you should make before embarking on an upgrade.

What are Benefits / Features of Sitecore 9.2?

This is usually one of the first questions that will be asked. I’m not going to keep this fairly high-level as there are many in-depth blog posts out there on Sitecore 9.1 & 9.2 features but the following should provide a succinct summary.

Sitecore 9.1 & 9.2 bring a lot of new features and there has been a big focus on splitting features and functionality out from the previous large monolithic architecture to a smaller modern micro-service based architecture:

  • Sitecore Cortex – Sitecore’s new Machine Learning Brain which can Suggested Personalisation and process and leverage customer data
  • Sitecore Identity – Single Sign On and Federated Authentication (using IdentityServer)
  • Sitecore Universal Tracker – Provides an central Analytics API to track  interactions from any device (e.g mobile apps, IoT, AR and VR)
  • Sitecore JavaScript Services (JSS) – allows development of apps using front-end frameworks such as Angular, React and Vue, using Sitecore as the source for the data (including SXA & Sitecore Forms support in 9.2).
  • Sitecore Accelerator Framework (SXA) Accessibility Improvements – SXA has been around for a couple of years and is a package or pre-built components for Sitecore allowing you to get sites up and running quicker.
  • Sitecore Host – A lean common runtime for .NET Core applications (Powers: Horizon, Universal Tracker, Sitecore Identity)
  • Helix Configuration – 9.1 shipped with some Helix configuration already setup. Helix is Sitecore’s recommended approach to building Sitecore Sites it sets out an number of overall design principles and conventions to follow.
  • Sitecore Installer Assistant (SIA) – 9.2 provides a new GUI for easily installing Sitecore in a few clicks
  • SSL offloading – 9.2 provides an SSL offloading config to Improve security and performance by shifting SSL Processing onto separate processors
  • Active Personalization Dashboard – 9.2 has a new new dashboard which provides an overview of all personalization actively occurring, providing visibility of poorly/well performing tactics to act upon.
  • Many other improvements including: Search, Content Delivery, xDB and Analytics, Sitecore Forms, EXM, SIF(2), YAML Item Serialization, Bug Fixes and performance Improvements

But We’re on Sitecore 8.2 or below, what else do I get?

Mainstream Support

If you are yet to upgrade to Sitecore 9 then you need to consider this soon as Mainstream support for 8.2 and below expires in December 2019. https://kb.sitecore.net/articles/641167
This means that whilst Sitecore will still provide security updates and fixes and endeavour to assist with product incidents they may not provide support for the following:

  • Assistance with errors or unexpected behaviour during installation or development
  • Addressing product defects as hot-fixes or patches
  • Compatibility fixes for supported technology platforms.

Therefore if you are on 8.2 or below after December this year then you may need to upgrade to resolve certain issues (depending on what the issues are).
Sitecore 9.0 Features

If you are on 8.2 or below you will also benefit from all the features released in 9.0, here are the key ones:

  • xConnect – Provides an unified API that centralises data access
  • Headless CMS support and JSS – Allows web apps to be built with React, Angular, Vue using Sitecore data
  • Rules based configuration – Configuration is now much simpler as it can be set based on the server role (e.g Content Delivery, Content Authoring)
  • Sitecore Install Framework (SIF) – SIF is a framework for installing Sitecore using automated scripts. This is how Sitecore 9 and above is now installed and it means deployments can be automated easier.
  • Sitecore Accelerator Framework (SXA) – SXA is a pre-built set of components to allow pages to be developed quicker with less development effort
  • Sitecore Forms – Sitecore 9.0 has newly designed forms to replace WFFM. These are built in a modern way and are easier to configure and customise.

Upgrade Considerations

sitecore-logo
So there are clearly some significant benefits to carrying out an upgrade to Sitecore 9.2, especially if you are on 8.2 still, as some customers are.
There are some additional requirements and considerations when moving to Sitecore 9.2 and standard upgrade considerations which need to be planned for:

  • Additional Servers / Roles – Due to changes to the architecture to split out elements of Sitecore into smaller services Sitecore 9, 9.1 and 9.2 require some additional Servers and roles. These are for xConnect, Identity Server, Cortex and processing. When you are planning resources for your upgrade this should be considered, particularly on Azure as there are quite a few additional services required.
  • Module Upgrades – Most Sitecore sites will make use of a number of Modules to extend the out of the box functionality. Some popular modules are: Web Forms for Marketers (WFFM), Url Rewrite and Sitecore Powershell Extensions (SPE). It is important to ensure that each module you are using is supported in Sitecore 9.2 and to consider time for upgrading each module as part of the upgrade process.
  • Updated Licence – Most customers will require a new licence generating when upgrading to Sitecore 9 and above. Therefore ensure you request this from your account manager in advance and that you have all features/modules you require included on your licence.
  • Active Directory module – Sitecore 9.1 & 9.2 or later does not support the Active Directory module. Sitecore uses Identity server to handle logins instead of legacy methods such as AD. Therefore if you are upgrading to 9.1 or above and use the AD module you will need to implement an integration with Active Directory from Identity Server.
  • Search – Sitecore 9 and above no longer supports Lucene so you must use SOLR or Azure Search. Lucene did not work well in distributed search scenarios so moving to SOLR or Azure Search has been recommended for a while. SSL is also required for SOLR in 9.0.
  • Code & Configuration Updates – Sitecore try and reduce breaking changes where possible but sometimes they are unavoidable, so as with all Sitecore upgrades some custom code and configuration will need to be updated to be compatible with Sitecore 9.2.
    To assist with this process Sitecore does provide an Express Migration Tool (to get to 9.0) and an Update Installation Wizard to update to 9.2. However these tools will likely only get you so far for highly customised Sitecore implementations and will likely need some manual upgrading too. Any code that needs upgrading will not be auto-upgraded by the tool. If you are on 8.2 then there are quite a few changes for analytics with xConnect. All references in Visual Studio will need updating to 9.2 also.
  • Support Patches & Hotfixes – You will likely have some hotfixes or support patches that have been applied to your solution over time. These will need analysing as part of the upgrade to understand if they are still required or not in 9.2. Many of these may have been rolled into 9.2 already.
  • Analytics Data upgrade – Part of the upgrade process involves migrating xDB data in the 8.x format to Sitecore 9.2 format. Sitecore have a tool for this: https://dev.sitecore.net/Downloads/Sitecore_xDB_Data_Migration_Tool/3x/xDB_Data_Migration_Tool_300.aspx
  • Implementation Quality – Best practice Sitecore implementations do not customise any out of the box Sitecore files and instead use patch files and extensions to customise configuration and other Sitecore functionality. Ideally the base platform should be installed ‘as is’ and the customisations layered on top to assist with upgradability. Depending on how well your implementation has been carried out will impact how easy it is to upgrade. If your implementation is not best practice then your team should take the time during the upgrade to correct this and take advantage of some of the newer and better ways of doing this.

A Note on Upgrading WFFM

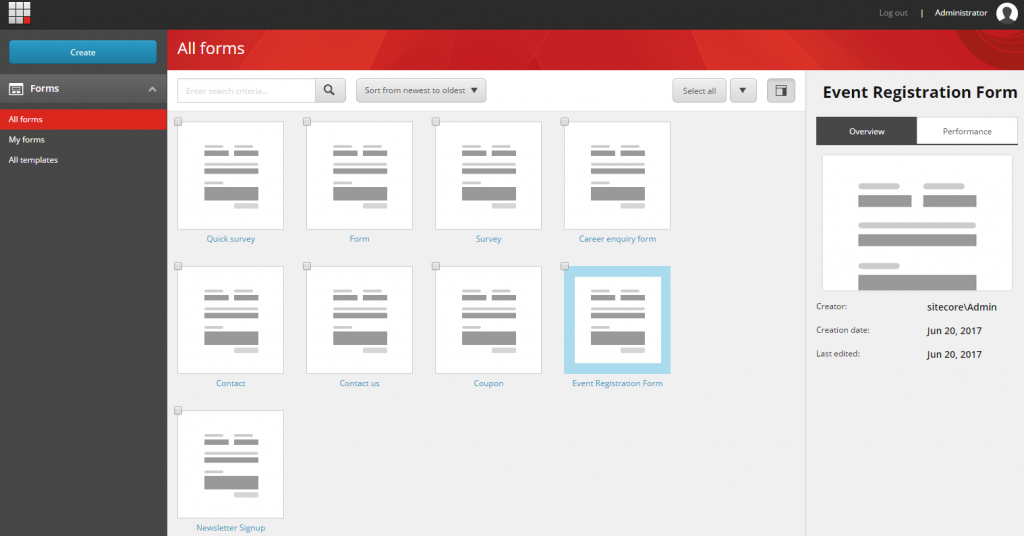
sitecore-formsOften one of the key stumbling blocks for upgrading Sitecore to 9.1 or 9.2 is Web Forms For Marketers, this is because it was deprecated in Sitecore 9.1 and is also not supported in Sitecore 9.2. Sitecore 9.0.2 is the last release where WFFM can be used. Sitecore Forms has replaced it.  If customers have many forms this can be a bit daunting.

So you could just upgrade to Sitecore 9.0.2 and stop there, but you would be missing out on a lot of features and you will need to upgrade again in the near future. Thankfully there is another option, there is now a community built tool to help automate this for you and convert WFFM forms and data to Sitecore Experience Forms: https://github.com/afaniuolo/WFFM-Conversion-Tool. I have yet to use this but have heard good things about it and it is regularly updated.


I’ve tried to cover the key features of 9.2 and considerations for upgrading here. As you can probably see the longer you leave an upgrade the more complex it becomes as there are more changes to consider. Frequent upgrades of Sitecore should be the aim as this will reduce the time and investment needed to carry them out. Hopefully you’ll find this post useful for planning an upgrade to Sitecore 9.2 and leverage the investment you have made in the platform.

Getting Started with Sitecore JSS

I saw a demo of JSS at SUGCON last year by Alex Shyba and it looked really cool. Ever since I’ve been keen to try it out as soon as I could. This post covers the basics of setting up JSS and running a demo React App.
jss-logo
The first stumbling block however was getting an install of Sitecore 9 up and running.
You will need this before you can proceed with the rest of this tutorial so if you don’t have Sitecore 9 installed already then you can read my Blog Post on how to install Sitecore 9 update 1 here.

What is JSS?

JSS is an SDK that allows developers to build websites using Javascript frameworks such as React and Angular. Sitecore is used as a Headless CMS to provide the Sitecore item’s presentation details as JSON. It has full support for the Sitecore Experience Platform, including Experience Editor, Personalization, MV testing and Tracking / Analytics.

One thing that will keep front-end developers happy is that Apps can be built entirely detached from Sitecore and then deployed to Sitecore later. This also means that Sitecore doesn’t need to be installed to build applications with JSS. Apps are deployed to Sitecore using JSS code-first services via the command line.

This just touches on the basics of JSS, you can read more about it and the full install instructions here: https://jss.sitecore.net

Prequisites

  • Sitecore 9 or 9 update 1 (with a licence with JSS included)
  • Node JS version 6.9 or above
  • NPM version 5 or above

JSS Setup Steps

There are a number of steps required to Setup JSS before you can start developing using it. Follow all of these for the purposes of this post.

  1. Download and install the following two JSS server packages in Sitecore (using the package installer) from here: https://dev.sitecore.net/Downloads/Sitecore_JavaScript_Services/90_Tech_Preview/Sitecore_JavaScript_Services_90_Update_1_Tech_Preview.aspx
    1) Server Package (Tech Preview 9.0.1 rev. 180111)
    2) Infrastructure Package (Tech Preview 9.0.1 rev. 180111) – this is optional but is needed if you want to deploy your App to Sitecore via the command line

  2. Apply this to the web.config at the bottom of the system.webServer/handlers section:

    <add verb=* path=sitecorejss_media.ashx type=Sitecore.JavaScriptServices.Media.MediaRequestHandler, Sitecore.JavaScriptServices.Media name=Sitecore.JavaScriptServices.Media.MediaRequestHandler />

  3. Apply this to the web.config inside the system.webServer/modules section:

    <add name=”Sitecore.JavaScriptServices.Ship.ShipFilter” type=”Sitecore.JavaScriptServices.Ship.ShipFilter, Sitecore.JavaScriptServices.Ship” />

  4. Login to Sitecore Desktop on the Sitecore 9 instance you want to use. Switch to the Core database. In the Content Editor Navigate to: /sitecore/system/Settings/Services/API Keys
    and  insert a new API Key item, call it ‘JSS API Key’. Under AllowedControllers, which fill in the field with: “*”. Leave the rest of the fields as is. (more info on this step here). Take a note of the Item ID of the API Key item as you will need it in the next step.
  5. Verify everything works by going to:

    http://your-sitecore-instance/sitecore/api/layout/render/jss?item=/&sc_apikey={YOUR_API_KEY}.

    You should see something like the following in your browser:
    jss-test

Downloading & Testing a Demo App

Were going to use React for this and to keep things simple were going to use the simple React demo.

  1. Pull the JSS Demo source files from here: https://github.com/Sitecore/jss/tree/master/samples/basic-sample-react
  2. Go to IIS and add a ‘jssbasicapp’ as a new binding in IIS
  3. Edit your hosts file (C:\Windows\System32\drivers\etc\hosts) and add the following:

    127.0.0.1 JssBasicApp

    (you can change the name of the app and other settings if you want by editing: jss-basic-app.config)

  4. Open command line and go to the folder where you have downloaded the basic react sample (e.g: C:\Projects\Jss-Demos\samples\basic-sample-react).
    Run:

    npm install

  5. Next Run:

    npm run setup

  6. Next Run:

    npm run deploy-config

    You will be asked: ‘Would you like to configure connection settings to a Sitecore instance?’ – Enter Yes.
    When prompted enter your the Website Folder and Host of your Sitecore instance.

    (If you have any issues with this ensure you have your permissions set so allow the script to run and copy files over to your Sitecore instance)

  7. Lastly Run:

    npm run start

This will build the app and run a WebPack server, finally it should open up a browser showing the basic App at the following url: http://localhost:3001.

This will look like the homepage of a Standard Sitecore 9 install.

The App is not currently using Sitecore for data, it is being provided by local files within the app.

Deploying the App to Sitecore

Finally were ready to deploy the app to Sitecore and hook it up using real Data.

  1. Run:

    npm run deploy-codefirst

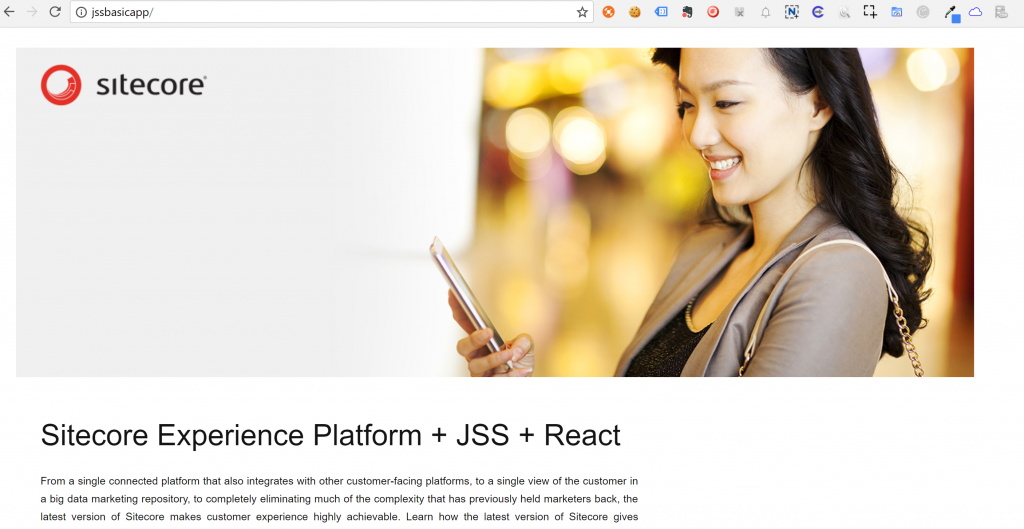
  2. Open up: http://jssbasicapp/ – you should see the following:
    jss-deploy1

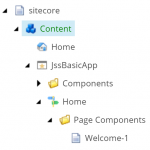
  3. Lets double check it’s worked correctly by going to your Sitecore instance, opening Content Editor and going to: /sitecore/content/JSSBasicApp. You should see something Similar to:
    jss-tree

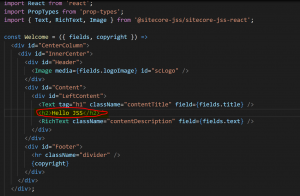
  4. Ok lets make a change to a component and re-deploy it to see the change working. Open up \samples\basic-sample-react\src\app\components\Welcome.js from the folder where you installed the demo.
    Edit the following lines to add a H2 tag with ‘Hello JSS’ in it:
    jss-component-update
  5. Open Command Line again and Run:

    npm run deploy-codefirst

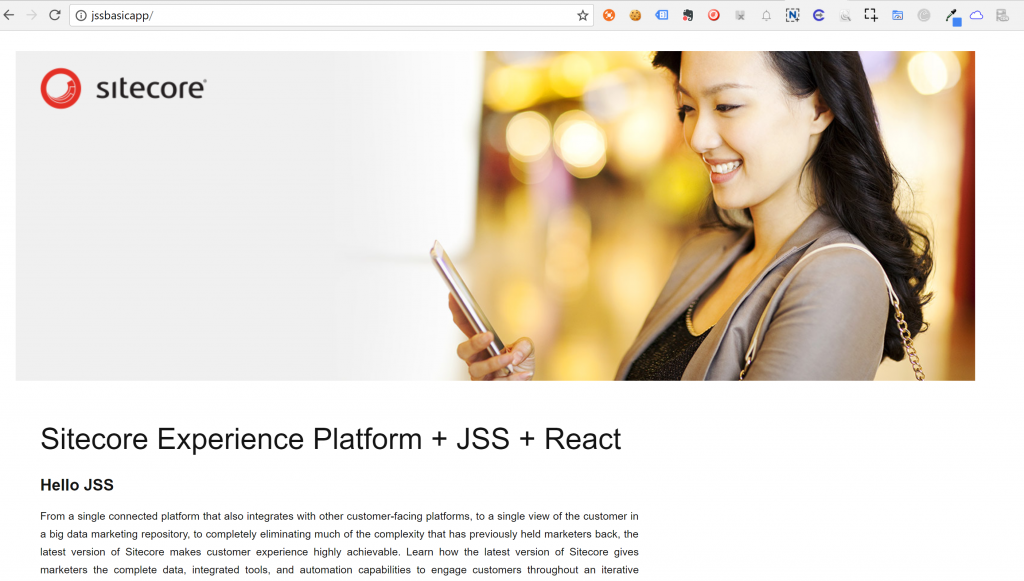
  6. Again open up: http://jssbasicapp/ – you should see ‘Hello JSS’ show up:
    jss-deployed-2

  7. Finally go to: /Home in the Experience Editor, you should be able to edit the page as normal even though the Components are provided by JSS.

This is a really basic demo of JSS but it should hopefully show whats possible and get you started with working with JSS.

Props to Alex and his team for doing a great job and addressing the workflow of front-end developers with how they have approached JSS.